

Passage of the game Lost Lands 9: Tales of the First Brotherhood 100%. All the secrets, puzzles, mini games, collectibles and achievements in one place...
100% completion of Shizarium (Sanitarium 1998)
Passage Shizarium (Sanitarium), version of the game in 1998. Solving all the puzzles and revealing all the secrets of psychological horror.
Introduction
Control: standard, using a computer mouse.
In order to make the main character move, press the right mouse button (RMB) and move the cursor in the desired direction.
To get a comment about the subject of research, press the left mouse button (LMB).
To perform an active action or take an item, you must first receive a comment from the character, and when the cursor changes:
in the form of a hand clenched into a fist - take an object,
in the form of an outstretched palm - to perform an action.
In order to apply the item, you need to click on the figure of the main character (clenched hand icon). Round windows with available items will open. We select the necessary one, point the light triangle icon in the upper left corner of the magnifying glass to the active zone, and when the icon lights up, press LMB.
Menu: invoked by pressing the "Escape" key.
Inventory: all purchased items the character "carries in his pocket." To open the inventory, you need to hover over the main character on the screen - round windows with items that are available will appear.
Saves: located in the folder with the installed game.
Note. To enlarge the screenshot, click on it in the walkthrough text. To view additional pop-up screenshots, click on the active links highlighted in the walkthrough text dark red color.
Contents:
- Part I. Cameras in the tower
- Part II. abandoned children
- Part III. Courtyard and church
- Part IV. Crazy Circus
- Part V. Cave
- Part VI. Laboratory
- Part VII. big mansion
- Part VIII. Hive
- Part IX. Mortuary and cemetery
- Part X. Abandoned Village
- Part XI. labyrinth
- Part XII. Trial
- Part XIII. Morgan's last game

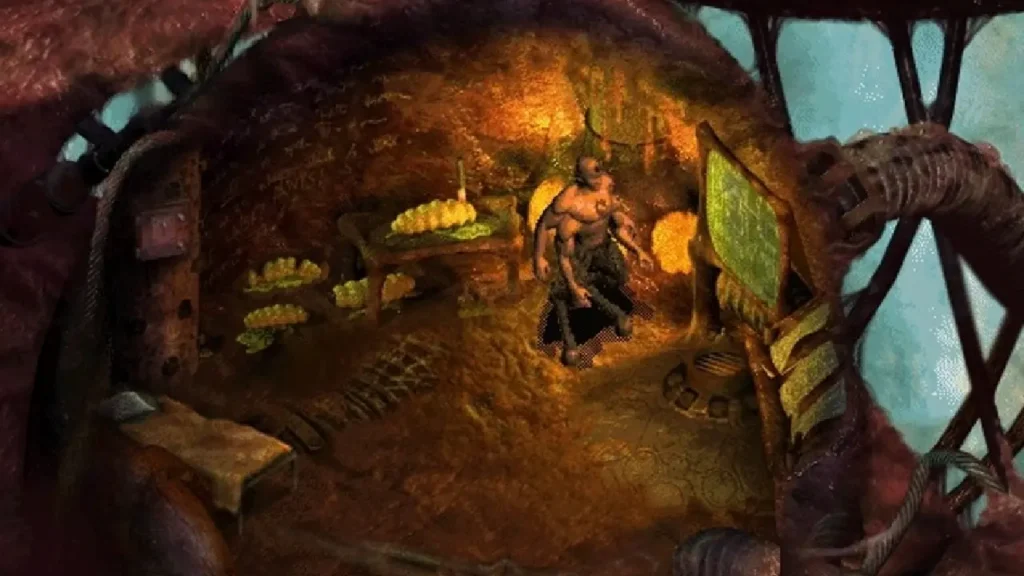
Part I. Cameras in the tower
In complete darkness, a male voice is heard urging employees to leave the premises, due to a generator failure that could explode.
We come to ourselves in one of the chambers round tower. We struggle to understand how we got here. The piercing sounds of a signal siren are heard.
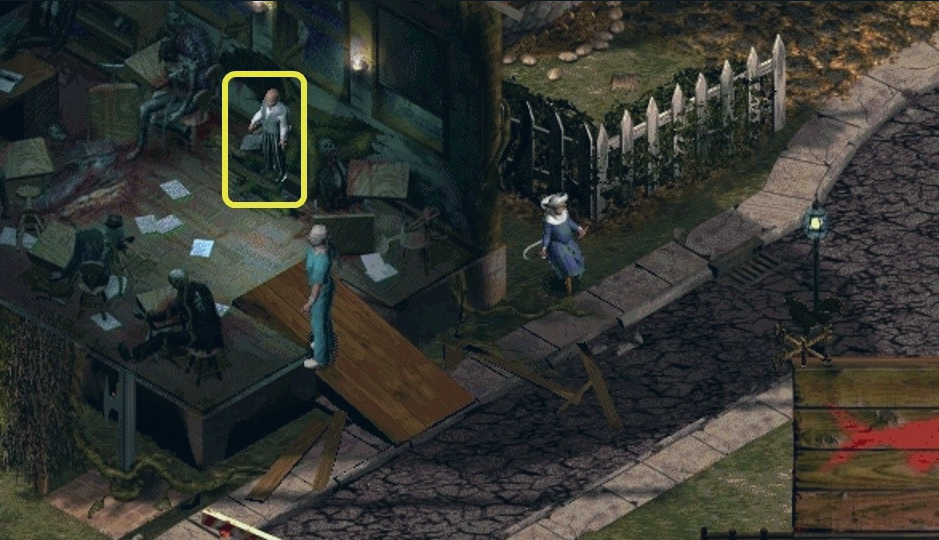
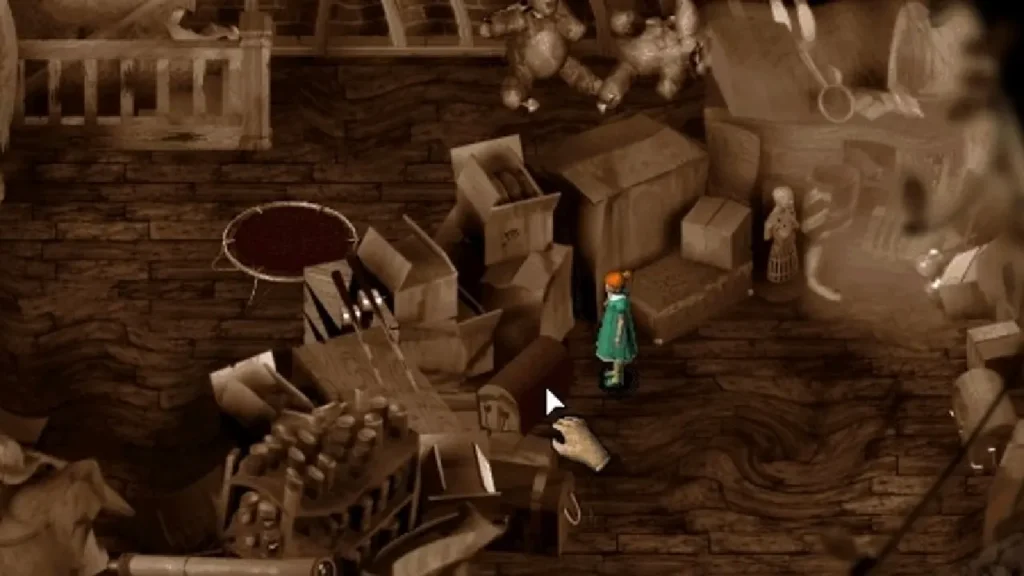
Exit the camera, go down the screen. We are watching on the switch on the wall, turn off the alarm. We go up, go to the next camera. We take a towel from the bed. We leave, we move up, to the stairs, we rise to the upper platform, we go to the left. Approaching the man banging his head against the wall.
Judging by the amount of blood on the wall, he has been doing this for a long time. Talking to a friend in misfortune will not work.
We pass a little further down to the man standing at the railing.
The man's name is Don. He hears the voices of the dead warriors.
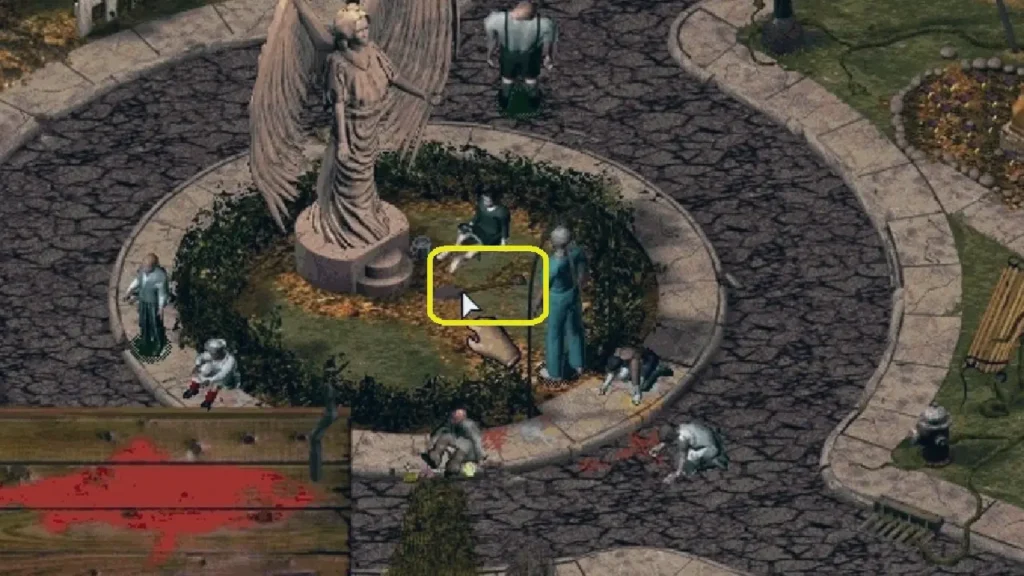
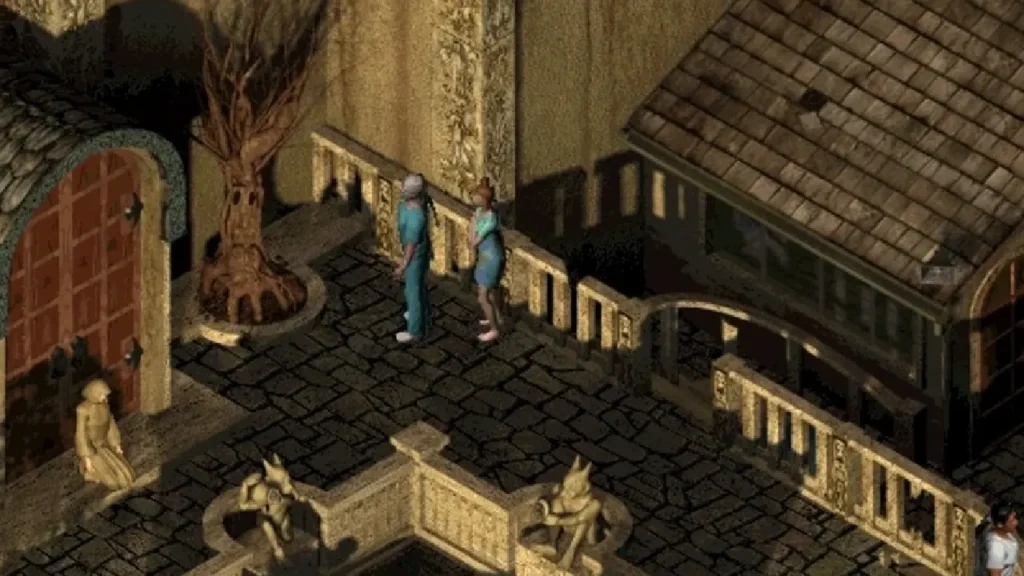
We turn around, follow to the center of the platform, on which stands a statue of an angel with wings. There is a keyhole at the base of the statue. We examine the stone angel.
A statue suddenly bursts into light.
We move to the right side of the screen, where we go down the stairs to the second tier. We go into the cell, in which stands, wrapped in a blanket, another patient.
His name is Lenny, and his mommy put him here because he ate pumpkin pie from the pumpkin patch.
After talking with Lenia, we leave the cell. We are approaching to a personsquatting at the steps of the stairs.
Martin is the only one who realizes the truth that we are all now in a madhouse. Martin himself is here because he is afraid of little bugs, which are actually not bugs, but miniature robots.
We go down a little more.
The patient with his pants down is balancing on the edge of the abyss and at our approach falls down. On the right we notice an emergency generator. Of all the conversations with patients, we note for ourselves the information about Dr. Morgan, about whom everyone speaks positively.
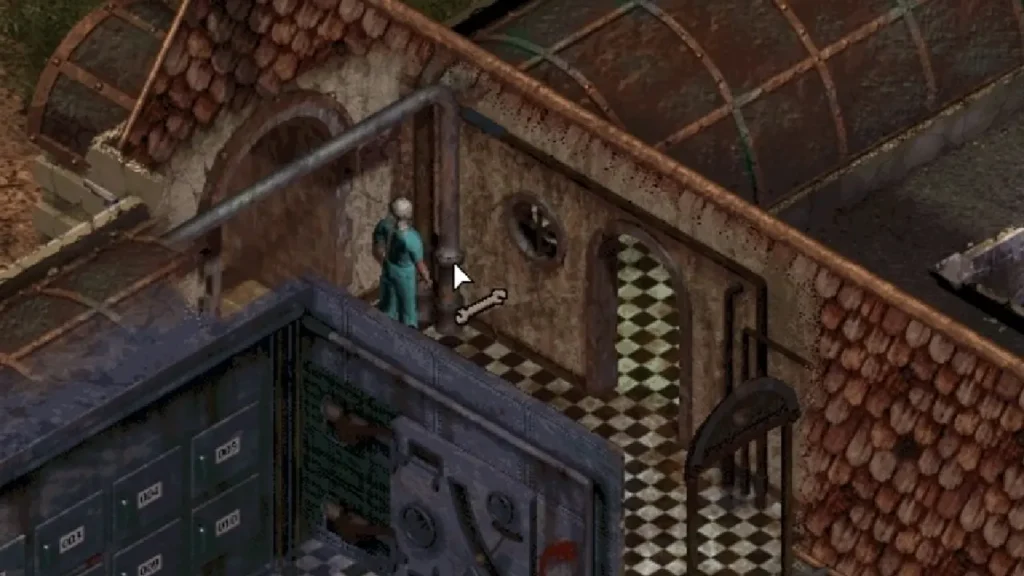
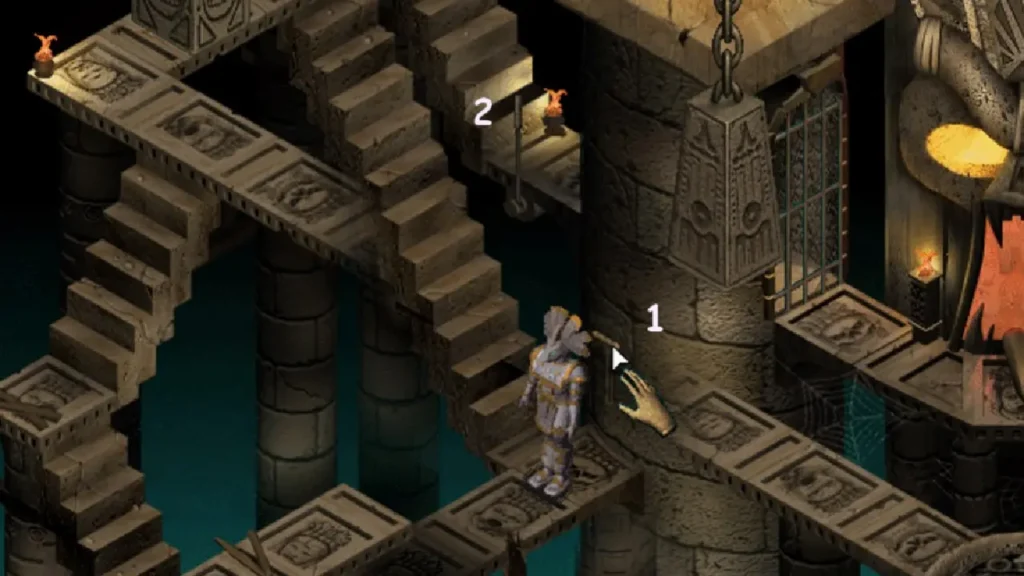
We turn around and go up the stairs. We rise to the upper platform, move to the lower right corner of the screen. We look at the electric wire stretching to the room in the center. Open inventory (move the cursor over the character, and, when a shrinking palm appears, click LMB), click on the box with the image of the towel. Translation of the cursor to the wire and use LMB.
Having thrown a towel over the wire, we slide off to the platform in front of the room in the center.
Click here on the red buttonby pulling out the bridge. We open the door, we enter into the room. We look at the devices.
Our character will notice that before using the devices, you need to turn them on. Automatically approach the computer.
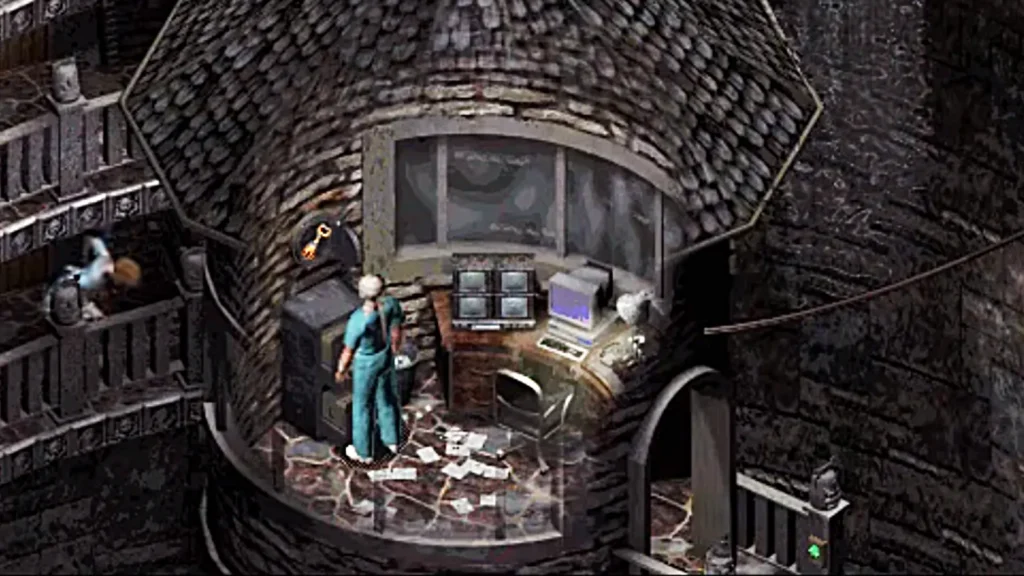
We insert the cable plugs into the sockets corresponding to them in color. Press the power button on the far right, then the play button located to the left of it.
We are watching a video recording of Dr. Morgan's conversation with a patient with a bandaged face - with us. A short circuit turns off the monitor, but it opens the safe, in which we find a strange key.
We pick up the key, open the drawers, take out and read the documents lying in them:
- a reminder on the need to keep the transitional bridge in working position due to a generator failure;
- a letter to Dr. Morgan from Professor Cunningham about a key related to the culture of the Aztecs;
- a memorandum from the chief of security about the disappeared patient 227;
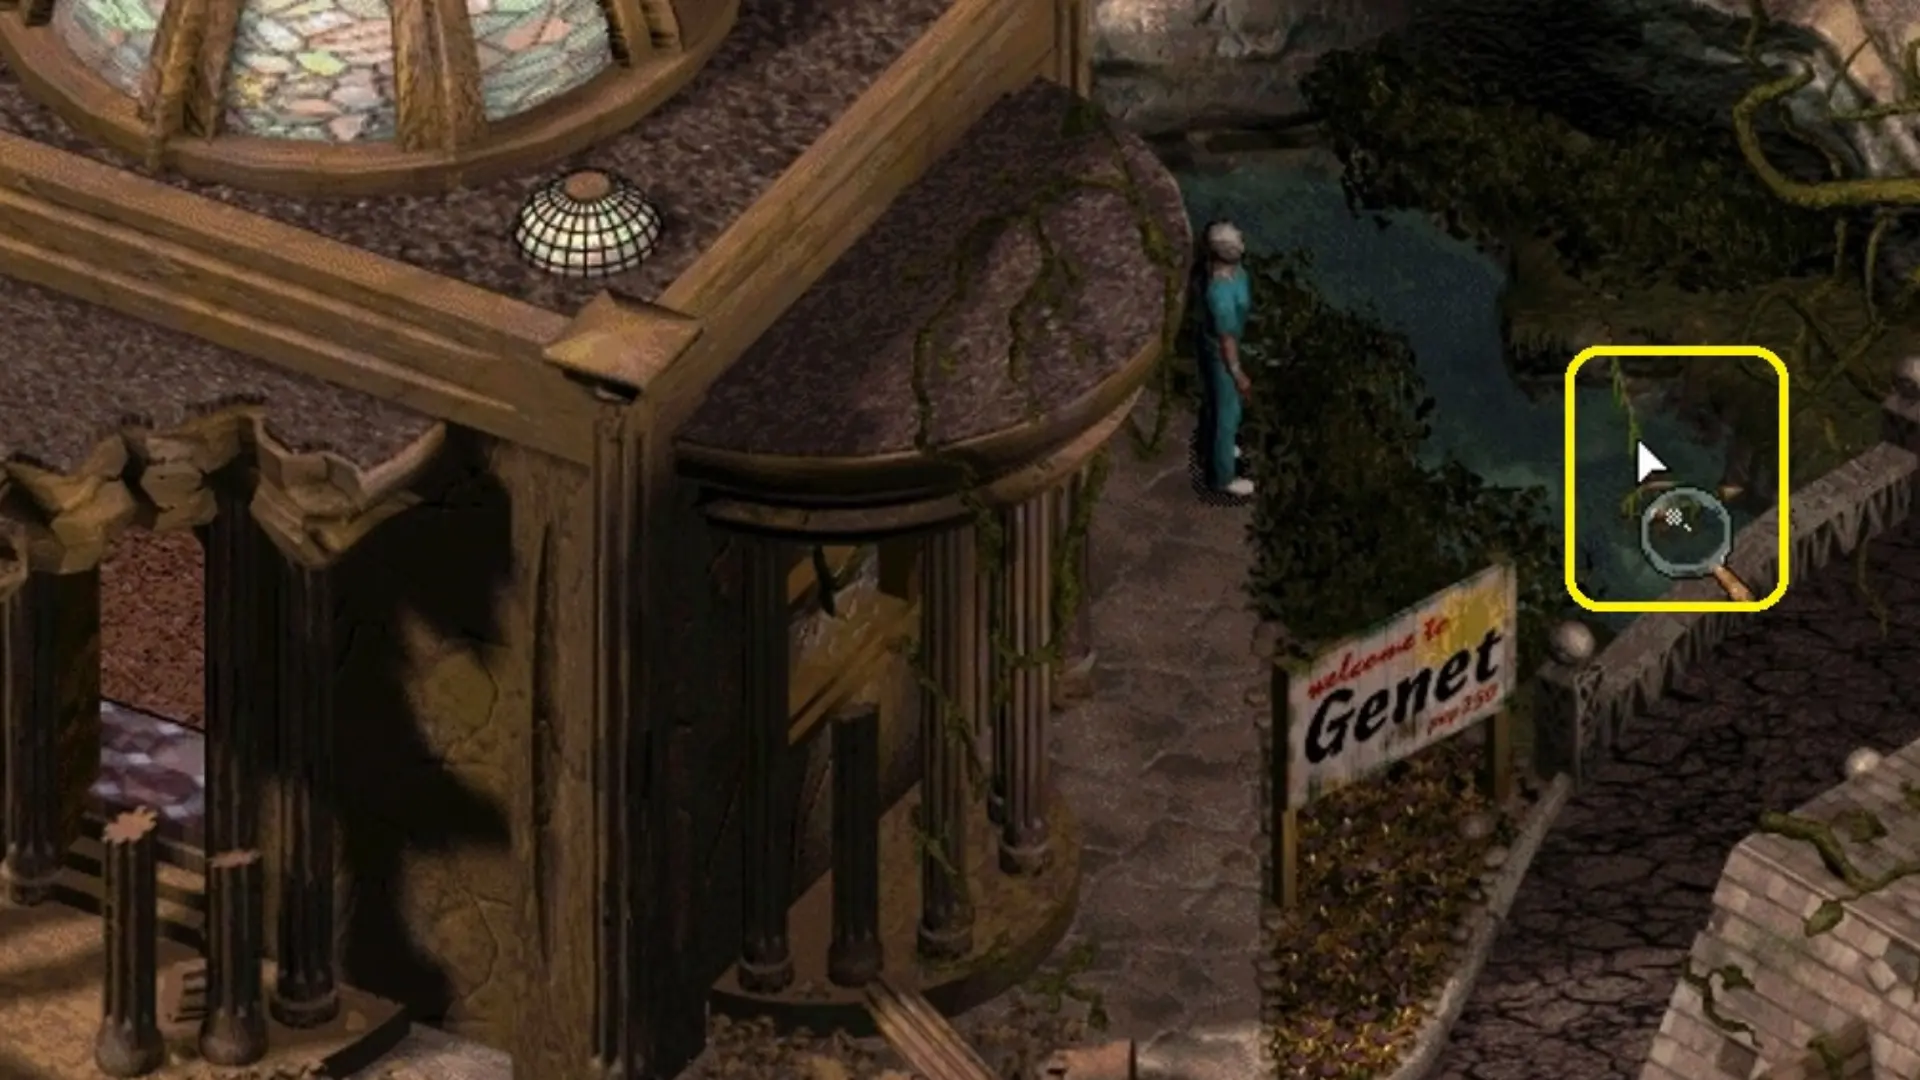
We leave the room, cross the bridge, move to the statue of an angel. We insert the found key into the keyhole at the base of the statue of an angel.
The angel covers us with wings and takes us to the Forsaken City.
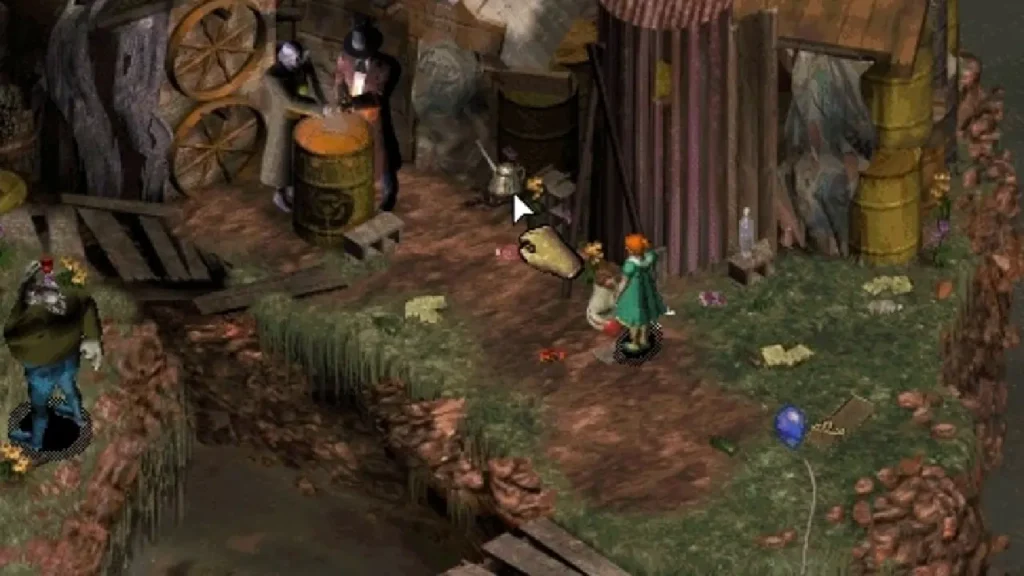
Part II. abandoned children
Central Square
standing in the park, which is located in the center of a strange desert city, on the streets of which children frolic. Behind him stood a statue of an angel with wings. Ahead, in front of a public garden, two children are playing tic-tac-toe.
We approach them.
Oh my God! They are freaks! The boy's name is Billy, the girl's name is Jessie Hatcher. Jesse considers himself the best tic-tac-toe player.
We talk with the kids, trying to understand where all the adults have disappeared?
They ask for our name, but no matter how hard we try, we cannot remember our name. As in the hospital, all the patients talked about Dr. Morgan, so here, all the children talk about some kind of "mommy." "Mommy" forbids them to talk to adults.
We head to the girl jumping over the rope, on the left side of the screen, near the fence of the church.
And this is with prostheses instead of legs!
We talk with Maggan Jones.
The sudden image of a mother calling her son brings us a hint of our name - Max! We know what our name is! And we had a sister, Sarah!
We return to Billy and Jesse. We talk with them, then we agree to play a game of tic-tac-toe with the girl. We win one game.
We learn from Billy that Maggan Jones beat Jessie four times.
Let's move on to Maggan. She confirms that she has beaten Jessie at tic-tac-toe four times. We pass to the church.
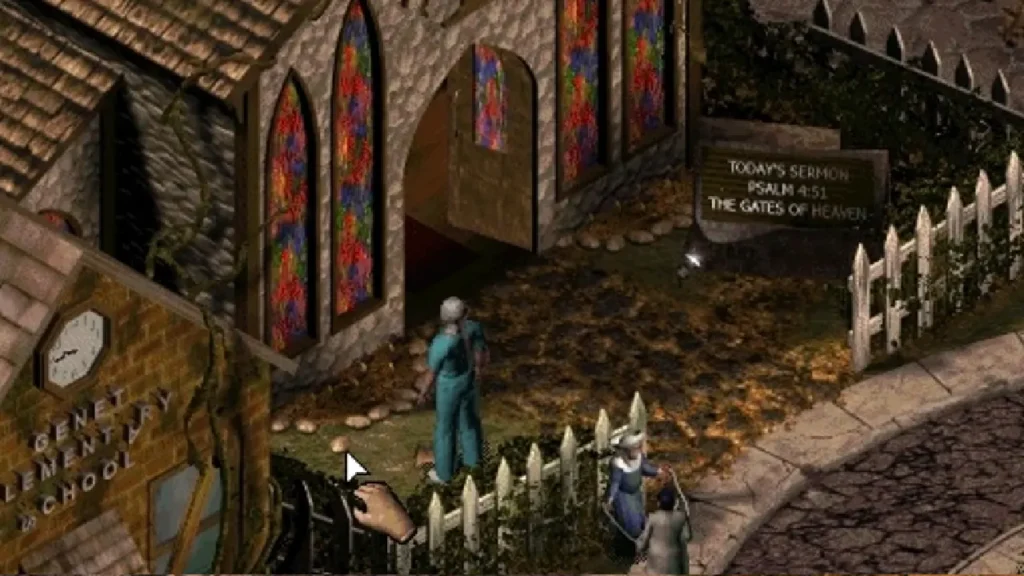
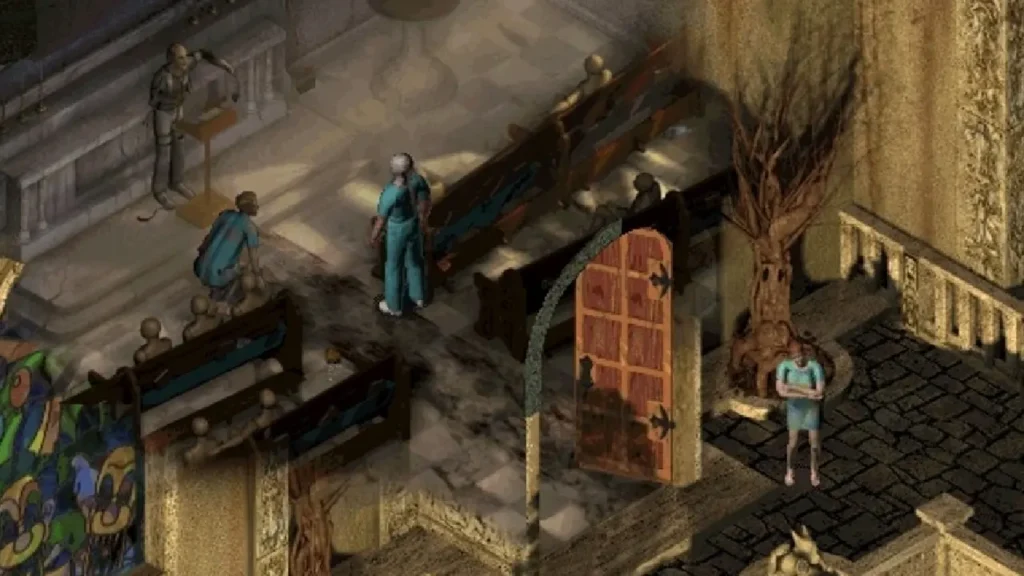
Church
To the right of the entrance to the church we read an announcement about the upcoming sermon on Psalm 4, verse 51.
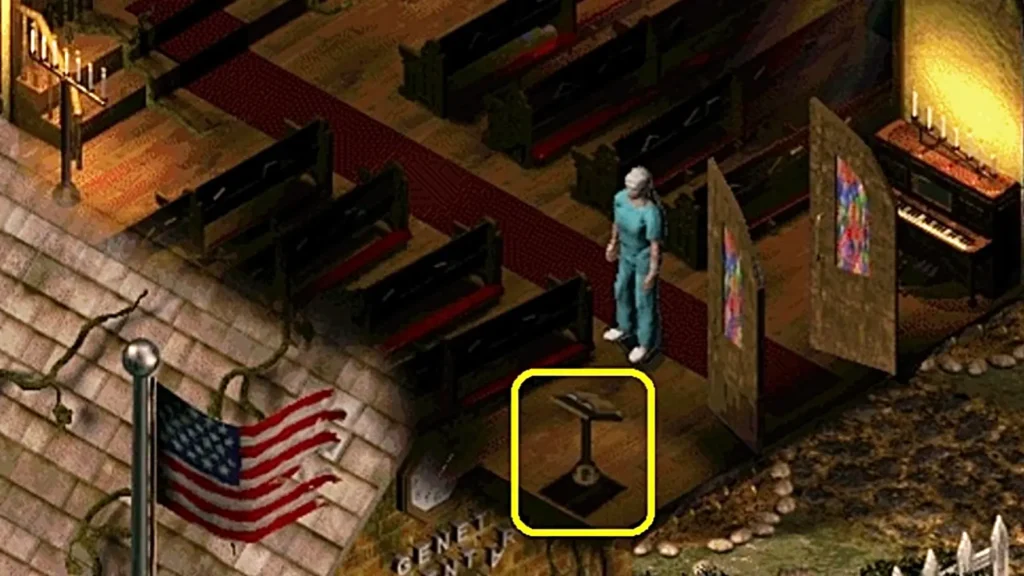
We open the door, we go inside. IN a book, to the left of the door, we find documents:
- a newspaper article about the preacher Father O'Toole, who claimed that the comet was a manifestation of the wrath of God;
- an act of interrogation of the husband of the deceased Marilyn Driscoll - Jed.
We leave the church, move down the screen.
We notice that The door in the school building are boarded up, and that the hands of the clock above the entrance go in the opposite direction.
We pass to the very bottom of the screen, where on the bank of the river boy fishing.
Meet Timothy O'Toole. He talks about the church bell that used to call for a sermon and that Dennis cut the rope with which the bell could be rung. That's why Timothy doesn't go to church now.
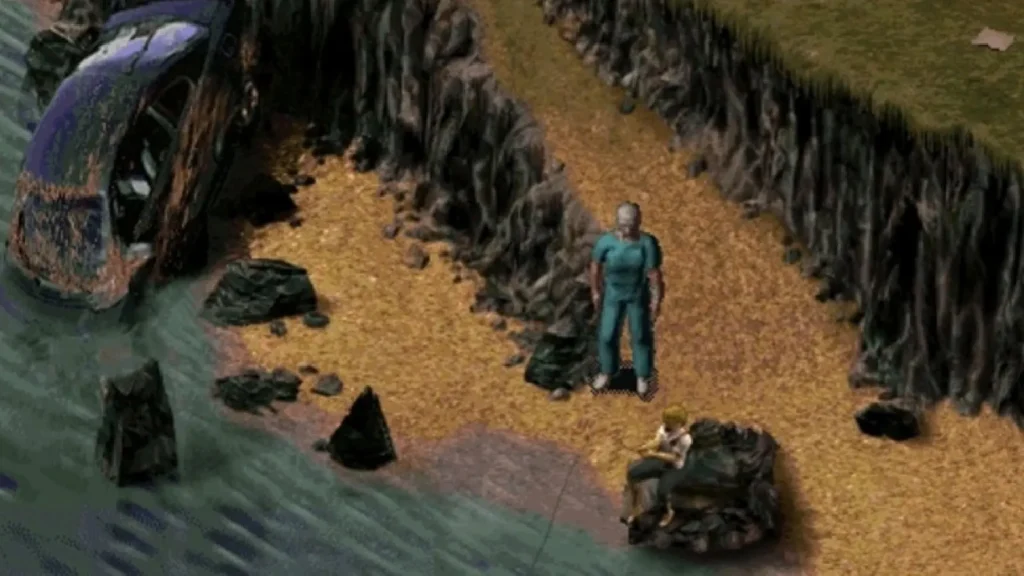
To the left of where Timothy is fishing is a car that has fallen into the water.
Our character notes that it smells like gasoline in here.
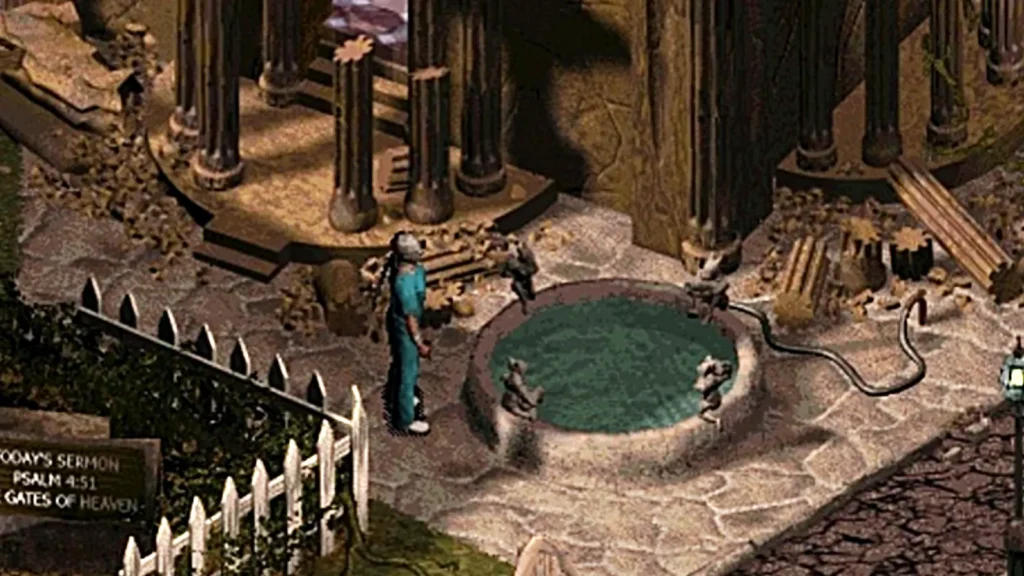
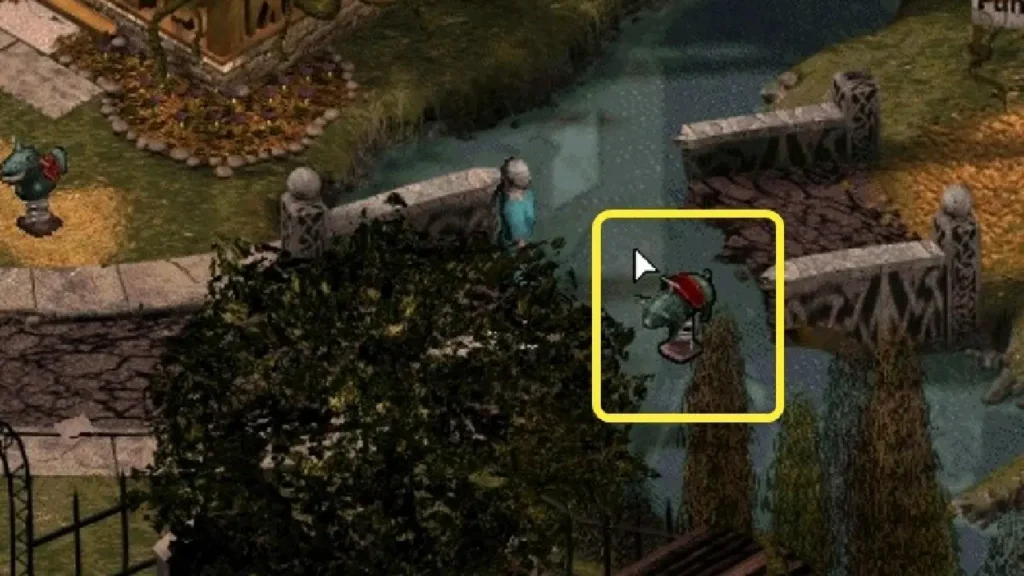
We go up the screen, stop in front of fountain between the church and the town hall building.
Town Hall
We pass to the building city government.
In the drawer we find documents:
- an article about a comet;
- a note about the annual city fair;
- a note that the comet "God's Eye" has changed the direction of flight and is moving towards the Earth.
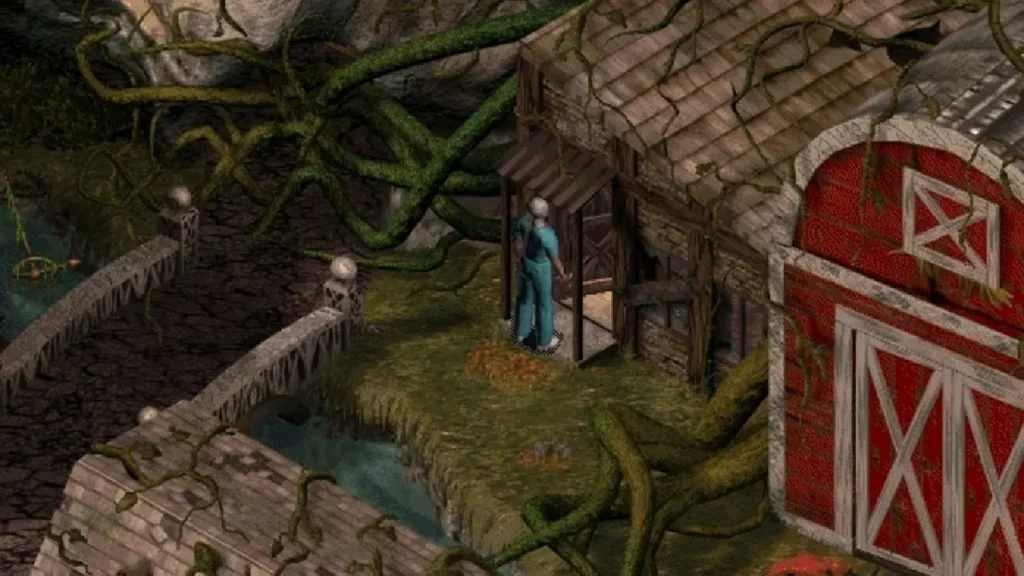
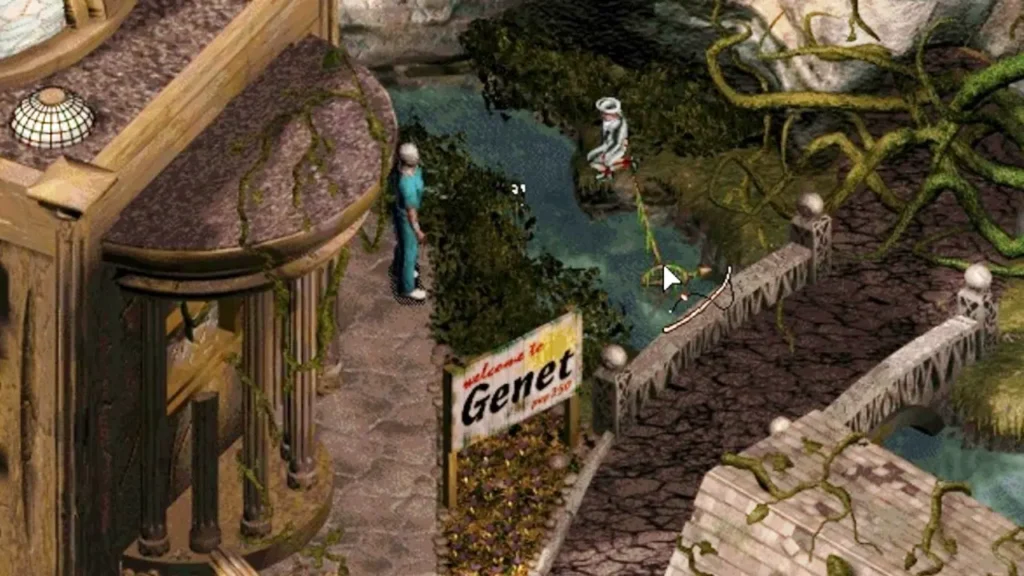
We leave the building of the town hall, go around it on the right side. On the bank of the river we see a man thrown into the water cross. We cross the river on the bridge, turn left and open house doorentwined with plant roots.
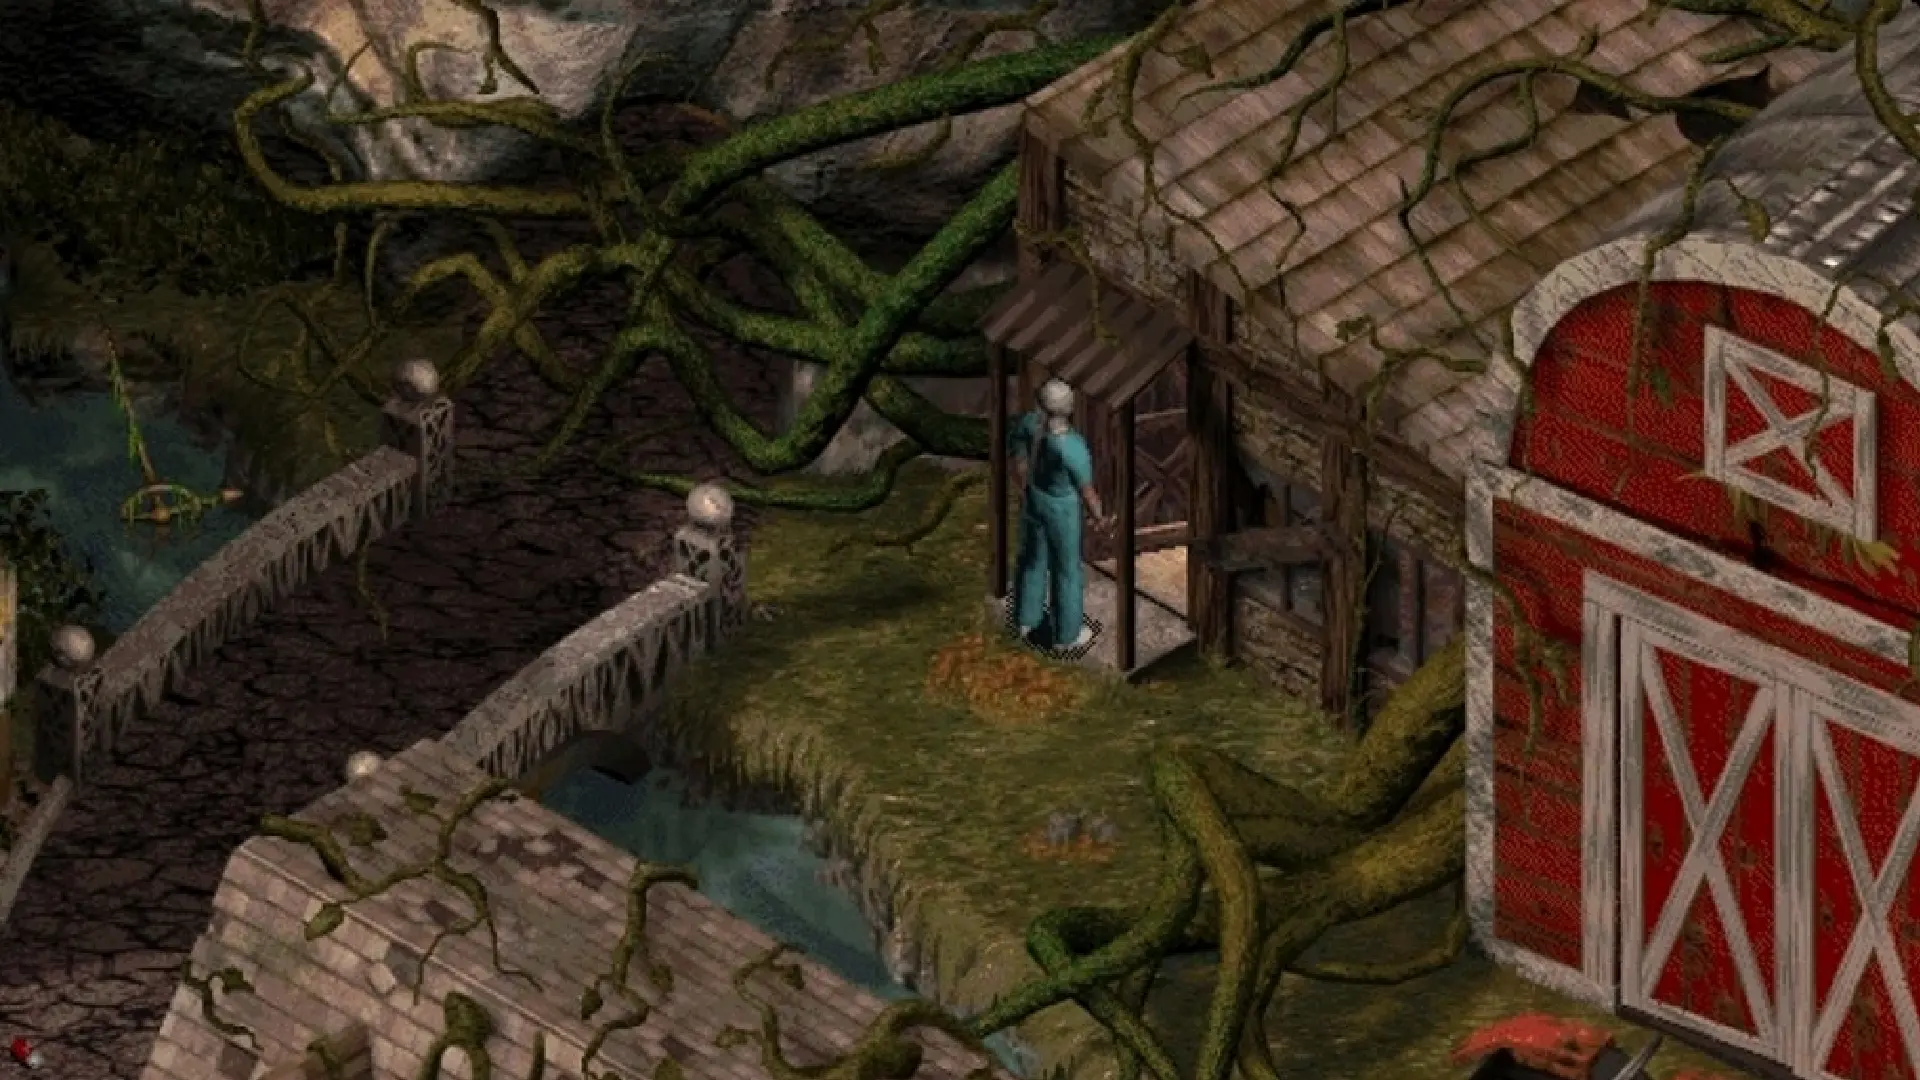
Rooted house
It turns out to be impossible to go to the barn - the roots have grown so much.
Inside the house, on the table, lies a newspaper obituary:
"Marilyn Lee Driscoll... 32 years old... husband of Jed, daughter of Carol, son of Lawrence...". Here we read the diary of a child.
We leave the house and move to the bottom of the screen.
We see children swinging on a swing.
city shop
turn left (along the character) to the house, on the porch of which the boy plays with the ball.
Trying to open The doorbut they are locked.
We approach the boy, we turn to him with questions.
His name is Marty Jones.
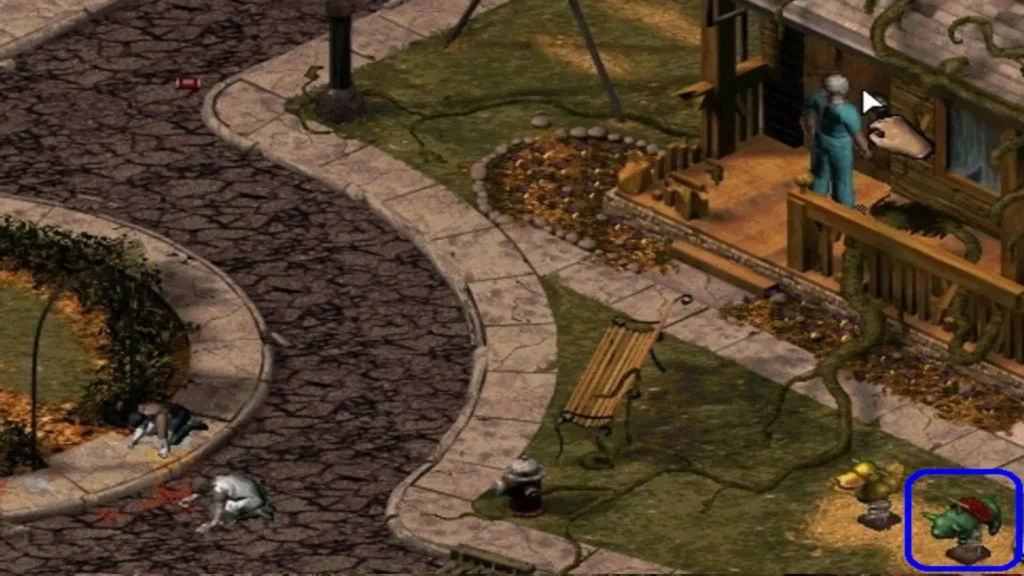
Having not received useful information, we go down from the porch, we approach to the rocking chairs in the form of animals. We sit on the central rocking chair (pig), we try to swing, but it breaks under our weight. We take the broken rocking chair with us. We pass along the screen to the right down, we enter through the gate cemeteries.
Cemetery
We learn the rules of the game and agree to play hide and seek with them.
We approach the children playing here, in a place that is not conducive to games. We talk to each of the guys present here.
We get acquainted with another son of preacher O'Toole - Dennis. He is here - the ringleader. The poor fellow has three hands (what kind of experiments does “mommy” put on them?). The name of the girl on the swing is Eileen Daly. She loves to grow pumpkins, which she will do now. She also reports that she beat Jessie at tic-tac-toe seven times. These constant reminders of the number of games won lead to the idea that this is not just childish boasting.
We also get to know little Derek and Larry the Hunchback.
We ask Larry about the newspaper article, and he confirms that this article is about his own mother, and Jeda is his father.
Sitting on the ground at the corner of the barn is a boy named Marcus Williams.
All the kids recognize Dennis as the leader of their team.
We open the barn door, we enter. We pick up standing by the barrel scrap. We leave, we move to Dennis, we talk to him.
He talks about their "secret weapon" and the main prize - the key to the city shop.
We learn the rules of the game and agree to play hide and seek with them.
Peekaboo
We are looking for hidden children.
Larry (the Hunchback) find in a barrel at the house with the fish on the roof.
By the way, we will not find anything interesting in this house if we try to go there.
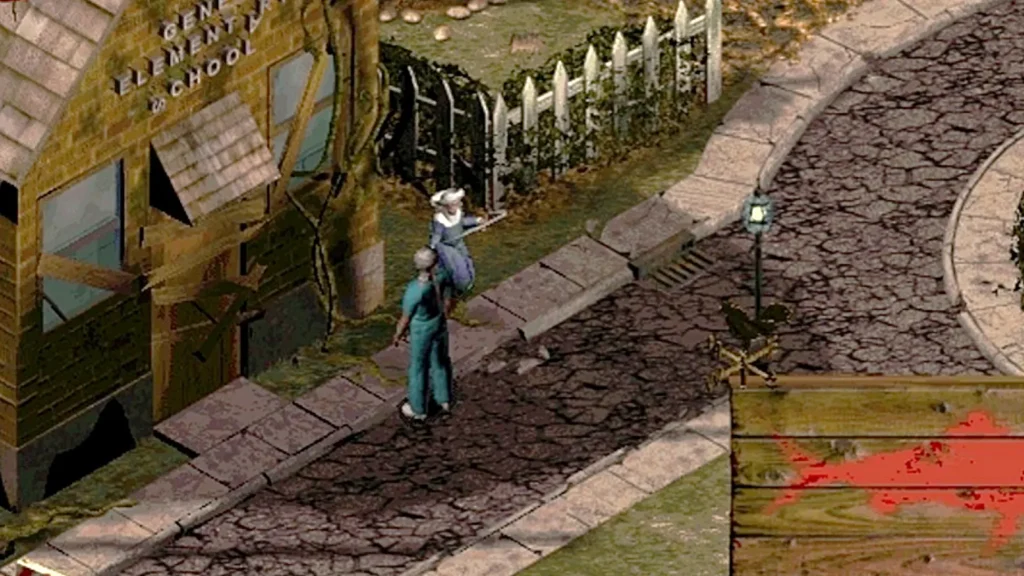
We go to the school building. We tear off the boards with a crowbar and enter.
We find here the decaying corpses of adult residents of the town.
Salim hiding here Dennis. After his departure, we examine the room, but we find nothing. We find Derek hiding behind a bench in the church. Eileen Daly hiding in branches tree growing in the courtyard of the town hall.
Marccus Williams crawled under the bed in the rooted house, where we find him. When all the guys are found, we follow to the central square, where all the children gathered after the game.
Central Square
We pass to Eileen, sitting at the foot of the statue of an angel. We talk to her about tic-tac-toe, and she declares that she has beaten Jesse seven times. Let's move on to Jesse. We ask about how many games of tic-tac-toe she lost. The girl lists names: five times - Eileen, four times - Megan, and once - to us (4-5-1).
We recall the announcement near the church: Psalm 4, verse 51.
We head to Dennis for the prize.
It turns out that we listened inattentively to him, and forgot about the main weapon. And this weapon is Carroll, which we never found (however, like everyone else).
We ask all the children about Carroll, including the boy with the fishing rod on the shore.
He does not want to talk much, so that he, like Mary, is not sent to the pumpkin patch on the other side of the city. Marty, playing with a ball at the bench, talks about how when "mommy" began to "change" them, strange things began to happen to their bodies. It turns out that no one has seen Carroll for about a year.
After talking with Eileen, we ask you to lend us her shovel. Let's go to the cemetery.
Cemetery
We are coming to the grave in the center of the cemetery, opposite the entrance. Marilyn Driscoll is buried here. We tear open the grave with a shovel and find the corpse of Carroll there.
Larry, running up, quickly sits down the decomposing corpse. on the stroller and runs away from the cemetery.
When we turn to him with questions, the boy thanks us for returning Carroll to him.
Central Square
Let's go to Dennis. He gives us the main prize - the keys to the shop. We move to the city shop. First, open the left door.
Inside we find only cardboard boxes from which someone built a model of the fortress.
We pass to the door on the right, where Marty plays. We open the door and enter inwards. We pick up the canister standing on the table and read the note lying next to it. It says all about the same comet that fell on the city.
The fall of the comet caused landslides that blocked the city and interrupted the power supply. The note goes on to say that Father O'Toole is temporarily acting mayor of the city, and Jed Driscoll is cleared of child abuse charges.
We leave the shop, go to the right side of the screen. We stop in front of the bridge, demolished by the flood. Throwing in the river rocking chair. Using it as a bridge, we pass to the other side. We are approaching a blind girl who is standing on the side of the road, near a hill of pumpkins.
We are talking with Maria Santiago, severely punished by "mommy" for disobedience. In the pumpkin patch, the crows pecked out her eyes. Maria is afraid to tell us everything, because. "mommy" will send her to the garden again.
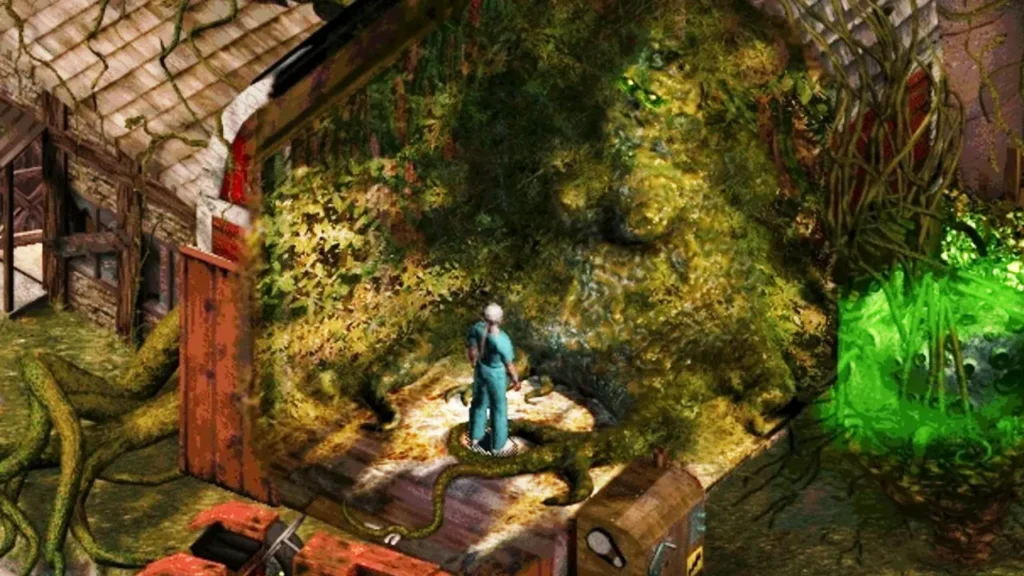
We decide to deal with this "pumpkin patch". We approach the gate, on which hangs a combination lock. We apply to it the combination already known to us: 4-5-1. We pass through the gate. We take leaning against the tractor scythe. We follow the path between the beds planted with pumpkins.
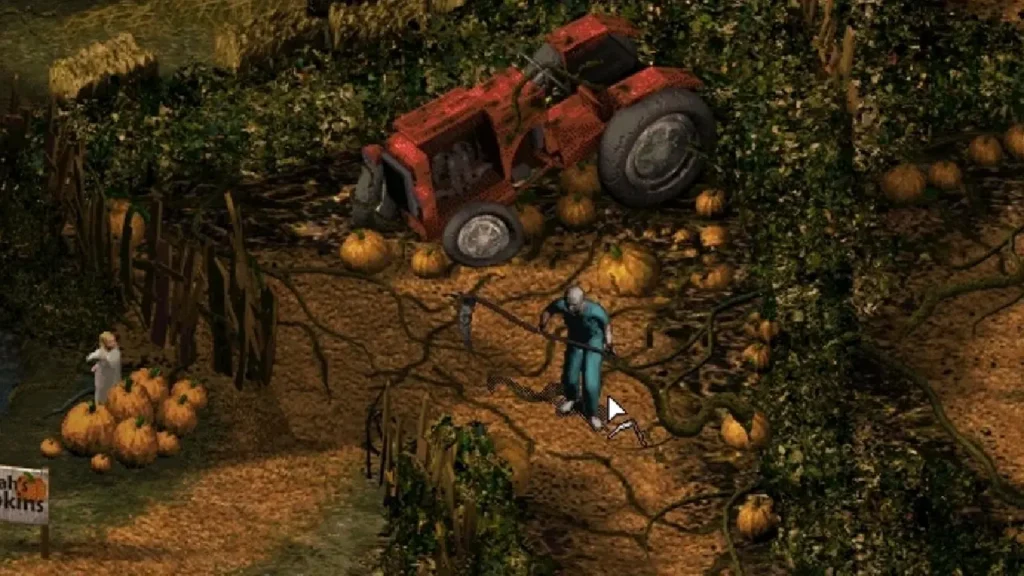
Game arcade insert. When moving along the path, crows attack us. We hover over them and kill the birds with a scythe. Crows also harm us. The more often our heart beats, the less vitality we have left. If we die, then the game has to start from the beginning of the garden, but the killed birds no longer appear, like the pumpkins cut down later.
We approach the cross, around which there are shimmering pumpkins. A garden scarecrow pounces on us.
First, we break all the pumpkins around the cross, dodging the attacks of the scarecrow, and then we deal with it.
We open the gate, we approach the fallen meteorite.

It looks like it's all metal.
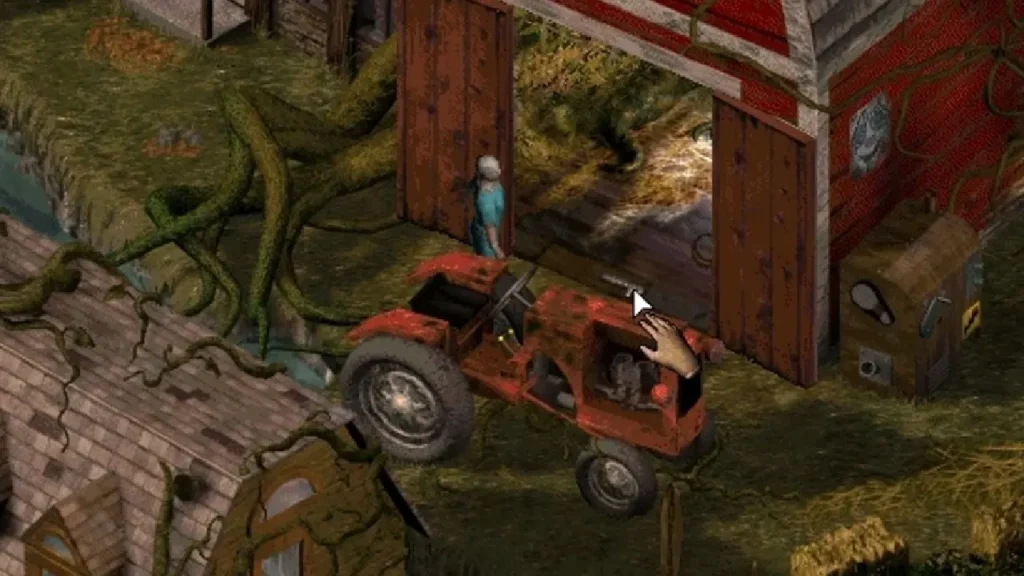
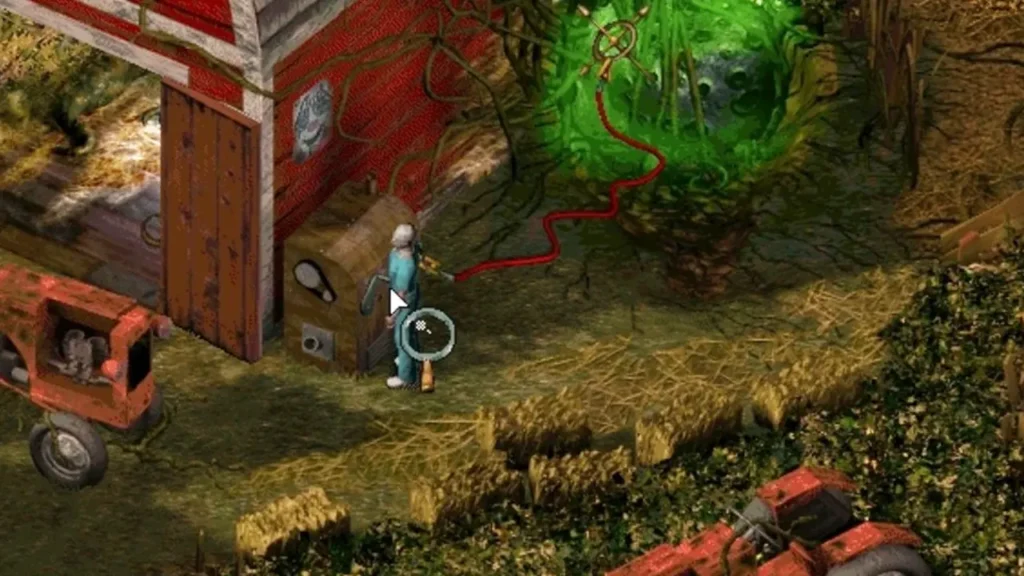
We move forward to the device at the wall of the building. Trying to crank generator handle, but it turns out that there is no fuel in the tank. We pass to the tractor standing nearby. We open hood, and remove the wire from the engine. We move to the barn door, we enter.
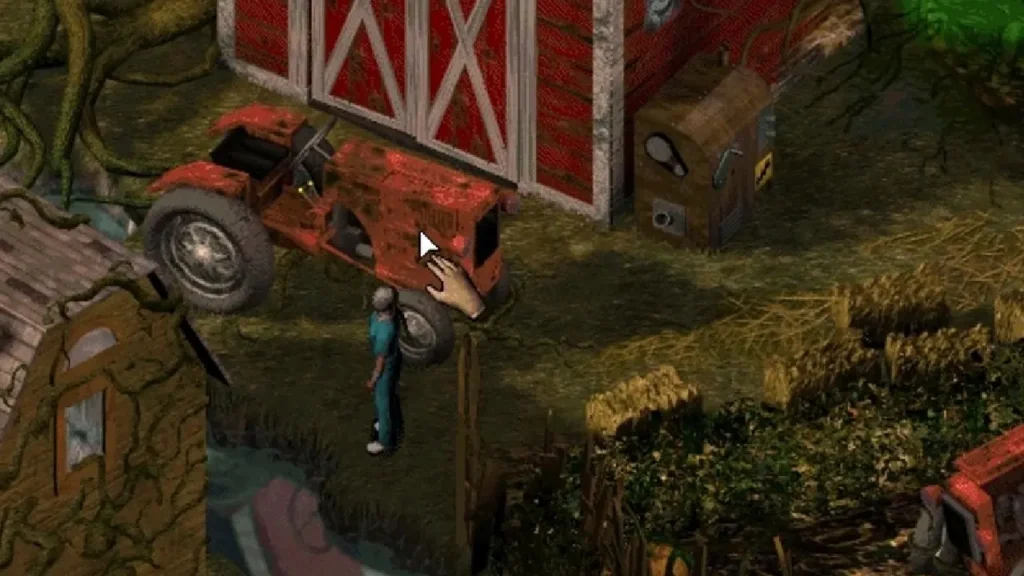
We find a strange jelly-like mass inside the room, which turns out to be the same "mommy" that we were looking for.
We have a long conversation with a representative of plant life.
At the end of the conversation, a bunch of jelly throws us out of the barn.
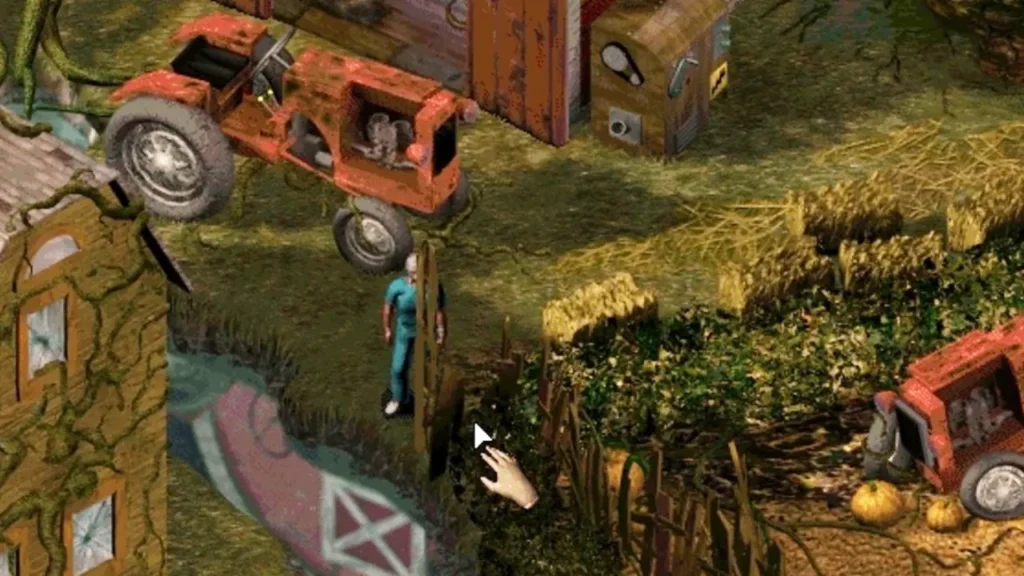
We raise lying on the threshold adjustable wrench. We go down the screen, to the edge of the fence, tear off from it the board. We throw it across the stream, creating a short path to the city.
If you try to talk to the children, all of them, as one, will unanimously praise "mommy."
End of "Mommy"
We go to the fountain near the town hall. Remove with wrench hose. We go down the screen and to the right, behind the fence of the church. To the left of the entrance to the building, near the flowerbed, we raise from the ground stone. We look at the bell on the roof of the church. We approach the gate and throw a stone at the bell.
Timothy comes running to the sound of the bell from the river.
We go to the river bank, pick up the abandoned boy fishing rod. We move to the car, where our character smelled gasoline. Open the gas tank cap, insert the hose and fill the canister with gasoline. We return to the town hall, behind the building of which we saw a cross in the river. We pass to the bridge, apply to the cross fishing rod. We get the anchor. We head to the hangar with "mommy". We approach the generator, attach a wire to it. We pour fuel into the generator tank, go to the meteorite, install an anchor on it and connect the second end of the wire to it. We return to the generator and turn the clockwork handle.
An electric discharge turns a thinking plant into the mess.
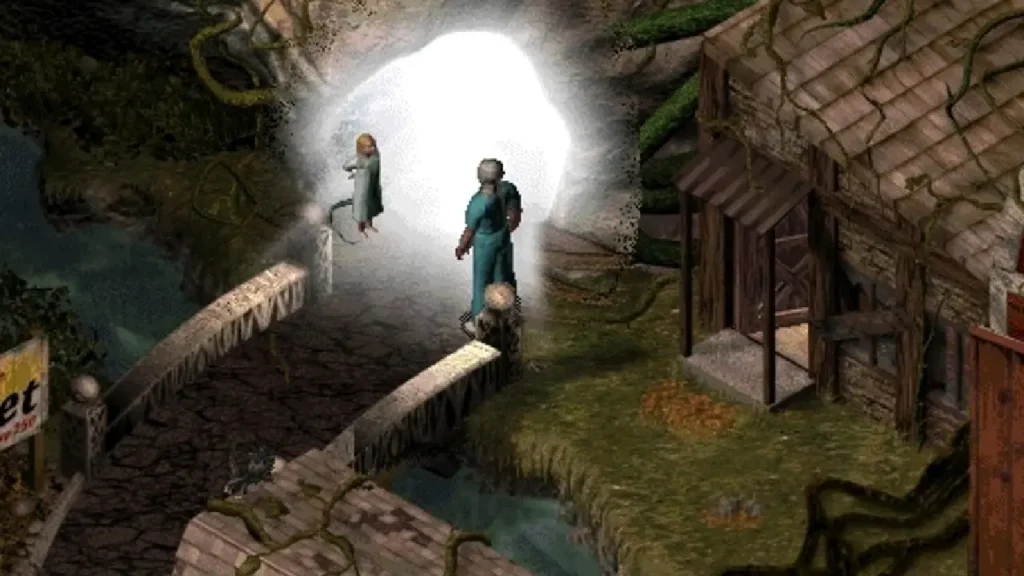
We leave for the city, we rise to the bridge behind the town hall.
At the glowing tunnel, we are waiting for a grateful Maria.
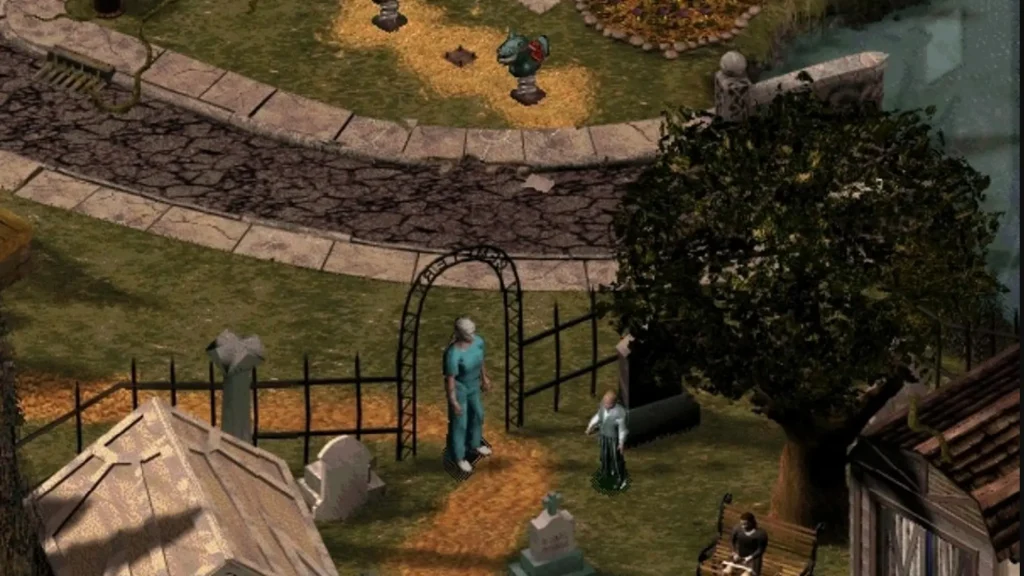
Part III. Courtyard and church
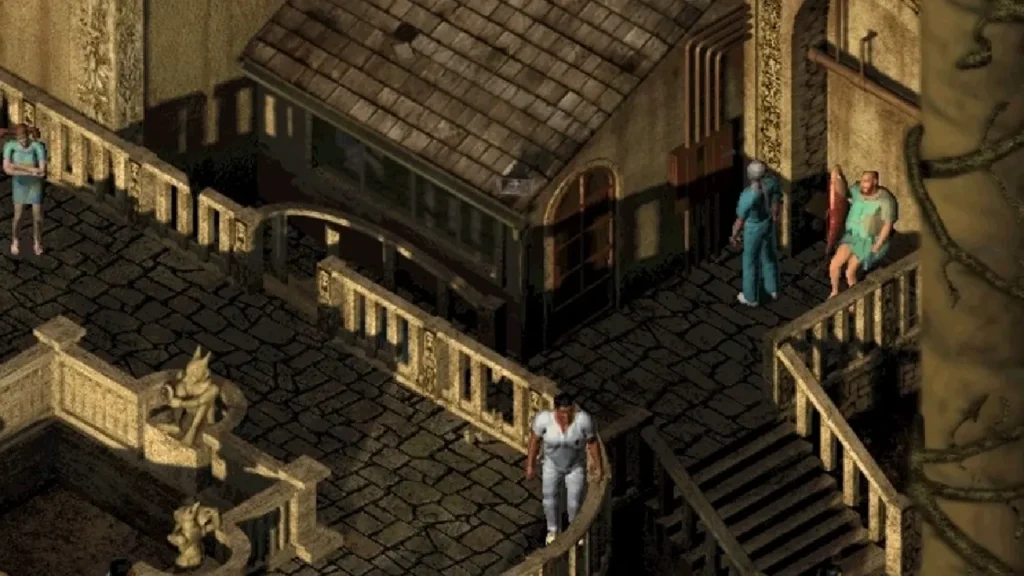
We find ourselves in the courtyard of a psychiatric hospital.
We pass forward and to the left. We approach the patient sitting on the bench in excessively large shoes.
We talk with the "king of rock and roll Elvis. We ask questions about the place where we are and about the patients of the institution, but our interlocutor lives in his inner world, far from the real one.
We move to the right, we go down the stairs. We approach the old man in a tutu, whose name is Skippy.
We also can't talk to him.
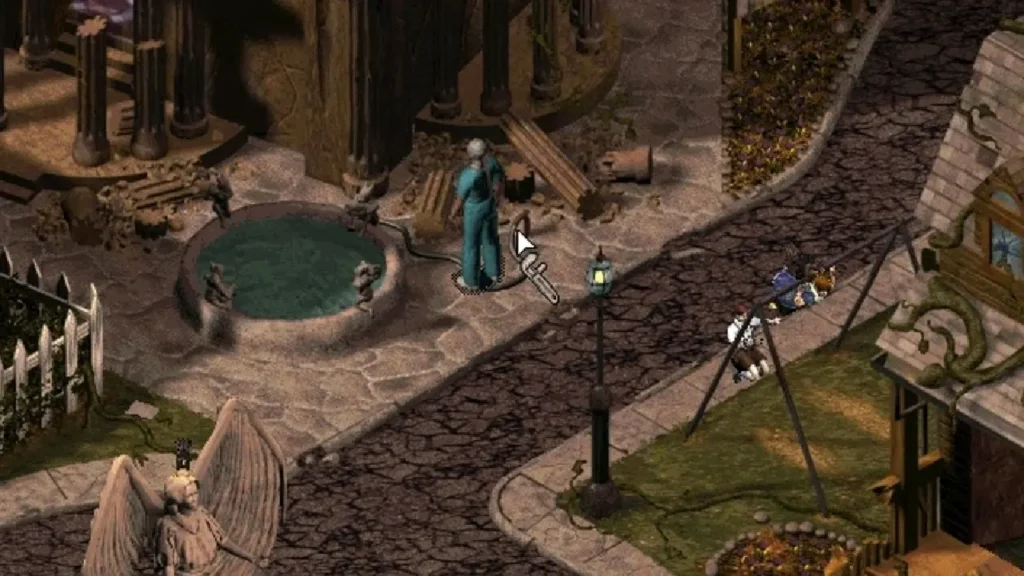
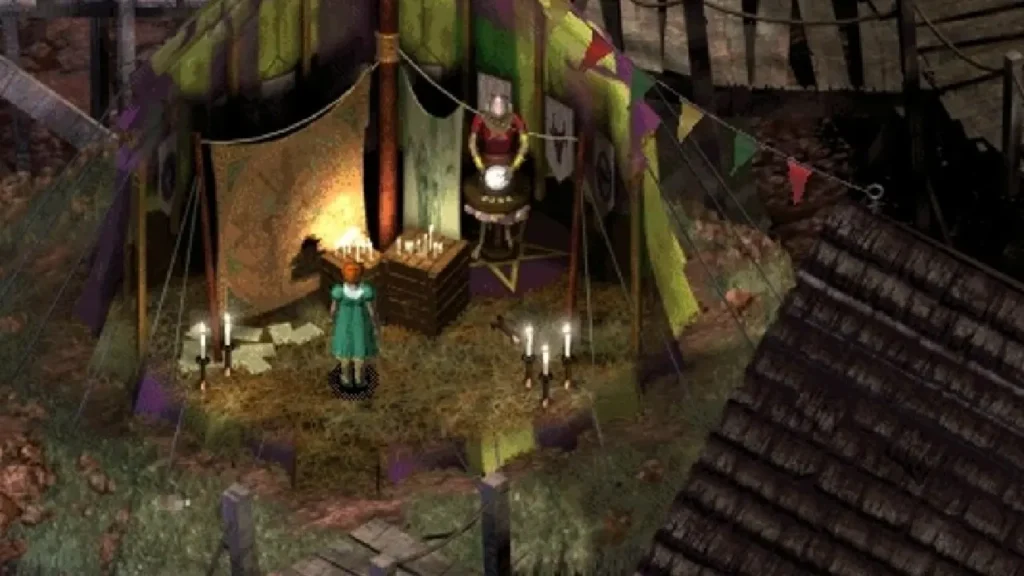
We rise to the upper platform with a fountain in the center. We approach the porch in front of the high doors, on the steps of which sits silent woman. She is the first to address us, mistaking for a doctor.
Another vision occurs, thanks to which we learn that we were Dr. Max Loughton. We are talking with a sad woman who is sad because a friend named Craig has not visited her for a long time. We also learn that behind the high doors there is a church in which Saint Bob reads his sermons.
The woman makes way for us, and we go up the porch. We open the heavy door with our foot, we enter inwards.
Preacher Bob delivers a sermon in front of wooden mannequins. We communicate with the preacher. We learn that a cross has been stolen from his church.
We leave the church premises, approach and talk with a woman in a denim skirt, standing nearby.
She gives rhyming answers to all our questions.
We go down to the right side of the screen.
We are trying to talk to a man with a fish in his hands, but the conversation also does not work.
Pay attention to Switchgear supplying water to the fountain on the wall of the building.
It is located high enough, and we need something to help pry this device.
We go inside the building. We are talking with Dr. Morgan.
We learn that as a result of a fire due to the fault of an emergency generator, the patients who were inside the tower died. We remember Don, Lenny and Martin.
We approach the table on the right. Considering gramophone records.
Three records are on the table, and one record is now being played on the gramophone.
We remove the playing plate. We take from the table and put on playback all the records in turn.
We leave to play the record to the music of which the old man in the tutu begins to dance.
We leave the doctor's office, go down to the dancing old man.
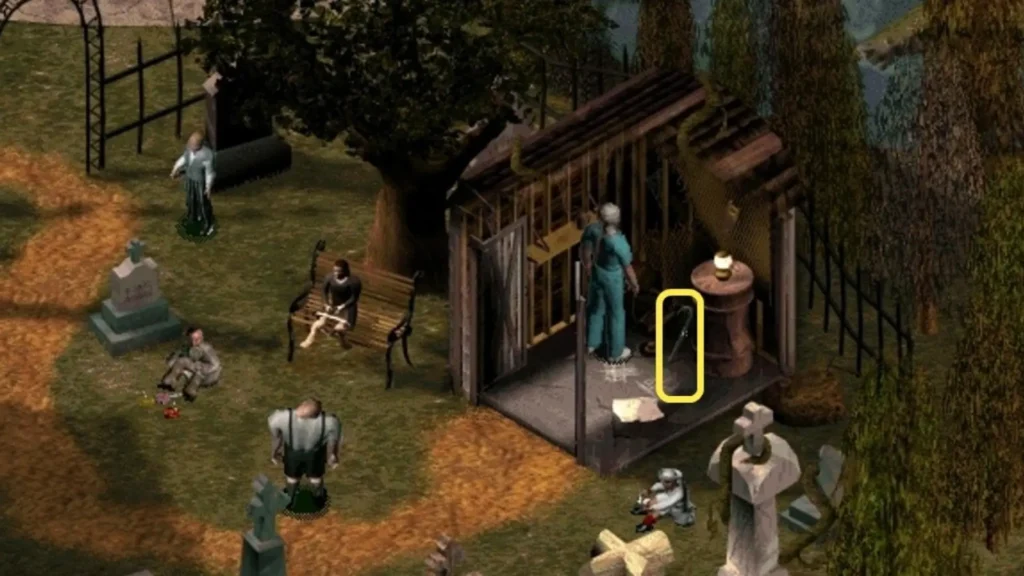
On the bench where he was sitting before, we see a cross.
We pick up the cross, take it to the church and hand it to the preacher Bob.
As a reward we get the Staff - a broom with a long handle.
We head to the switchgear. Use the broom to open the cabinet doors.
Puzzle.
By turning the dies at the intersection of pipelines, it is required to create a continuous circuit for supplying water to the pipe leading to the fountain in the center of the yard area (second pipe bottom right).
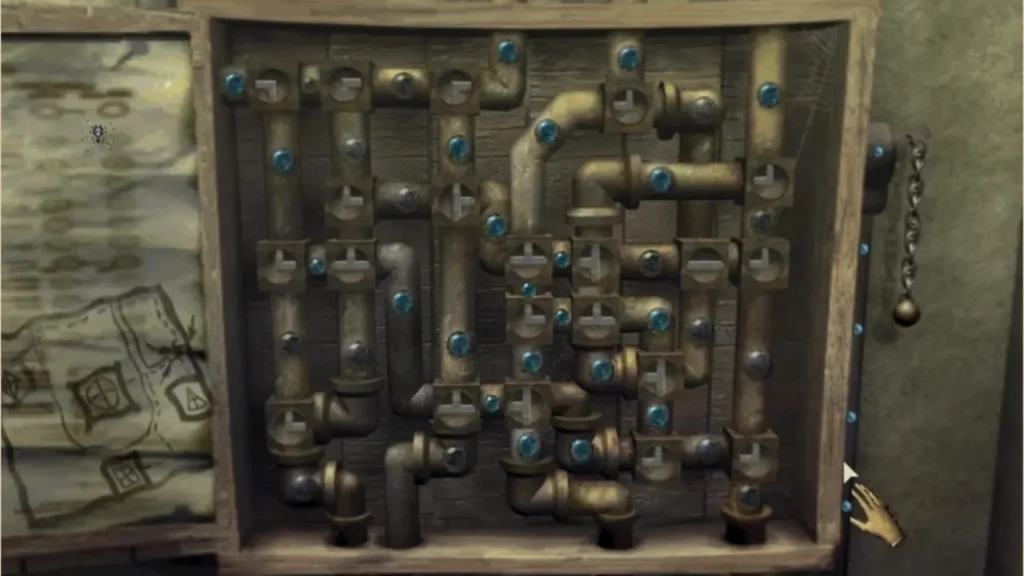
Having set the dies in the desired position, pull the lever chain on the right.
Fountain starts to function.

We move to him. We speak with the reflection of the statue in the water.
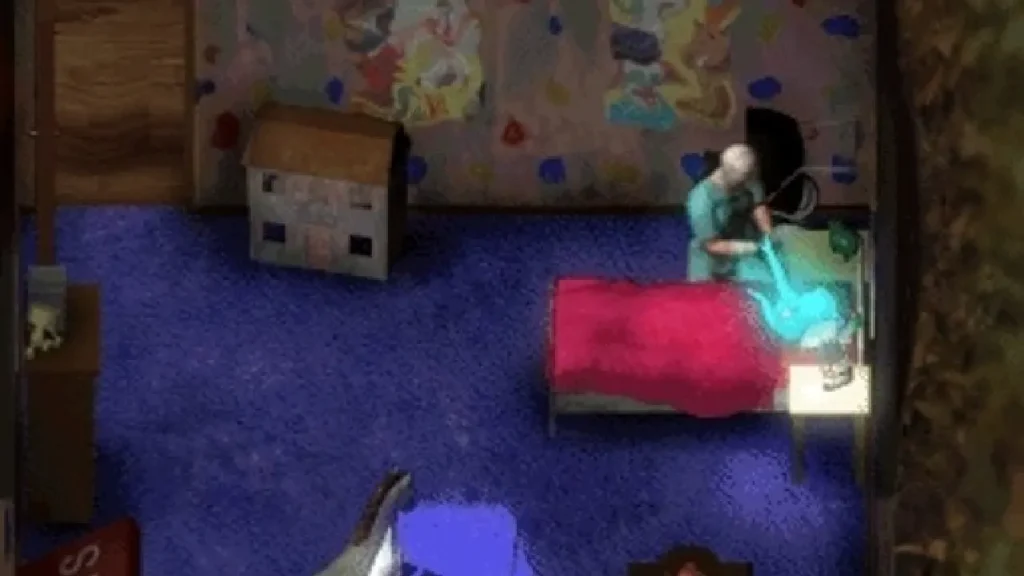
We watch an animated video where Max's sick sister, Sarah, asks him to bring a doll. This doll was given to her by a clown when they were with dad at the circus. Max rushes to the toy box, frantically looking for the clown, but does not have time.
Part IV. Crazy Circus
We play as Sarah, an eight-year-old girl. We find ourselves on the islet, on which the traveling circus spread its rides.
We approach the observation binoculars located behind the place of arrival.
In the eyepieces we see a gloomy uninhabited house.
We turn around, approach the lying person, help him get up.
Meet Antonio Baldoni, director of the circus of the Baldoni brothers. We listen carefully to his story. We get a free pass to one of the rides.
Moving along the grass, next to the wooden flooring, we pass to the tent of the traveling circus,
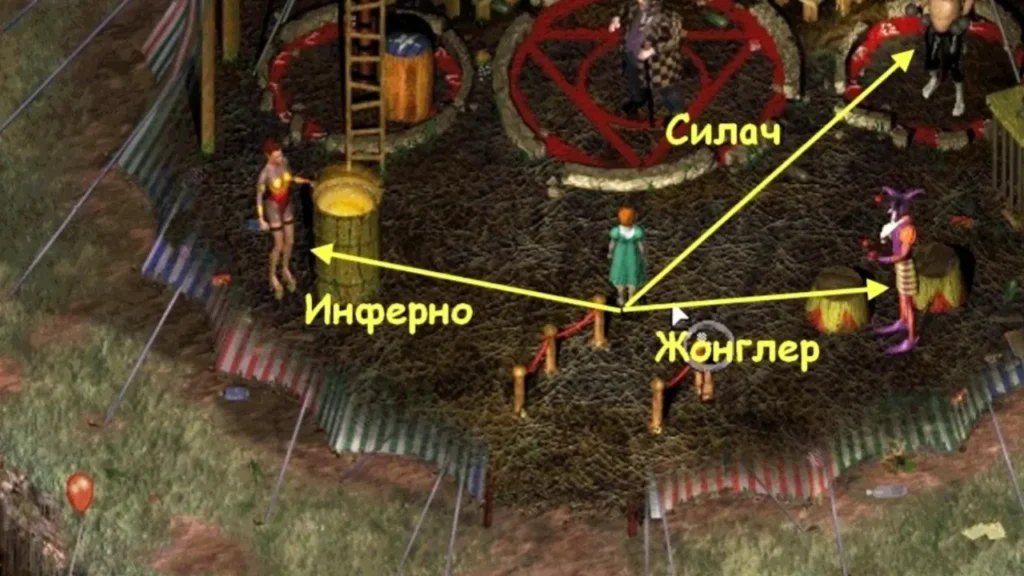
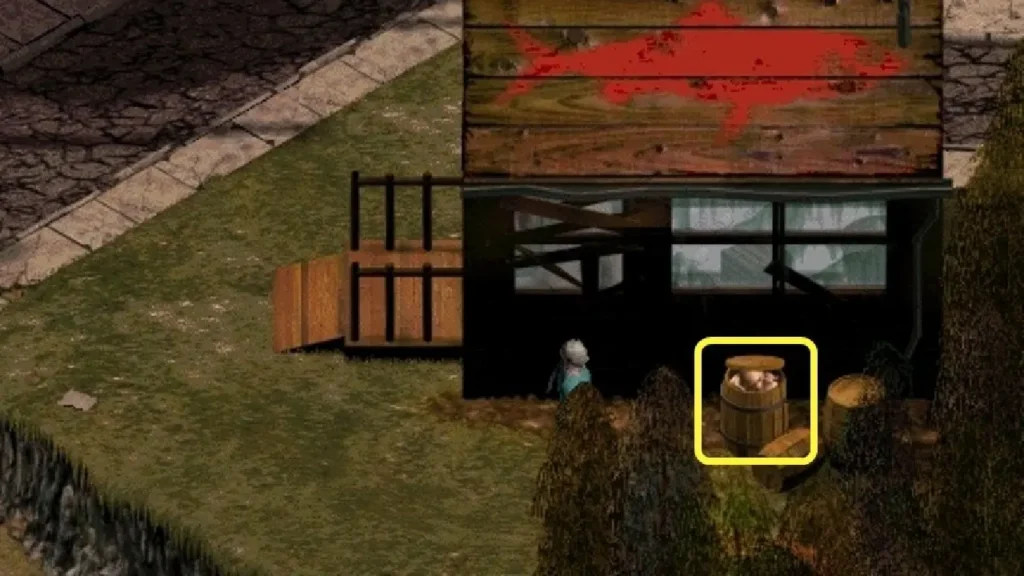
We go inside, move in a circle and get acquainted with the artists. On the left, near a high barrel, there is a woman who can exhale fire. We talk with her.
Her name is Inferno, and she is very sorry that she does not have a daughter like Sarah.
We ask you to teach us how to breathe fire, and Inferno agrees. But she ran out of fuel, and we need to bring it. We pass to the juggler, then to the strong man. We talk to both.
You can chat with the director of the circus and the clowns located on the benches above.
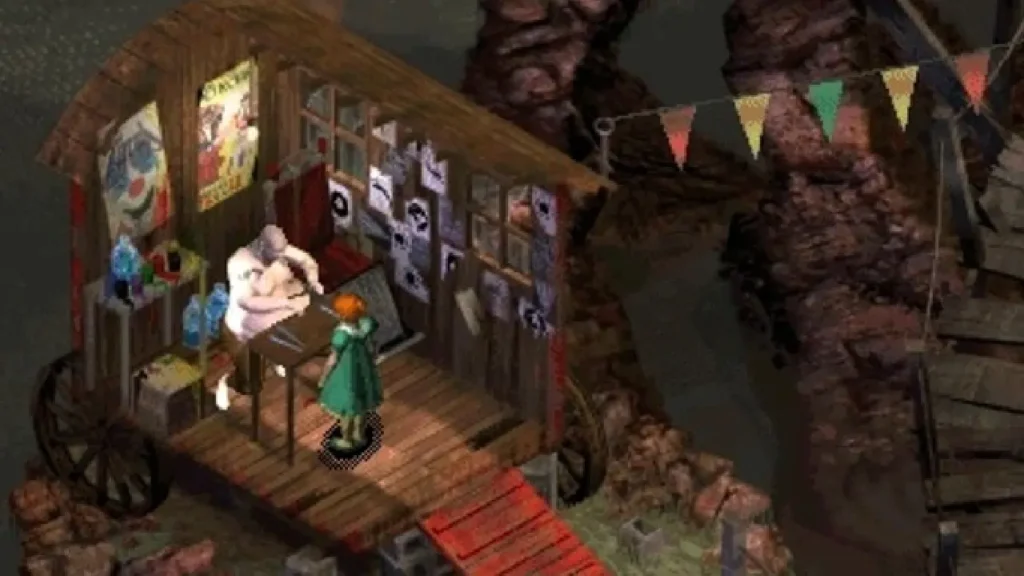
We leave the tent. We return to the place where we started the game. We pass along the walkways down, turn to the camper. Let's go inside, get to know each other with a tattoo artist.
We try to take a needle for tattooing, but the owner does not allow it.
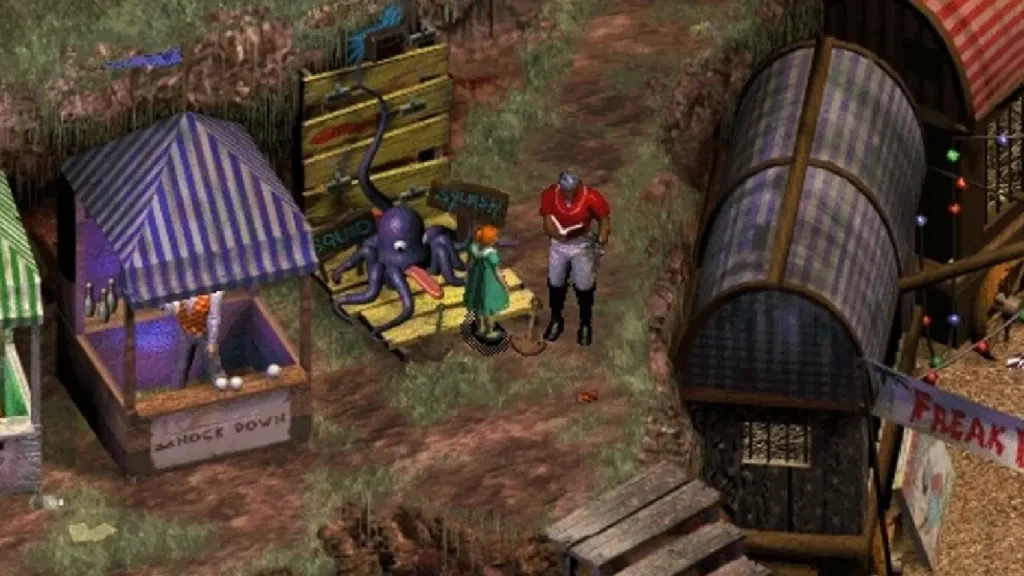
We get from him a bottle of alcohol for Inferno. We leave the house, we pass even lower along the bridges, we approach the attractions. Choose the far right attraction Squeeze the Squid for which we have a free pass. We give the caretaker a pass, we play.
You need to win fifteen tickets so that you can visit other attractions. If we are unlucky and lose all the tickets, then we should look for them at the steps leading down to the beach.
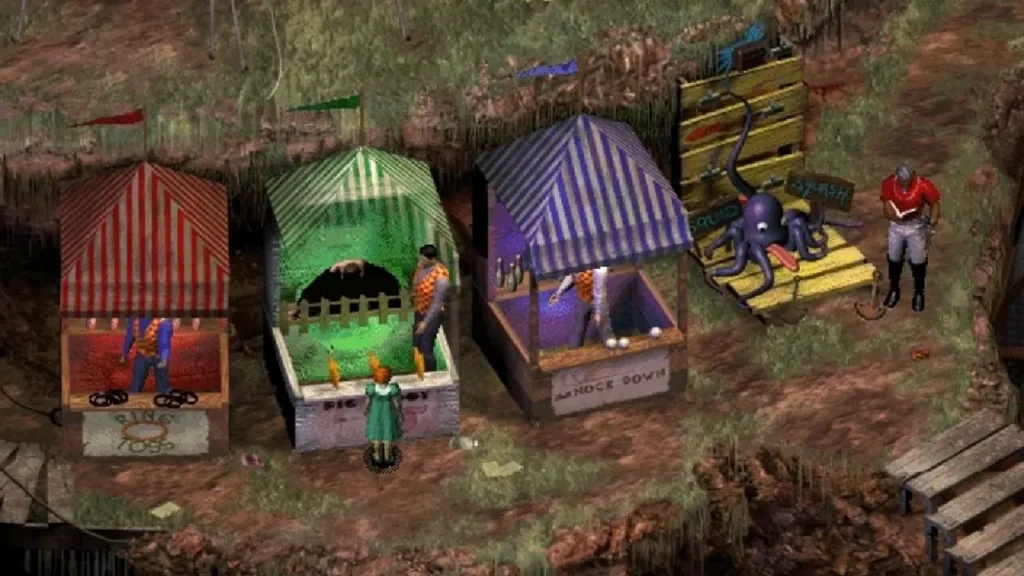
We take the winnings - tickets, go to other attractions. We ask the caretaker to sell a ticket for the attraction for knocking down pins. We make several attempts until one of the skittles flies over the counter. We raise it from the ground, and head to the neighboring pavilions.
It is especially not worth staying here so as not to waste tickets in vain.
From the rides, we pass up the screen past the “Squeeze the Squid” stand. We move along the flooring to the boy lying on the ground, and communicate with him.
The situation is clearing up. As a result of the flood, the inhabitants of the town were forced to climb to a higher island. But at this time, a squid escaped from the Freak Show attraction, which has grown to an incredible size in three years, and is now devouring all the inhabitants of this island. The inhabitants of the island consider themselves doomed. We also learn that the strong man is in love with Inferno and writes poetry for her.
We move away from Sean, take the one standing nearby butter dish. We pass forward, we talk with Sean's parents, then we return to the circus tent. We approach Inferno and give out information that a strong man is in love with her.
We are interested in how she would react if the strongman tattooed her name. Inferno is intrigued by our question. We are learning the focus of exhaling fire.
We are rewarded with a torch for academic excellence. We approach the juggler.
Having tried to juggle, we get a ball instead of a skittles from the circus performer.
We move to the strong man and advise him to get a tattoo.
The overjoyed strongman runs away.
We follow him to the tattoo booth.
Gaining a moment while the tattoo artist is busy with his work, we take a needle from the table.
We head back to the amusement tents. We go down the stairs. We talk with the clown - the predictor. We approach the caretaker of the attraction "Freak Show", pay five tickets for entry, and go to the cages. We talk with the elastic man in the first cage, then with the dog-man in the second cage.
The dog-man asks us to let him out of the cage.
We use a needle on the lock, and the mutant runs away to freedom. We leave the attraction, move to the left side of the screen, to the carousel. We use the oiler on the lever, turn it, go and sit in the carousel.
After a few turns, the carousel stops.

We descend from the steps of the carousel. We pass to the next attraction - the room of crooked mirrors. We are talking with caretaker.
He offers to check his age with a wooden clown whose nose was stolen by someone.
We are approaching the clown.
Anthropological measurement does not give us a chance to get on the attraction.
Instead of the stolen nose, we insert the juggler's ball to the clown.
The cheerful clown allows us to pass.
We approach the caretaker, buy a ticket, enter the pavilion.
We examine the mirrors, we see a man with a bandaged face - Max, trying to escape from the mirror. We select a fragment of a mirror.
We leave to the street, we talk with another clown, we follow the fortune-teller's tent.
Fortune-teller predicts our fate, and moves to the entrance to the big top.
We leave for the island to Sean.
We see that the runaway dog man dug a deep hole in the ground. We look into it, talk to the mutant and watch how the squid drags him away.
After watching the animation, we jump down.
Part V. Cave
We find ourselves in a dark cave.
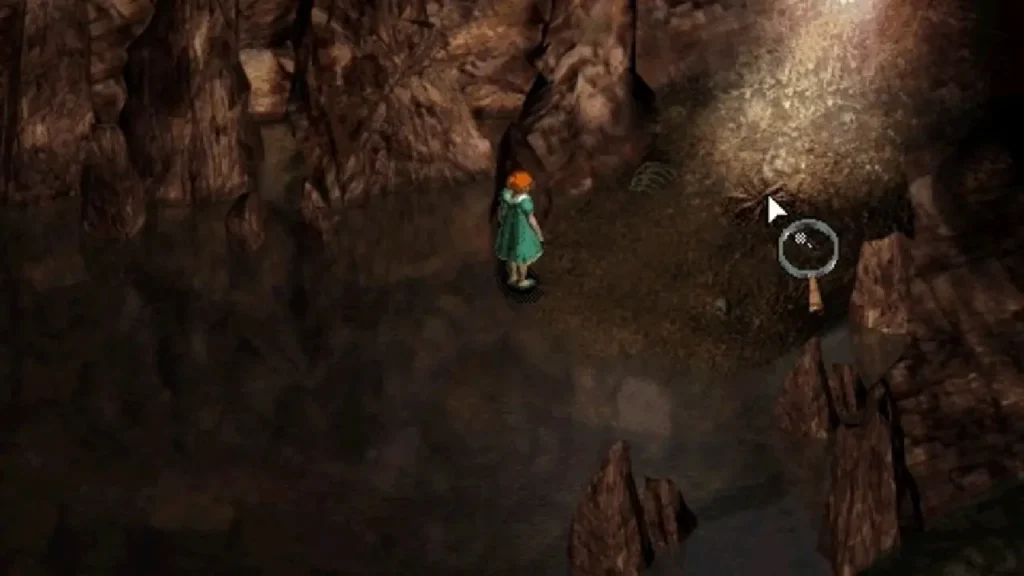
On the border of light and twilight lies a small pile of dry branches.
We use a mirror on the branches. From the inflamed flame of the fire we light the torch.
With a lit torch, we automatically enter the water. Another game insert. It is necessary to move through the water to the left side of the screen, and at the same time dodge stones falling from the ceiling, and destroy the tentacles emerging from the water with flashes of fire.
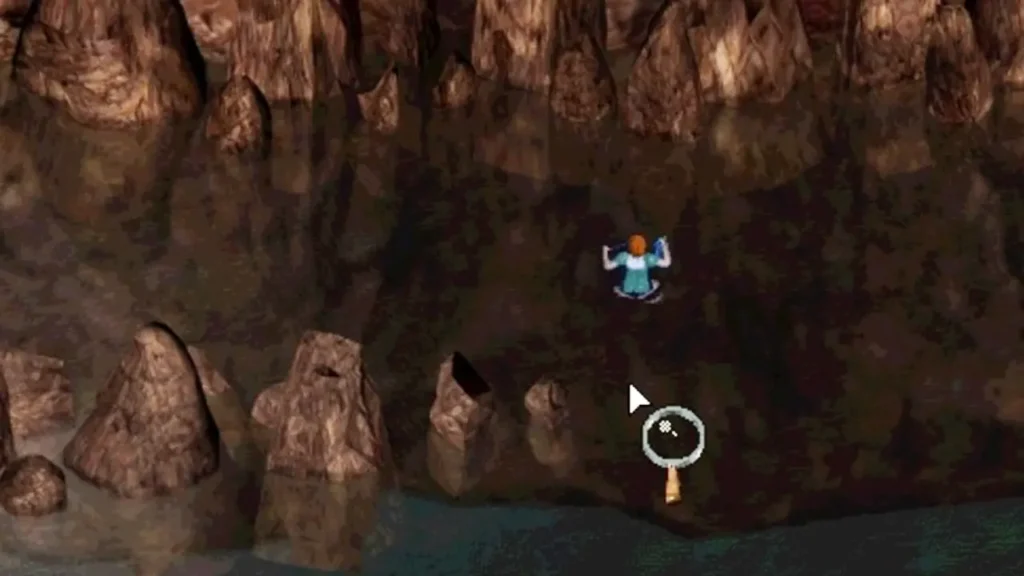
We go, with the help of fire we destroy the tentacles, turn right in the direction of travel (up the screen), moving to the adjacent stream bed. We continue to move to the left side of the screen.
At the exit to the shallows (top of the screen) you have to fight the monster.
We kill the monster, we leave the cave.
Part VI. big mansion
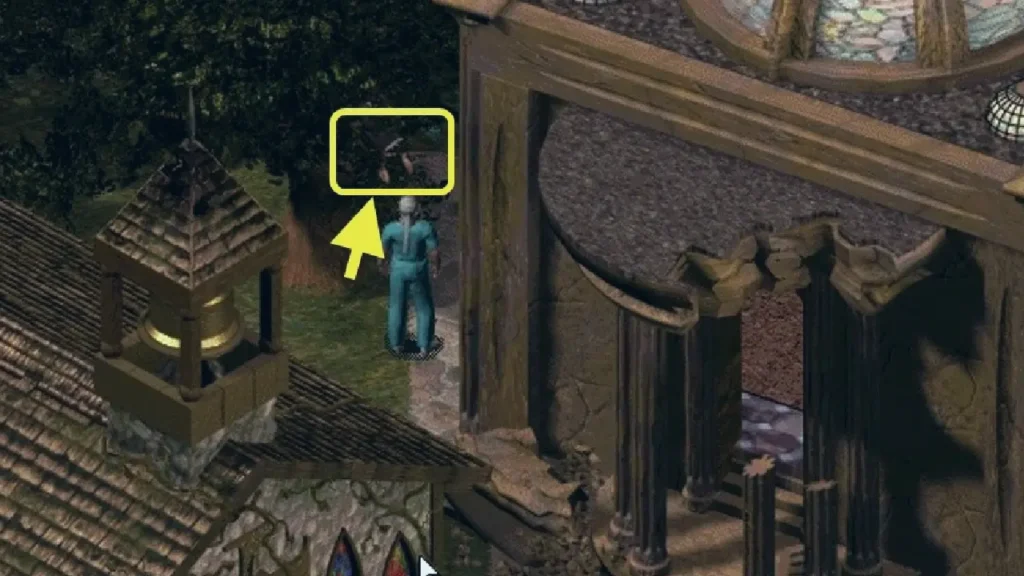
We find ourselves in the basement of a gloomy mansion, which we saw through binoculars. We go up the stairs to the first floor.
When moving through the rooms of the mansion, we will periodically encounter haunted - the ghosts of Max and Sarah's family members. We freeze, look at their actions, listen to the conversations of ghosts.
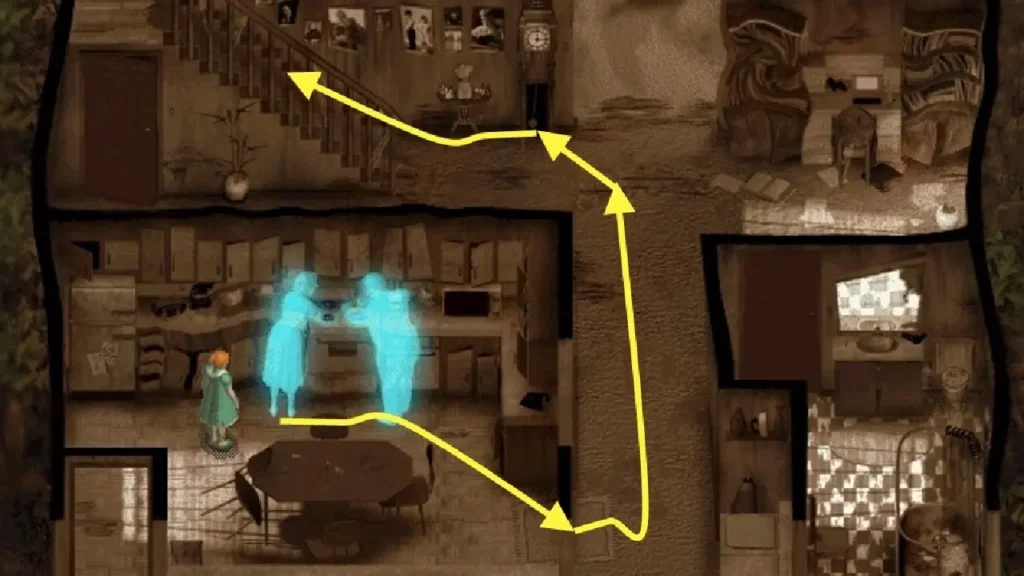
We rise to the first floor. We are heading to the floor antique clock.
We are trying to open them, but the clock is prohibited.
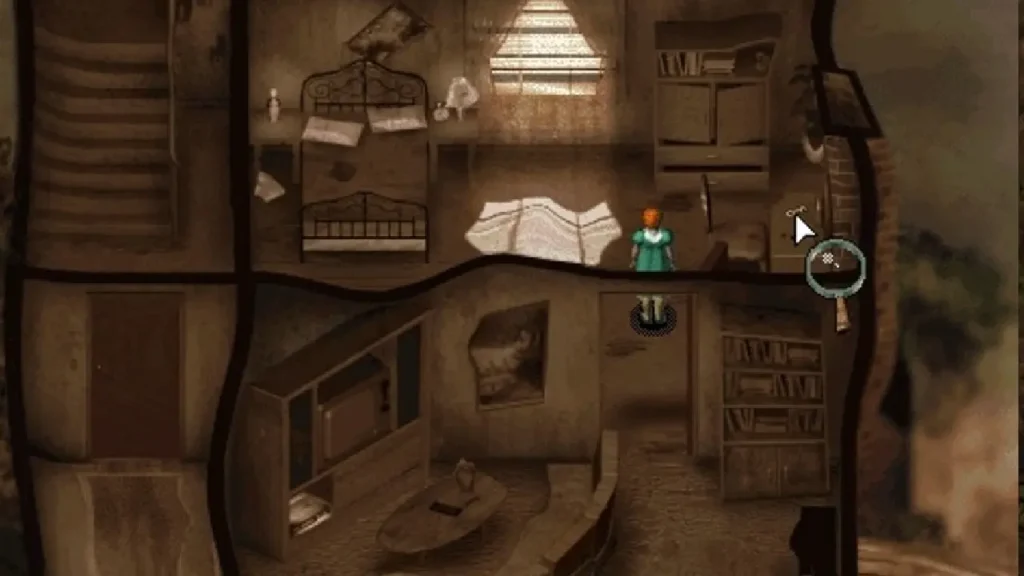
We go up the stairs to the left to the second floor. Go to the TV roomup the screen). We open the door in front, we get into the bedroom. On the right, on the table, lies a bronze key. We pick it up and go down to the first floor, to the grandfather clock. Open the clock using the found key. Turn the minute hand forward.
After the clock shows seven o'clock, a ghost will come out of the room.
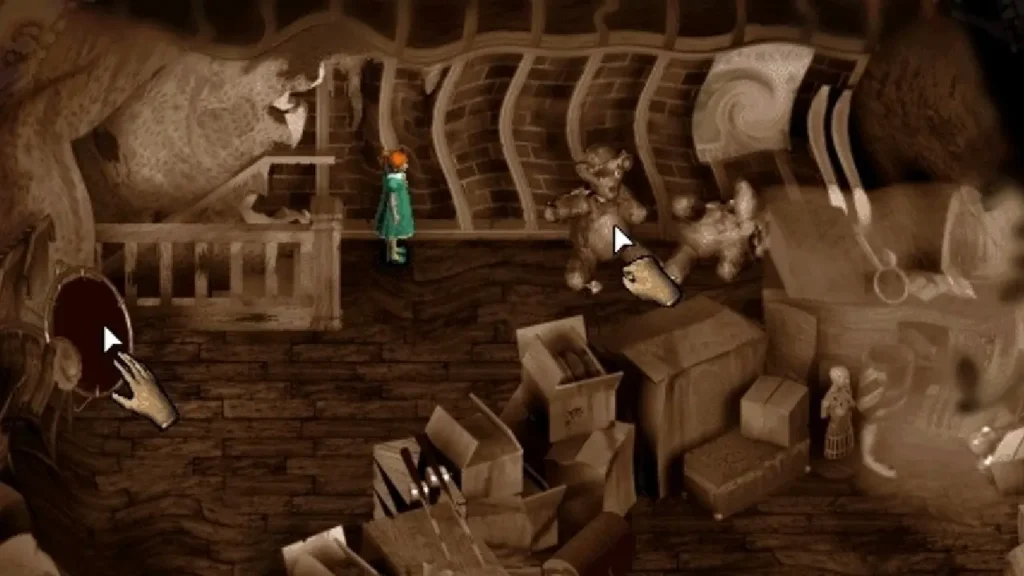
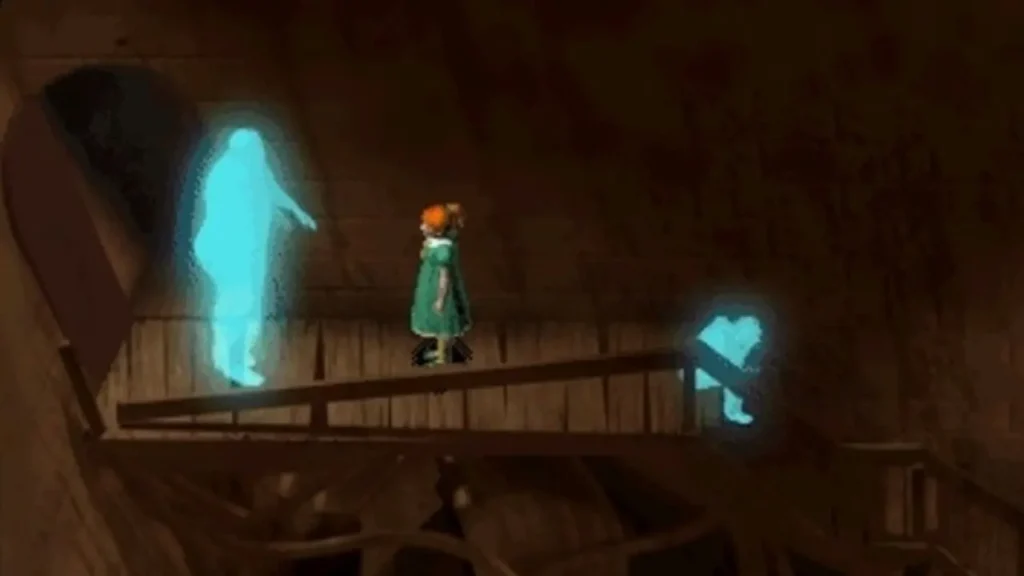
We turn to the right, we pass into the corridor, we move up the screen. We go into the room from which the ghost has just left. We take silver from the table key, and from the shelf of the bookcase on the left - a video cassette. We rise to the second floor, to the TV. We install a video cassette in the player, watch the video. We return to the stairs, turn right (along the character's path), go to the upper left corner of the screen. Open the door to the attic with the key. We rise to the attic, we approach teddy bear. We extract the golden key from under the toy. We approach the children's trampoline against the wall. We move it to a pile of boxes, climb onto the trampoline and jump over to the other side of the attic. We are coming to the chest on the left, open it with a golden key. We take out the clown doll from the chest.
The ghost of Max appears, calling us to follow him.
We go down to the second floor, go to the locked bedroom.
Max's ghost reveals to us the door from the inside.
We approach the ghost of the girl lying on the bed, we give her the clown.
Watching the transformation Sarah to Max.
Part VII. Laboratory
From the place of arrival we go up the stairs. Entering roomlocated on the right.
We examine the portrait hanging on the wall. The face of the person on it seems very familiar to us. Again there is a vision - the father of Dr. Morgan, young Morgan and Max Lufton.
Behind the fallen portrait we find a valve. We pick it up, go to the table. We look at the clock.
Our character says the phrase: “The clock goes counterclockwise. They show one o'clock, and the alarm is set for eight."
We leave the room, move to the left side of the screen.
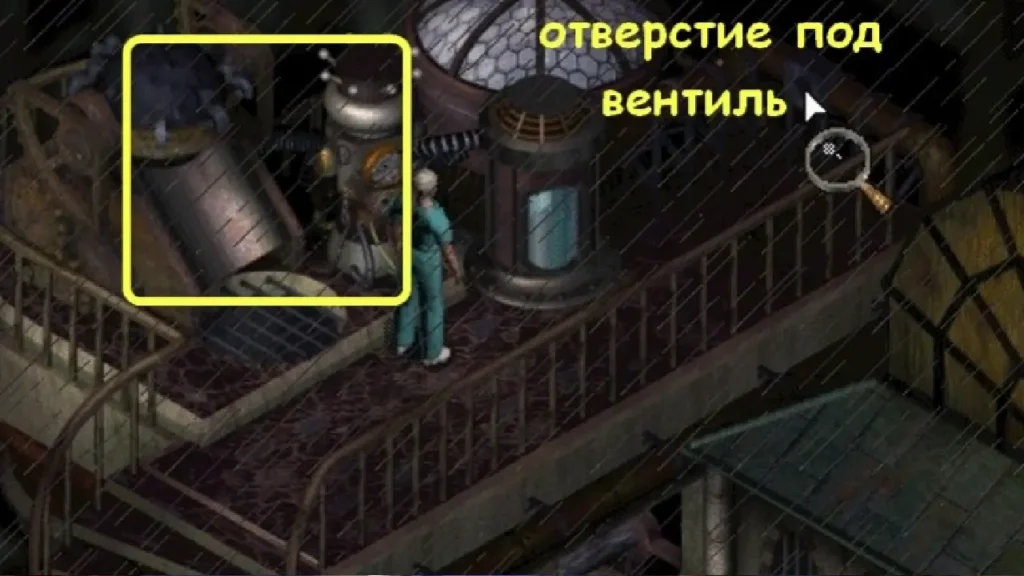
We consider a strange device on the left. We pass forward, insert the valve into the hole on the fence. We rotate the valve and see that the device has become active. We return. We are approaching to the device.
Turning the valve in the center, we fix the turn by pressing the lever on the right. We need to open the latches holding the stone.
Solution: press the valve once to turn it counterclockwise, then press the lever.
This sequence is repeated nine times. (The clock shows the hour, and the alarm clock shows eight).
The stone is released from the clamps, rolls down, opens the passage to the central room.
Let's hurry to the lab.
At the entrance, we are pierced by a vision as if in pain - the room, which now resembles a slaughterhouse, was previously a clean, tidy laboratory.
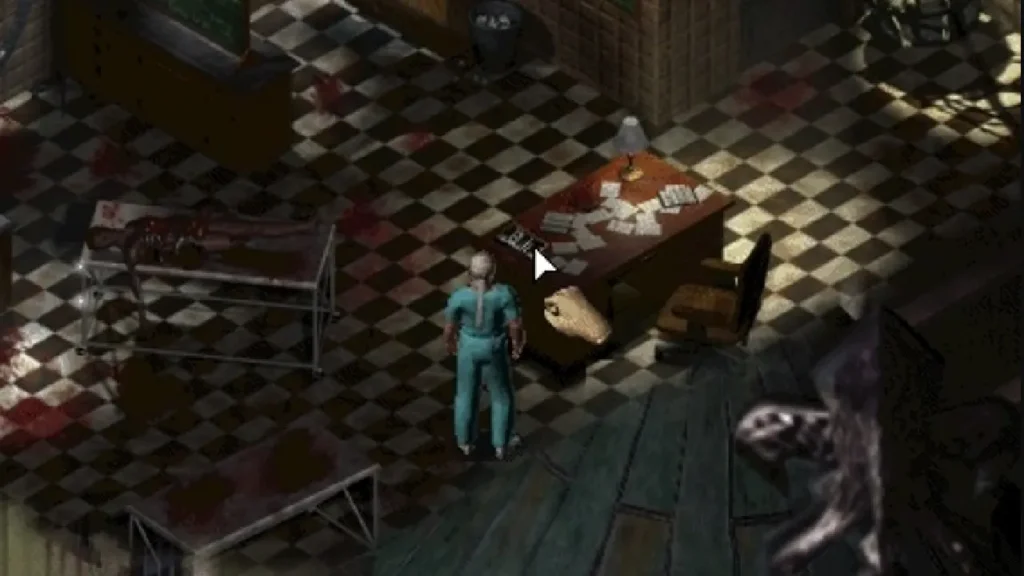
We approach the desktop, turn it on Dictaphone.
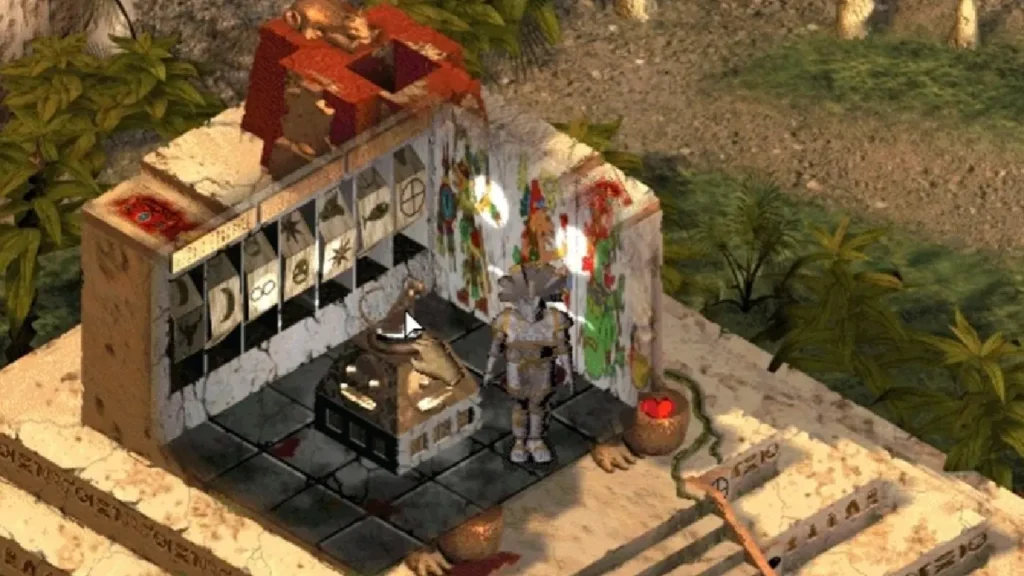
We listen to the recordings of Dr. Morgan, giving reason to carefully study the inscriptions on three green boards.
We approach each board, study the text. Click on the capital letters in the lines - the letters will appear at the bottom of the board.
Puzzle.
From the letters of each board you need to make words.
On the first board to salvation
On the second board youth
On the third board and there is a key.
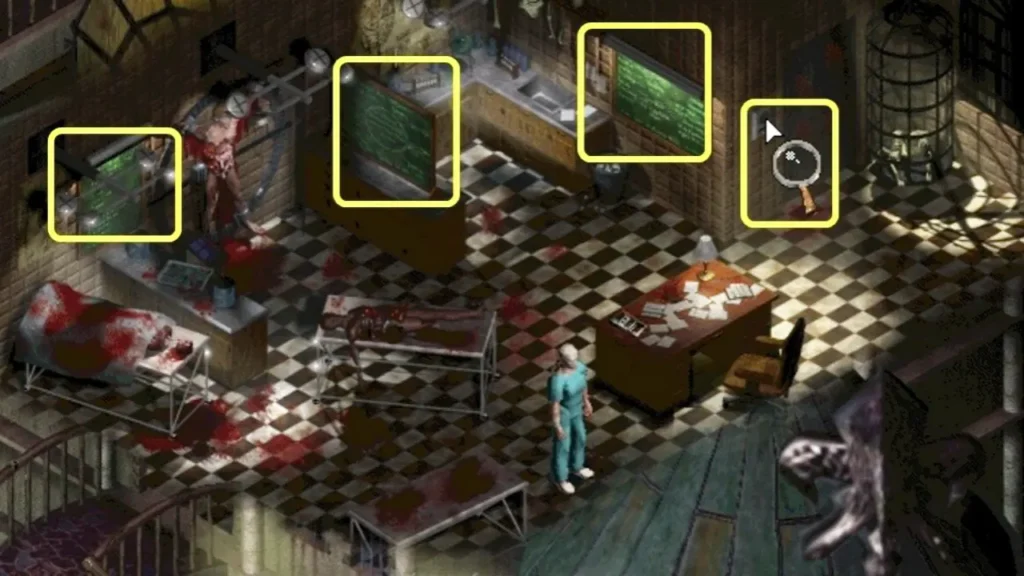
We pass to the locked door with a combination lock.
We type the phrase:Youth is the key to salvation". We pass inside.
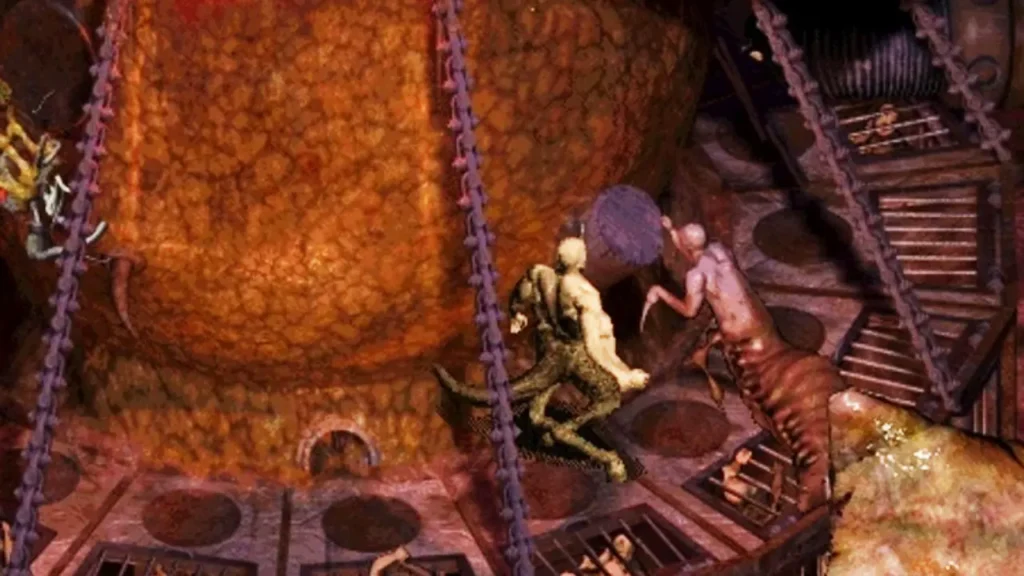
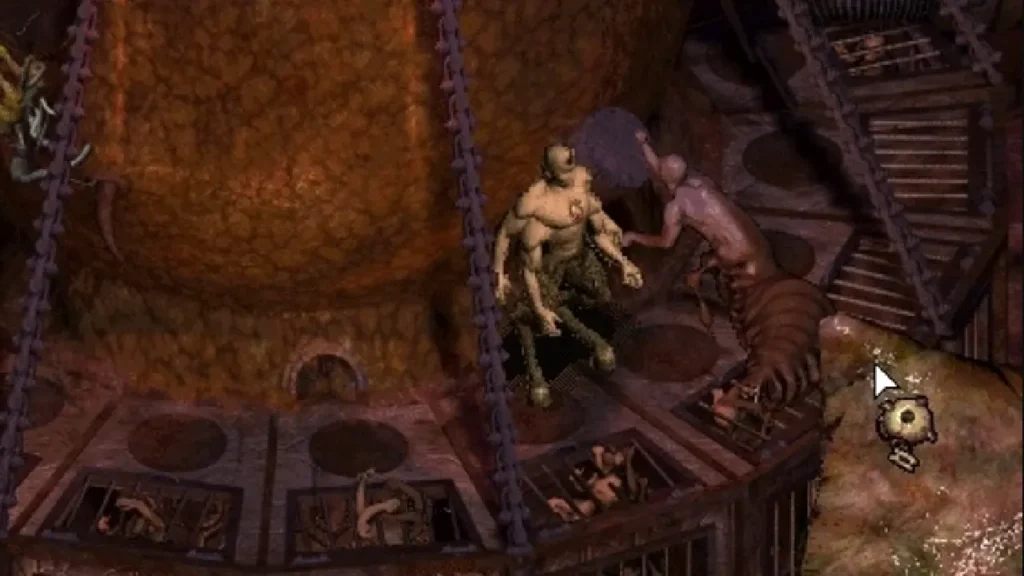
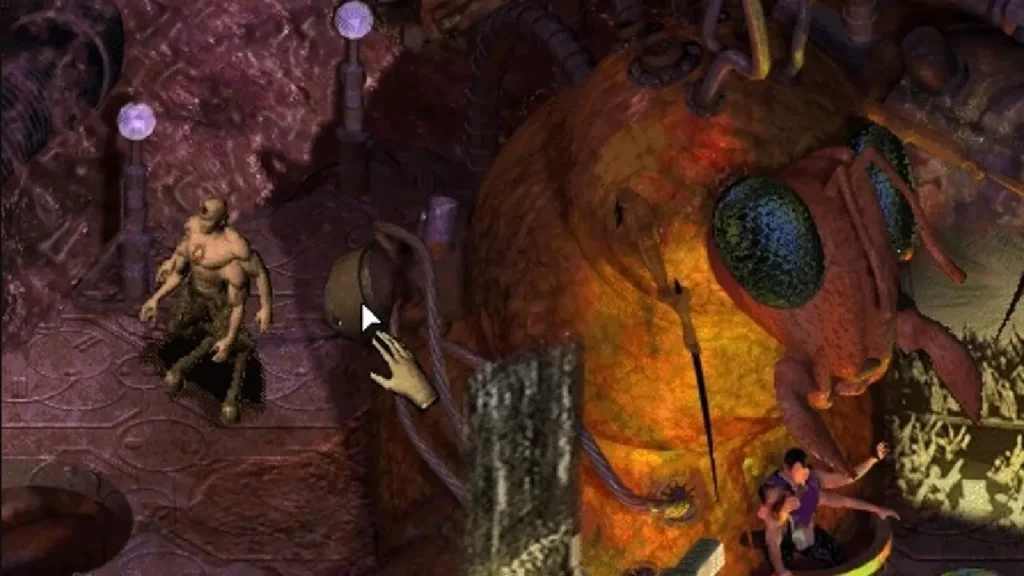
Part VIII. Hive
We play for four-armed monster. We examine the corpse of the beetle. We remove from it a device that allows you to move around the hive (automatic scanners will read the confirmation information). We start at the level of the drone - the guard.
We pass forward, on the left (in the direction of the character's movement) we see the remote control. We are trying to activate it, but it is still useless.
Drones are not allowed to enter the Queen's House.
We pass down the screen, turn to the left side, press on the yellow button. We pass into the premises of the local laboratory.
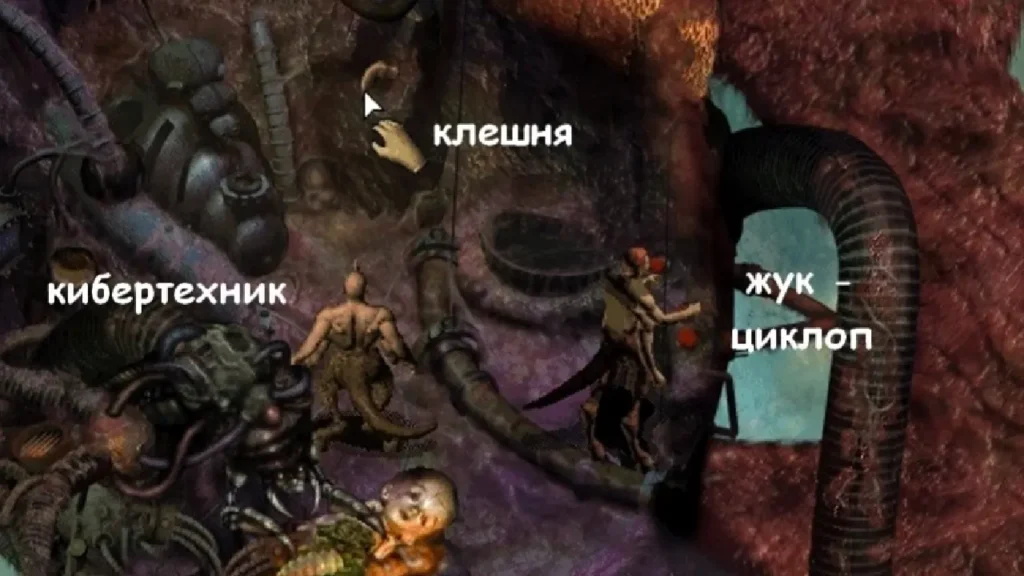
We talk with the cyclops beetle sitting on the right, which invites us to meet later in its hole, and reports the access code - “Grenesier". We turn left, to cybertechnics.
We ask him to give us a higher degree of access, but in order to obtain a higher access, you must have someone's guarantee.
From the wall, opposite the entrance, we take a claw. We leave the laboratory, follow down to the right to the hole Grenaisir ().
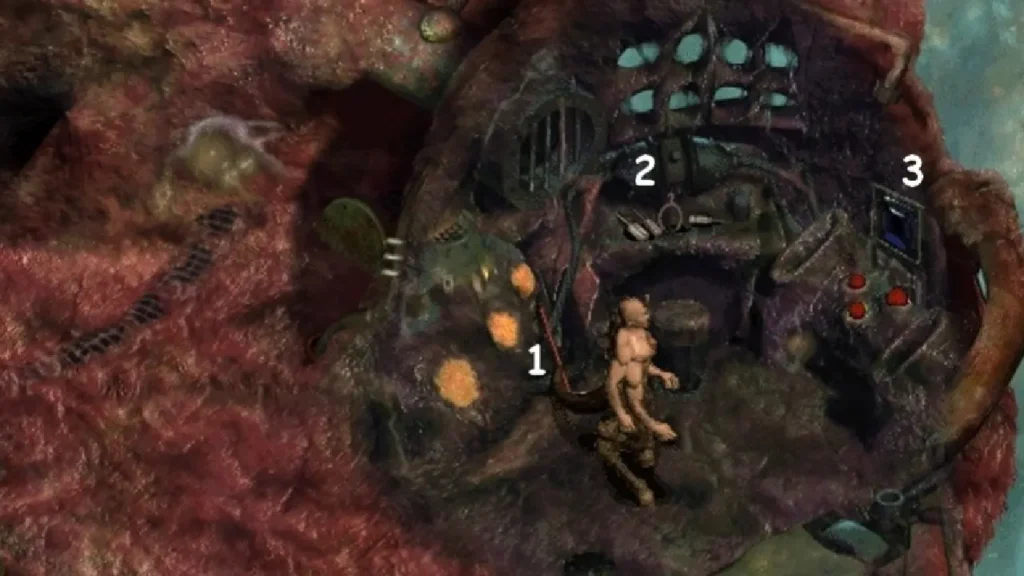
Inside we take a sledgehammer 1, tools 2, watch TV 3. We leave the dwelling and go to the upper right part of the screen. We enter the room where the drones work, inflating furs. We pass forward and hit with a sledgehammer by patch on the pipe.
The drones stop working.
We move to the furs and swing them.
As a result, the older beetle, who was in charge of the work, flies off the control panel, dropping mechanical arm.
We approach the control panel.
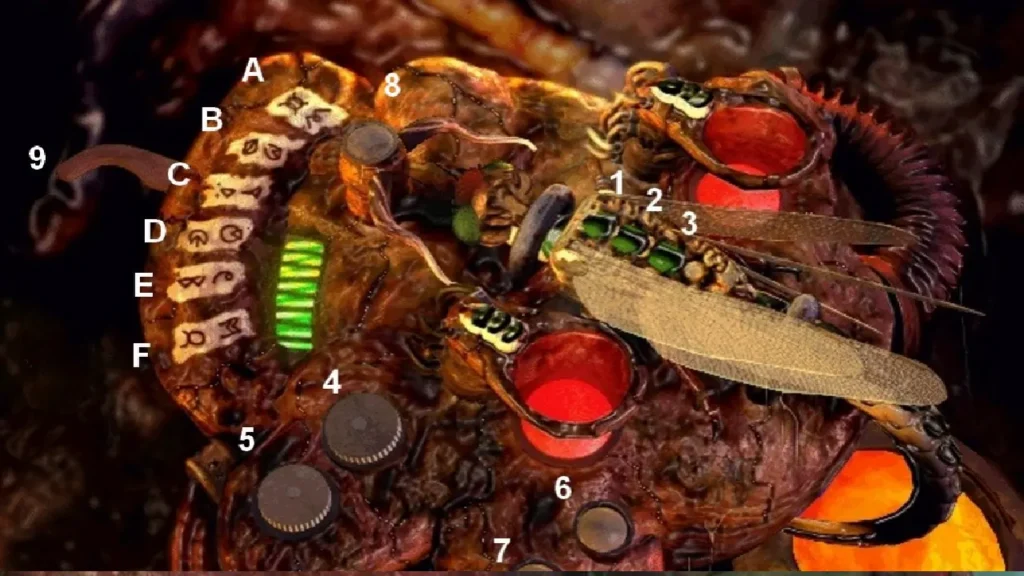
Puzzle:
It is necessary to collect six pairs of symbols from combinations on pairs of insect wings, similar to those shown on the left side of the device (A, B, C, D, E, F).
- Buttons 1, 2, 3 open/close pairs of insect wings
- Buttons 4 and 5 are responsible for changing the color of the backlight, which changes the outline of the pattern on the wings
- Buttons 6 and 7 activate symbols A–F for phased closing of the furnace
- Button 8 - reset
- Lever arm 9 is used to determine the output pair of characters.
Decision:
For a pair of characters A:
- Set the lever to symbol A. Press buttons 2 and 3 (the second and third pairs of wings).
- Set button 4 and button 5 red light. Activate buttons 6 and 7.
For character pair B:
- Set the lever to symbol B. Press buttons 1 and 2 (second and first pairs of wings).
- Set button 4 and button 5 blue light. Activate buttons 6 and 7.
For a pair of C characters:
- Set the lever to the symbol C. Press buttons 1 and 3 (the first and third pairs of wings).
- Set button 4 and button 5 green light. Activate buttons 6 and 7.
For a pair of characters D:
- Set the lever to symbol D. Press buttons 2 and 3 (the second and third pairs of wings).
- We set the green light with button 4, and the blue light with button 5. Activate buttons 6 and 7.
For a pair of characters E:
- Set the lever to the symbol E. Press buttons 1 and 2 (second and first pairs of wings).
- Set button 4 to red light, and button 5 to green light. Activate buttons 6 and 7.
For a pair of F characters:
- Set the lever to the symbol F. Press buttons 1 and 3 (the first and third pairs of wings).
- Set button 4 to blue light, and button 5 to red light. Activate buttons 6 and 7.
The oven is closed.
We return to the hole of the cyclops beetle. We communicate with the Cyclops, we talk about the stove we saw.
Gravin cannot believe what he has heard and asks for evidence confirming Gromn's betrayal.
Please give us a guarantee to obtain a higher level of clearance.
The cyclops beetle sends us to the cyber technician, with the offer to indicate his name to confirm the request.
Let's go to the lab. We talk with the cyber technician, we call the guarantor of the cyclops beetle (everything happens automatically). The cyber technician requires age verification, for which you need to scan your hand.

We are coming to the scanner and install the beetle's mechanical arm into it.
We get a clearance level that allows you to enter the Queen's House.
That's where we're heading. Inside the house we are talking with a monstrous hybrid. We consider cylindrical vessels with cubs of cyclops inside. Use the claw to remove one of the vessels. We pick up the vessel, take it to Gravin as evidence.
The cyclops beetle agrees to help us and takes us to Gromn's hole.
At the entrance, Gravin calls out the beep code. Together with him we enter the opened doors.
Gravin soon leaves to see what can be done with the machine that stopped working on the hive after Gromn's intervention.
Inspecting a room.
We study the notes on the board. Pay attention to the unevenly lying pillow on the bed.
We approach, throw the pillow aside and take out the key. We apply it to the safe in the wall next to the head of the bed. We take out the acoustic generator from the safe. We move in the direction of the laboratory, we pass below and see Gravina who fumbles around the car.
He reports that Gromn took two important parts from the car, and only Gromn himself knows where they are.
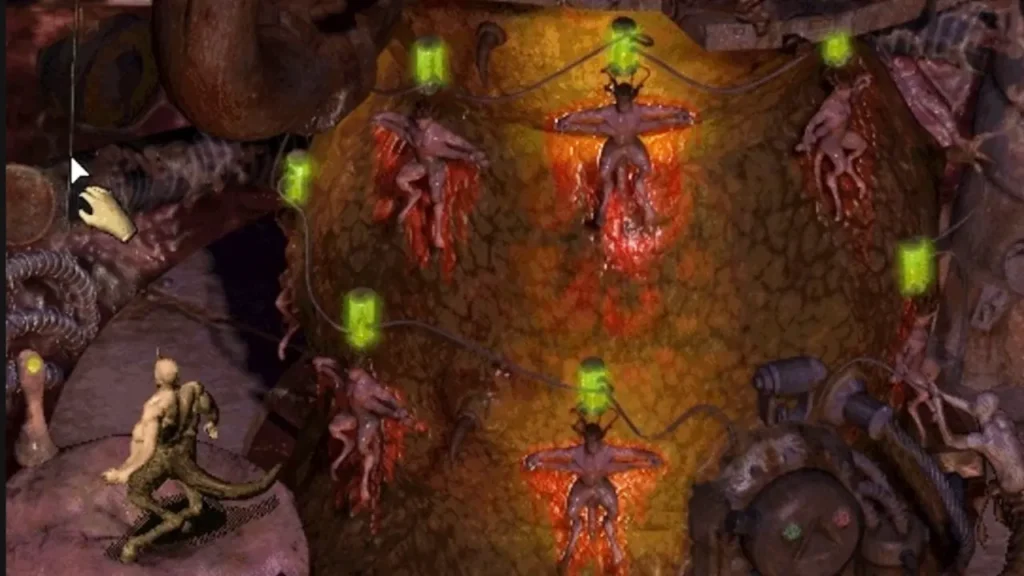
We move to the Queen's House and use the generator on the offshoot, from which green slime drips.
The automatic elevator works, and we find ourselves in another room. Hiding behind a ledge, we observe how Gromn bypasses his possessions.
When he leaves in the elevator, we approach another hybrid beetle and cyclops. We talk, get more information. We turn to children whose tentacles extend from the cages in the floor.
We carefully listen to the melody performed by the children of the beetles.
We approach the elevator, click on the remote control on the right.
Puzzle.
When you press the remote control buttons, you need to repeat the melody heard a little earlier.

Decision:
We press the buttons in order: 2-3-3-4-1-5. Moving on the elevator to the next level. We approach the hybrid working here, we talk with him. We turn left, to the working car. We apply to it the tool from Greymin's room. We take part of the mechanism. We go down a level, go to the right side of the screen, use an acoustic generator to the shoot on the right.
We are in the Queen's House. We leave the House and head to Gryvin. We give him a part of the mechanism, we immediately go in search of the second part. On the elevator in the Queen's House we return to the premises of the upper part of the hive. We rise to the second level. With the help of a top down ropes above the elevator platform, we rise to the room of the Queen of beetles.
We listen to the fiery performance of Gromn, announcing the coming of a new era - the Era of Beetles.
We approach the Queen and take it out of her back second part of the car. We teleport to the car, we hand over the second part to Graimin.
All this time, memory is returning to us in parts. In the visions, we see how we began to work together with Dr. Morgan, what inhuman experiments he performed, and how we made some kind of discovery.
Part IX. Mortuary and cemetery
In the morgue where we ended up, there is a hellish cold.
We approach the corpse of a woman lying on the table.
The corpse comes to life for a while in order to announce in a sepulchral voice that someone really does not want us to leave the "psychiatric hospital", and will make every effort so that we fall asleep forever in this cold.
We are approaching a massive iron door.
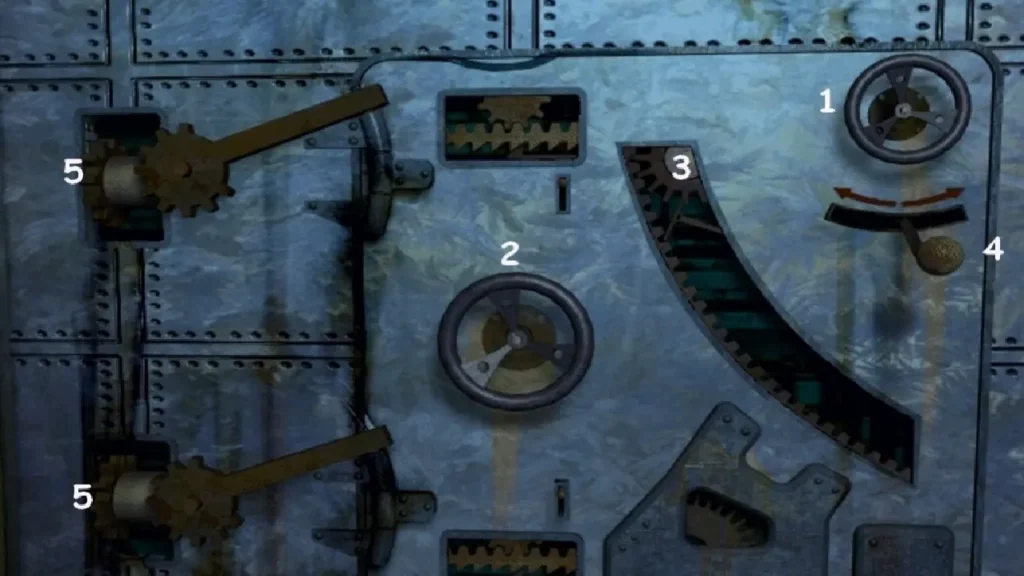
We study its device.
In order to open the door, we do the following operations:
1) Spin wheel 1 until gear 3 is in the top position
2) Turn lever 4 to the right
3) p.p. 1-2 repeat twice more until the 5th gear meshes with the constipation gear
4) Spin wheel 1 until gear 3 is in the top position
5) Turn lever 4 to the left
6) p.p. 4-5 repeat two more times until the gear wheel 5 is closed with the gear wheel of the constipation
7) Turn wheel 2.
We pass through the opened door. We turn left, we go out into the street. We are coming to the gravestone.
The letters on the stone are half-erased, it is impossible to read the inscription, but our character remembers the old means for reading such erased inscriptions. For this you need to use ash. Being at the crematorium of the mortuary, there should be no issues with the ashes.
We pass to the right, into the square.
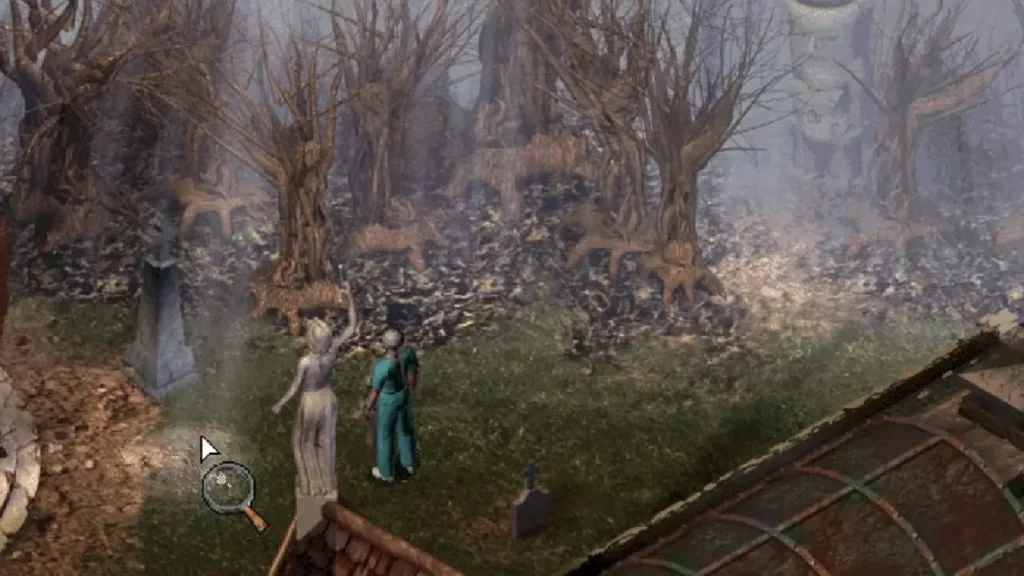
Pay attention to sunbeambreaking through the branches of trees.
Let's go a little further and see tree with eyes.
The only way to make the guardian of the forest get off is by giving the name of the creator.
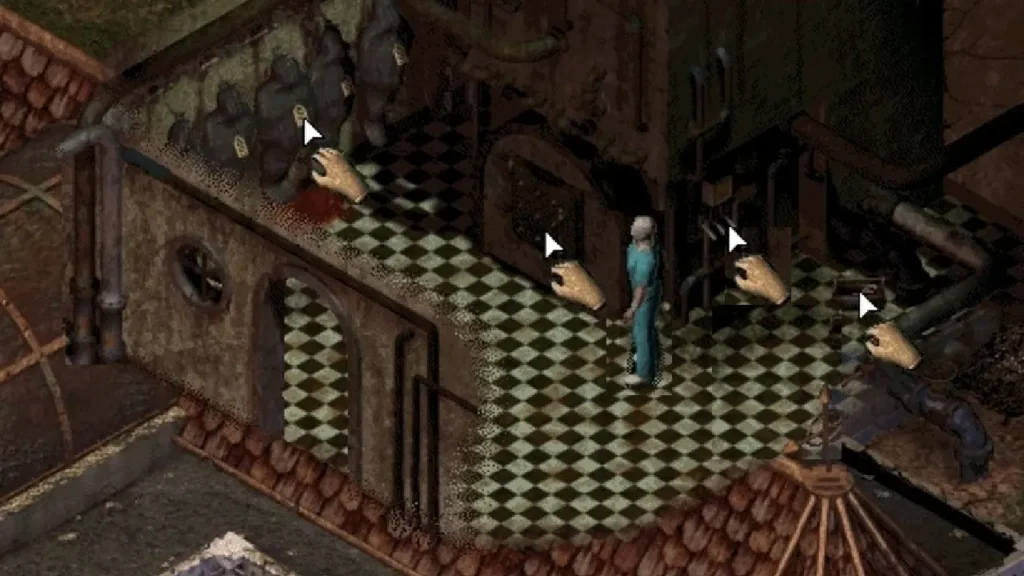
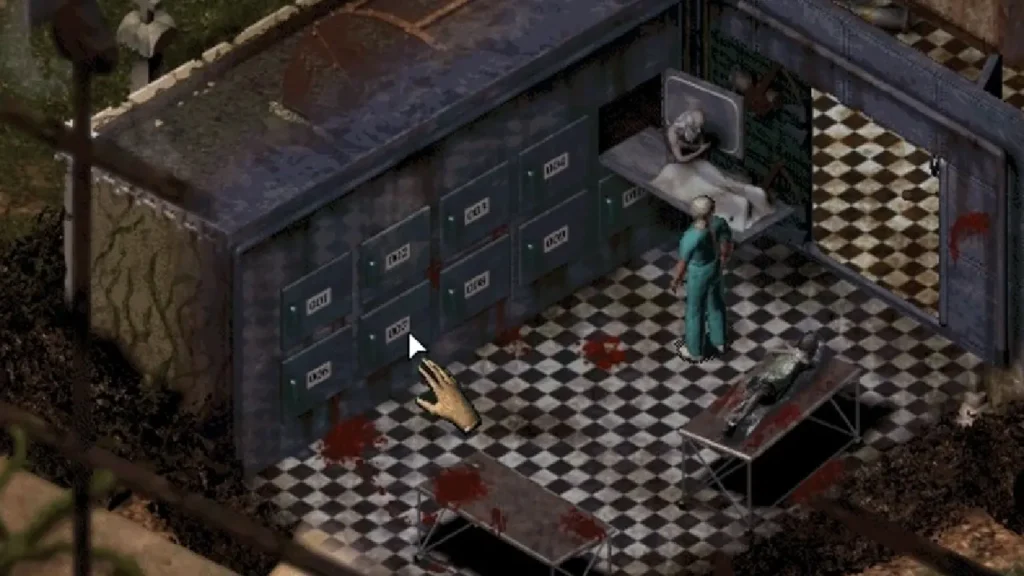
We return to the morgue, we go to the crematoriumlocated opposite the morgue. From the box on the right we take the sliding key. We study the control panel of the furnace and try to open the door.
Neither the panel nor the door is active yet. We look at the corpses in bags with tags, which are located on the opposite wall. The cursor on one of them becomes active.
We leave the hall, follow to the right side of the screen. We find ourselves in the office. Here we pick up the urn for the ashes of the deceased on the locker, to the left of the door. From the table we take a box of matches and a steel bust of Dr. Morgan. Pay attention to the wall in the cracks.
Our character declares that it is necessary to get through this wall.
We stand against the wall and throw a heavy bust at it twice. We pass into the breach, take the U-shaped piece of pipe.
There is a smell of gas in the room, which our hero will pay attention to.
We open the valve.
There is a whistle of gas passing through the pipes.
We return to the crematorium. We approach the control panel, turn on the switches. We move to the furnace door, open it and follow the corpse against the wall. We transfer and put a lifeless body on the table, then we send it to the furnace. After a short interval, we open the furnace, and collect ashes in an urn. step aside (otherwise we won't see) and pick up the glass eye from the table. We leave into the corridor, we approach the pipes. use on them sliding key. Then, instead of the removed piece of pipe, we put a Y-shaped piece.
The building starts to unfreeze. From the mortuary chamber come the distinct sounds of knocking and screaming.
We enter the chamber, open the upper right cell.
We find a living person there. He says that he clearly heard scraping sounds in one of the cells.
Open the second bottom cell from the left. We look in there, we shine with matches. Then use the glass eye.
Read inscription, scrawled on the inner surface of the wall - "until birds nest in the eyes."
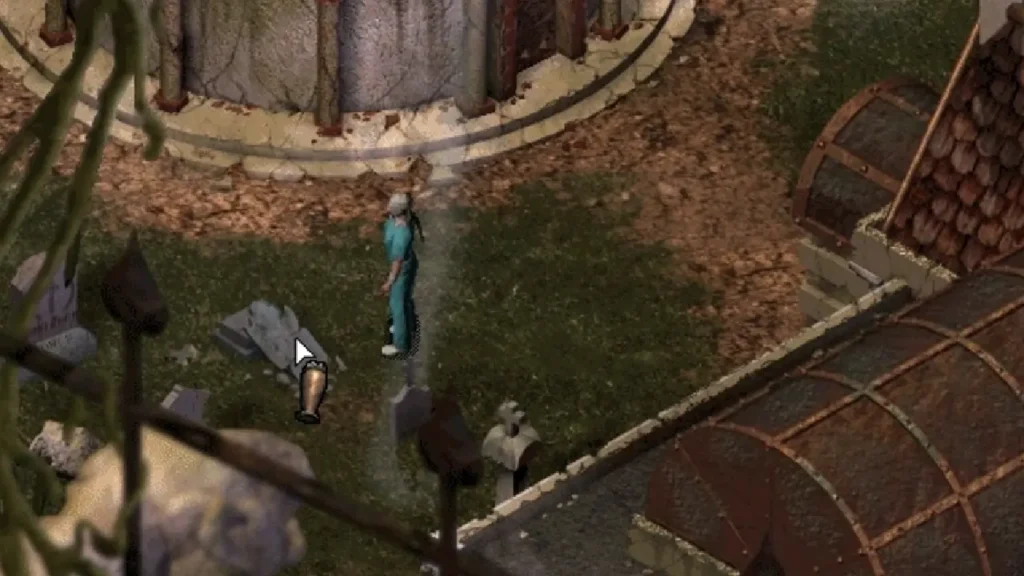
We go out into the street, approaching the gravestone. Apply to it urn with ashes.
We read the inscription - Paul Stark, the gardener of the clinic.
We move to the tree with eyes.
We talk with the tree, we call the conditional password, and then the name of the creator - Stark.
The guard steps aside. We approach and take from the obelisk the lens. Go to the beam of light between the branches, use the lens on the beam.
Opens the passage to the building nearby.
We hasten to the opened passage, we see there Morgan.
He quickly disappears into the beams of the force field. We read the notes on the table and the memo on the wall. We are approaching a device that resembles the Mayan calendar.
As stated in the memo, you need to create five full-fledged drawings.
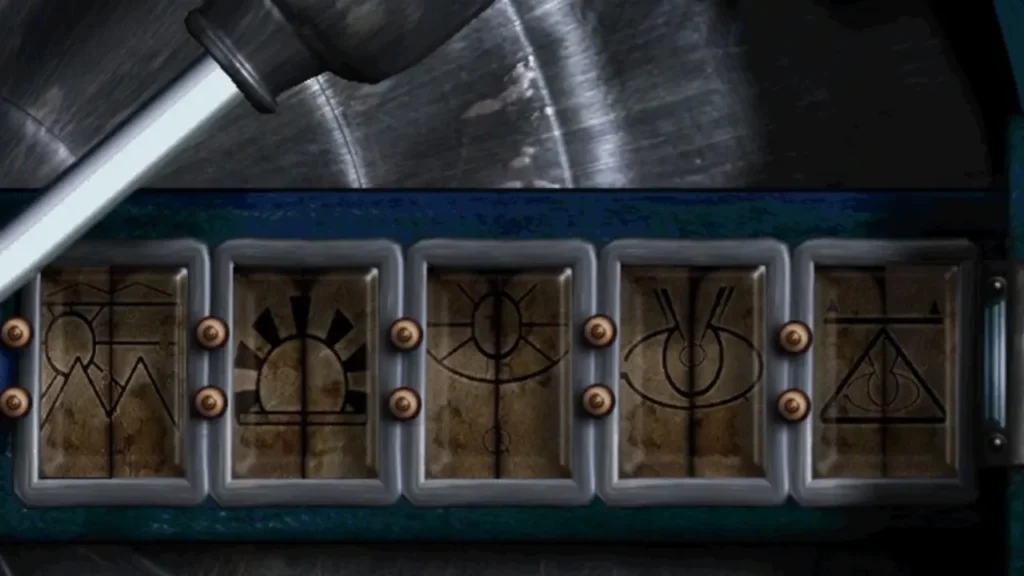
Decision:
By turning the disks, we expose the drawings. We turn into an Aztec warrior and move in space.
Part X. Abandoned Village
In the image of the sacred warrior Olmec, we stand at the wailing wall.
We are approaching the woman who uttered the words of the challenge.
The woman tells that Quetzalcoatl, whom they worshiped, returned from the world of the dead and destroyed their village, and killed all the male warriors. Quetzalcoatl himself stands on the top of the mountain and works his black magic to destroy all the survivors.

We go down the stairs, go to the left side of the screen. Cross the bridge towards the village. In the lower right corner of the screen, note ghost warrior. We talk to him.
This is Utzilop, a veteran of many battles, the younger brother of Mixoatl.
We pass forward, we talk with the warrior, at the top of the screen, by the lake of lava.
This is Mixoatl, the leader of the warriors, the elder brother of Utcilop.
We follow to the left, we approach the steps leading to the top of the cliff.
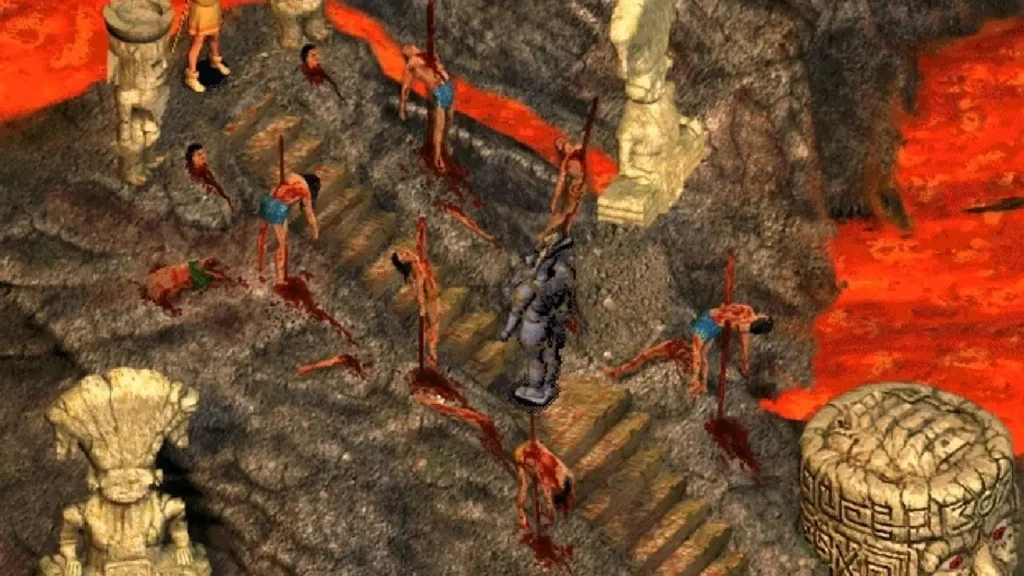
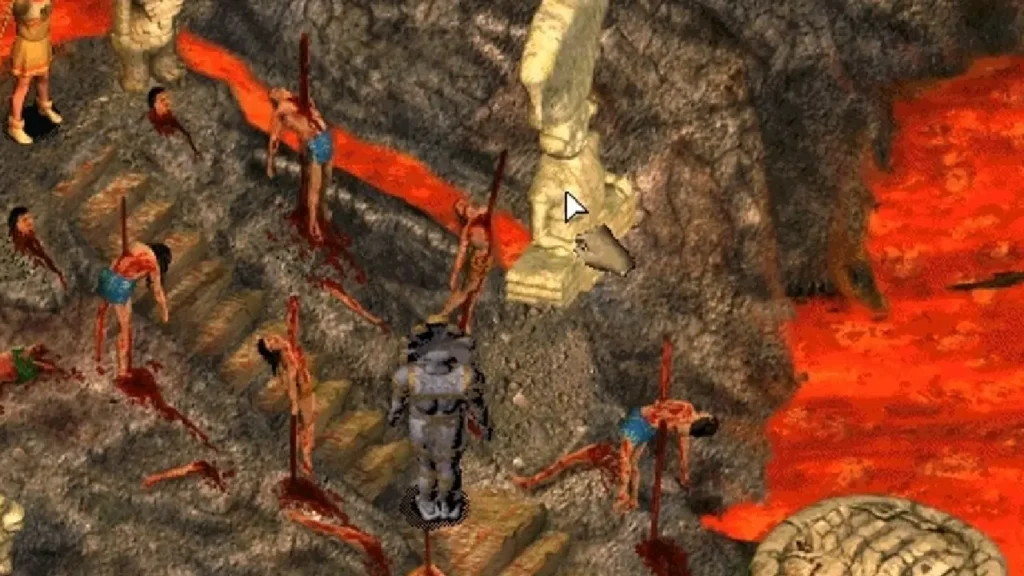
We see the bodies of warriors strung on stakes. Standing at the top Quetzalcoatl, effortlessly dropping us down. We need to find a way to overcome his magic.
Below, at the base of the stairs, we communicate with the ghost of the third warrior.
This is Xilonen, the youngest in the clan.
We go down the screen. At the Sacred Pillar, the statue of the god Quetzalcoatl, we speak with a ghost.
This is Tepictok, he stands where he died, and guards the Temple of the Air.
To be able to get closer to the Temple, you need to pass the test: you must return the necklace to the wife of Tepictok, which is located at the stonecutter.
We are approaching another dead warrior.
This is Ometoch, young, but older than Xilonen.
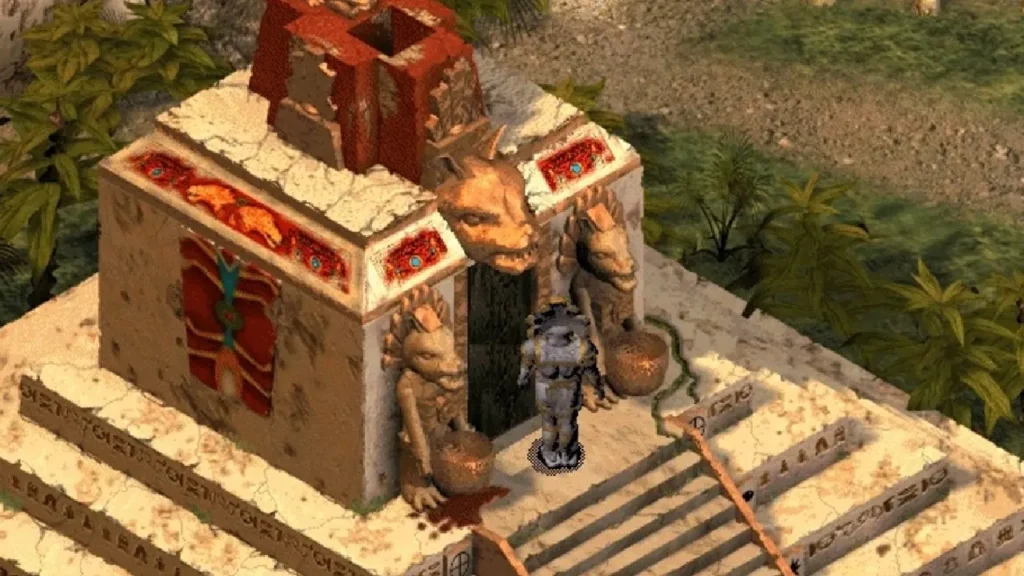
We follow to the left side of the screen, we rise to the Temple of the Jaguar.
We cannot enter this Temple yet, because. for this, blood and heart must be sacrificed.
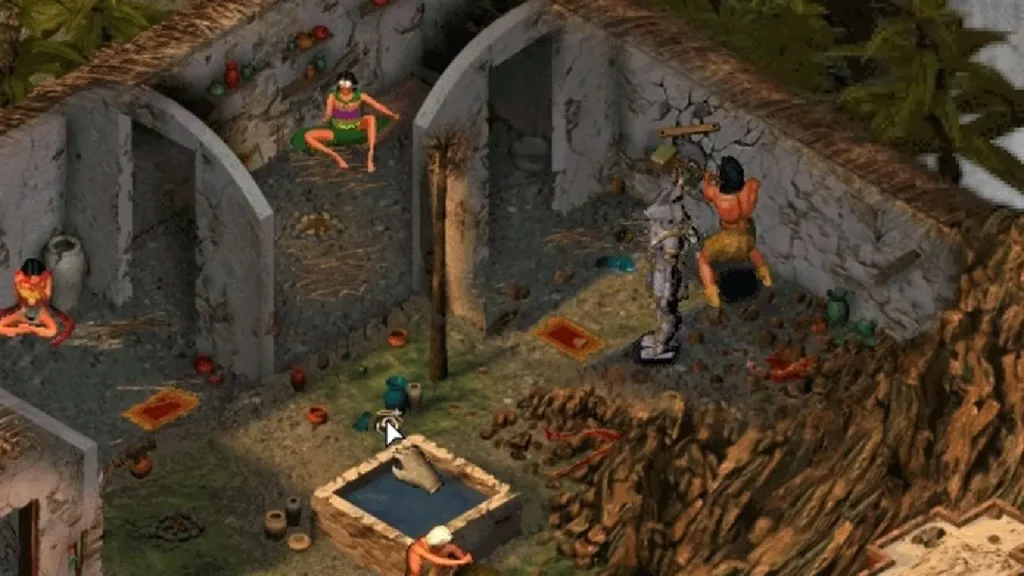
We leave for the village located on the right side of the screen, we enter the hut.
We pass through the rooms, talking with the grieving wives of the dead soldiers. We learn that Quetzalcoatl caused a wave that flooded the Temple of Water, and an earthquake filled up the Temple of Air.
We go into the room in which the only surviving man works, a former stonemason, and now the leader of the tribe. We talk with him.
We learn about his daughter, buried under an avalanche.
We demand that the necklace be returned to Chalchiute, wife of Tepictok.
The chief agrees to hand over the necklace.
We pass into the courtyard, by the small pool we take copper vessel.
We communicate with an elderly woman sitting right here by the pool.
She tells that for the sake of the remaining inhabitants, her husband, the medicine man of the village, is preparing to sacrifice himself by fighting Quetzalcoatl.
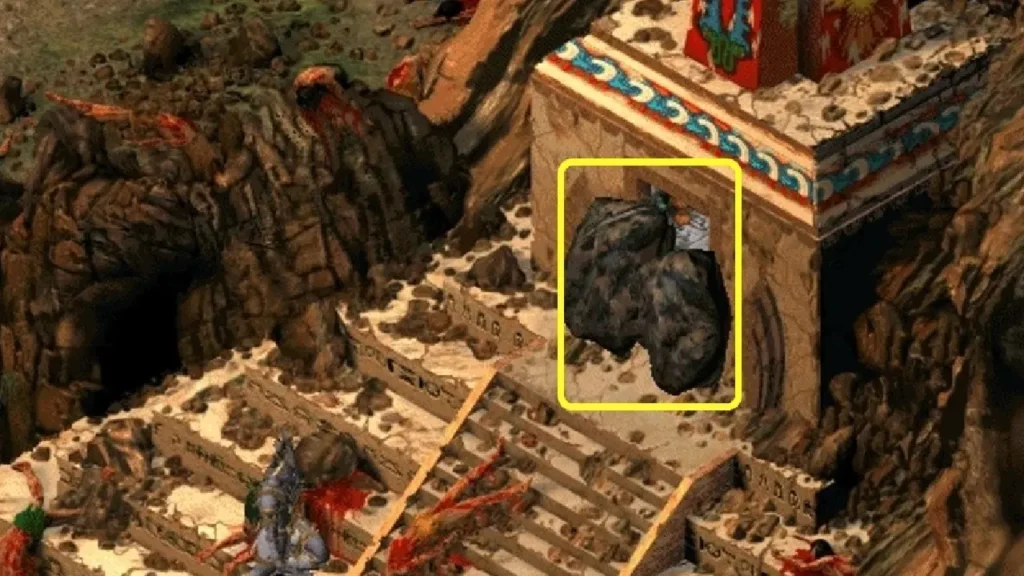
We move to the entrance to the Temple of Air, and the spirit of Tepikotok passes us. We push the Sacred pillar, and it falls on the two banks of the cleft, forming a bridge. We approach the Temple, move apart bouldersblocking the entrance.
Inside we find a girl, the daughter of the leader of the tribe, and take her to her father.
After the end of the video, we talk with the girl who is in the first room of the common hut.
She talks about musical gongs.
We return to the Temple of Air. There are copper gongs on the wall, and in the center there is a totem protected by a crystal cap.
Hitting the gongs in that order. We take the totem of Air. We move towards the mountain on which Quetzalcoatl stands. Before the mountain, turn left and follow the path behind the Temple of the Jaguar. Find here medicine man - the woman's husband at the fountain. We talk to him.
The old man says that he must find the one who will bring the Cocoon of Power. The medicine man's name is Tezacatl, and he is the village's last hope. Tezacatl is obliged to destroy the enemy. The cocoon grows on the Adjacent Tree, in the middle of the lava lake. In order to get to the tree, we must go through the Ancient Ritual of a Warrior. The new leader of the tribe can conduct the initiation ceremony. Before the ritual, we should collect the totems in the Temples.
We move to the lava lake, in the middle of which an unusual tree grows. In its trunk we see the Cocoon of power, about which the old healer spoke. We turn to the stairs. We go up the stairs towards Quetzalcoatl. Before reaching it, on the site, turn right.
Our character will notice that we have "Volcanic statue", and that "the forces of the earth made him unstable."
We push the sculpture.
It falls, causing a wave of lava to slosh out, which solidifies immediately, forming a bridge to the Water Temple.
We pass to the right side of the screen, to the frozen lava. On the lava we cross to the Temple of Water. We are approaching another ghost of a warrior.
His name is Centeotl, he is from the Othonmi skinhead clan. Older than Tepictok, younger than Utzilop.
We turn to the frescoes on the wall.
Unfortunately, in the Russian version (at least the one I played), there is no clue that can be obtained by talking to the Tepictok warrior's wife and his ghost.
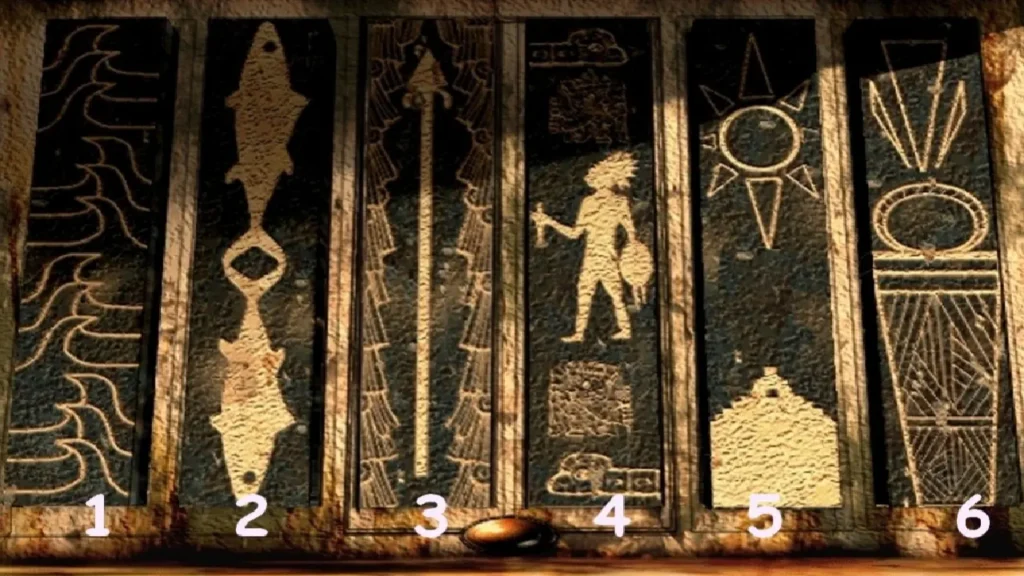
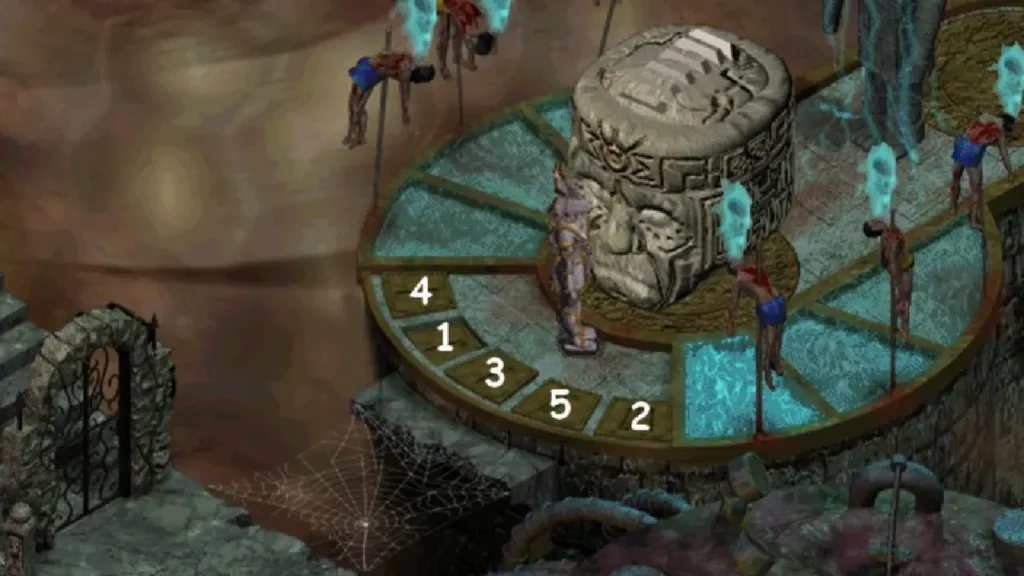
Click on the frescoes panel: 5-3-1-2-6-4. We stand on the stove opposite the entrance to the temple, and the door opens. We go inside, take the Totem of water. We hasten to the leader of the village. We ask him to conduct a rite of passage - the Ritual of the Warrior.
To the question of the leader about the dead soldiers, we answer by seniority: Xilonen, Ometoch, Tepictok, Centeotl, Utzilop, Mixoatl.
At the site Wailing walls, the leader endows us with magical powers. We hurry to the lava lake, boldly enter it and get cocoon of power. We carry the Cocoon to the old man.
The medicine man goes to battle with Quetzalcoatl and dies in an unequal battle.
We approach the sacrificial stone on which the old man dies.
Before dying, the healer manages to whisper that the power of Quetzcoatl is in his mask of death, which is located in the labyrinth.
In a copper vessel we collect blood at the foot altar. We move to the healer's house and pick up the crystal lying on the table a heart. With these gifts, we follow the steps leading to the Temple of the Jaguar.
Pay attention to drawingsapplied near each step.
We rise to the Temple. We pour the blood into the LEFT bowl for sacrifices, and put the heart into the RIGHT. We pass through the opened doors.
On the opposite wall, we set the symbols in the order of the drawings at the steps of the stairs leading to the temple. Take the Jaguar Totem.
The revived power of the Temples destroys the statue of Quetzacoatl with its rays.
We go to the leader, we ask him about the Mask of Death. Then we head to the base plate of the destroyed statue. Install at the top of the triangle Jaguar totem, at the base - below, put the Wind Totem, above - the Water Totem.
The slab collapses, opening a passage down.
Part XI. labyrinth
In this arcade insert, you need to go through the so-called. labyrinth to pick up the Mask of Death in the crypt. When walking on the platforms, contact with the pinkish beams of the force field should be avoided, since. this causes a return to the starting point.
We pass to the bottom screen. Finding a way to get there to the control panel. Press the left and right buttons.
The bridge will lower and the load will rise, preventing the movement to the right (in the direction of the character) from the starting point.
We return to the starting point, go to the left side of the screen, we approach to the lever 1. Open it, move up the stairs to the lever 2. Turn the lever to lock the gate. We pass forward and enter the crypt. We are filming The mask of death.
We watch video scenes of the battle with Katzecoatl and further developments.
Part XII. Trial
At this level of the game, for its successful passage, it is required to transform into different incarnations of the character with which we are already familiar.
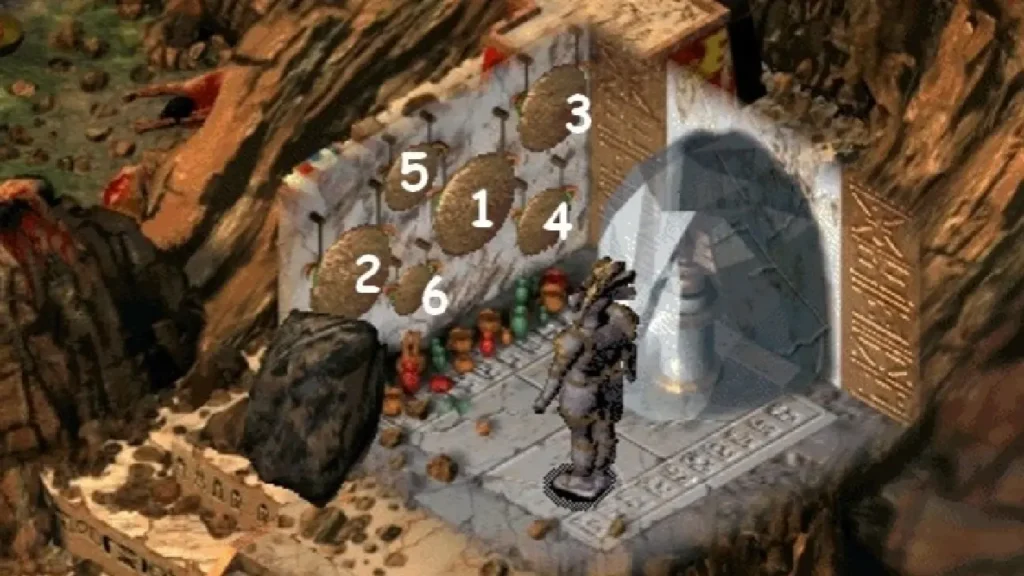
In the image of an ancient Aztec warrior, we pass to the fence with the masks left over from Halloween impaled on stakes.
Other characters are prevented from doing so by hard spikes sticking out of the ground. We carefully look and remember the flickering of pumpkin masks.
Repeat the flicker by clicking successively on the masks 4-5-2-1-3-6 (screen 143). After the fence and the children disappear in flames (it was a mirage), we pass and pick up the skull. We follow to the left side of the screen, we examine the gravestones. From one grave rises a headless ghost. Apply the skull to the ghost.
In the image of a cyclops, open the lid of the appeared stone coffin. From the coffin we take out the head of the statue.
In the form of an Aztec warrior, we pass through prickly thorns to the pole at the bottom of the screen.
In the image of the Cyclops, we apply force to the pillar.
We carefully look at the colors of the flashing lights.
In the image of a warrior, we move down to the head of a clown with bared teeth, along which lights run. In accordance with the prompt, click on the teeth: red - yellow - green - blue.
In the image of a girl, we climb up, climb through into the hatch in place of the clown's nose that fell out. We get the left wing of the statue of an angel.
We pass to the right side of the screen, to the tower, we rise to the gate. Over the bridge from the web we follow to the platform with plates.
In the image of a warrior, click on the plates in the specified order.
When you press the desired plate, it remains in the recessed position. The next incorrectly pressed plate returns all previously pressed plates to their original position.
In the image of a cyclops, we move the vacated pedestal to the side. We lower down all the corpses on stakes. Pick up right wing statues.
We go to the right side of the screen, into the hole of the beetle. We press the buttons of the unit on the right, we clear the hatch from the larvae (everything happens automatically). On the left side of the hole, in the combs, we get a sharp claw.
In the image of a girl, we climb into the hatch and get out away from the hole.
In the image of a warrior we pass through the pointed bush to the wire and cut it with a claw.
The body of the statue falls into a hole.
We return to the pipe.
In the form of a girl, we move into a hole. We take the torso of the statue.
We follow the ruined tower. At the stained glass window, we install on a pedestal first the body, then the wings and the head.
Let's watch the video.
Part XIII. Morgan's last game
The final arcade puzzle.
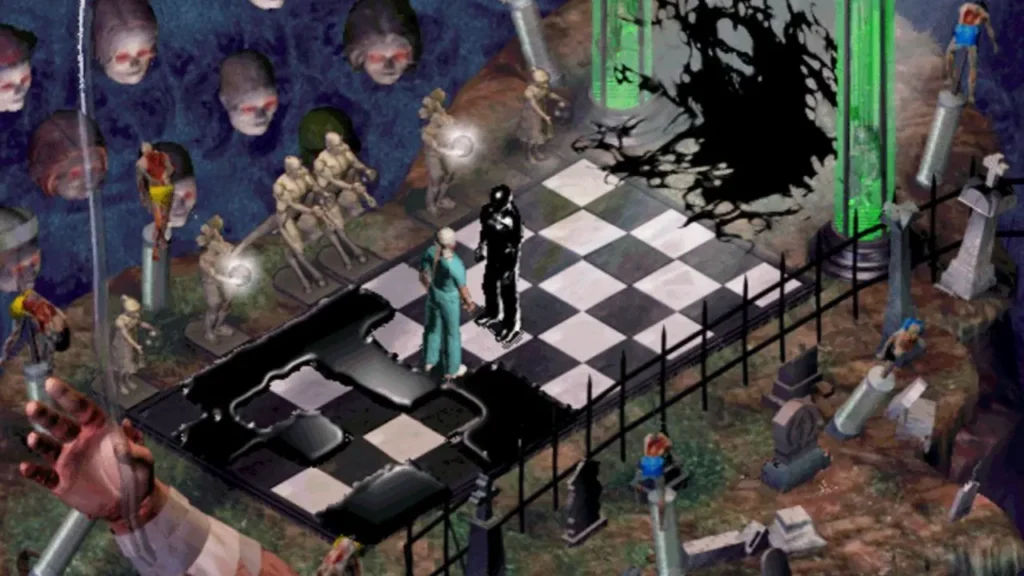
For a limited time, you need to approach the figure and break the crystal ball. In this case, three attempts are given for one ball. And you will also have to break three balls, with a different arrangement of figures, relative to each other.
We will not be able to go forward. the double interferes, and the dark substance that appears randomly for each new attempt will interfere with moving through the cells.
We successfully cope with the task.
Watch the final video.
Was the article helpful?


