Demon's Souls Walkthrough, Guide, Guide
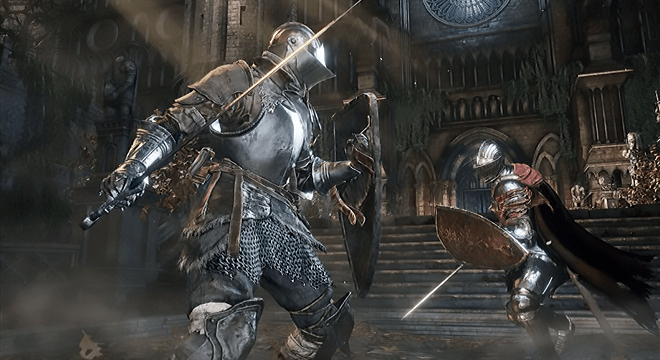
So, today we begin a journey through one of the most interesting, intriguing, mysterious and complex RPGs of all time - the Demon's Souls 2020 remake. We will tell you how to play the game correctly, and in what sequence so that you do not have to see the inscription "You are Dead" on the screen.

A dense magical fog descends on the once flourishing kingdom of Boletaria and neighboring possessions, and the lands are under the rule of demons that destroy the human race, absorbing the souls of the unfortunate and feeding on their strength.
That's where you enter the equation. As a brave hero, you will travel through numerous regions, defeating powerful demons and contributing to the continued existence of mankind.
Choice of character
After an introductory video of wondrous beauty, you, like in any self-respecting RPG, are offered to choose a character with certain characteristics. You can choose the path of a magician, you can choose the path of a warrior, you can also choose something in between.
I will say right away that initially the knight is the optimal choice.

Firstly, he initially has very good armor and weapons, and secondly, relatively equal starting characteristics, which can be seen in the right corner of the screen. Let's list them.
Vitality (life force) - the parameter is responsible for maximum health and for how much the character can put in a backpack.
market (intelligence) - increases the number of slots for magic and increases the maximum mana.
Endurance (endurance) - increases stamina, maximum weight of ammunition, resistance to fire, poison and bleeding.
Strength (strength) - increases the physical damage dealt by various weapons.
Dexterity (Agility) - Increases physical damage and reduces fall damage.
Magic (magic) - enhances spells and physical defense. Without at least level 10, magic teachers will not teach you.
Faith (faith) - increases the power of miracles, the number of slots for miracles and increases resistance to magic. Without one slot for miracles, teachers of miracles will not teach you anything.
Luck (Luck) – Increases the chance of enemies dropping something useful and rare. Also increases plague resistance.
Please note that each characteristic has its own symbol.
For hand-to-hand fighters (which we will act as), I advise you to pump, first of all, endurance, strength and dexterity, since it is these parameters that affect the possibility of using and the damage done by piercing-cutting-shooting weapons.
Tutorial level
Note that while this is considered a tutorial, don't expect to be able to just walk through it without difficulty. Enemies can deal a lot of damage if you're not paying attention or timing blocks incorrectly, but your life will never reach zero until you reach the boss in that area. If you die at the boss, your time in that area will immediately end and you will be transported to the Nexus. You can also jump right into the Nexus if you want, but you'll miss out on getting a few extra items. The choice is yours.
After choosing a character, you enter the tutorial level. Everything is simple here - the inscriptions on the ground explain the basics of control, and weak enemies are eager to be killed.
Everything is perfect until you get to the first demon, which will immediately kill you, and you will be transported to the Nexus. But maybe you will kill him if you are not too lazy to learn a few simple rules?
- 1. The boss has two types of attack - hitting with a cleaver and jumping with his ass to the floor. When hit with a cleaver, do a somersault under his right arm, when jumping with your ass, bounce to the side. The rest of the time, chop non-stop.
- 2. Always stay close to the boss, so it's harder for him to notice you, and it's easier for you to run behind your back.
- 3. Before the fight with him, take off all your armor to make it easier to do somersaults and dodges.
- 4. If you decide to overwhelm the training demon at any cost, choose a barbarian as a character (as I did), because he has the most vitality at the start and the enemy, in most cases, will not be able to kill you with one blow, leaving a bit of life for you managed to heal with grass.
- 5. If you are still killed, immediately press the console off button until you get to the Nexus, and turn it on again. Choose "Load Game". You immediately start at the beginning of the training level with the class already selected. To run to the boss is a matter of three minutes.
After killing the first demon, you will receive about 600 souls, the soul of the demon itself, and a portal to a new location.
Here the enemy is more serious.


Before entering the arena to the dragon, collect the souls from the bodies of the fallen warriors - there are plenty of them here, including 2 full moon herbs , 3 souls of a famous warrior , 3 shard of hard stone and 3 sharp fragment stone. After that, the demon kills you with one blow, and you finally find yourself in the Nexus.
Nexus
This is the last refuge of lost souls on earth. The blind girl will resurrect you in the form of a phantom (soul). In this matter, your life force is reduced exactly by half. To return the form of a living body, you need to defeat any leveled demon, or use a special magic stone - Stone of Ephemeral Eyes, which are quite rare in the game.
From now on, the Nexus is your base, impenetrable Fort Knox.
Here you can sort your belongings with the help of the storekeeper (in the middle), repair or improve weapons with the help of a blacksmith (on the right), pump your level with the help of a blind girl with a staff (on the left), and go to any of the five worlds with the help of magic stones,
The inhabitants of the Nexus are a vibrant crowd. | The blacksmith can craft weapons for you or improve what you already have. |
but so far only the first one is available to us. We approach it and move to the world 1-1.
Castle of Boletaria
Boletar Castle is an ominous place inhabited by ferocious dragons. The cutscene demonstrates this fact as you enter. Once it ends, you can move forward through the area.
So, we are in the first level of the first world. We have little life, but the enemies are quite weak. The most important thing is not to die. Since there are no records and even a pause in the game, after death we will always start from the beginning of the level.
Inventory sorting is performed in real time and it is better to find a quiet place before doing any castling with the character.
At the start, we have a wooden shield and a club (if you play as a barbarian). The strategy is simple - they put the shield under the blow of the enemy - they hit back with a club and got the soul of the slain.
The first trap lies in wait for you in the form of a magical failure. Avoid this dangerous trap or you will get instant fall death and climb to where the archer is waiting, then tackle him and take Crescent Grass from the body next to him...
Then, on a high rise, the knight will roll a stone ball at you, have time to jump off the stairs at the right time.
Another soldier is waiting for you outside. | This is probably the guy who pushed the huge ball down the stairs... |
The boulder will destroy the partition and open the passage to the corpse, from which you will take Bastard Sword (corrupted sword). This huge broadsword is not yet your strength to carry in one hand, so put the shield away, press the triangle and the character will take the blade with both hands. This tool is much cooler than a wooden club.
A fork awaits you on the fortress wall - a blue knight on the left, crossbowmen on the right. We run to the right.
After killing the soldiers, we find ourselves at the beginning of a long corridor that leads to Mausoleum of Old King Doran. Here it is better to reduce the ardor. Firstly, we still don’t have the key to the mausoleum, and secondly, the entrance to the shrine is guarded by a red knight, who is still too tough for us.
Don't try to fight this guy just yet. | Instead, find a weaker knight near the catapult. |
Therefore, let's go wet the blue!
Opposite him (as you soak) jump through the gap in the wall to the lower tier.
Now you have crossbow and bolts!
Return to the upper level and run to the left tower. On the balcony, do not forget to cut the chains on which the executed knights hang.
At the very bottom, pull the lever and the tower bars will open.
Pick up from corpse attraction ring and put it on your finger. Your health in phantom mode has increased by 25%. Not bad!
Here you will also find jade comb, which can later be exchanged with the storekeeper in the Nexus for ring of herculean power (allows you to carry more items).
Climb up and enter the passage through the dense fog, where you killed the blue knight.
Go to the side near the wooden frame and rest against it. The character will climb over the stone fence and jump down, coming face to face with knight of Ostrava - the son of the King of Boletaria. The guy needs help, he was besieged by kreglins. Pick up first thief ring and put it on the second finger.

Where there used to be enemies, now there are goodies. | Seduced by a deadly way to the left... |
Now the enemies will see you worse. It's a pity, but only two rings can be worn on the hand at the same time.
Kill the kreglins and don't forget about the soldiers and knights on the lower level - Ostrava will rush into battle, but they can cut him down. As a reward you will receive from the king's son spyglass.
The blue knight standing with his back is the perfect target - if you have a thief's ring on you, quietly sneak up to him, and press the main attack button. The character will pierce through the silent piece of iron.
On the second level, you will find some soldiers and a zombie vendor. In no case do not kill him, but rather buy a set of armor, because the barbarian's naked body is so vulnerable to enemy attacks. Start with chainmail. If there are not enough souls for a helmet or boots, do not forget to use the souls of the fallen warriors - they give an increase in units from 200 to 10000 (at later levels).
Having properly equipped, rise to the third level. If you are already in armor, the blue knight will not stop you.
In a narrow isthmus, standing sideways, break a partition with stone boulders with a sword, and five soldiers will turn into cakes.
Soon you will come to a glade of dragons, where many fallen warriors and all sorts of good are scattered. The blue dragon is sleeping, the red one is on the lookout - until the "swag" can be collected.
Run to the beginning of the bridge with a detachment of knights and stand behind the column.
In fifteen seconds, the red dragon will burn out half of the warriors trying to get to you. As soon as it flies - rush headlong past the survivors to the other side of the bridge. With luck, on the second run, the dragon will fry two or three more.
Immediately turn on the mechanism of the main gate of the castle, behind which the first boss is hiding.
As soon as the gate opens, the dragon will no longer disturb you. You can return to the bridge, kill the surviving soldiers and collect a rich harvest of medicinal herbs.
Now go down the tower with the main gate mechanism. You will encounter a couple of Kreglins and three Sarissaphors. This is such a pile of slime with a shield and a spear. They look formidable, but in battle they are complete bullshit. Approach them in a block, go behind your back and hit.
 Usually one or two blows are enough to send this snail to the other world. Sometimes they drop valuable ore needed to upgrade weapons.
At the very bottom of the tower, activate another lever, and you will find yourself at the beginning of the level, right in front of the spear thrown by the demon Phalanx.

Watch out for flying spears as you dance around your target. | Wet your weapon with turpentine to bring fire into battle. |
This boss is extremely weak. It is a huge clot of mucus, covered with a cloud of sarissaphors. The demon itself does not attack, so the tactics of fighting him are primitive - since the slugs are terribly afraid of fire, throw several incendiary bombs at their cluster, or use Turpentine (in the common people turpentine), which makes your blade fiery for 60 seconds.
After killing all the slugs, stupidly approach and wet the boss with a broadsword until he dies. You will immediately return your corporeal form (the ring of attraction can be removed), increase the scale of life and get many units of souls, plus the soul of the demon itself.
Approach the formed portal, and be transported to the Nexus.
Back in the Nexus
So, you are unrealistically cool. From the first time we passed the initial level, saved Ostrava, got two rings, did not kill the armor seller, destroyed the demon, returned our corporeal form and never died!
Open the trend map of the world.
 The first stone burns brighter than the others. This means that the first world trend has brightened. What does it affect? First of all, on the difficulty of passing - the brighter the world, the weaker the enemies, and vice versa.
How to make the world dark? Elementary! Die on one of its levels several times in corporeal form, and it will turn dark, and the game will turn into real hardcore - instead of enemies, their phantoms will climb (two or three times stronger), and you will become weak and infirm.
So remember - never die in corporeal form and always save all the characters. Since the game is a continuous autosave, it is better to turn off the console at the time of death and start the level again.
I'll tell you a little secret. Autosave works in the level itself. Sometimes you will see a blue flashing ball in the upper right corner of the screen. This is a record in a key place. Now if you get killed and you have time to turn off the console before switching to phantom form, when you turn on the console again, you will start from the last save on the level, with full life and in human form. You can quickly turn off the console by holding the "on" button. on the hull.
But, back to the Nexus. The blind girl tells you to go upstairs to the Monumental - a monk with a burning candle.
The monument does not look particularly remarkable. | You are absolutely looking for the power of the soul! |
Monumental will encourage you to continue to destroy demons in exchange for their power. Accept this mission by choosing the answer option "yes", and the Monumental will open the other four worlds for you, and the blind girl will pump your level for the collected souls.
To get to the first level of any world, you need to approach the corresponding stone. There are already two levels open in Boletaria. I recommend that you run the first one again to consolidate your skills (the boss will no longer be there), and save up a shower. In addition, you will see firsthand how brightening the world weakens enemies - the second time it will be an easy walk, especially since you have a full scale of life.
Return to the Nexus through either of the two portals. Now it's time to pump.
A piece of iron for pumping
To understand the essence and magic of leveling, you need to know only two things - the elementary basics of the English language and the structure of the weapon view screen, which I want to talk about now.
Bastard Sword +1 - The name of the weapon. Plus one means that the blade is upgraded to the first level.
Four hieroglyphs are visible under the name of the weapon. These are the types of damage the weapon does, from left to right: pure physical (physical damage) Blunt (blunt force injury) slashing (cutting damage) Piercing (piercing damage).
physical attack - two digits, the first is the physical attack for this weapon, the second is an additional bonus attack (depends on the level of pumping certain parameters).
Magical attack - magic attack, similarly.
Fire attack - fire attack, similar to the first two.
Stat Bonuses - additional bonus damage, calculated from the pumping of the player's parameters, from left to right: Strength, Dexterity, Magic, Faith. The letter (S, A, B, C, D, E) - means the degree of impact of this parameter on damage, S - the largest impact, E - the smallest.
special Effects - additional damage, from left to right: Bleed, Poison, Plague, Critical hit. The higher the number, the more corresponding additional damage the weapon is capable of inflicting.
Damage Reduction % — the percentage of physical/magical damage that is extinguished by a weapon (shield) upon blocking.
Guard Break Reduction - resistance to impacts when blocking. The higher the number, the more powerful hit you can take without breaking the block.
Stats Needed - the required parameters of the character to master the weapon, from left to right - Strength, Dexterity, Magic, Will.
Durability - wear resistance of weapons. The higher the number, the less often the weapon breaks.
Weight - the weight of the weapon.
The total damage caused by a weapon is the sum of all types of attacks from both scales.
In this way, we do pumping. You can, of course, turn to a blacksmith and upgrade the blade itself, but you shouldn’t get carried away with this - you will change weapons quite often, something better constantly appears in the game, and skills remain forever.
Also, do not forget to pump vitality and endurance, but only in the second place. If strength and dexterity are low, you simply cannot pick up most high-level weapons.
Soul Catcher
So, having correctly spent all the accumulated souls on leveling up the character, we move on ... no, not to level 1-2, but to level 4-1.
We approach the fourth stone and we are transported to the Shrine of Storms.
Shrine of the Storm
Here, our main enemies will be skeletons. They are strong, but your sword is sharp enough too! The main thing is to hold the block, and after the strike, strike two oncoming ones, and the enemy will be defeated.
Now we will not go through this level to the end - we are still too weak. The goal of the sortie is to collect a lot of souls, find a large bow and cheap arrows, which are vital in level 1-2.
Each defeated skeleton swordsman gives 200-300 souls! Although it is dangerous to fight with them, which cannot be said about skeleton archers - they die like flies.
Perebeyte skeletons on the outskirts of the fortress and approach the arch. O! An old acquaintance is the boss from the training level.
Now he is not dangerous to us, beware of flying stingrays that throw stone spears.
Run into the left passage of the fortress (be careful, it's a trap!) and go up to the upper tier. Perebeyte skeletons and at the other end of the wall get down. Pick up the key to the dungeon from the corpse.
Go back upstairs and run to the next fortress wall, on which the skeleton archer is located. Near it lies a large long-range bow.
Remember, I advised you to pump strength and agility? If you did so, you can already pick up the bow. It remains to get the arrows.
Go down to the underground dungeons in the same fortress and use the key to free the merchant from the cell.
Buy arrows for all souls from him, as they are half the price of the blacksmith in the Nexus. You should get about 400-500 arrows.
Another point - some walls in the dungeon glow and float like jelly. Hit them with your sword and they will open. Beware of skeletons!
As soon as you have stocked up on arrows, climb the first fortress wall and methodically shoot the boss with a bow.
He will not even understand who is shooting at him - he will die standing up. Get down, take his soul and a generous harvest from the bodies of the killed soldiers. You can go down to the dungeon again and bribe the arrows from the merchant - as soon as you leave the level, it will disappear and the freebie will temporarily end.
In this location you will find many Japanese katana, god talisman and a whole bunch of souls of heroes. It is better not to go further than the killed demon, you are still too weak to fight with two skeletons at the same time.
Climb up the hill to the tree with the crow's nest and throw the god's talisman on the ground.
You can open the gate with the Copper Key. | You can leave items on the tree as a reward. |
When we return here again, a colorless demon soul will lie under the nest, which is necessary for pumping powerful weapons.
Leave the level. At the exit, you can shoot from a distant position a black skeleton with katanas, which is located on the left foothills.
His death will bring you about 1200 souls. I do not recommend approaching him with a sword - he will tear you with one stroke.
You will return to the Nexus with an excellent bow, a lot of arrows, a huge supply of souls and solid prospects. Start pumping your character. If this process sucked you in, you can visit the Shrine of the Storm a couple more times, beat the skeletons and take the colorless demon soul from the crow's nest (the exchange took place). Do not use it in any way, but give it to the storekeeper in the Nexus.
Also, do not forget to shoot the glowing lizards from the bow until they disappear underground. Their corpses will give you a lot of valuable ore.
Boletaria Castle 1-2
The level starts with a hangar with five slugs crawling around. Now they are like ants to us.
And here is an old friend - Ostrava!

And again in trouble - it was blocked by crossbowmen, and the grate in front was closed.
Run out of the hangar and run up to a handful of charred bodies. In a second, a red dragon will sweep over your head, pouring fire on the fortress wall.
Run right after him - he enters in a dive and enters the second circle. Having reached the first tower, go up and take a position at the embrasure.
From here, methodically shoot the dragon with a bow. He will not be able to get you with a flame. After half an hour of shooting, the beast will die and reward you with an unmeasured amount of souls. Now get down into the dungeon and go left to help Ostrava.
After killing a fire-breathing dragon, killing archers is easier than farting on a quiet street on a frosty day. Ostrava is pleased and again presents you with a gift.
If you run into the dungeon to the right, then you will meet watchdogs (easy prey) and a familiar merchant who moved here from the previous level.
“Sorry, lad, we’re full of arrows…”
Now we have to turn back and go to level 1-1. We are interested in a clearing with a sleeping blue dragon. He, like a real cat, wags his tail, the blow of which can kill. We have already decided on the red dragon...
Carefully collect souls and artifacts from the corpses of warriors, there is something to profit from there! And don't get hit by the tail. To be honest, it’s better not to risk it, and pump life force on the souls of the killed red dragon in the Nexus so that the blue dragon does not send you to another world with one random blow of the tail.
Having cleared the clearing and thoroughly pumped in the Nexus, we return to level 1-2 and go purposefully to beat the first serious boss in the game
To be continued ....
 Thank you very much!


