
http://portalvirtualreality.ru/?p=2624
Doom 3 Walkthrough 100%. Complete Game Guide
0
On this page you will find a 3% walkthrough of Doom 100, including tips and tricks for the legendary first-person shooter.

- Release dateDecember 10 2004
- developerId Software
- Publisher / Publisher in RussiaActivision/1C
- Site
Doom 3 is a first-person shooter with elements of science fiction. The year is 2145, the battlefield is the research center of the United Aerospace Corporation (UAC), located on the planet Mars. Doom 3 is a remake of the first part, but with significantly changed graphics and a new game engine. The player controls the UAC guard and must prevent the invasion of infernal creatures occupying Mars
The player receives a hefty arsenal of weapons - from conventional rifles to the iconic BFG-9000. In addition to the usual story campaign, the game also has multiplayer, which makes it possible to fight against each other.
System Requirements
MINIMUM: 3D hardware accelerator card required - 100% DirectX® 9.0b compatible 64MB hardware accelerated graphics card and latest drivers; Microsoft® Windows® 2000/XP English version, Pentium® IV 1.5 GHz or Athlon® XP 1500+ processor or higher, 384 MB RAM, 2.2 GB uncompressed free hard disk space (plus 400 MB for the Windows® paging file), 100% compatible with DirectX® 9.0b 16-bit sound card and latest drivers, 100% Windows® compatible mouse, keyboard and latest drivers, DirectX® 9.0b (included)
MULTIPLAYER REQUIREMENTS: Internet (TCP/IP) and LAN (TCP/IP) play supported, Internet play requires broadband connection and latest drivers, LAN play requires NIC and latest drivers
Screenshots
-

- doom 3
Walkthrough Doom 3 100%
CONTENTS
Prologue
So, we land on Mars in order to strengthen the security of a certain UAC organization. Something has been going on there lately. Scientist and head of research, Bertruger, is experimenting with teleportation. The rest will be unlocked as the game progresses. A certain Chancellor arrives with us and another soldier with him. As you might guess, our goal is to announce our arrival. On the way to the command center, you will have to go through a scan and get a PDA card.
It is worth stopping here and talking about this device separately. It looks like a pocket computer, contains information about the owner, through it you can read letters (mostly strangers), watch videos and listen to audio. You can activate it with the TAB button. on the left there is a list of people starting with person, that is, the owner himself. In the middle is our current target. Above, above the target, a list of letters or video files. On the top left are two or three tabs that divide information by type: audio, video, or text. In the future, it will be possible to find many such cards, data from them will be downloaded, and the names of the owners of these cards will appear in the list on the left. In the e-mail section you can read their mail. You can also listen to their audiologist.
All this will have to be used - PDA-cards contain codes and a lot of other useful information. Moreover, if most of the codes are from hidden places, then without some you simply cannot complete the game.
In general, we take a card on the table, apparently a watchman, and go to the command center. Along the way, on some stands, you can download some information on the PDA. Of the various branching paths, there is a toilet, a cafe (there is a dark toy there!) And a weapons warehouse, but the code for it simply does not exist, that is, it simply cannot be opened in principle yet, the code will appear later, and the plasma gun on the table, not a plasma gun at all, that is, it is taken, but it does not appear in the weapon.
What I especially liked was the implementation of interaction with various consoles. You don't have to shoot at them, do you? Therefore, when aiming at such a display, it changes into a cursor. Interaction occurs as with a shot - using the left mouse button.
In general, we still come to the command center where we are sent on the first task - to find the missing scientist. An interesting device that looks like a mechanical spider takes us to the next level. By the way, he is not immortal. And what pleases most of all, the duck is that he does not break to his destination, but, if necessary, stops and even returns, not to mention the fact that in the future the same bots will protect us.
Chapter 1: Mars City Underground
We pass to the next level, where they give us a gun. From this point on, you can already kill, for this you need to move away from the person. Serious, in my opinion, a bug. In short, let's go and go. There isn't really anywhere to turn. In one place, to the left of our direction of movement, there will be the first cabinet with the code, and next to it is a map of some absent-minded idiot with this same code - 531. Further, it seems as if we need to go along the bridge, but it is disassembled, so we pass to the left. Another interesting thing about this game is walking in open space. On Mars. If anyone does not know, then the pressure there is a hundred times less than on earth, this is enough to die on the spot ... although the year is 2145, everything is possible. There, by the way, immediately after the exit, there will be a cylinder on the left that restores the level of oxygen.
After such a walk there will be another elevator and that's it. Found a scientist. Immediately after the video, it must be soaked.
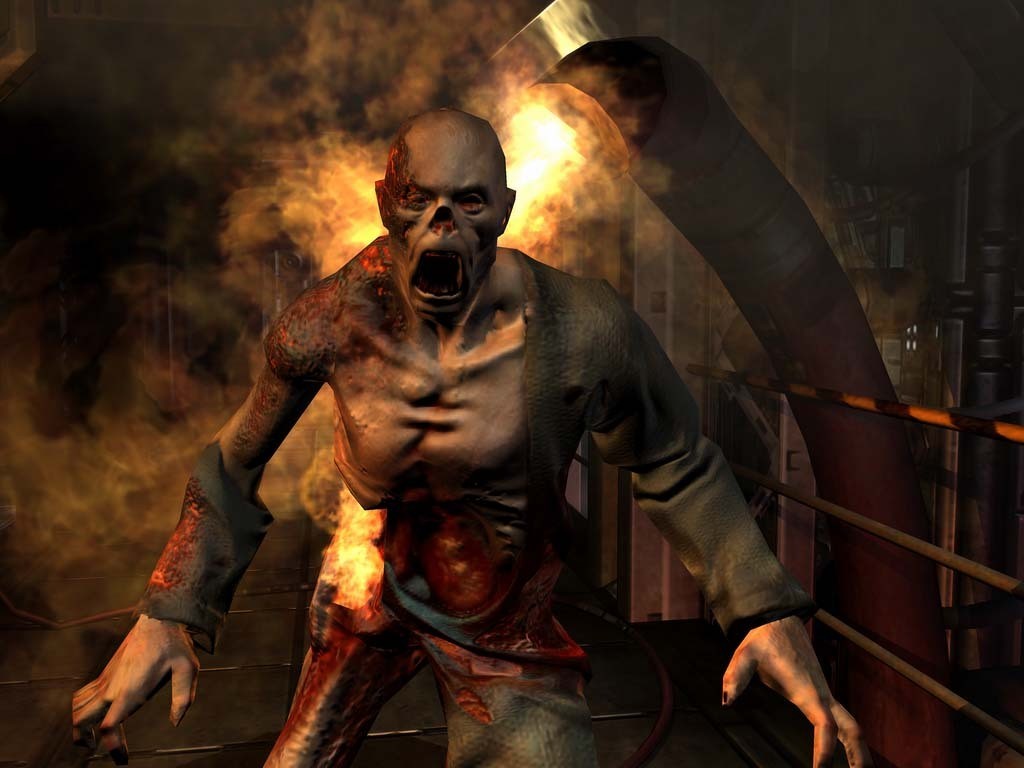
Zombie Tactics: Spread unevenly, but often in large numbers. Pros: strong damage at close range; lack of fear; quiet; can surround. Cons: lack of intelligence; safe over long distances; moves slowly; Weak (health, not strength). From this we conclude that they must be killed from afar, or run up, quickly strike and quickly run back. The best and most beautiful means - at point-blank range from a shotgun to the chest or head - the brains just fly out.
Another one behind with a gun, behind the door, but first we look at the monitors - there are a lot of interesting things, namely, you can see the main portal, or rather, how all sorts of muck flies out of it.
The scientist was found and killed, now we have to go back. What is especially pleasing is the radio messages in which death screams and screams are heard, as well as desperate shooting and breaking bones.
Next, imps and marines will begin to meet. The first meeting with the imp is scripted in the form of a video, and behind the fire, in that place, there is a first-aid kit.
Tactics of combat with Imp: the most common creature, so the tactics of fighting with him must be learned from the first encounters. Pluses: throws fireballs; dark (can hide); teleports; throws sharply. Cons: does not walk fast; teleports slowly; fireballs have a low speed. It follows from this that it is necessary to stay as far away from him as possible, dodging fireballs, or approach and take under the shotgun sight the place where the teleporting imp is about to appear. You can dodge his jump, for example by crouching, but it is very difficult. Another important thing is that he does not throw the fireball immediately, but with a delay, and taking into account our movement, so we have to wait until the last moment, and then move away. There are two modifications of the imp, the second one is even called differently, but their only difference is that one of them can teleport.
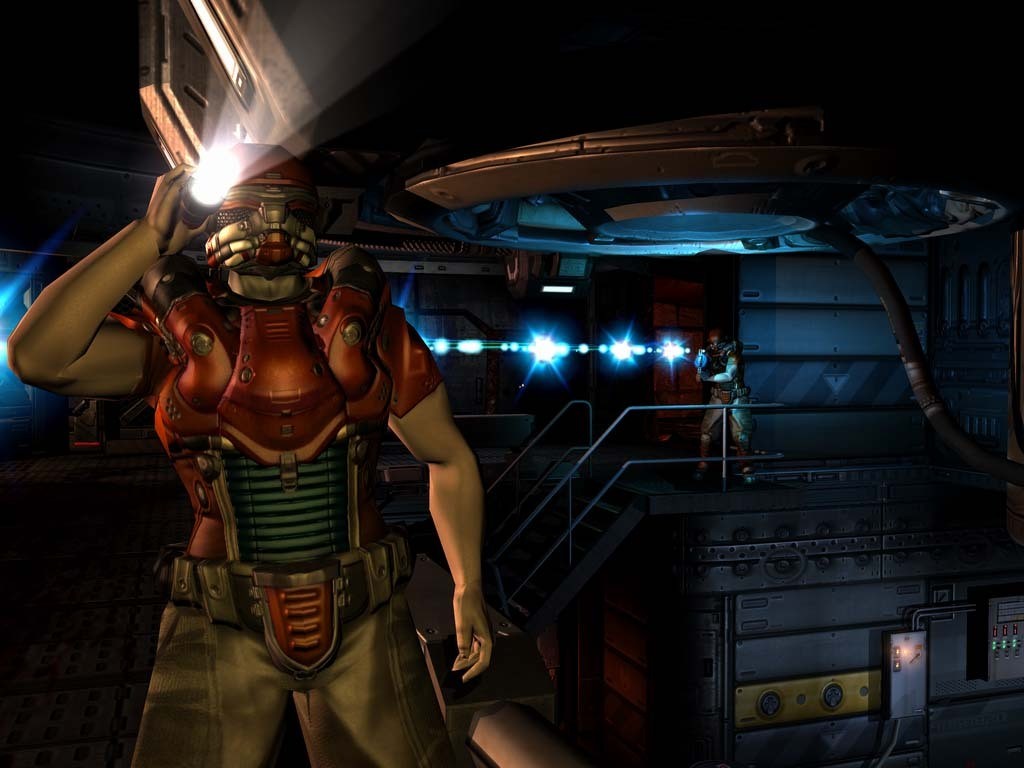
Marine Combat Tactics: Also common, especially at first. Pluses: they usually go in pairs; shoot from a machine gun, pistol or shotgun; greater accuracy at short distances; some have a shield. Cons: "dumb intelligence", that is, almost always resorts if you hide; low accuracy at long distances. So you need to either shoot from afar, or sit in an "ambush" around the corner and wait for him, for example, with a shotgun at close range.
Actually, the way back is not particularly thorny, only in one place there will be a closed door, but at the bottom left on the remote there will be a card, taking which you can use the door remote. You will also have to go through that very disassembled bridge, having previously assembled it with the remote control on the left. There will also be a room with an open floor. There is some kind of mechanism in this floor, there will be a shotgun on the right, immediately after that we fall under the floor to the zombies ... Behind the pipes (we crawl) - a first-aid kit and armor. Go ahead.
We reach a dead end, a dead end, because the door is closed, but the door is open a little closer. Behind her, we use the computer and go to the previously closed door. Soon they will write to us that they say the goal has been completed. As it is written, so to the left, to the next level.
Chapter 2: Mars City
It seems to have returned to the previous level, but this is a different level. Where we were before, we can’t jump there, so we go to the left and along the wall stairs, which the surviving employee lowers to us. We climb on our haunches above the ceiling, jump off. Further in one place, the door on the left will be closed, to open it you need a card, which lies in the office next door.
By the way, here is an explanation of where the chainsaw comes from - they were sent by mistake instead of jackhammers, but they will not meet soon.
Then again there are no special turns, but we go slowly, it is so difficult to get lost. In honey. laboratories, a cabinet with ammunition, code - 347, it can be obtained from the audiologist of the card lying here on the table. In the next compartment is a syringe - you can hear a heartbeat from it. The feature is tirelessness when running, although why is it in the narrow corridors of the Martian base? At the exit on the left (under fire) there is a map with the code from the armory - 584. Further to the right, it is closed on the right, and our boss is talking directly to us, who gives access from the closed door. Warehouse nearby. This is the same warehouse that has not been opened in principle before. While we were gone, the plasma gun disappeared somewhere :(.
A little further, the bot will help us. I recommend not to rush after him - he will still return and wait - but to explore the surroundings, not without his help, for first-aid kits and cartridges. It's impossible to get lost with a bot. It will lead us straight to the exit from the level, but there is a hole in the wall on the right, behind which you can climb up and find something.
Chapter 3: UAC Administration
They show us the Chancellor talking to Bertruger about something, or rather about getting out of control of some experience. More on that later. You can only go to the left, past the zombie crouching on the bench, through the gate with the inscription "alpha labs" above them. In the nearest office there is a cabinet with grenades numbered 013 with code 586 (this code is in the letters on the map next to it). Another gate with "alpha labs" written above it. Behind them, by the way, lurked imp. Then an unsuccessful attempt by another imp to break through the armored glass with a fireball and a falling barrel. The gate, with the inscription already on them, "alpha labs", is closed, on the right the soldier is dying.
To open this gate, you need access, which gives the card of William our Banks. We go to the beginning of the level, there two imps break a passage in the wall for us. Then two more imps, apparently jokingly, cut the fucking electricity off. Further ahead, a closed door. We open it from the computer in the office on the right. At this time, a monster called pinky jumps out.
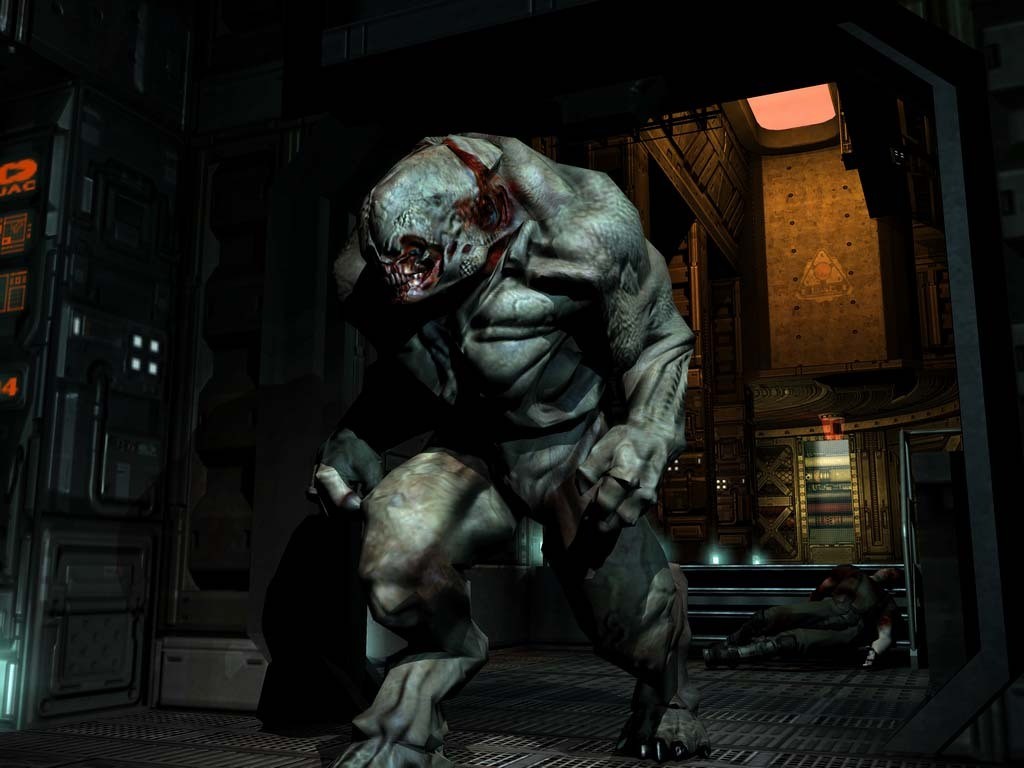
Pinky Demon Tactics: This monster is not common, but it is very dangerous. Pros: high speed of movement; great impact force; big damage. Cons: Large size; safe at a distance (until he comes running). Only corners can save him from it, and, for example, two shots from a shotgun. Extremely fast and dangerous. If he caught up, then from his blows the sight is greatly lost. Saves only its size (easy to aim). You can, for example, stand around the corner, wait for him to exit, shoot and at the same time move back.
He seems to knock out the door, but in fact you have to stand just in time for it, because the animal will jump into the glass, towards the computer. After feeding him with lead, we go to the opened door, where another kick is waiting around the corner. Then there will be an office straight ahead with a cabinet in which there is a machine gun (translated as an ultrasound :)), the code of which is 0508 (taken on the spammer's website), and up the stairs. At the fork we do not go down to the left, but go to the right, where the Chancellor is visible behind the glass, and then the office of William Banks. In the next one (there are candles in it) is his card. That's it, we go back to where - to the left_down_on_the_steps. We go to the beginning of the level.
We need to go to the alpha lab, to the same closed gate, near which there was a dying soldier, but when we pass through the first door, two dangerous marines are already joking with electricity. In short, we go to the gate and leave the level.
To open this gate, you need access, which gives the card of William our Banks. We go to the beginning of the level, there two imps break a passage in the wall for us. Then two more imps, apparently jokingly, cut the fucking electricity off. Further ahead, a closed door. We open it from the computer in the office on the right. At this time, a monster called pinky jumps out.
Pinky Demon Tactics: This monster is not common, but it is very dangerous. Pros: high speed of movement; great impact force; big damage. Cons: Large size; safe at a distance (until he comes running). Only corners can save him from it, and, for example, two shots from a shotgun. Extremely fast and dangerous. If he caught up, then from his blows the sight is greatly lost. Saves only its size (easy to aim). You can, for example, stand around the corner, wait for him to exit, shoot and at the same time move back.
He seems to knock out the door, but in fact you have to stand just in time for it, because the animal will jump into the glass, towards the computer. After feeding him with lead, we go to the opened door, where another kick is waiting around the corner. Then there will be an office straight ahead with a cabinet in which there is a machine gun (translated as an ultrasound :)), the code of which is 0508 (taken on the spammer's website), and up the stairs. At the fork we do not go down to the left, but go to the right, where the Chancellor is visible behind the glass, and then the office of William Banks. In the next one (there are candles in it) is his card. That's it, we go back to where - to the left_down_on_the_steps. We go to the beginning of the level.
We need to go to the alpha lab, to the same closed gate, near which there was a dying soldier, but when we pass through the first door, two dangerous marines are already joking with electricity. In short, we go to the gate and leave the level.
Chapter 4: Alpha Labs Sector 1
We open the gate and quickly, until it is pinched, we go out into the darkness. Open the next door with the remote control on the right. Behind her on the right are two marines, behind the next door jumping imp. We go out to some kind of installation (just a dead end). We go to the right into the control room, where the code for the cabinet with the number 009 - 752 lies. The cabinet is in front of the room, and after it is the control panel of the protective grille. We use it and carefully walk along the beam, better crouching so that it doesn’t burn from behind. At the end on the right is a hatch with a remote control above it. There will be a door on the left, and a fire burns behind it. We have to extinguish it. we turn around 180 degrees and go into the darkness, along the aisle to the remote control for extinguishing this fire. Behind the place with fire there will be a cinematic and several new two-headed creatures.
Tactics of the fight with Maggot: this creature is also relatively rare, but you need to be prepared for anything. Pluses: quickly moves (jumps); hard to aim. Cons: Safe at a distance, more of his jump. This bastard is complicated by the fact that he jumps when attacking, but then crouches down, so it is difficult to aim at him. It's best to kill him before he gets within his jump range. If they do come close, then, as always, the shotgun is an indispensable weapon.
Moreover, it is necessary to aim at the floor, because most of the time he still crawls.
After the bloodbath, you will have to crawl under the floor and go through the collapsed bridge. Behind the door, some bastards are dropping barrels on us. Actually, I don’t find out who exactly, but just throw grenades at them - a very effective tool, reinforced by barrels that were not dropped. Up the stairs, up, up. The screen suddenly turns red, the weapon disappears. No, it's just a show off. After a couple of seconds, everything is in order, including two imps.
Closed on the right, need a map. We go to the left and climb onto the ceiling, where the fat scientist hid. By the way, next to him is a killer door. Us there. We take a card and jump right next to the door that opens with this card. On the right, the Chancellor competes with his guard to see who can run the fastest, and on the left, several Maggots jump off fire-hazardous devices. Behind the door: on the left is the very first dead end, straight ahead is the dead end, on the right is the exit from the level.
Chapter 5: Alpha Labs Sector 2
To the right, around the corner, you can see a flying body. Then on the left - a dead end, on the right - a toilet. We climb up and crawl on all fours. At the fork on the right are cartridges guarded by a maggoth. So they went around the broken door. There are two zombies in the office, and one is the other!! Armor in the floor. Then we will have to hold our breath, although we will not go out into the open area. We go around some kind of conveyor, along the way using the computer, which opens the way for us to the cartridges - the stairs on the left. We meet the first elevator in the form of a platform. Below we meet another scientist with Ilyich's light bulb and follow him, protecting him. Near the stairs they will still kick him. There, in the dark, you can rummage around and find cabinet 038 with code 409. We climb in and open cabinet 039 with code 102 from behind. We get out in an interesting place where you need to call a ladder that will go down for a long time. And at this time we will be attacked by a lot of spiders.
Spider fighting tactics: not often found, but for that in large quantities. There are two varieties: tick and trite. Pros: attack in a crowd; jump when attacking. Cons: weak; relatively easy to hit, slow; They don't all run out at the same time, but one by one. The easiest way is from two meters with a shotgun, or a grenade. There is no need to be afraid of them, they must be methodically shot, carefully looking around, no matter how they crept up behind.
Here, the spiders will crawl from behind, so we don’t enjoy life when we climb up.
Chapter 6: Alpha Labs Sector 3
First we go to the left (at the fork), but the door is closed there, which you can open with a card. We go straight, but there they tell us that the room is infected, it is necessary to remove two barrels with green smoke from the office next to the lift to the far right corner. In the audiolog of the map in this room, you can hear about idiots who put one code on three cabinets - 123. In the middle on the floor of that previously infected room is the same map. Next is cabinet 047 with code 123. We do not raise the lift (!!!), but go back to the closed door. There is a first-aid kit under the stairs and on the right is cabinet 048 with the same code - 123. In the next room, we will be closed along with the spiders.
Having masterfully shot back, we go to the left along the red corridor. Carefully. Then we return and use the computer on the table and go back for the first-aid kit to the ventilation and the armor on the pipes further (the grate will fall off). After collecting all the caches, we go to ride the elevator down, although our trip on it is overshadowed by its breakdown and the abundance of Maggots below, as well as three kicks in the next room and two imps. In addition to this abundance, some invisible force throws a bedside table at us through the glass. All exit. Cabinet code 049 is still the same - 123.
Having masterfully shot back, we go to the left along the red corridor. Carefully. Then we return and use the computer on the table and go back for the first-aid kit to the ventilation and the armor on the pipes further (the grate will fall off). After collecting all the caches, we go to ride the elevator down, although our trip on it is overshadowed by its breakdown and the abundance of Maggots below, as well as three kicks in the next room and two imps. In addition to this abundance, some invisible force throws a bedside table at us through the glass. All exit. Cabinet code 049 is still the same - 123.
Chapter 7: Alpha Labs Sector 4
The new goal is to quickly get to the factory. Cunning, and what is most interesting, the current trick. Involuntarily you start to hurry, although you can pass the level for a month.
Behind the door, we have to choose: release or flatten the next scientist (why are there so many of them? Survivors?). It is better to release - it will open a room with supplies. We get down, open the glass and take cartridges. Further, our path runs through the same chamber, behind which spiders will run almost the entire remaining level. We rise, on the left behind the wall a Marine hid. further to the left is a dead end, but with cartridges, before the issuance of which they will scare us. We go out into a large space, and here we have to make a choice: go along the dark bridge or jump along the light ledges. It is better in the dark, because it is difficult to jump and there are no enemies there. Only at the end of the Marine. Even below, all sorts of nonsense is lying around, but a dozen imps will appear almost simultaneously there.
Another bridge and up. After the brutal execution of the maggoth, I recommend quickly running forward and down. Crowds of spiders will crawl out from behind. The bug is that they cannot jump - they explode. After the descent, there is still a bridge on the left, but first we go right behind the plasma gun, guarded by four imps. After the bridge at the top is cabinet 064 with code 651. Another bridge and before descending we are preparing to meet with spiders. Behind the last bridge on the left is a dead end, and on the right, the Chancellor and his soldier this time decided to compete in the accuracy of shooting from the BFG. The target is the first boss - Vagary.
Apparently he threw a bedside table at us at the previous level, because here he demonstrates the wonders of telepathy, or rather, the control of the look of thorns. One piece of advice: soak as quickly as possible, preferably with a plasma gun, while dodging well-aimed throws of the bug-eyed.
Chapter 8: EnPro Plant
There was such a goal - to connect with the detachment. Judging by the scene at the beginning of the level - this is not necessary, moreover, these idiots started indiscriminate fire and blew up something. As a result, the temperature in the reactor rose sharply. The new goal is to score on the squad and change the reactor core, thereby removing the threat of a thermonuclear explosion. You also need to find some kind of card, judging by the name - to be able to control the transmitter through a couple of levels.
We go down the falling steps. On the right in the room with a lurking imp and zombies are ammo for the crusher, but we actively use the plasma gun - there will be a lot of ammo. We follow the bot, looking with interest at local sights for ammunition, first-aid kits and armor. At the finish we climb the stairs to the right. Above is a disassembled bridge, you can assemble it next to the room with the only female representative, and even that one is not without jokes.
Judging by the audio, she participated in the development of the plasma gun.
Lost Soul Tactics: Often flies overhead. If you come to a large or open space, wait. Pros: small size; high speed; high intelligence. Cons: weak; at long distances practically does not maneuver. "High" intelligence lies in the fact that they can dodge the plasma gun and their ability to maneuver at close range, so the best thing you can do is shoot them down with an assault rifle or machine gun from afar, or a shotgun on the approach.
We collect the bridge, take the plasma gun in the closet 063 - 972 and go to the lost souls. With automatics on the edge, we cheerfully run across the bridge and see the miracle of the twenty-second century - controlled thermonuclear fusion. We bypass the red-hot plates of the reactor. The first door is closed, but after replacing the rod, you will have to return here. The second is open. We go past the green beam to the elevator down, down past the green beam and the red-hot plates of the reactor, into the room. We change the stem. And here is the Chancellor, this time he competes with his guard "who will find the map faster." The score is a draw - 0:0, in favor of the Chinese. We go back to the elevator up, past the beam, blue plates and into the nearest, previously closed door.
Let's go. Past the cunning mechanism, the algorithm of which I did not fully understand. Well, figs with him. We reach a closed warehouse, the code is 734. To the left of it is a platform with many barrels. We find the Chinese and fulfill our current goal. He is killed by the second type of imp - mug atas! At the bottom left is a map with a code from the warehouse where we ran from. Everything. Let's go to the next level.
Chapter 9: Communications Transfer
Kaka flies on the street.
Tactics of the fight with Cacodemon: powerful creature, rare. Pros: flies; shoots powerful projectiles; strong. Cons: slow (relatively); big. Like everyone else, it is better to destroy at a distance. From a distance and from his projectile, it is easier to dodge, and it is not difficult to hit (not from a plasma gun or a grenade launcher). If it flies up, a shotgun will help.
We quickly knock down kaku (by the way, optional), take an oxygen canister and go right into the airlock. We go in, we go down, we don’t approach the door (!) But we go under the stairs to the right, we crawl into the ventilation. We are intensely frightened by mocking giggles, sparks, a corpse, and for joy, we beat zombies to death with a flashlight. We go down to the spiders on the street. On the left (at the end on the right) there is an elevator, I recommend that you immediately run to it to call it, and then shoot back, probably with a plasma gun. Above we see the Chancellor. After winning the race, losing the shooter, and tying in the search, he decided to have a cross-country race at the Martian base! What a fun pioneer. To the left behind the door is finally a chainsaw! But you still have to take it away from the zombies behind the wall on the right, and then defend the right to it from the zombies behind the wall on the left.
Behind the next door (we use the remote control) are the next, and I must say successful, attempts to scare. Around the corner is a non-working elevator, we return to the opened door. The floor is abundantly strewn with something infernal, and cocoa flies from above. We rise to the second station (three in total), but the cart does not function from its console, so we go past this console, to the right to the console of the first station. The goal is the third station, but it is closed there. We go to the second station (we use the second line from the bottom of the cart console), and from it - straight and to the right. At the top of the bridge - on it (we raise the platform with the arrow on the right of the remote control), both to the right and to the left.
A handsome man with a chainsaw desperately guards the control room, but in vain. Yuzay and now back to the cart and to the exit - the third station. Out there, my favorite feature is the adrenaline rush. After boxing on the street. In a high-speed race, it is not clear who won, the Chancellor or his boy. Let's go find out from the back door on the left.
Chapter 10: Communications
Here's the jeep, but it doesn't have the Chancellor. The conclusion is that he left, and his last name is Swann. We rush after him in pursuit of the elevator, to the only possible floor - the communication level. The green pointer arrows point to the closed doors of the monorail level and the communication center, but the second one can be opened on the right behind the table. You can admire the views - the street is modeled well. Swann is a real pig - he took and bombed the communications center from the BFG. Anyway, we go there, take the map and back (beautiful imp under the stairs at the exit), unlock the door. Here's a Marine with a shield. You don't have to shoot at the shield, you have to shoot at him, at the Marine. Down on the platform and forward past the rod moving mechanism. On the bridge (in the middle of the first-aid kit) straight ahead - a dead end, to the right, along steep stairs, past a dangerous mechanism (dangerous because it can pierce through - dangerous to health) and on the platform we go up. The cabinet code is 054 in the warehouse of security bots - 246. Here we activate one of them and go.
We take the elevator up to the third floor. From here you can see the place that is on the splash screen of the level loading. We leave and head to the communication control room to send a message. Swann is agitating in every possible way - they say there is no need to call for help, otherwise we ourselves will not understand what is happening here, and the Earth can be endangered. It turns out he was right, but: firstly, the message will still be sent, and secondly, secondly, we ourselves will fix everything in a forced (by the game developers) order.
We take the elevator up to the third floor. From here you can see the place that is on the splash screen of the level loading. We leave and head to the communication control room to send a message. Swann is agitating in every possible way - they say there is no need to call for help, otherwise we ourselves will not understand what is happening here, and the Earth can be endangered. It turns out he was right, but: firstly, the message will still be sent, and secondly, secondly, we ourselves will fix everything in a forced (by the game developers) order.
Chapter 11: Recycling Sector 1
The corridor breaks and leaves us without oxygen alone with what. Down right back, left and right into the airlock. Behind the man hanging upside down (why did he hang there?) there will be a new dangerous monster.
Revenant Tactics: Powerful, both melee and ranged. Pros: Shoots two homing missiles. Cons: slow; missiles can be shot down or dodged. Well at least they don't go in crowds. In general, the main thing is to soak quickly and at a distance. You can even grenades - they are powerful. It saves only that he does not jump and does not fly, and you can get into him at least from anything. And missiles, if you are not a sniper and not a doomer, are difficult to shoot down (at the same time, also a reverent Kotsai).
There will be a second one almost immediately. After the reddened screen, we go down on a large elevator. At the fork equally where to go, it converges. After the zombies, we climb the sloping stairs. On the right, where there is another reverent, you can’t climb, on the left is a polluted room, to clean which you need to turn off the pump. There you can jump into the next room. The remote control lowers the ladder, behind which we reach a seemingly dead end, but we jump onto the pipe on the right and crawl to the opposite side, where we turn off, albeit urgently, the pump.
We go out to the place where the reverent was on the right and go into that polluted room, to where the imp is smacking with fireballs. At the top there will be kicks and then a mining tunnel inhabited by spiders. Immediately behind it is a similar polluted room, but with a curved path laid out. On the opposite elevation, the reverent steers the parade. And here is the rocket launcher. What is it for? In addition, the most difficult section on the street will be next. First, we go straight, dodging the rockets of the reverent at the top, but it is advisable to kill him before reaching. Further to the right there are a lot of barrels, gently blowing them up, we kill another reverent. On all sorts of ledges, we jump onto the bridge and go straight, there, a little lower, there will be an exit. We do not pay attention to Kaku - we just run and dodge her projectiles.
Chapter 12: Recycling Sector 2
The goal is still the same - to reach the delta of the laboratory via the monorail. You can’t jump on the ladders - Bertruger’s laughter brings them down. We go into the room where, after using the computer, the same good-natured uncle Bertruger says that the fleet was called in vain - he himself will bring hell to earth on the same ships, and no one will survive. We believe in the word. After shooting the imps not with a plasma gun or a grenade launcher (we keep good at the end of the level, we spend a maximum on reverents), we drive up on a vertical rod and make our way through the jungle of the same annoying imps, maggots and reverents. After the descent, there will be grenades and reverent. At the nearest fork we go to the control panel on the right side, after cleaning the camera on the same right side we go to a clean room. After it, we hear new sounds.
Tactics of the battle with Cherub: another cool idea of Carmack - a grasshopper child. Pros: small; dexterous. Cons: weak; safe from a distance. It is somewhat similar to spiders, but faster and more dangerous, for which it is heard from afar. I don't even know if this is a plus or a minus. As always - we wet at a distance, for example from a machine gun. It's hard with a shotgun. Often, at least this entire level, it is easy to throw grenades in advance.
After the ascent, you need to call the platform and go down on it, but first we just throw two or three grenades down. After a lull, we descend. Here, too, you can throw a couple of grenades to the right, but it is more difficult to hit. There will be a similar situation even further. After this situation, there are practically no enemies, everything is dark (even for a doom) and the sounds are strange with shaking around the level. This mancubus is my favorite monster.
The tactics of the battle with Mancubus: a very rare creature, it is understandable - they will not fit in narrow corridors, and therefore dangerous. Pros: very dangerous at close range; short distance five meters; shoots powerful projectiles. Cons: very large; slow; Its projectiles are easy to dodge. The main thing is not to approach, not even, the main thing is to stay as far as possible. At a great distance, it is easily shot at with anything - it does not know how to dodge, and its shells are not the most complex, although powerful.
Actually there are three of them. A lot, yes. But they are still easy to kill. If you have 450 plasma guns, consider that you will not lose health. The advantage is that there is no one else besides them, besides, they are far from each other, and there is where to run. True, after that a dozen grasshoppers will appear. After riding the elevator, one of the promises of the evil genius is fulfilled, namely air pollution. Paying no attention to anyone, we rush to the left as fast as we can, using three remote controls in turn. Behind the reverent on the left is the exit, straight ahead is cabinet 003 with the code 483, on the right - they were already there.
Chapter 13: Monorail
Short level. In terms of writing passage. Near the train, we do not adjust, but calmly collect carefully scattered usefulness. Then we get on the train and go to the laboratory delta, but along the way, at point two, we must manually open the gate. We leave and go. The commando hid behind the door.
Combat tactics with Commando: often seen, this is a type of hell soldier. Pros: fast, strong; dangerous at close range - ten meters. Cons: low intelligence; safe over long distances and on the floor. I explain: you can’t run away from the whip either back or to the side, because he runs very fast, this gives the impression that it is impossible to pass it without losses, but this is not so. The fact is that his whip flies “high”, and you can crouch from it, although it works about five meters from him, and at two meters he starts to kick. Conclusion: at the last moment, when he has already run up and swung, we squat down, start shooting and crawl back. By the way, once from a shotgun (if you hit it well) is enough.
There is also a second type - with a gun. The same Marine, but some two hundred percent stronger.
At the top (under the stairs armor) we open the damper with code 826, there is cabinet 054 with code 142. We go back, past the passenger gnawed by the spider into the train. After the disaster, we climb up and go in. Through the door to the right. Let's go. Even before the bridge over the monorail in the glass office, we take a map. In the place where there will be a closed door right and the turret on the right, we run straight (to the right of the door). We are not in a hurry to turn off the protection system, let him kill zombies and imps first. Behind the door are two cabinets - 079 and 078. The code for both is 364. That's it, we go to where the turret was and leave the level.
Chapter 14: Delta Labs Sector 1
At first, there will be no enemies for a long time. They will appear only in the second paragraph. We are frightened by the flying grate and find out that electricity is needed, otherwise it will not be enough to start the elevator to the next level. We go to the control panel through breaking glass, a passage under the floor, and find out that we need to get access. For access, we go back to the floor, to the place where the imp is rummaging along the ceiling (above, behind the glass) (before that, there will still be a non-working elevator - exit from the level). Near the corpse (see it?) lies access. We go back to the control panel and find out that we need to find the reactor control room. Holography is top notch. By the way, on the right is a display on which, in addition to the reactor, there are four more points.
And only here the first enemy imp appears, capable of losing health. After the imp, turn right into the door. See the corpse? Hanging which. This is the one near which the access was picked up (it can be seen from the traces of blood). And even further it will fall out, creating a cheerful shadow. After fighting in a large space with many lost souls and one reverend, we are looking for a hole near the floor. Cabinet 21D, which is guarded by a kaka with an imp, is opened with code 298. Again, a large space with three kakas and a reverent, after which we go down on the platform and exit to the reactor, more like a turbine. That's where the rod had to be changed, right there, the reactor. And this is so, some bullshit. Well, as a last resort, the turbine is from the reactor. In general, it doesn’t matter, the loss of souls will not decrease from this.
We go into the reactor control room and start the turbine. Then we rise for admission to the closed (opposite the remote control) door. After a large space down on the platform and to the second floor on the elevator. We go, we go, we go until two like, writing out aerobatics under a glass ceiling. We go down to the reverent, behind which the same elevator is the exit from the level, but already working.
Chapter 15: Delta Labs Sector 2a
Difficult level - three secrets, complex mechanisms, you will not find codes, plus they will give you the most powerful weapon. We teleport for the first time ... I recommend falling into the elevator shaft on the left.
First of all, we go to the toilet on the left to look at the zombies, then we open the cache under the table and go up the elevator. It’s a good idea to throw a grenade into dark offices first. Personally, a wounded commando with a whip ran out at me, whom I laid down with a single counter blow of a flashlight. The code from the one hundred and twelfth cabinet is 538. We break the glass with a chainsaw. To the left of the glass are two boxes, we kick them to the glass and jump into the hiding place along them. At the green intersection on the sides, it is still closed, we go straight, where we meet another scientist. He then unlocks those two doors. He says that he needs to teleport, but the teleport still needs to be repaired. You need a spare part - a plasma inductor. Behind this scientist is a teleport, in front of which five healths will be taken away from us, but first we need a detail, back to the green crossroads.
On the right, everything is closed, but you can look at the zombies through the glass. To the left, through the honey. laboratories, where in the first room in the corner is a secret. Next will be a room with a manipulator. We take out any box and put it back. While the manipulator grabs this box, we jump on it and at the moment of the turn we go to the side of the wall. On the opposite side behind the drop-down grate are cartridges. We jump down near the room with the BFG, the code is 931. We go further and in two rooms we alternately use two computers. There will be a cabinet 116 with the code 972. Then we exit at the green intersection and go straight, that is, to the right as if before. From the glass wall to the right. We go on the right side, going into the rooms. One of them has cabinet 114 with code 715. The other will have a plasma inductor. We reach the end and go down the elevator. We find ourselves just near the glass wall. Everything, we go to the scientist (to the left at the green crossroads) and for him to the teleport.
Chapter 16: Delta Labs Sector 2b
In the room to the right, next to the sitting zombie, there is an access card from a closed door. The door on the left opens with a computer on the right. Cabinet 103 opens with the code 259. A dozen other imps will appear one after another after the flying corpse. After the ascent, there will be an archvile on the platform right below, but you can’t even see it from afar, so more about it further. By the way, he summons imps (to infinity), so he is the main target here. Then we crawl to the right, to the scientist, dressed in a spacesuit for a change. Nearby are two cabinets - 216 and 217, with the same code, which the scientist himself said - 624. After reloading the BFG, we jump over the barricades of three boxes. And there is another archvile, but upstairs, on the bridge. Here is another miracle - commando without a whip. On the right, the door is opened for us by his brother, who has already seen enough of the exhibits of the Kunzkamera. On the left is the necessary closed door, and on the right is the unnecessary open door leading around. We start the conveyor (to the right of the door in front of the conveyor is a secret) and do not run in front of a dozen imps, but go through everything carefully with a flashlight, especially since there will be infinity of such “bulbs”.
After the room with the two hundred and thirteenth cabinet with code 371, there is another "path". Before us is a unit for studying the cube of the soul, but it is not there - Bertruger stole it. On the right is cabinet 666 with code 372, but you don't need to open it. The code for the nearest closed door, storage 07 is 463, and for the closet in this room is 0508. The code for the exit from the level is 725. And here it is - an archvile in the immediate vicinity.
Archvile Tactics: Had it been implemented the way I envisioned it after playing Doom XNUMX, it would be my favorite monster, not the Mancubus. Pros: strong; dangerous at any distance; calls others - imps, commandos, etc. Cons: slow (relatively); around the corner is safe. That's what I like about it - it's a fiery path, and of arbitrary length. When meeting with him, the main thing is to fill him up, otherwise he will call imps to infinity.
Specifically, this and the BFG is not a pity. More imps, if you delay, will start scratching in the back.
Chapter 17: Delta Labs Sector 3
Behind the door is a whole set of opponents. Again I advise BFG (on the next level they will take away everything, including a flashlight), but we keep eight rounds of ammunition at the end of the level. We also actively use the grenade launcher. In the room we open the next door and go straight (ammo in the toilet). Behind the next room directly open the door on the right. Behind it are two cabinets 386 and 387 with code 836, the already familiar disinfection and a teleport, but on the left on the remote control you first need to turn it on, then scan the area for points where you can move and select point two (the first one is here). On the right is storage 03-2 and behind the reverent on the right we open the door straight ahead. There are hellish thickets. The blood runs down the walls beautifully. Under the floor we crawl to the left, the rest is dead ends.
Next to storage 03-3, the remote control does not work, and in another pair of doors, on the right - cartridges, on the left - a teleporter. The first item is “ammo on the right”, select the third one, it is in storage 03-4, and item two at the exit on the right. A little further on is a beautiful melted bridge that you can't jump over. Eh, to reap that rocket jump only in multiplayer furychit. But behind him is the exit from the level. We go to the reverant, to the right. Further out of the three doors, only the leftmost one is open, behind which we open the rightmost door below, which leads to the last teleport. 1 - to the exit from the level. 2 - the middle door, there are 150 plasma guns (the door to this teleport was on the right). 3 - in storage with cabinet 317, code 841. 4 - almost in the same place as 3, there is no difference.
Next to storage 03-3, the remote control does not work, and in another pair of doors, on the right - cartridges, on the left - a teleporter. The first item is “ammo on the right”, select the third one, it is in storage 03-4, and item two at the exit on the right. A little further on is a beautiful melted bridge that you can't jump over. Eh, to reap that rocket jump only in multiplayer furychit. But behind him is the exit from the level. We go to the reverant, to the right. Further out of the three doors, only the leftmost one is open, behind which we open the rightmost door below, which leads to the last teleport. 1 - to the exit from the level. 2 - the middle door, there are 150 plasma guns (the door to this teleport was on the right). 3 - in storage with cabinet 317, code 841. 4 - almost in the same place as 3, there is no difference.
Chapter 18: Delta Labs Sector 4
The shortest level. BFG still available? Will come in handy now. First left to the one hundred and fourth cabinet. The code is 579, in as many as two places. So we finally fulfilled the goal of the last few levels - we found the main portal, but our fun is overshadowed by two knights of hell.
Tactics of the battle with Hell Knight: a kind of reinforced imp. Higher, faster, throwing more powerful green fireballs. Actually, the advice is the same as with the imp, just run faster and further away, shoot more often and more powerfully. Not to say that the most powerful, no. It just shows up spectacularly. In addition, it is he who is drawn on the disk.
If there are eight BFG rounds, consider leaving without losing health. After killing them, all weapons will be taken away, including a chainsaw and a flashlight. Bug - weapons are not taken away during teleportation (as in the story), but also at this level.
Chapter 19: Hell
The new goal is to return the soul cube to its homeland. There are no enemies in this paragraph. We restore health and armor, take a shotgun and a pistol. Personally, at first I just looked at the level for two minutes. What is at least worth a smiling face with a green beam. Or that head with horns. Further more. The green beam moves us into a puddle - the only water in the game.
Then we just go and admire the beauties of the best level of the best game. In the course of the entire level, you have to collect all the weapons, although I did not find chainsaws, machine guns and hand grenades, and the BFG is in the same place as the cartridges from it, behind a stone. There are no dead ends, so I will write general principles: we go where the enemies are, we try to rise all the time. In extreme cases, if you get lost, just go along the wall. The only moment (where there is adrenaline - a knight of hell with one blow!), There you have to follow the hieroglyphs.
We reach the green beam and teleport to the second boss.
Still the fool. He was born with no eyes, instead he has flying lanterns. They then report the location of our location in the clearing. Shines a lantern - explain to a friend. When everyone understands everything, the fool from the back teleports more flashlights, and all over again. The boss can only be wounded by the blue orb when it spawns naturally. And he appears only when new flashlights are needed, including at the very beginning. So do not be shy and immediately after the splash screen throw a couple of grenades. Flashlights are easier to shoot down from the BFG.
After showing "Kuzkin's mother" we take the cube of the soul.
Chapter 20: Delta Complex
With a pistol and a machine gun, we climb into the floor for a flashlight and grenades, with which we kill the commando without getting out. There will be a lot of spiders behind the delta labs 3-4 transition. Now about the cube of the soul. This new, most powerful weapon, kills any monster at once (except for bosses). But to use it, you need to kill five, only then one charge will appear. That's just on the spiders and train. Then we take the plasma gun and up the elevator shaft and into the hole, behind which we go down on the platform. Further, even more interesting: after going up to the second floor, we see ... Whom? The same Swann aka Chancellor, but his soldier is not to be seen. He lay down and pretended to be dead, not even reacting to the shots. With the help of his card, you need to get into the processor unit. Near the hellish thickets we turn to the floor, at the dead end we turn around and crawl further.
Use the remote control to lower the ladder down, open the door and into the processor unit.
Use the remote control to lower the ladder down, open the door and into the processor unit.
Chapter 21: Central Processing
Swann's soldier was completely crazy and decided that they were playing hide-and-seek with him.
Don't forget about the Soul Cube. The code for the 452nd cabinet is 571. The code (627) is needed on the left, the door does not open directly (slightly to the right) - a card is needed. On the right after watching the second miracle of the twenty-second century - antigravity, on the right is a monitor through which you can see the same code - 627, and on the left the remote opens the secret directly. We return to the door and dial the code. For the next Carmack horror movie, we go up to the second, and on the next elevator to the third floor. We reach cabinet 669 with code 468 and take the necessary card in the next one. We return on two elevators to the first floor, to that door with a red arrow on its remote control. Not a high-speed elevator will take us straight to the exit, but there are still cartridges in the floor.
Don't forget about the Soul Cube. The code for the 452nd cabinet is 571. The code (627) is needed on the left, the door does not open directly (slightly to the right) - a card is needed. On the right after watching the second miracle of the twenty-second century - antigravity, on the right is a monitor through which you can see the same code - 627, and on the left the remote opens the secret directly. We return to the door and dial the code. For the next Carmack horror movie, we go up to the second, and on the next elevator to the third floor. We reach cabinet 669 with code 468 and take the necessary card in the next one. We return on two elevators to the first floor, to that door with a red arrow on its remote control. Not a high-speed elevator will take us straight to the exit, but there are still cartridges in the floor.
Chapter 22: Central Processing
The whole level is somehow symmetrical. We go around from either side and go out to the bridge (you need to call it), at the end of which there are four destinations: 4 - in addition to many enemies, you can find good cartridges. 2 - at the end there is a map - access to point 1. We store the soul cube, it will be very needed now. We go to point four, where behind the second door, without a roller, the third boss sat down - Sabaoth.
This bastard shoots BFG, and drives fast, so a soul cube is a must. The charge of the BFG must be shot down and then, as often as possible, press the left mouse button. Accuracy won't hurt, not even, you can't get past this boss without accuracy.
This bastard shoots BFG, and drives fast, so a soul cube is a must. The charge of the BFG must be shot down and then, as often as possible, press the left mouse button. Accuracy won't hurt, not even, you can't get past this boss without accuracy.
Chapter 23: Site 3
Almost all the doors are closed, you have to get access. We go through the open doors, past the GARAGE (there is a pin on the ceiling beating its head into the wall), candles, a blue pipe, vertical descent and ascent (I mean stairs), vertical jumping to a scientist with glasses. He explains what the hell is going on here.
He (the bespectacled scientist) gives us full clearance and we walk through closed doors, opening them naturally. We go past the door to GARAGE, to the elevator to the second floor, where after the "live" tunnel in the tower, with a beautiful view from the window, we use the remote control and go back to GARAGE, where we get into the car and leave for the elevator to the next level - caves.
He (the bespectacled scientist) gives us full clearance and we walk through closed doors, opening them naturally. We go past the door to GARAGE, to the elevator to the second floor, where after the "live" tunnel in the tower, with a beautiful view from the window, we use the remote control and go back to GARAGE, where we get into the car and leave for the elevator to the next level - caves.
Chapter 24: Caverns Area 1
From this moment we begin to think about weapons. The fact is that at the final boss it will be necessary to fill up, being driven by rockets in the ass, several times five imps. So we begin to save up either BFG or missiles or something else. By the way, there will be a lot of missiles in front of him.
We shoot spiders from the elevator and go up, noticing BFG cartridges behind the gap. A little further there we find ourselves. The tunnels lead us to an inclined elevator shaft - sort of like in Half Life. The goal is to descend on it, but it still needs to be called. We rise to the building opposite (the stairs descend with the remote control on the right) and jump over to the profile. In the office we use the remote control, in the room next we take cartridges for the BFG, we go down on the platform to the spiders (save the soul cube!). We go out again to the elevator shaft and call it with the remote control on the left. This is where the soul cube for the hell knight will be needed, otherwise it will be thrown right into the mine.
There are a lot of enemies below, including archvile, a knight of hell, and imps, what to do with them. BFG cartridges on the ground. Use the remote control to open the hatch (the hatch on the top right) and climb up. We go up on the platform. One door won't open. We leave, climb a little higher and deep down, going down and then jumping on the retractable plates. Downstairs, the man behind the pipes gives access to that door. To climb back, push the ladder with the remote control. Behind that door, on the upper left is a cache, and on the right, the door will not open immediately. After a rockfall over the lava, we run quickly, or not kirdyk. We go to the crane and turn its arrow to the right, pushing the load away. Through this arrow and climb over.
A knight is waiting for us in the elevator, and an archivile is waiting for us below, so we choose where to merge the soul cube. Below, behind a door that is not immediately found, there is a puddle of lava, behind which there is another elevator, but the last one on this level.
Chapter 25: Caverns Area 1
One door is closed, supplies are behind it. Access behind the cave below, but if you go back, there will be a lot of spiders. Choose. We DO NOT (!) turn on the light on the remotes, but go through the caves of an ancient civilization. Behind the "eggs" there will be several first bosses. By God, no stronger than some knight of hell. And only at the elevator, the transition to the next level, you can turn on the light.
Chapter 26: Primary Excavation
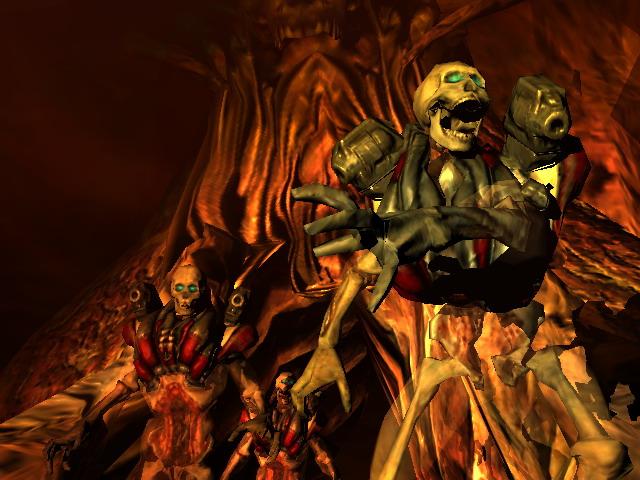
Not long levels on this page, this one is the shortest, and no enemies other than the boss. By the way, in front of him, on the left, there is a red nook and there is a brick with the “id” emblem in it, it opens a secret room.
Reminds no one? That's right, he does not resemble Banderlog from The Brothers and the Ring. Handsome.
Ordinary ammo does not take it, only the soul cube. And it, in turn, is given for five dead creatures. In this place it is only imps and maggots. Running in a circle (so that the missiles do not hit, all the more nothing else), we methodically shoot off the heels of the ten-eyed freaks (the BFG will help) and smack the Cyber Demon with the cube of the soul. And so five times.
Congratulations. Now we go through again ourselves without codes at the nightmare level!,
Was the article helpful?
 Thank you very much!