The April Anomaly will bring great changes to Fontaine and beyond! Yes, yes, you heard right! Update 4.6 is already on…
Bunkoku puzzle in Genshin Impact: All damaged stone slabs
Damaged Stone Slabs are quest items you need to find for the Bunkoku puzzle world quest Genshin Impact version 2.5. Find out the location of all slabs, how to get the quest, usage and more about Damaged Stone Slabs.
The task will become available as part of the update event "Offering the gates of the three worlds". The seven damaged stone slabs are safely hidden and must be found in order to open the secret room and obtain the Seals of the World of Light. See how to do it below:
How to get the task "Puzzle Bunkoku"
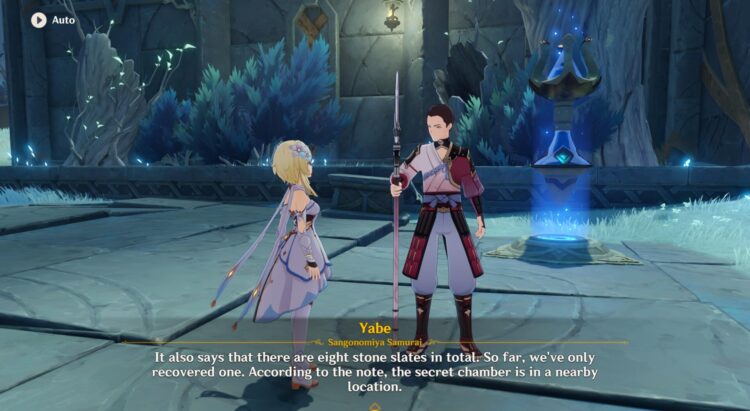
Initially, you need to start the starting task of the event "Offering the gates of the three worlds. the day before". The storyline of the quest will lead you to a guard named Yabe, who is located in Dainichi Mikoshi (see screenshots below). When talking to him, you will receive the first damaged stone slab.
Note: The Bunkoku Puzzle side quest involves visiting three large landmasses in Enkanomiya. Naturally, things can get more complicated due to the Decay and the fact that you won't be able to activate teleports unless your Bokuso box is properly upgraded. However, if you're fast enough, you can get through it all without a hitch.
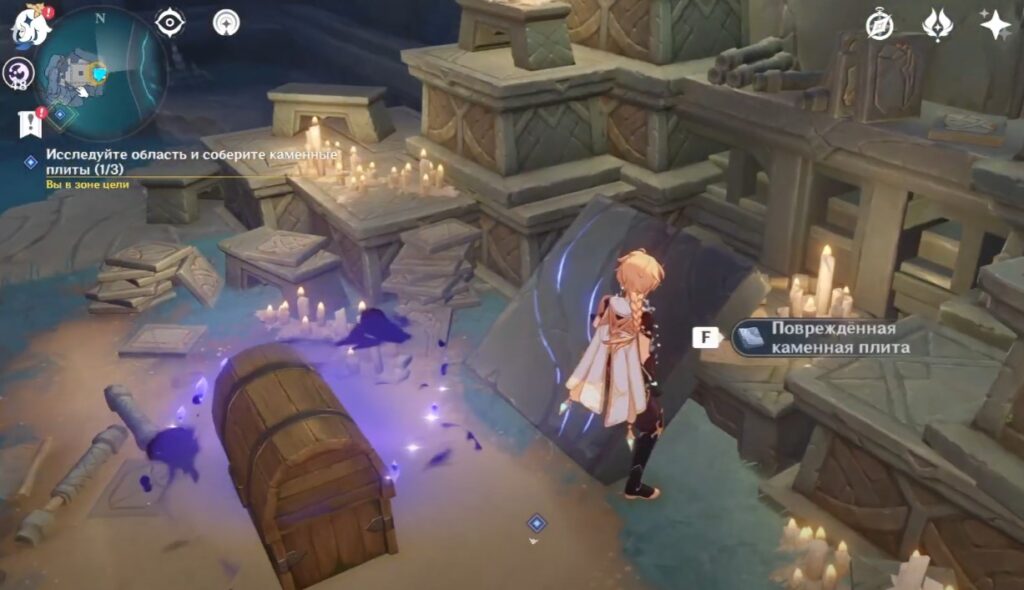
Find clues
Now you need to get to a certain location. Follow the blue quest marker. Once inside, you will see powder kegs near the wall. Blow them up to open a breach. opening up a passage for you. Go inside and interact with the lever on the right.
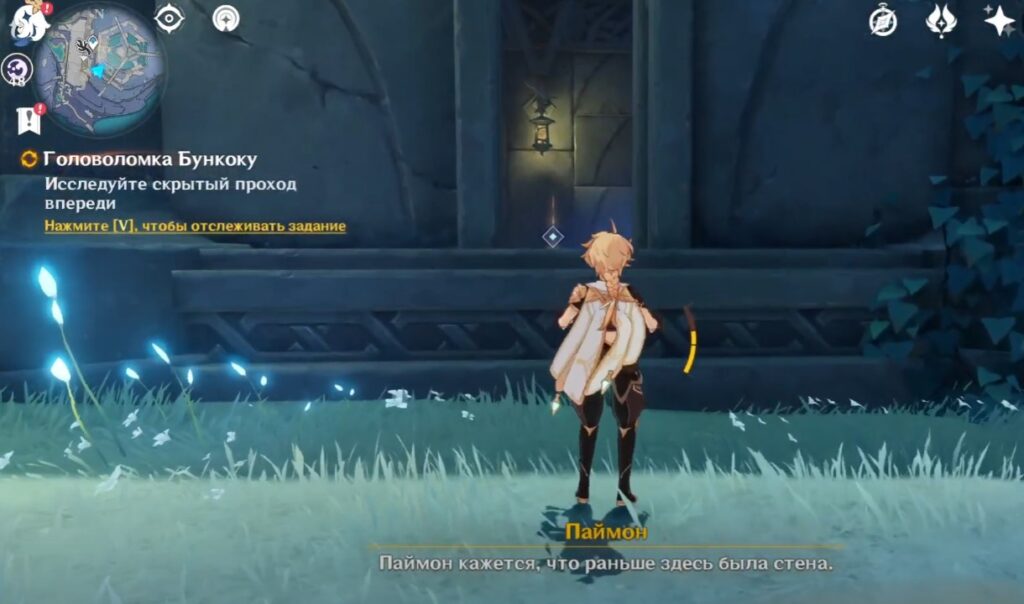
A short cut-scene will start, after which move towards the source of the sound. Exit the room, go upstairs and enter the window. Talk to Paimon and then return to Yabe to find out where the remaining stone slabs might be.
Collect the stone slabs of the Bunkoku Puzzle quest
Stone slabs 1-3
We strongly recommend that you start collecting slabs from Gorge. Quest items are hidden in the well-known library, but now the entrance to it is blocked. To open it, you need to activate three Electro monuments, two of which so far do not react to your actions in any way (are blocked). To remove the block from them, you need to perform a couple of tests.
In the first challenge, you will need to collect 8 Electro Particles in 90 seconds. There is nothing difficult in this, since all the spheres are nearby. At the end, a rich chest awaits you. In the second, you need to blow up the barrels in 45 seconds. The fastest way to do this is with an archer, so take at least a free Ember into your team.
Open the second rich chest, and then activate all the Electro monuments and go to the library. Upon entering, immediately pick up the first damaged slab on the first floor on the right side. The second one will also be downstairs, but already on the left side of the room. Now go upstairs and pick up the third plate.


Note: There will be a combat test in the library, but it is not necessary to complete it. However, for its implementation they give a chest.
Stone Slabs 4-5 (mirror puzzle)
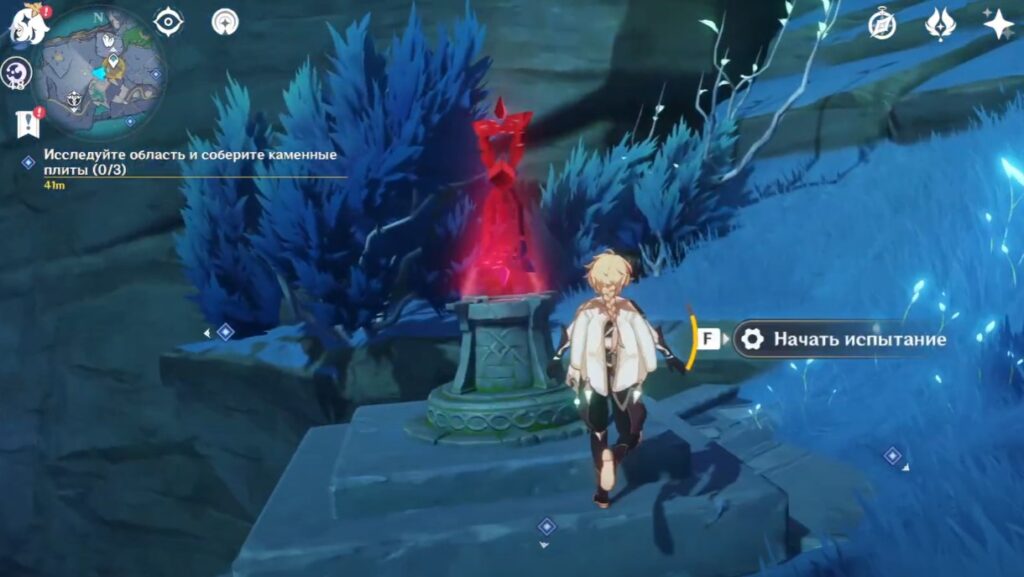
Now go to the Temple of Eternal Night, where the second search area is located. If you have not opened this location yet, then use the water ring in Dainichi Mikoshi (shown in the screenshots below). Then move northeast. You have probably been here before when you went through the labyrinth.


The first puzzle with mirrors at the entrance (chest)
Next, you will need to solve the first mirror puzzle. You will need a box, so make sure it has enough energy. Also add Pyro and Cryo heroes to your squad to defrost and freeze mirrors.


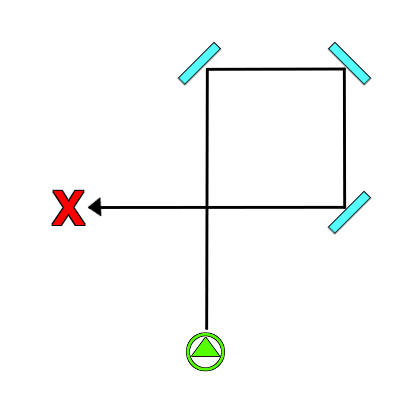
Green arrow = Transmitter of light beams
Red X = Light beam receiver
Blue = Ice Mirror
Dark blue = Water mirror
So, you need to defrost two mirrors in front and behind, and leave the side mirrors frozen (nothing needs to be rotated). The first diagram and screenshots show the necessary rings. Then go to the transmitter of light rays (bright box) and use the box near it. As a result, you will receive a rich chest.
The second puzzle with mirrors at the entrance (lattice)
Now you need to freeze the front mirror again, and rotate the side mirror on the left three times so that it is parallel to the right one. The screenshot and diagram below demonstrate the desired option. Next, use the box near the transmitter. After that, a precious chest will appear, and the grate should open. Jump down.
Note: There are 11 mirror puzzles in Encanomia. If you want to see their solutions and locations, visit our dedicated guide here.
Third puzzle with mirrors inside (door)
First, freeze all Cryo mirrors with attacks. After that, you will need to rotate the two rings on each side once. The screenshots and the diagram show which mechanisms need to be rotated. After that, use the box near the transmitter to open a new passage.


Green arrow = Transmitter of light beams
Red X = Light beam receiver
Blue = Ice Mirror
Dark blue = Water mirror
Get down. There will be a chest shrouded in darkness (requires a high-level Bokuso box to dispel it). Directly behind it lies the fourth damaged stone slab. On the left in the water will be the fifth. Now you can get out of here by opening the grate with the lever on the wall.
Stone slabs 6-7
Now you can go to the Serpent's Heart. If you have not yet opened this location, then teleport to Dainichi Mikoshi and go south, and then go along the stone bridge. In the center of the right island, not far from the teleporter, there will be a passage in the ground. Jump into it.


Pick up the sixth damaged stone slab on the left in the recess. The last one will be on the right. After taking it, proceed to the next task.
Insert all stone slabs
Solving the slab puzzle
Return to the location in Dainichi Mikoshi with the cube console locked and the platform where you can put the plates. You found her almost at the very beginning of the quest. After installing the tiles, you will need to move them in such a way that they match the pattern painted on the ceiling in the room below.
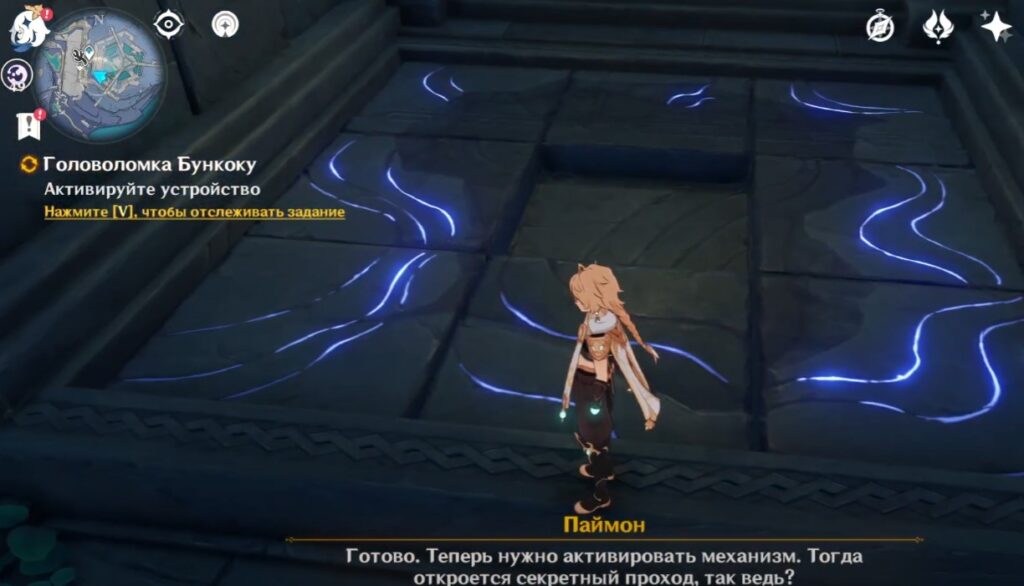
If you are too lazy to run down and memorize the drawing, then look at the diagram above, where all the quadrants are indicated by numbers. You will need to step on the tiles in the sequence shown below and then move them:
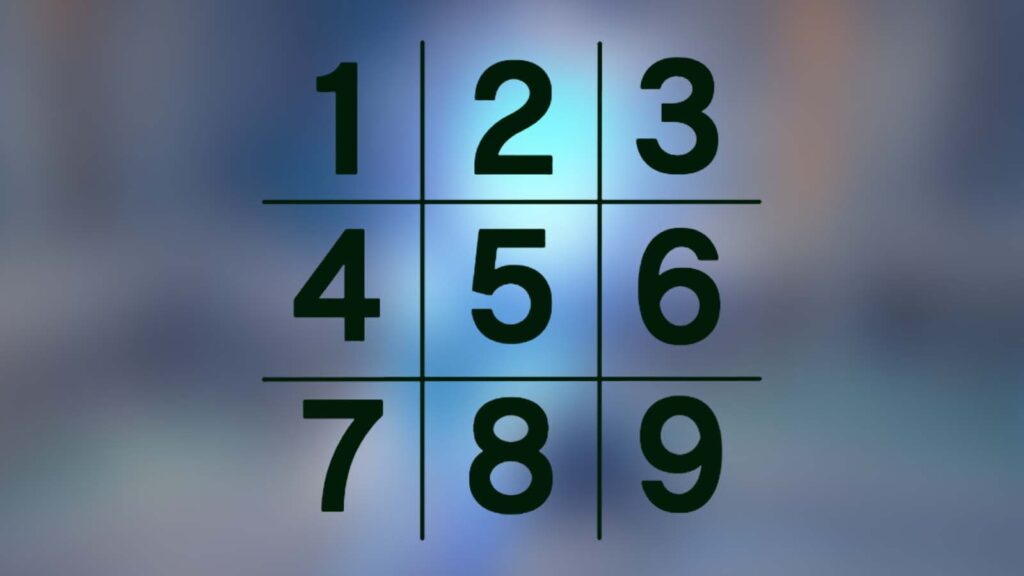
4 > 7 > 8 > 5 > 6 > 9 > 8 > 5 > 6 > 9 > 8 > 5
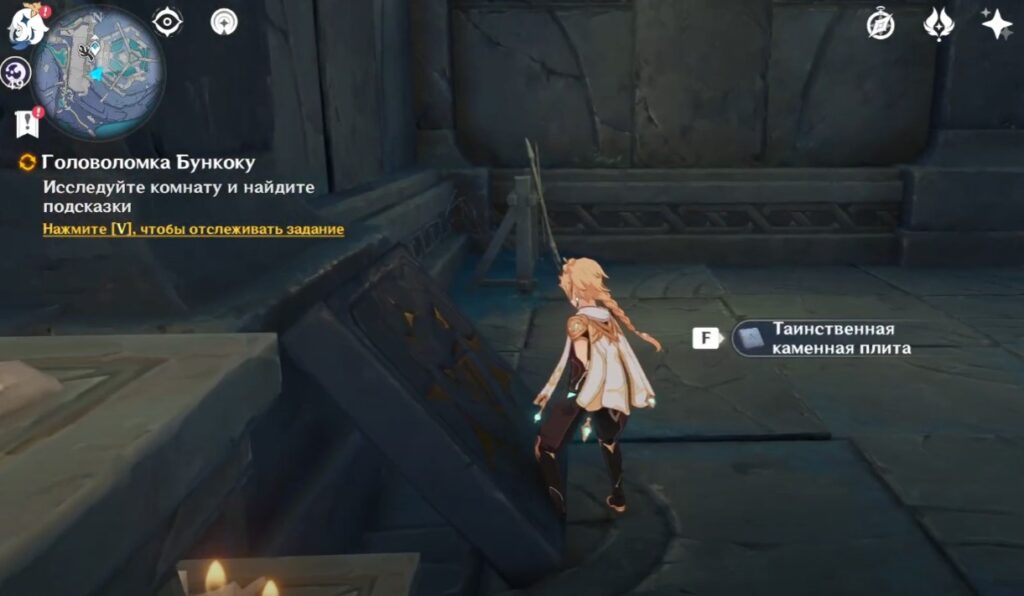
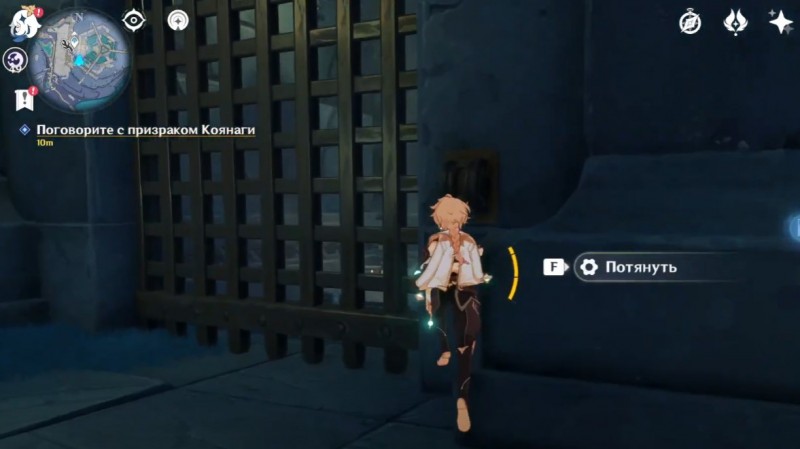
The finished version is shown in the image above. Then activate the cube and go down into the gap that appears on the floor. As a result, you will enter a secret room. You can talk to the ghost of Koyanagi here. Next, take the mysterious stone slab leaning against the wall. Climb up using the phantom gate.
Again interact with the cube console, and then insert the last plate and start the device again. Go down again and deal with the Mysterious Samurai (a stronger version of the Kairagi). Open the luxurious chest, which contains the core of the World of Light. Pull the lever to open the lattice gate and chat with Koyanagi.
You can return to Yabe and tell him about what you saw. This will complete the quest. As a reward, you will receive 40 Source Stones, 3 Hero XP, 30 Pestilence, and 000 Seals of the World of Light.
Was the article helpful?