
Grounded is a cooperative action game with elements of survival and a first-person view. The main characters are reduced children who are trying to survive in their backyard, having to face the local flora and fauna. Together with other players, you will explore the amazing world, build a shelter and try to survive as long as possible. You will take on hordes of giant insects using weapons that you can create from improvised means.
Grounded Walkthrough Guide
This page contains information about all the story and side quests, to start the game "Grounded” in the form of “Early Access”.
Please note that due to the status of the game, this walkthrough is subject to change during development. This walkthrough reflects the game as of July 30, 2020.
When you start the game inGrounded”, you will first need to select your character. Max, Willow, Pete and Hoops are all available and each of them works exactly the same. The only differences you will face are their personality in how they talk to themselves and how you will see other players when playing online.
Explore your surroundings
When you start your adventure, you will start in a hole in the ground, right in front of a large suitcase with several human-shaped holes that you seem to have fallen out of. If you want to get to the bottom of this enigmatic mystery, you first need to find out where you are.
Turn away from the briefcase and leave the ditch behind, and you'll enter a wider open area in the dirt, with tall grass all around - as well as a giant sphere: a baseball! Approach the ball to add it to your list of landmarks. Given your relative size on this adventure, finding large unique items in the world can help you get your bearings and add them to your map.
At this point, various bugs, including aphids, mites, and even ants, may sweep past you. Don't worry - these insects won't attack you - until you hit them first.
You can also start looking around on the ground for things to pick up: small rocks called pebbles and small pieces of plants called twigs and plant cellulose. Just by picking up materials like this, your character will get ideas for new crafting recipes like healing items, food, weapons, and more - so be sure to grab every new item you see!
Track the strange signal
Track the strange signal
By now, you've noticed the little HUD icon in the bottom left corner - your SCA.B. This bracelet tracks many things, including your thirst and hunger (water and food icons in the center), as well as your stamina and health (blue and red bars on the sides).
As you move to the left of the giant baseball, a new icon will appear at the top of the center of SCA.B - with a small purple marker and green lights on the side. This means that you are approaching the location of the field station, and the more lights flashing on the side, the closer you are getting. Walk along a small, wet ditch past a baseball under a large red leaf and look for a purple tent-shaped object among the grass.
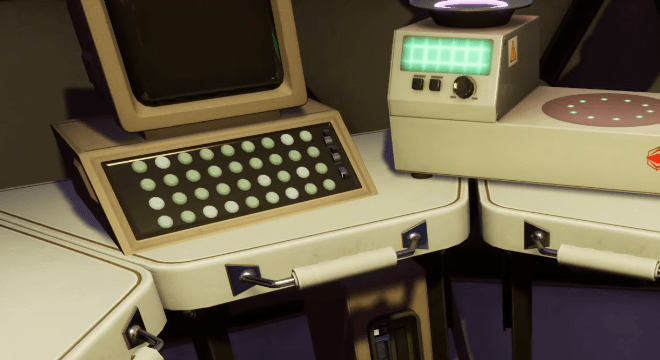
Inside, surprisingly, you'll find a neat little computer station and some scientific equipment to analyze things. You can't use the computer monitor itself, but try interacting with the object on the right to analyze the material in your inventory. This will allow you to further identify potential uses for items you find during your exploration. Try using it on Plant Fiber to get the recipe for Braided Fiber, Pebble to get the recipe for Pebble Axe, and Twig to get the recipe for Barbed Spring and Trail Marker.
Each of these field stations can analyze 3 items and get a new charge every hour in the game (about 5 minutes), so you will need to look for additional stations and visit more often to learn more about the items you find.

Find water and food
By this point, your food and drink counters are probably getting low, so now is the perfect time to find ways to fix this. There are two types of water - dirtier groundwater that can quench your thirst in a pinch, but will also quickly increase your hunger.
To get clean water, you need to get it straight from the dew hanging on top of the tall grass around you. Take a stone and knock down a drop of race, letting it fall and roll down, quenching your thirst.
You may also find dew on the ground, or small to large amounts of honeydew from insects such as aphids, which can also be used to quench your thirst.
Maintaining hunger levels is another matter. At this point, you won't have many resources to help you, so for now, look for tall red mushrooms in the area and look around for smaller mushroom shoots that can be harvested and eaten. Over time, they will respawn, but very slowly, so eventually you will have to start fighting insects for some primary "meat", but more on that later.
Before moving too far forward, be sure to look along the thin branches, similar to the one that rests on the nearest baseball, to find the juice - as this resource is also important for further processing. For the next step, you need to research the Mystery Machine.
Find mysterious car
There are many more to explore in your area. From the field station, continue straight ahead on a winding path of wet dirt and you should find a red tick chewing on a mosquito corpse. Be sure to pick up the mosquito corpse (the tick won't mind) to get some new recipes, and then take a look at the large object further down the path in the clearing.
The large white object has a glass top with lots of internal circuitry that you can explore by entering the openings - but focus your attention on climbing up to the top of the device. It looks like three objects are pointed at the central raised platform, and there are various control dials and buttons nearby. One of these buttons is blinking - Target - so press it. Three adjacent large devices, towering above the grass, will emit lasers at three objects surrounding the platform. However, one laser does not seem to reach the object and the other one flashes on and off. To make things work, you need to solve both problems.
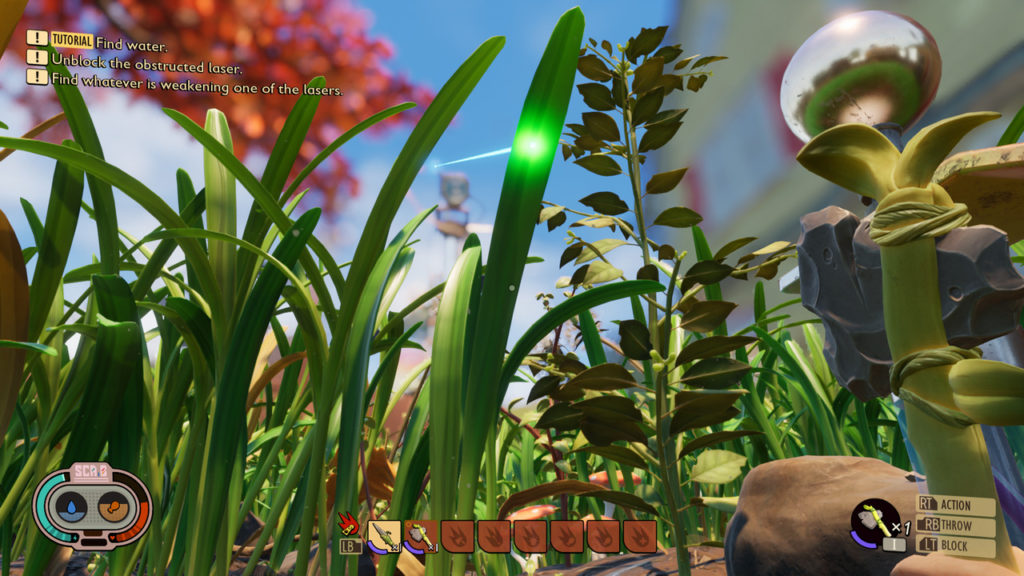
Unlock locked laser
Pay your attention to one laser that cannot reach the platform. The laser is blocked by a particularly annoying blade of grass, so you'll have to move it out of the way. Approaching the grass, you will find that there are not enough pebbles to knock it down and you need an axe.
Be sure to analyze the Pebblet at the Field Station to unlock the recipe for the Pebblet Axe, and also analyze the Plant Fiber to get the Woven Fiber recipe. You can find both pebbles and plant fiber scattered on the ground and dirt, so collect a few, as well as a few taller branches, until you have enough resources to work with.
Go to your inventory and select the "Materials" section in the "Crafting" tab to make a woven fiber using the 3 vegetable fibers in your inventory. You can now use this, along with 3 twigs and 2 pebbles, to craft a pebble ax in the Tools tab.
You can now approach the blade of grass that is blocking the laser (look up to make sure you've found the right one) and hit it a few times so that the blade of grass falls onto the boards. Note that these boards can be carried - but not in your inventory. Instead, you can stack them up and use them later to build camps and bases, and collecting these boards will allow you to start building walls and doors!
Build a shelter
At this point, it's probably a good idea to start building a shelter nearby. Hideouts can serve as a base of operations, a safe place to sleep when the bugs become more active and aggressive, and you can grow from a humble barn to a massive fort over time.
By now, you'll most likely have the Lean-to recipe in your inventory, but if it doesn't already appear, just look among the blades of grass for the three-leaf clover and chop it down like you did with the grass stalk. When they fall, you can grab and save each of the clover leaves, which should give you the recipe if you haven't already.
With three clover leaves in hand and a few twigs, find a spot not too far from the Mystery Machine to set up Lean-To. Viewpoints are ideal, but as you expand, you may find a better spot that suits your needs. In the meantime, go to your crafting menu and select Lean-to. For large projects such as walls, doors, and roofs, you can record where you want the object to be placed. Confirm its location and then exit the crafting menu and the blue outline will remain - even if you don't have all the ingredients yet, you can throw the ones you have into the blueprint.
Once you have everything you need, complete the blueprint and the object is complete. If you want to go beyond a simple bed, feel free to place walls and a door around your chosen spot and then interact with the slope and you can sleep the night away. This will also allow you to set a respawn location if you die - instead of spawning at the last autosave point. You must also craft and place a marker here - otherwise you won't be able to easily find your hideout again using the map!
While you're chopping the herb, be sure to break up some dry herb to learn how to make a cooking spit. You will be able to cook the raw insect bits you get to create real meals that reduce the rate at which you get hungry.
Find what weakens one of the lasers
When one laser source is set up correctly, you need to find out why the other is not working at full power. For this excursion it is recommended to make a spear with pebbles and some fiber bandages with sap found on small twigs. It's also a good idea to get enough sap to create a torch, since you'll be gathering a short distance underground.
Look up into the sky to determine where the laser is coming from, and make your way through the thick grass until you reach the base of the emitter. You'll find it to the right of the baseball you passed by at the beginning of your adventure - just look at the kart.
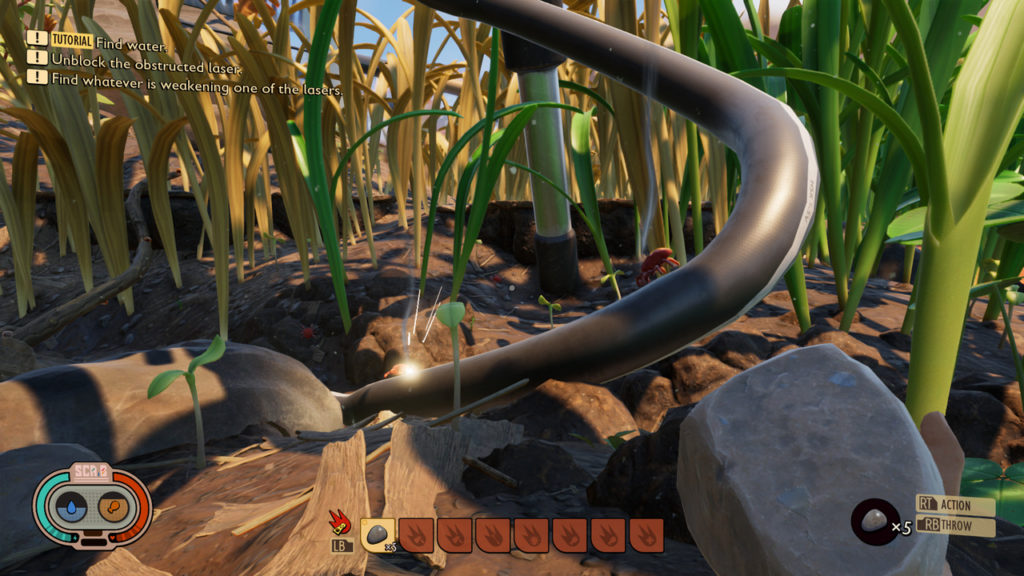
When you get close to the object, you will find the source of the problem - the mites are chewing on the cable, causing it to short out. You will need to clear the entire length of the cable of all mites - and don't expect them to graciously accept your intrusion.
The wire-gnawing ticks won't really fight back, but they will signal for help to a few wandering ticks in the area - and the battle music should alert you to the upcoming battle. Ready your spear or ax and make some quick attacks, but be prepared to block their light bites. If you can time it right, you can block all damage by blocking right before hitting - which can help you ignore incoming damage.
Keep an eye on the wires as they hang from the laser emitter and follow them so they lead to a small opening in the cave. This is the moment when you want to prepare a torch that you can use along with your main weapon. Keep pushing back the ticks on the cable to the left, guarding against any stray ticks rising up from the depths to fight you.
When you reach the end of the cave, you will find some bioluminescent slime molds above the last mites. Feel free to grab a Slime Mold as you can make replacement burners out of them. There are also several square pieces of minerals called quartzite here. If you have the resources to craft a Pebblet Hammer, you can break the minerals apart to get additional materials used to make Repair Tools. Also, if you make your way through the mineral blocks, you can find a small tunnel passage leading to a new UI shell for your SCA.B. - which you can change in the OS settings. When you're ready, return to further investigation of the Mysterious Machine.
Re-explore the mysterious machine
Now that all three lasers are working at 100% efficiency, it's time to return to this mysterious machine in the middle of the grass. Climb back onto the car and look next to the last button pressed - this time the second "Activate" button. Press the button and see what happens next!
Investigate oak explosion
After an awesome cutscene, a line of smoke will lead you to a tall oak tree on one side, where a big explosion has scattered around a piece of the tree. The oak tree in question is located to the northeast of the Mystery Machine and this will be your next objective.
As you might expect, the lands to the north can get more dangerous, so be sure to set up a good spawn cover if the worst happens, and make sure your gear isn't going to break before you leave. You also don't want to travel at night - as the spiders are more active and if you come face to face with a wolf spider you'll be dead in one hit!
As you head north, keep your sights on the oak tree until you find a large lantern at its base, as well as a new location - Abandoned Ant Hill. Walk right around the hill and the lantern around the base of the tree - using the branches and roots to stay away from the first floor in case there are some aggressive insects roaming around. The oak tree is also a great place to find acorns and break them open with a hammer to get edible acorn pieces, as well as other crafting materials.
On the other side of the tree, look for purple smoke rising from under some rocks and leaves to find debris in front of the entrance to the lab among the roots.
Look for Oak Lab
Once in the lab, go down the corridor to a large room with a purple "Pure Science" display. You can't interact with it, but if you ever see any purple objects in the world, you can collect them for more Pure Science. In the meantime, grab the audio log marked BTU 01 and then look at the far terminal up the stairs to find a lever and some colored buttons.
To open a nearby door, you need to set all the lights to "green" and then pull the lever. If you haven't touched them yet, press the red top left button to rotate the buttons to the right and below the red one, then press the middle bottom button to rotate it and all the surrounding green ones to get the full set.
Pull the lever to the left and the door will open. This may cause a new threat to emerge - a floating robot named TAYZ. T. This bot is no joke, it has two main attacks - a triple kick ending with a spin, and a longer left arm kick. Both attacks can go a long way, but leave him vulnerable to being countered. TAYZ T moves quite slowly and cannot move while attacking, you can dodge backwards before attacking.
Defeating TISE will earn you some Pure Science and you can find more in the room on the left where some 9V batteries are dead.
Enter the next large room and you'll find an overturned robot - but this one is friendly. Help BURG and he will briefly tell you what is going on in this place.
Note that this is where the main "Grounded" story technically ends in this part of Early Access. You can still take daily quests from BURG. L, but nothing else will advance the plot at this time.
Be sure to talk to BURG. L to get a little more information from him, including some backstory, and the ability to complete daily quests in exchange for Raw Science. Speaking of Raw Science rewards, look on the ground next to him to find a BURG in the Meadows. L Chip, and then ask to exchange Raw Science for rewards. He will now sell you plans for even more building options and other tool upgrades!
Be sure to check out the last room in Oak's lab as it has more Raw Science materials, another analyzer to use, and a second audio log called BTU 02.
Was the article helpful?


