Hellpoint Walkthrough Guide

Welcome to the complete walkthrough guide for Souls-like sci-fi Action RPG hellpoint. This guide will help you get through the whole game, making sure we see everything, rob everyone, kill everyone and everything we need to complete 100% of the game.

Please edit the guide or contact us if something is missing, you have an alternative strategy or any advice you would like to give.
To use this guide, you can look at its content (contents button at the top of the page). You can refer to the content section for links to all key sections of the manual.
Посольство
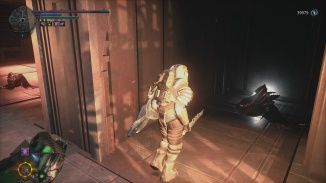
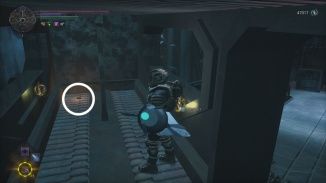
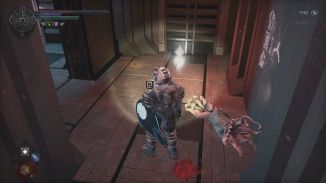
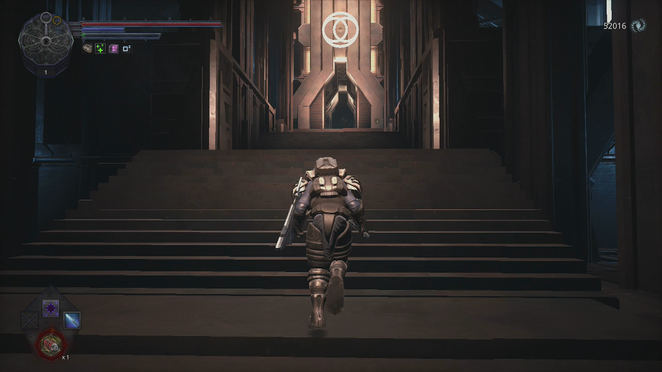
From the start, head down the stairs and grab the Healing Injection from the pedestal below. Continue up the next ladder and through the open door at the top.
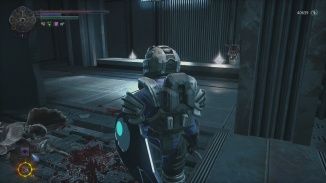
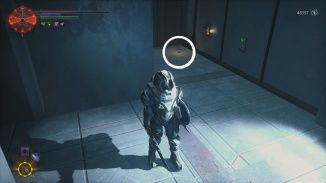
As you enter, the door at the far end of the hall will open. On the left wall there is another open door with a loot cube with 333 axions . Continue through the open doorway.
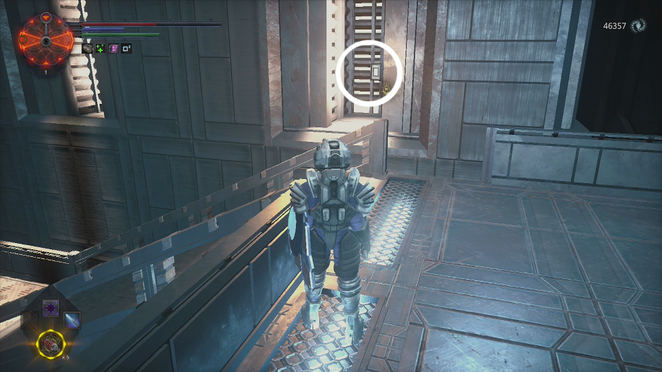
At the end of the room, you will find that the door on the left is currently locked. Thus, examine the green handprint on one of the columns opposite the entry point for a clue and interact with the glowing panel next to it to open the blinds. Jump over the ledge here to reach the lower platform.
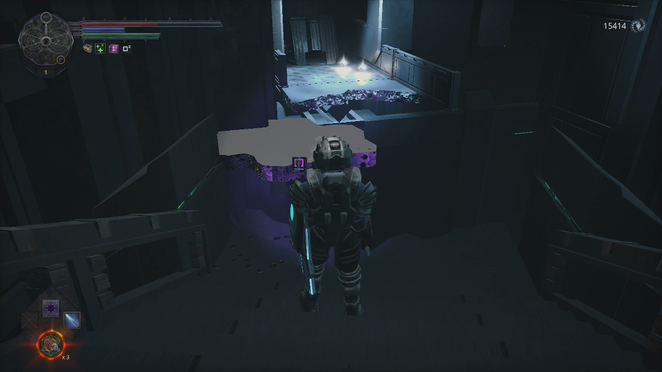
Exist Violation (Embassy - break) . Approach and interact with it to stabilize it.
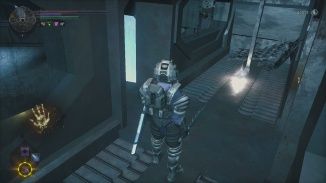
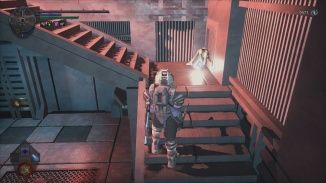
Pick up Weapon - Ax from the ground near the Gap and arm it. Continue down the next series of stairs and interact with the green hands to get a hint on the go (strong/weak attack and block). At the bottom you will meet your first enemy.
Here will be the first enemy, collecting a bunch of garbage. Attack him and practice your attacks. Go across the narrow bridge to the far end of the room. There is a second enemy here that will be patrolling and coming out of this area through the stairs at the back.
Jump through the gap at the top of the stairs and enter the door ahead.
When you enter, you will see an enemy in the back, in the right corner. However, when you approach it, the second one will crawl out of the vent on the right and try to ambush you. Deal with him first before calming the first one (who should passively watch until you get close).
Exit the room and follow the path to the right until you find a gap. Jump into the box below. Jump through the hole to get to the bottom passage and defeat the enemy here. Follow the passage to the end to find a ladder leading down.
At the top of this ladder are two more opponents, one will patrol in the hallway where you are and back towards the ladder, while the other will stand against the wall until you get close to him. Deal with them one by one.
Ignore the stairs for now and go around the wall to find another staircase leading up and a passage leading to the left. There is another enemy in this passage armed with throwing weapons. Get him out of the hallway and defeat him.
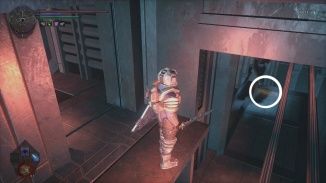
Enter the hallway and interact with the Exo-Lift on the left to get to the ledge above. Defeat the bastard here and look for the golden glow in the nearest corner to collect 1x coins . Run and jump to the top ledge on the other side of the corridor. Defeat an enemy here with a plasma weapon and take the loot cube he was guarding with 99 axions . Drop down into the corridor below and grab the loot cube at the end of the passage for Weapons - Column . On the left, there is a green panel that we can open.
Return to the stairs leading down and exit the door. Kill the Tool Victim on the left. Use the Exo Elevator to get to the ledge above.
Take a look at the room upstairs. The lower levels are mostly filled with enemies, so let's try doing something sneaky first and get some loot to boot.
Run and jump to the next platform ahead. There are two exo-elevators on this platform, one obvious, the other in the shadows on the left. Use the darkened one first to find the golden loot cube with storage key INB .
Use the other Exo-Lift to go down to the room below. Send the Tool Sacrifice here - just be careful as you can pull two more through the open door (they patrol past it). Take the Loot Cube for 333 axions . Exit through the door to the left of the Loot Cube - watch out for another patrol victim.
After leaving, you will see a heavily guarded room on the right with a green panel by the door along the left wall (this is where we want to go in the end). Right in front of you is a lighted staircase, and to the left is a dead end. You can talk to the NPC behind the fence at the dead end, but he won't do anything to you.
If you look along the wall to the left of the "friendly" character, you'll see a door-shaped marking. There is a secret door here. Interact with it by opening it. Inside there is an exo-elevator. He will take you upstairs.
When you get up, look to the right to find another secret door that we can open. Inside 1x coin and a gold loot cube with Port Issoudun credentials . Exit the small room and follow the path to find a Loot Cube body. Model Number: Demon Cannon and an occult station.
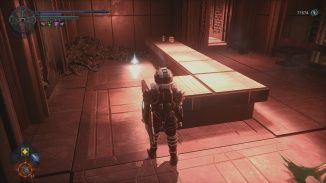
Note. Occult Stations are much the same as Tech Stations (which we'll find in the next zone, the Observatory) and are essentially 3D printers that allow you to use your resources to print new equipment. Here we can do several things, including:
- ➤Technological Resources - We can break down all of our purchased resources into usable reagents.
- Dismantling - We can recycle any unused armor/weapons we have collected into usable reagents.
- Model Printing - We will be able to print any sample models found provided we have the required reagents - however these are more limited to the occult style mechanism.
Drop down the abyss on the stairs behind the occult station to drop down to the ledge below. Take the Loot Cube for 777 Axions . Jump down to the path below.
This path leads to a path back to the box we descended to earlier. Enter the door and take the loot cube from 222 axions . Climb down the stairs to be back behind the gate with the "friendly" Tool Victim.
It's time to clear the main area. Kill enemies in a densely populated room. Once the area is free, check the open door along the wall to the right of the green panel - there's another bastard here that will try to ambush you. Defeat him and take the loot cube for 222 axions .
Right between this door and the larger one at the end of the room is a small passage with another Cube. Luta in it with 1x Raw Inselium . Enter the large door and follow the short passage to the end to find a loot cube with 111 axions . This room has a locked door at the top of the ramp. This is a shortcut that can be opened from the other side.
Return to the green panel and interact with it. This will set off an alarm and summon all nearby enemies that you haven't defeated to your location. Fight them and after a short time the door will open. Interact with the floating sphere inside - it turns out there is an elevator in the room!
Exit when you reach the next floor.
Exit the door leading to the main corridor. To the left is a staircase leading to the boss. To the right is a shortcut and some loot. A large Guardian patrols up and down to the right of the entry point.
Guardians are large, statue-like enemies armed with a large Cross Shield and a sword. They have several melee attacks, including 3-4 swings, a lunge, and a punch. They can also stick their sword into the ground and cause 1-5 bursts of energy to come out from under your character. Since melee attacks can deal tons of damage, at this point it's a smart move to stay away from them and have them use an energy blast attack that will allow you to jump across the entire area and backstab a few times before they recover. Repeat as needed to defeat them.
After defeating the first Guardian, continue up the main hall to find an enemy up ahead between two doors. Defeat him too. Grab a loot cube here for 111 axions . The left door leads to a new area that we don't have access to yet - Ascended Dominion. The right door will open a shortcut back to Rift (Embassy) - there is also a Cube Luta с 1 x Inselium Wand .
Optional study - Find the Embassy vault and EVA suit:
We took INB storage key before, and now is the time to use it. As you head towards the already open door back to the Rift, look along the left wall for a door-shaped recess. Approach and interact with it to find a secret passage.
In the room on the right, you will encounter a new type of enemy - flying fish. This darkened room has 3-4 flying fish and another 3-4 tool victims (including one with a shield). Go through this carefully to avoid an ambush. In the back, to the right of the first room filled with enemies, is a loot cube with 1x carbon waste . Continue down the stairs.
On the floor below there are two more enemies and two more Flying Fish guarding the Loot Cube with 1x Carbon Scraps . Continue down the stairs to the lowest level. Hiding among the crates on the right are two Flying Fish and a Tool Victim, a Ranged Victim and a second fish in a small hallway on the right side of the area.
Opposite the stairs leading to the airlock is an unusual looking door. Head over here, click the blue orb inside, and exit through the next door to leave the station.
Once outside, follow the ledge to the right and jump over the first gap. When you see a slanted beam on the passage ahead, jump over it and then look around the corner to the right to find a loot cube with armor set - broken EVA (chest, gloves, leggings, helmet). Get back inside quickly.
After returning through the gateway, look at the stairs we lowered earlier. On the left there are several boxes (a flying fish used to hide between them). Behind them in the left rear corner is a small square platform - this is a hidden elevator. Stand on it and interact with it to go down to the room below.
Find a corpse ahead to get a loot cube with bones Material: bones, and then open the gate behind him using your INB storage key . Grab a loot cube here for Healing . We can exit through the gate on the left.
There are also three unlocked/open doors along the wall opposite the starting entry point. Enter the farthest door to the right of the entry point and defeat the enemy in the large room. Take a turn at the far end to reach a room with a pit - right inside the doorway here is a loot cube with 111 axions . Go to the smaller room behind the pit. Take the loot cube from the corpse here for weapons - ceremonial dagger . Return to the main corridor.
Go to the farthest door on the opposite wall (to the right of the stairs to the boss at the end of the hall). Inside, open the next door and draw out two enemies who will spot you from the room and fight them. Enter the room, among the boxes on the right there is another enemy, and on the back right there is another one. Clear them all and grab a couple of loot cubes here for models: cross shield и 1x refined carbon .
Approach the orange mist at the top of the stairs and interact with it to trigger the first boss fight in the game.
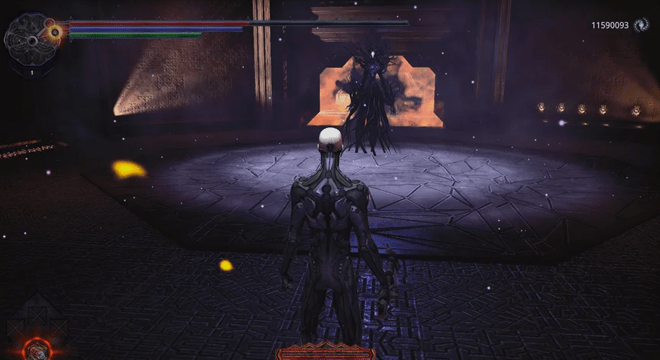
Archon Slaver
The Slaver is a boss encountered at the end of the starting area of the Embassy. He uses his claws and powerful energy attacks to strike from a distance. Standing too close to the boss will also lower your body temperature and slow down your character's movements. Use heaters around the room to get warm again!
When fighting him, simply dodge to the side using CTRL and attack once with a heavy blow. Repeat actions until victory.
Remember that when you deal damage, you gradually restore healing injections.
After the victory, inspect the console and talk to the Architect. There will be an omnicube in the corridor behind the control panel. Take it and through ESC install a new program. Move through the door to the Observatory.
Observatory
After entering the observatory, go up the stairs in front. We will reach a large circular path that has seen better days. There are cracks to the left and right that we can jump over or fall over to reach the area below (which we'll do later). There are also a pair of doors, one on the right and one on the left, with stairwells that lead to the same areas.
There is no loot on this level, so let's first enter the door on the left (from the top of the stairs). In this stairwell is the Cube Luta с 33 Axions . Climb the stairs to the upper level of the observatory.
After exiting, take the loot cube on the left 1x refined carbon . Jump through the gap on the right. Enter the open door on the left to reach a small balcony with a Vessel Loot Cube Mind: Unknown . Go back through the hole and follow the left path to the end to find a locked door to the Gallery. Next to this door on the wall is an Exo-Lift leading to a small service area containing some information data and a loot cube 999 axions .
Note: write down the code in the info point here - for me it was D Pattern Eye Three: 5440 3583 . We'll need to type this (and some other related codes) into the console later for some goodies.
Enter the open door before the Exo-lift reaches the balcony too. Notice the white flag ahead. Make your way to the chamber and jump off the ledge to reach the balcony platform below. There is a Loot Cube here with 1x carbon waste . From here, lower the edge again (carefully!) to get to the bottom ring.
Drive past the stairs leading to a fancy platform at the bottom and to the far side of the ring - there is a cube here Luta с 333 axions . Note the restricted area behind the gate (this is a later issue!). Return to the stairs and go down.
Before crossing the bridge ahead, take the smaller ladder on either side of the main ladder to another ring below it. You will see a large number of green handprints on the walls - these will be most of the clues you have found so far, as well as a few new ones. Follow this bottom ring to the end to get a loot cube with 1x carbon waste . The door through the gap on the right is not yet open (requires Port Issoudun credentials).
Go back up the stairs and approach the control panel forward. Interact with this to open the observatory and display the Rift. Look on the back of this panel for an inscription that we can check for information point .
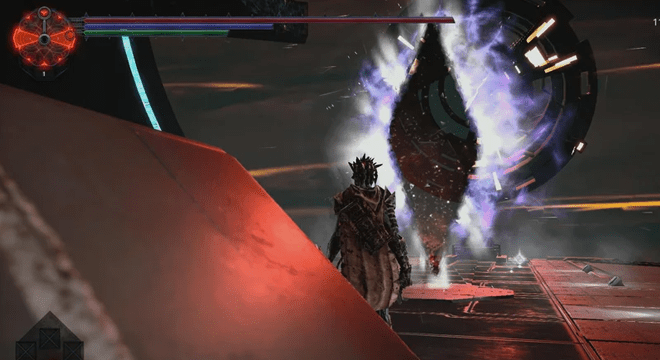
Take the loot cube from the console to Armor - Ancient Warrior Pack (boots, mittens, armor and helmet). Activate Rift (Observatory - Runway) for use.
Grab a couple of loot cubes from the edge of the platform ahead to get Reflex Melee Conductor и Strength Melee Conductor . Interact with the Weapon Editor here. We will be able to modify the weapon by connecting one of the conductors we just purchased.
Go down one of the stairs on the observation deck. There is a cube in the area below Luta с weapon - Glaive of Officers . It also has a medical station and a technical station.
Go behind the stairs you came down from. At the end of each path you will see a gap in the railing. Jump down to the ledge below. Look under the main platform to see a darkened ledge on the support structure that we can cross over. There is loot cube with 333 axions. Return to the previous ledges.
There is a vertical downward trajectory here, consisting of a series of ledges that we should be able to jump or jump onto, and a loot cube containing 1x carbon waste on the run. Below is 1x coin and two more Cuba production from path и 333 axions . There is an Exo-Lift here where we can run and jump to get to the inner area. There is a friendly NPC here. Talk to him and offer him food ( ration ) and it will give you something in return:
- ➤Material: antimatter gyroscope
- ➤Material: black tempered
- ➤Material: crystal lenses
- ➤Material: Earth Minerals
Open one of the doors on either side of the tool's victim to return to the area below the Intruder.
Go back up the stairs to the Breach. From here, if you look at those locked gates that we noted earlier, you will find that at this moment they are lit with green lights, and that the gate is gone. Head to this location to find three doors - each of them leads to the same place - area arcology .
arcology
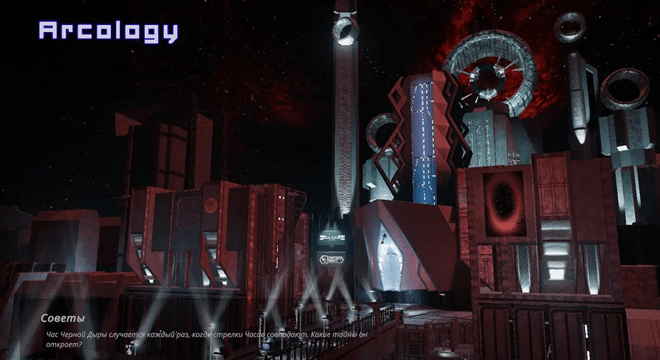
After entering Arcology, activate the panel on the large circular platform in front. This is the elevator that will take you to the main Arcology area. Once you reach the bottom, head up the ladder to the top to find fault (arcology - funicular), which we can open.
Climb up the unlocked stairs up to the floor above. At the far end of the room we want to get to is a lift platform. In this area, you'll see a series of glass panels overlooking the elevator below, with three enemies standing in front of them. The rest of the room has four more patrols in the trees and between the drawers/dividers. It's a good idea to follow the outer wall around the room to take out the patrolmen.
Look at the debris on the right side of the elevator platform to find a loot cube with weapon - rail и firearms conductor .
Ride the elevator to the walkway above. Kill enemies and collect three Cuba production for 66 axions , 1 raw inselia и 1 carbon waste . Use the control panel here to open the large shutters in the room opposite the windows.
Before heading down, head back to where we fought the ranged enemy on the path. Look for the nearest stack of crates. We can jump on them and reach the ledge above. Jump over a series of narrow beams (don't fall - you will die!), and at the end there is a cube with prey and magnifying glasses .
Return to the lower level.
When all the shutters are open, you will see that there are many enemies waiting for you outside... these are just the ones you can see. Exit through one of the open doors at the end and work your way along the outside to the other end, there are seven tool victims here that we can take out and defeat 1-2 at a time. Along the way, take a couple of loot cubes for 1x coal waste и 1x raw inselia .
Go down the big stairs. On the right is Loot's cube with a daring effigy. Ahead you will see a large bridge with a boss.
Before you cross the bridge, notice the smaller steps on either side leading to the passage below. There is a Cube here Luta с 1x Inselium Wand and another cube Luta с 333 Axions at the top of the left stairs.
Approach the fog on the bridge and go through to trigger a boss fight.
sky creature
The Sky Beast is a large four-legged monster that guards the bridge from the elevator to the main section of the Arcanology area. It uses lunge attacks and its two spiky tentacles to deal damage both up close and from a distance.
As with the previous opponent, the best tactic is not to run, but to dodge to the side and attack 1-2 times. This is enough to dodge most attacks. If stamina is low, try to go around a little more in a circle after dodging, without holding Shift. When you win, activate the rift.
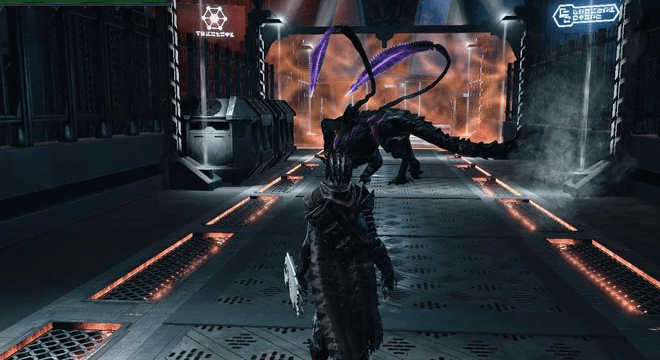
After defeating the Sky Creature, you will receive 4500 Axions и Arcology Restricted Passport . Rift (Arcology - Customs Bridge) will appear at the far end.
After crossing the bridge, in front of you is a building and a panel in front of it. Before using this, let's grab some goodies: look to the left to find a door we can enter. There is a green switch here that will open the door. Keep following this path and go all the way to the end to find a loot cube with health module .
Look back towards the bridge to find a loot cube to the right of the end of the bridge for weapons - Lost ax . To the right of this there is a staircase leading down. Look under the stairs for search a new enemy flayer and a loot cube with 1x raw inselium .
Use the Exo-lift on this platform to get down to the smaller ledge below. Look at the wall under the bridge for information point . Jump across the small gap in the passage opposite to find a Loot Cube with 999 axions . Follow the main path to the end to find the Exo-Lift going up. There are two tool victims at the top, guarding a pair of dice with booty . Model: Infused Column и 222 Axions .
Return to the breakout point. Let's continue this time. Enter the door with the green panel. When you enter you will find 1x coins . Come to psychocube ahead.
Climb up the stairs and through the narrow passage. Take the loot here for Breach Synchronizer . The green door is the elevator, which is currently disabled, so head back outside.
Approach and interact with the control panel here. It will scan your Arcology Passport. He will ask you where you want to go - Son area or Ikari Walkways. Whatever you choose, one of the doors ahead will open. We decided to head to the Son area first for the purposes of this guide.
Enter the door leading to the Son District.
Go down the exo elevator and take the door at the bottom. Continue down the corridor until you reach a red room. This place consists of narrow passages above what appears to be a bottomless pit. So watch your step!
Kill the first two victims of the tool and go to the first circular platform. There is a Loot Cube here with 1x carbon waste . Defeat the next enemy (far battle) and go through the dead end a ladder passing next to it, for a loot cube with 1x Raw Inselium . Follow the path to the end and up the stairs to the large room above.
There are several tool victims in this upper room, so let's approach carefully. From the top of the stairs, go back for them and defeat the enemy here. Go around the back of the large illuminated cube structure and give another one a beard. Pay attention to the debris on the left - here, after all, we need to go, but first we need to get something.
Two more hostile characters will be patrolling this side of the illuminated cube sculpture, so defeat them. Then go up to the front of the sculpture and defeat two groups of two enemies. Take a couple of loot cubes they were guarding for 1x carbon waste и material: accelerator .
Go back behind the cube sculpture and up the short stairs next to the door. Kill sacrifice Tool that crawls out of the grate and then grab the Cube prey behind 444 Axion .
Pass by a pile of garbage and fallen shipping crates. You will see two doors in this area. The one on the left has five enemies (two armed, one ranged) - we can take out those 1-2 at a time. The door directly in front of us is protected by the enemy.
Behind the boxes right in front of us is a cube Luta с 444 axions . Look at the stack of crates to the left of the heavily guarded door and find a loot cube with 1x wand of inselium . There is a cliff to the right of the heavily guarded door. Look down to determine the area we can get into.
Jump over the gap here for another Loot Cube with Shield - Son's Bastion и Rift (Arcology - Western Square) . Nearby there is an exo-elevator. Use this to climb up and jump over the wall to get to the footpaths earlier.
Climb back up to the area we just cleared and go through the door the guy with the shield was guarding. Use the Exo-Lift inside to reach the area above. Jump across the gap to get to the next platform.
When you land, take the loot cube on the left 1x Inselium Rod . Make your way up this elevated path to the first trash heap, defeating three Cannon Victims along the way. Just past them, you'll see some slanted shipping crates on the right. Climb them up and look back in the direction we came from - jump here to another set of crates and then to a wall section with a Loot Cube containing Material: White temper .
Return to the bridge. Behind the debris we noted earlier, there are three ranged weapon casualties ahead. Get close enough for them to spot you, then quickly retreat and hide behind a nearby shipping container. Let them come to you and set up an ambush.
Once the area is free, look at the end of the bridge for a loot cube with a set of armor and nerves (leggings, gloves, torso and mask). Jump across the gap and go into the corridor on the right.
Defeat the armed Tool Victim in the first room and then carefully go through the door - there are a couple of armed Tool Victims here that will attack when you enter. Drop down into the room at the end of this corridor and use the Exo-Lift to reach another area below.
The door at the end of the lower corridor turns into a tunnel where we can go left or right. The right path leads to a door that we can open to create a shortcut (which we need to make) back to the area with all the dropped crates and the illuminated cube sculpture. Walk left to continue.
At the end of the corridor you will find a ladder leading up and a small storage room with a loot cube with weapon - Scythe Demon . Halfway up the stairs is the Cube Luta с Omnicube Light . It can be a kind of flashlight to help navigate dark areas. Climb up the stairs.
At the top we will reach a hole. There are rooms on the left and on the right. In the right room are two large square rooms connected by a passage between them. There are four tool victims in the opening room and four more at the far end of the room - pull them 1-2 at a time to deal with them safely.
Once cleared, look for a small vault between two large areas with a new enemy - the flying fish. Take the Loot Cube for 1x Raw Inselia . In the second large area at the back is the Loot Cube, on the right, containing 222 axions . Come back from the room - let's try something else.
There are four tool victims in the left room (two with shields, one armed, one far) and we can take them out one at a time. At the far end of this room is a darkened area with Shield Luta Cuba - Scrapped Heat Shield . Look below the edge platform to determine the area we can lower down.
Interact with the control panel on the wall here for information point .
Jump across the small gap to the left of the Info Point to reach a darkened area ahead. There are two open doorways in this location, on the back right is a loot cube with 222 axions, and in the left hallway there is a gap that you can jump over and a cube with booty ahead with Power conductor + 1 .
From this loot cube, we can head left or right. The right passage leads to a door that we can open to create a shortcut to the upper level. The left passage leads to the stairs and at the top we will find Rift (Arcology - Kondo Ruins), which need to open.
Interact with the panel on the wall here to travel to the area Dream .
Son District
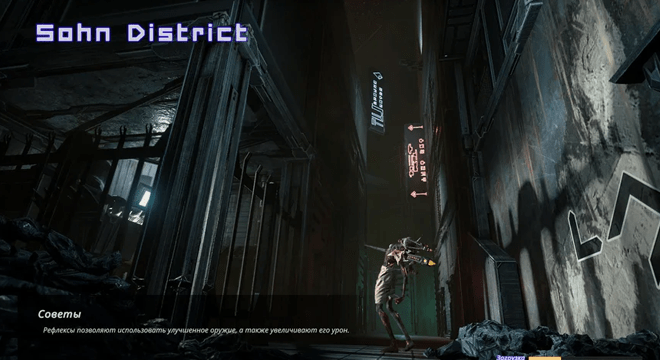
After entering the Son area, go down the stairs and use the Exo-Lift. When you reach the bottom, you will find yourself on a pile of corpses. Nearby there is Rift (Son District - Corpse Pit), which we can activate.
Exit the corpse pit until you reach an open area.
Across the alley from the bottom of the stairs, you will see a building with ground-level windows allowing you to look inside. From here we can go left or right.
First go right and jump into the first open doorway. There is a Loot Cube here, but when you get close to it, the Tool Victim will crawl out of the hole behind you and try to hit you. Deal with him and take it loot cube for 111 axions .
Return to the alley and continue around the next corner. Deal with the Flying Fish here and the number of instrument victims in the future.
Returning to the stairs, we went down in front of the window and headed to the left. Following the main path, you will encounter a patrol demon. After defeating him, keep going through the open gate, and when you pass under the hanging passage on the right, two enemies will jump down, including the Spiked Tool Victim - these guys are similar to the standard version, but will charge up and glow red before launching a projectile with thorns in you. Fight them and then defeat the second patrol demon. The area should now be relatively free of enemies.
From the gate through which we passed, there is a staircase to the left. At the top of this loot cube is 44 axions . From the top of the stairs, look down into the street and you'll see a small ledge on the left that we can jump onto. Follow this around the corner and jump to the next ledge. Kill the Tool Victim that jumps out of the nearest door to attack you. Check the room he was guarding to find the Loot Cube with 1x Fearful Effigy .
A little further down the street is a small room with a victim tool inside. He guards a switch that opens a gate near his location. Just outside the gate you will see an orange mist.
Just past this area, you'll see a functional door with a slightly bluish tint to the left - we can explore here. We'll be back to do that in a minute. For now, let's continue down the street. Further down the street, there is a door that we can open on the right, leading to an area behind the glass we saw when entering this lower area (however, this requires entering the authority of the Ministry). Finally, at the very end of the roadway, there are some crates here that we can jump on to reach the ledge above. Here is a Loot Cube with armor - Arisen Robe и Armor - Arisen Coat .
Return to the blue door and go inside. Move inside and exit to the far side. Cross the metal bridge here and deal with the victim of the tool. On the far side of the bridge, we can go left or right.
First enter the door on the right and go down the Exo-Lift. Go through the door to reach a spot under the short bridge we just crossed. There's a Tool Sacrifice here and two Cuba Luta с 111 Axions и Shield - decrepit Shield Warrior . Go back and to the end of the bridge.
Now let's take the left path. Defeat the Tool Sacrifice ahead. We will come to the crossroads again. Note that the correct path leads to the misty door we saw earlier. First, take the left path to the room below. As you enter, the door will close behind you and three tool victims will fall off the roof. Defeat them and collect a loot cube here for weapons - railgun .
Return to the previous intersection and follow the correct path. When you turn the corner, there will be two tool victims in front of you (one in ranged combat). As you get closer, a flying fish will appear around the corner to the right. Pay attention to the loot cube behind the fence on the left (we'll get it soon, but we need to do something tricky to open the area). For now, follow the main path (ignore the side passage on the right for now) and beat a few more victims to get to the mist door again.
Let's explore the area. There is no boss here, but there is an ambush. As soon as you enter the area, a lot of Violations will appear and enemies will start pouring out of them. These include 4-5 victims with spiked tools, 4-5 victims with normal tools, and eventually a demon. Luckily, they won't appear all at once, but will come in several at a time. Keep moving and try not to get cornered - use the Exo-Lift next to the doorway we entered to get to a higher platform if you need a breather or regroup. Once enough enemies have died, the misty doors will disappear.
After escaping the ambush, there is a lot of research to be done. Head down the tunnel away from the street we cleared earlier to see some moving cargo containers on an overhead conveyor.
Go forward into this corridor, here you will probably be attacked from both sides. On the right there will be a Victim with thorns and weapons with loot cubes - Saber of the Wastes . and on the left is a spiked victim and two regulars. Go into the room straight ahead and defeat the two Victims, for the production cube with 222 axions .
Go left from the corner and you will see a flying fish ahead. Pay attention to the side door on the right. There are also two spiked victims and a flying fish. Take the Loot Cube for 44 axions .
Return to the main corridor and look along the left wall for a secret door-shaped passage behind a pile of corpses. Interact with this to reveal a hidden area. In this small side room, find a hole in the floor and drop down. There are four Flying Fish in the dark room below. Clear them and go up the stairs to find an exo-elevator. Open the door at the top of the Exo-Lift to find Rift (Sona Area - Balcony) which we can open.
From the Breach, drop down to the area below. We will be where we used to see the Flying Fish at the end of the corridor - two Flying Fish buddies will be with him. Take them all out and follow the passage to the end. Kill the tool victim at the bottom of the stairs.
Before continuing, look back up the stairs to see a smaller set on the right leading down to a lower area. Watch out for the spike victim under the stairs on the left when you reach the bottom. There are four Flying Fish and another victim with spikes. Defeat them all and take the loot cube in the center of the area for Conductor firearms + 1 and another one under the stairs, which we lowered behind 444 axions .
Go back up the smaller stairs to the bottom of the larger set. Follow the passage to the end to find another orange mist door. It leads to the boss Ascended Conglomerate. We'll come back to this a little later.
Head back to where we fought the ambush and into the tunnel we came from. Take the side passage we ignored earlier. The first open door on the left has an exo-elevator inside. Take it upstairs. Jump over the gap right outside the door to find the Cube prey с 444 Axions at the base of the stairs opposite. Climb up to the roof. Wait away from the stairs and you will see the Demon and 3-4 Tool Victims waiting for you. If possible, wait until the Demon patrols down to the large roof area below and kills the smaller enemies first before chasing and dispatching the big boy.
Take the loot cube on the starting roof for 111 axions . Note the lever on the other side of the structure from it (this results in some loot after a minute). Drop down to the main roof below and grab another cube with booty с 666 axions . From the large skeletal altar-type structure on the roof, look to the far left corner of the roof. In this corner you should see an open window separated by a space. Jump over to this and look for scrap metal for the Loot Cube with Photonic Amplifier . Destroy the crates here and check on the wall information point .
Go back to where we saw the switch earlier. This opens a door at ground level directly below. We need to activate it and then run off the roof to reach the smaller ledge on the opposite side of the alley and then onto the ground and through the door before it closes. Inside is a Cube Luta с 9999 Axions . Use the switch here to escape.
Return to the roof. You should be able to spot another rooftop on the far side of the main street across the gap. Use the narrow metal beam on the left as a bridge to get to it. On this roof you will find a victim with thorns and two Cuba prey containing 444 axions и Dargas tower key .
Back at ground level, go past the exo-elevator door we just used. Follow the tunnel until it descends into a large empty room.
Enter the first door on the right and use the Exo-lift inside. This will take you to a small room with a loot cube containing a hostess mask and an occult station.
Jump in hole at the far end of the room to find another cube with booty с 444 axions . Jump down again to get to the floor and exit into a large room. There are several places to explore in this area - the hallway opposite the entry point and the stairs on the left side of the room.
First go to the stairs. Before climbing them, look at the wall at the bottom of the stairs to find a secret passage wall. Interact with it to open it. Follow to the end to get to the Booty Cube with weapon - Red Saber . Use the panel on the gate to open the way back to the overhead cargo conveyor corridor.
Return and go up the stairs. At the top, follow the ivy-colored wall on the left to find a doorway. Inside is a cube 777 axions . Go back past the stairs and up to the second set. A door will open at the top right. Ignore this for now and follow the path to the left. At the end of the cube Luta с 111 Axions . Go back to the stairs, look behind their top for a small ledge with a Loot Cube containing 222 axions .
Enter the door at the top of the stairs. Defeat the spiked victim up ahead and two more tool victims in the second part of the room. Interact with the green handprint on the wall here for information point .
Run from the door here and jump over to the next platform. Defeat the four Flying Fish here and take the Cube Luta, who they guarded for 222 Axions . Jump off this platform to see another misty gate ahead. We'll come back to this a little later.
Move in the opposite direction from the fog gate and around the first corner. There will be a door that can open on the left. Inside there are two normal tool victims and a pair of spiked victims. If you make too much noise, a couple of these guys will come to you. In the far right corner of this room is a Loot Cube with Shield - Apprentice Shield .
Go down the nearby exo-elevator. There's a Loot Cube here with 1x Inselium ingot . Use the Exo-Lift at the top of the next stairs to get to a door we can open. Do this and defeat 7-8 Tool Victims in front - you can select them 1-2 at a time, but if you get too enthusiastic they will most likely try to swamp you.
Once they are dead, you will see a large misty gate here. This is the same room we saw a few minutes ago. Yes, it's the Arisen Congregators boss again. Now that we've done most of the research and we've come across all three boss fight entry points... It's time - let's beat them.
Ascended Conglomerate
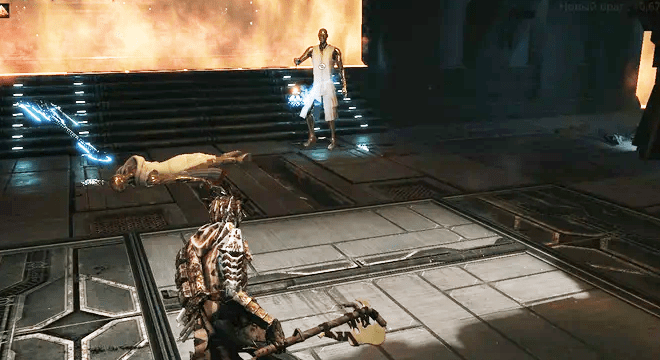
Arisen Congregators is a duo we'll be fighting at the same time. Each is armed with a glowing staff and will focus on dealing magic damage with projectiles while teleporting themselves around the area. The second is armed with a ball and chain and will focus more on melee attacks and be much more aggressive. Focus on splitting and conquering if possible, using pillars and two large stone platforms to block projectile attacks and separate the bosses from each other.
For winning the battle, you will receive a pass to the Ascended Dominion. The same location that was closed at the beginning of the game when you followed the first boss, Archon Slaver.
Continue up the stairs that the boss was guarding.
At the top of the stairs you will reach a large open area with a building ahead and to the right and another to the left. Ahead is a large staircase leading to the lower area, and two steps of a smaller staircase directly to the left/right leading to another, narrower lower zone.
The building on the left has an inactive elevator at ground level, but if you walk past the building and look around it, a darkened area will appear with two cubes prey containing 1 ration и 555 axions . Climb up the ladder on the side of the building on the right and enter the door at the top.
Inside you will find Rift (Sona Management Area) , a tech station, and a friendly NPC. Mention that you are "the author's offspring" and he will talk to you a little more.
Exit the building. Go to the opposite building with the inactive elevator and go left from the entry point. Kill the spiked victim by hiding around the corner, two tool victims that crawl out of the vents, and two spiked victims that fall from above. In this area, pay attention to the door with red lines - we will open it shortly. Follow this set path all the way to the end to reach the loot cube with 222 axions and a series of stairs leading down to a narrow path below.
Defeat the group of flying fish ahead (and possibly the patrolling spiked prey) and head up the stairs. At the top is a cube loot с 333 axions . Jump over the top of the stairs to reach the ledge behind them. Here, at the gate, there is another Loot Cube with 444 axions . Go back down the stairs.
Go past the first rung of the stairs and defeat all the flying fish. When you reach the wall, you can either go left or right. The right leads to more flying fish on either side of a barrier made up of scrap cubes that we can break and a dead end. The left path leads us down the stairs.
Drop down to the lower room and fight the lizard. These things are pretty well protected and have a number of devastating attacks. His melee attacks have serious range and usually come in small combos. He also uses a particularly nasty spinning lunge and a charge and then charges forward while slamming forward multiple times - both of which can seriously drain your health... or even kill you outright, so be careful. Lure him into doing a lunge/jump attack and then attack him once or twice before backing off and repeating the process.
After sending the Tool Raptor, use the blue panel to open the door with the red lines we marked earlier above. Climb the ladder and jump over to the far platform to get a loot cube from 666 axions . Use this ledge to climb back out of the hole.
Return to the door with red lines and find that it is open. When you enter, you will see another inactive elevator. There are stairs leading to the left or right of this place. To the left is a room with three victims with spikes and three flying fish that guard the cube prey, in which is 222 axions .
The correct staircase leads to a room with two victims with thorns , an ordinary victim with tools and a loot cube with 111 axions . Go through the door and take the loot cube from the small bridge outside for synchronizer hacking . From this bridge, look to the right and find another loot cube - jump over the beams to get to it - it contains 666 axions . Return to the bridge. The far door contains a golden loot cube with tram activation key . Follow the passage here to the very end for a loot cube with 444 axions . Drop out of the window here to reach the area below.
We will return to a large open area. Now head down the larger ladder in the center of this area. Below you will see a tram ahead. Enter the tram and interact with the console inside to get to Port of Issudon.
Port of Issoudon
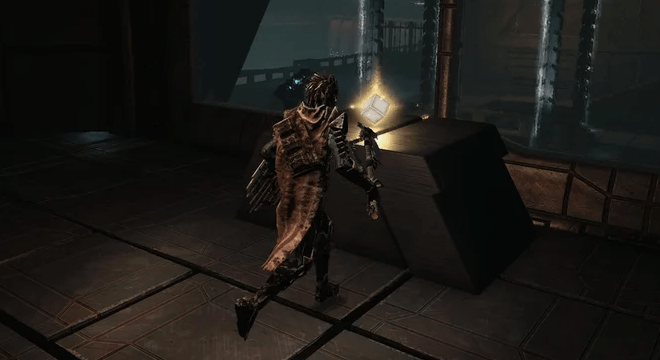
Once you reach Issoudun Port by tram from the Son District, you will be attacked by a new type of enemy - Thespian. These things have feverish growth for a head and are equipped with a large sword. Fight back.
Instead of taking the main path, look behind some crates on the left to find an exo-elevator leading down. In this lower area you will find a couple of loot cubes (one is hidden in some crates) with 1x Daring Effect и 1x Inselium Rod . There is also a door here, but it is currently locked.
Return to the Exo-Lift and follow the main path.
You will see a building with stairs leading to the second floor. There is also a bridge-like passage on the right with another new enemy - the Abomination. These guys have stretchy arms that they will use in a variety of ways - mainly by tying each other, doing melee attacks and headbutting. Watch it to feel its patterns and then take it away.
Take the loot cube to the right of the stairs to find 111 axions, and examine the writing on the wall next to the door to find information point . This door itself demands to be opened cargo credentials, so we'll come back to it later. Go back and up the stairs.
At the top of the stairs, immediately turn left and interact with the wall to find a small hidden room. It contains Coin x1 and Loot's Cube with Model Number: First Fool's Head . Exit the hidden area and go to the main room to see Rift (Port Issoudun - Dock Bay) ahead. Activate it.
Go outside and cross the bridge that was guarded by the Abomination. Here, behind the shipping containers, you can find a couple of loot cubes containing 1x purified carbon и 222 axions . Follow the path to the end to find two Thespians. Pull and fight them one by one. Go through the door they were guarding.
Inside you will find loot cubes containing 1x ration , 1x refined carbon и 1x refined carbon . There is also a golden loot cube that contains freight credentials .
Once you take the freight credentials, the door will close behind you and three Thespians will enter the area (two melee, one ranged). Protect yourself and fight them off. Use the Exo-Lift on the right side of the area (facing the exit) to find the switch upstairs to open the door. Return to the street.
Use the key " Freight Credentials" on the door under the Breach. Now we can go inside. Use the exo-lift and point the feeling hand down. Go to the large area ahead.
There is a raised walkway in this room that we will enter with the Thespian. On the left side of the room, there are two exits from the entry point and a, as well as a lower area below and to the right of the entry point with a couple of abominations and another Thespian.
Get down to the lower area first and defeat the enemies. Take a loot cube from 1x diamond ingot and use the Exo-Lift to reach the room above. At the top, fight the masturbation.
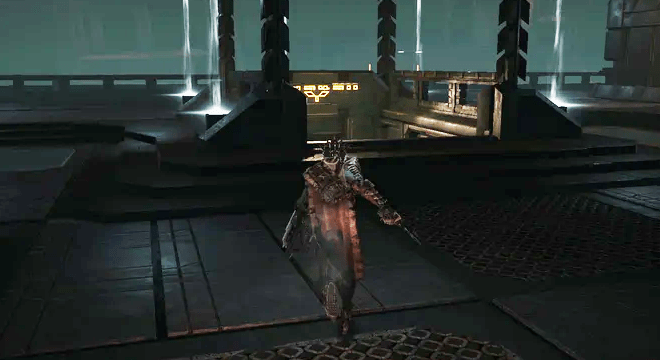
There is an open doorway opposite the top of the exo-elevator returning to the previous room. However, before using this, find a loot cube with material: black tempered and a second open door. Go through the door to find Thespian and another Exo-Lift that has a Loot Cube with Armor Model Plan - Revolutionary Warrior Set (Chest, Gloves, Leggings, Boots). There is also a new Rift (Port Issoudun - Silos) upstairs. The door to the bunkers is currently locked, so return to the main room below.
From the room we entered from the exo-elevator base from the cargo mandate door, head to the far left. There are two sets of stairs here. Let's first go down the pair on the left.
At the bottom of the stairs you will see a cube with gold loot. As you progress towards this, be careful as Lichen and a sentient hand or two hide in this area. There are also passages leading to the right and left with enemies in each, so be careful not to get too close or you'll pull them. If you look around the room, you will also find two regular loot cubes containing 1x carbon waste и 1x carbon waste . Grab the golden Loot Cube for credential stores A .
Heading towards the golden Loot Cube, go to the corridor leading to the left. This leads to a staircase. There are three Thespians and three Living Hands. At the bottom of the stairs is a loot cube with a model: Rebuilt Warrior Shield. Be careful - another Sentimental Hand will probably crawl out of the vent behind this one.
Follow the adjacent corridor for a couple of extra loot cubes containing material: charged prism и 1x inselium ingot . Use the Exo-lift at the end of the passage to get to the room above. Ignore the passage leading to the right - we'll take a look at it from the other side soon enough.
Return to the main room and take another ladder this time.
The right staircase leads down to a large open area with a five-sided pit in the center. The door on the right requires Vault credentials и credential stores B , to open. Next to the passage on the opposite side of the territory is a loot cube with 1x diamond ingot . Go through the door.
At the bottom of the short ladder you use to entry into the next room, on the left is another cube with booty с 888 axions . This area leads to a large hallway where we can go left or right.
First to the left. On your way along the main passage, look for a secret door on the wall to the right of the first of the two open doors on the right. Inside 1 coin и sinister monolith .
Exit the secret area with the Sinister Monolith and continue down the corridor - ignore the pair of doors leading to the side room on the right for now. A sentient hand will appear from here to attack us, so deal with it. There are a couple of Thespians in this main corridor and two more sentient hands (and one from the room at the end of the corridor will most likely join the party too).
Freed area, look behind the crates we passed to find a cube with booty с 1x Inseluim Rod . The room at the end of the passage contains two loot cubes that contain 1x carbon waste и anti-radiation injection . This room will contain either Sentient Hands or Thespians, depending on the mood of the game at the moment.
Exit the far side and jump over the gap - ahead you will see an area where we have the key Vault Credentials A. Jump over the next gap on the right. If you follow the narrow passage on the left you will reach the Exo-Lift, if you follow it to the right you will find hidden control panel (this opens an elevator nearby). Activate it. Take the exo lift upstairs. Kill the trucker here and get a golden loot cube for Key to the bunker .
Return down to the Exo-Lift and jump over to the ledge opposite the exit from the previous room. Look over to where we found the Key Vault Keys earlier, and along the left wall you'll see some niches. The first two contain vents that sentient hands can crawl out of, but the third has a unique type of floor tile. With the secret panel that we activated earlier, standing on this tile, we can press the interact button - this is a hidden elevator.
At the top there is a room with an abomination. When we fight him, several Thespians and sentient hands will also enter the room. Note that Abomination's attacks will damage them, so try to lure him into attacking to damage smaller enemies. Once the smaller enemies have been defeated, return your attention to the big boy.
Once you defeat the Abomination, continue through the door he was guarding. Look to the left at the base of the first set of stairs you descend to find a Loot Cube with Model Number: Second Fool's Head . Follow the path to the end to reach an elevated ledge overlooking the five-sided pit and the locked door we saw earlier. Grab the mining cube here for weapons - Thespian Hook .
Drop down and go back through the next room to the left again. This time, head into the room from the side of the passage we marked earlier. There are three Thespians here. If we use the second door (where we originally entered the corridor from) we can eliminate them one at a time. When they die, take a loot cube to weapon - red saber and use the exo lift they were guarding.
Once you reach the bottom of the elevator, a swarm of five sentient hands will move up the stairs from below. Protect yourself and fight off their attacks - fall back on the Exo-Lift if you need to regroup. After dealing with them, continue down the stairs. At the bottom of the stairs is a loot cube with a vessel mind: OB and a writing on the wall that we can examine for information point .
The right path leads to a staircase with an elevator at the top. The ladder is broken halfway down, but there is a cube right in front of the hole Luta с Model: Sewing Anlas .
Take the elevator down to the large room below. In the center of this bottom area is a large illuminated bridge with a sinkhole in the center and a golden loot cube on the far side. There is a tougher version of Thespian, armed with a scythe-like melee weapon on the far side.
Jump off the bridge to the right. Defeat the sentient hand that will emerge from the vent behind you and slowly move towards the bridge gap. There are two Thespians here - a patrol guy and a stationary guy. Pull them one by one.
Go around the left side of the first part of the bridge and look for two more Thespians in the small lower area, guarding a loot cube with Model: Melee Conduit Strength . Be careful, as a sensitive hand may come out of the vent at the top of the stairs leading to this lower area.
When you reach the crack between the bridges again, look for the Abomination ahead. When he's on patrol, look for a transport crate on the left side of the bridge. Follow this and defeat them for a loot cube with 1x Fearful Effigy . Pull the Abomination back to the opening on the bridge to fight him, otherwise Thespian with the scythe on the bridge above will spot you and come down to join the fight.
Go up the stairs on the left side of the room. On first landing, a sensitive hand will emerge from the air vent. When you go up the second staircase, look to your left. We can go down to the crate under the platform at the top of the stairs to find a loot cube that contains armor - embalming goggles . The panel at the top of the stairs will turn on the light at the base of the bridge, allowing us to see.
Return to ground level and head to the far side of the room opposite the entry point and descend the slope past the edge of the bridge. There is a Loot Cube with Model: Corrupted Ferula . From here drop down to support below with a Loot Cube for 1x Diamond ingot . This area has a small elevator and several exo-elevators leading to a control console that requires a code (we'll have to come back for that in a bit).
Return to the base of the broken bridge. This time let's explore the right side (forming the initial entry point). Look for a loot cube along the right wall for Models: Head of the third fool .
Along the wall to the right of the Loot Cube and stairs is a small dead end passage with crates. Destroy the crates and interact with the wall behind them to find a secret door. There is inside 1 coin and an exo-lift.
Take the Exo-Lift down. At the bottom there is a Loot cube with health module and six green handprints on the wall, each of which counts information point .
Go up the stairs along the right wall, there is a Fespian at the top and a door that we can open into a small room containing a couple of loot cubes with 1x Diamond ingot и 1x Inselium Bar . This room also has a tech station, an occult station, and a medical station.
Just before the door, look to the left to see a gap in the raised hallway. Jump from here to the upper ledge. Jump over the narrow ledges to reach the platform above the entrance to the area. There is 1 coin . Jump across the gap behind this to find a loot cube with 1111 axions .
Return to the door leading to the Tech/Occult/Med Station room. This time, the fall to the far side of the broken bridge forms an entry point. Defeat the scythe guy (if you haven't already) and grab the golden Loot Dice for Credential Vault B .
Follow the bridge to the end. Two Thespians are waiting to ambush you behind the crates at the end of the bridge, so approach carefully. Move with caution through the door behind this platform.
The room you arrive in is long and has a lower and upper platform running the length. There are five Thespians running around here - so pull them one at a time or work your way across the room slowly trying to take them down in one-on-one duels - just beware of the occasional Feeling Hand, there are a couple that will spawn here. To get to the top ledge, there are Exo-Elevators that we can access at the other end of the platform.
In the bottom area there are two Cuba mining, which contain 222 axions и cube cooling . The top ledge is connected to two additional rooms for exploration. The door to the right (from the starting entry point) has a Loot Cube with three pieces Armor set - Large Thespian (Leggings, Gloves, Armor).
The door to the left on the upper platform has a series of platforms and exo-elevators that we can climb. After the second exo-elevator, look back at it to see a platform with a loot cube holding Model: Fourth Fool's Head . On top of the third exo-lift there is a loot cube with 1x Rod of Inselium . From here, run and jump across the center of the room to the next platform, and then over the next two to the right to reach the last exo-elevator.
At the top of the bunker is a room with a glass floor. In the distance, opposite the door, you will see a golden loot cube. Between us and yet two abominations. As you fight this pair of cuddly critters, try to focus on one, but don't be afraid to hit the other if you spot a hole. When you fight, two Thespians and a sentient hand drop from above. If a smaller enemy appears, be aware that the abominations can damage them (though not each other). Be sure to deal with the smaller enemies as quickly as possible (or do it with the Scoundrels).
As soon as the enemies clear up, take the loot cube behind your back, the left corner for 1111 axions and a gold loot cube for tram activation key . Use the Exo-Lift here and lift it up to the ledge above for a Loot Cube with 1x Inselium Rod . At the top of the stairs is a Thespian armed with a scythe. Use the two exo lifts after that.
At the top of the second you will see a round information point on the wall.
Follow the path to the end to find a loot cube with material: antimatter gyroscope and a door. Open it using the Bunker Key to get to fault (Port Issoudun - Bunkers), which we used it all the time!
Head to the room with the five sided pit in the center and use your fancy new keys Vault Credentials A и Vault Credentials B on the door to open it. Climb down the stairs, getting a couple of loot cubes as you go for Breach Synchronizer и Material: Organic fiber . Enter the next corridor.
Notice the hole in the floor. If we fail here, we'll get to the next boss fight vs. Osiormi Goya, Puppet Master.
Optional: Investigate the sinister monolith. This area is essentially the same as the one we explored earlier, although some areas have been blocked and the entire area is mirrored. In other news, thefespians have been replaced by mindflayers and you will find several smaller versions of the Archon Slvaer boss in the area. There are also new cubes around Luta, and almost all of them contain Shards Nikhla or Nikhla rocks .
It is worth visiting the area at least once to capture all the goodies. Of particular note, we can also get the following loot:
- ➤Instead of Vault Credentials A, there is a Loot cube with Breach Synchronizer .
- There is an archon in the room with the five-sided pit and vault door. Kill her for 1x Archon Fragment .
- There is an Archon at the top of the secret elevator next to Vault A Credentials - defeat her and the Living Hands and Mind Destroyers she spawns for 1x Fragment Archon.
- One of the loot cubes on the top ledge overlooking the five-sided pit is equipped with a loot cube with hacking synchronizer .
If you opened a door that requires two vault identities A + B, you can go to the boss room (if you haven't killed him already). In this area you will find a Loot Cube with Breach Synchronizer . Talking to the boss here will unlock the achievement/trophy. He will ask you to bring him the flesh of 10 archons.
He wants us to bring him 10 Archon Fragments . Since there are only two of them in this Sinister Monolith, we will have to trawl others to find additional fragments. Completing his quest will earn you another achievement/trophy.
Ascended Dominion
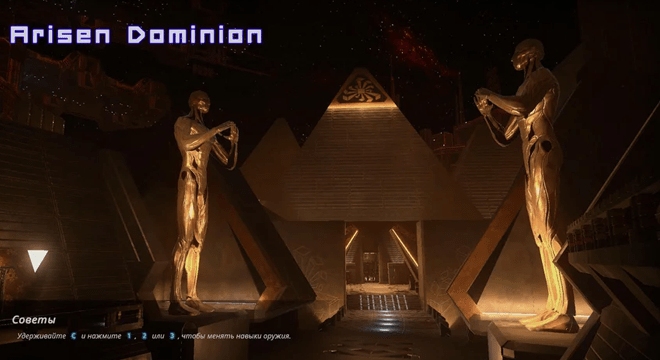
When entering Arisen Dominion from the Embassy area, you will see Rift (Arisen Dominion - Solar Promenade) ahead. Among the boxes to his left is a trophy cube with 1x carbon waste .
This starting point of entry into the Ascended Dominion has several large flights of stairs leading up to a large pyramid-shaped building at the very top. Of course, there's a lot of loot to be found along the way, so let's grab it while it's good.
Climb up the first stairs. Once you get to the top, turn right and look for a small passage to the right of the door behind a stack of crates. Follow this until you're inside. Defeat the Zombie in front, and a second, a dismembered Zombie is crawling behind the crates on the left. Examine the red scribbles on the wall to find an information point.
Go through the door at the far end of the room to find paths leading left or right.
The right path leads to another small room with a Heavenly Beast. It's basically a smaller version of the Sky Beast boss we fought earlier in the Arcology zone. The same strategies apply.
Heavenly Beast guarding the Cube Luta с 1x Inselia Ingot and a set of stairs. At the top of the stairs there is another loot cube with entropic conduit in close combat and a bookshelf with a glowing red book. Interact with it for Information Point (and some knowledge about Bulk AI).
Return to the fork in the path and this time go left. This runs parallel to the stairs outside.
This passage is inhabited by whip-wielding zombies on patrol. Fight him here or in the room he patrols. This next room has a Zombie on the far left, and a second, dismembered Zombie will be crawling up the next stairs once you enter. If you stay here too long, another zombie will patrol down the stairs, so keep your eyes peeled! There are also some glowing barrels in the room itself, so be careful when you swing your weapon (or use a projectile to blow it up and kill a zombie or two).
Once the area is free, search this lower area for two loot cubes holding Foresight Channeler и 1x carbon waste, before going up the stairs. At the top, kill the zombie with a whip (if he didn't come down to greet you) and take the loot cube in the corner to get 1x ration . Interact with a note on one of the tables here for information point . Exit through the door here.
We will find ourselves back on the main embankment at the landing above the third large staircase. Heavenly Beast ahead. Defeat him. To the left of his original position, there is a staircase leading to the building behind him.
There are a couple of zombies in the room at the top of the stairs. On the left is a metal door that looks like a flash (not sure if it can be opened, but for now we will look around). At the top of this room, there is a console that we can interact with to get information .
The door here opens onto a balcony overlooking the waterfront with a loot cube containing Breach Synchronizer . From the edge of the balcony, run and jump to the nearest platform with a golden statue. Behind this there is another loot cube with 1x Inselium ingot . Return to the street.
Climb up the next big ladder to get to the landing above. When you arrive, you'll see even more enemies in the distance with a Congregator and a few Celestial Beasts - sometimes there's a fog wall here, sometimes not. In the immediate vicinity of us there are locked doors to the left and right.
Take the loot cube by the door on the left to get 1x carbon waste, and then go around side of the building to find a Celestial Beast (and sometimes zombies) and a loot cube with 111 axions . There is a similar passage with a Heavenly Beast next to a door on the right side of the area. It has a Cube Luta с 1x Inselium rod .
Approach the crowd of enemies, in the distance ahead is the Congregation of Spellcasters, and at the nearest gate is the Melee Congregator, two Zombies and two Guardian Beasts. Deal with the caster before going up. At this point, we need to use the left or right wall to pull enemies 1-2 at a time (although if you have a ranged weapon, you should be able to pull them one by one). Be careful as there are several vents here that can spawn crawling zombies.
Once the area is free, you will find that the gate is locked. Go back to the top of the stairs and look for a small alley on the right (as you face the gate) for a loot cube with 1x coal waste . Look to the left to see a stack of crates that we can jump over with a walkway.
Follow the passage and in the red-lit room, examine the writing on the wall to find information point . Enter the next large room.
This area is a gentle slope with numerous large pillars. Among the pillars is the Cube of Loot with 1x Carbon Scrap and two crawling Zombies who will try to ambush. The back wall has a Zombie Whip that will join the party once you get close enough to him, so send him out as well before picking up his loot die for 1x Carbon Waste .
Behind, to the right of this area from the entry point, behind a pile of rubble are two more crawling zombies and a loot cube with 1x carbon waste . Go through the door at the bottom of the slope. Here is another Loot Cube with 555 axions . Take the Exo-Lift to reach the area above.
From the top of the Exo-Lift, duck behind the barrier on the left. There is a Zombie whip here. On the far side of this room, there is a Spellcaster Congregator, two zombies, and a crawling zombie hidden behind another barrier. Get the Congregator's attention and fight him on top of the Exolift to keep the Zombies from getting sucked in. Clear them out once the main threat is gone.
When the area is clear, interact with the blue orb to open the gate back to the waterfront. Enter the room on the opposite side of the area from the exo elevator to find The Breach (Arisen Dominion - Hall of Remembrance) . Under the stairs behind the Rift is a Loot Cube with 1x Refined Carbon .
The stairs here lead to a locked door, so go back to the room we just cleared and head through the door to the pyramidal structure opposite the waterfront gate.
Interact with the glyph on the pyramid-shaped sculpture in front information point and go past two sets of stairs to find a small tunnel containing a loot cube with 1x purified carbon . Return to the main room. There are two areas to explore from here - we can continue up the stairs or look in the dark area on the left side of the room (where we entered from) to find a staircase leading down.
Enter the hall at the top of the stairs. You will see a Melee Congregator at the far end of the area by the next exit. Before approaching him, dive into the doorway on the left and defeat the Celestial Beast inside (otherwise he will ambush you when you fight the Congregator) before heading off to fight the Congregator. As soon as it falls, take the Cube prey behind 777 Axions .
There are two exits in this corridor - an open door on the right and the main exit at the end. First go through the main exit.
Grand Gallery
Go to the large four-sided pit in the distance. On the opposite side there Rift (Arisen Dominion - Grand Gallery), which we can activate.
From this four-sided pit (which we will hereafter call the lifting chamber) there are passages leading in four directions. With our back to the Prophet, in addition to the path leading back to the previous corridor, there is another path with a fully formed bridge leading to the right. Let's explore there first.
Go across the full bridge to the right. Upon entering, you will see an open door on the left. Be careful when you get close to this, as the Heavenly Beast will jump out of the small alcove opposite and attack. Deal with him and go to the door.
Looking through the door, you will see a mass of Congregationalists occupying the room. There is a Spellcaster against the wall to the right of the door, a second on the stairs in front of him, and one melee Congregator on each of the room's three tiers. We don't want to fight them all at once, so try to take them one by one with a ranged weapon/body back to the previous corridor before returning the next one.
After clearing the room, look to the left side of the first tier of the room to see a secret passage wall. Open it. After entering, examine the red inscription on the right wall for information point . At the top of the stairs is a loot cube with 3 materials: heat-resistant steel . On one of the tables at the bottom there is 1 coin . The room at the end has a trophy cube with Leech Enhancer and a door that we can open to return to the elevator chamber area.
We can jump over the columns outside to get to the loot cube with 111 axions . Head back through the secret passage to the room we just cleared of the Congregants. At the top of the room exit through the provided door.
Go past the open door and up the collapsed stairs on the left to find a cube with booty с 1x Inselium Ingot . Exit the door. Here we can go left or right.
First follow the path to the right. When you reach the abyss, jump over to the next ledge. Enter the door to find the tram and Gap (Arisen Dominion - Tram stop), which we can activate. We will also be able to get some loot cubes in this area containing antigravity module и 1x diamond bar . The tram goes to the Almer Mater Atrium, which we will get to a little later.
Back across the chasm and follow the narrow passage past the door we went through earlier and turn the corner on the left. At the end of the path, there is a crate that we can jump onto. From here we can jump over the platforms to reach the open area high above. There is a Loot Cube with 666 axions .
Find the Sky Beast at the back left of where we jumped and take it out. Don't go down the next ladder until you break it, until four crawling zombies come out of the vents and try to get around you. Move back and deal with them one by one when they get close.
Go through the door behind the vents. Defeat the Guardian Beast in the first room and take the Loot Cube for 111 Axions and golden cube prey for Seals of the Patriarch (Print 1/4).
Enter the next corridor and take a beating ahead of the Guardian Beast - be careful as there will also be zombies lurking among the benches on the left. Between some columns on the right side of the room there is captured cube with 1x inselium ingot .
Go through the door at the end of the corridor to find a small room with technical station , Cube production for 7 Axions and a friendly NPC (he may also appear in the next room). Head down the Exo-Lift opposite the Tech Station to find a couple of doors we can open, creating a fast path to the Breach in the elevator chamber and opening up a path behind the Breach.
Return to the Exo-Lift and enter the room at the end. At ground level, there is a Heavenly Beast, and the Congregation of Exorcists patrols in and out of the room. Wait for the Spellcaster to either reach the top of the stairs to fight him, or leave the room below to fight the Heavenly Beast. Once you have killed the first one, do the same for the other one.
Head down the stairs, but be careful, there are two melee Congregators on the right. Pull them one by one back to the previous room to fight them. Once the area is free, you will see three possible exits - right, straight ahead and left.
The right path leads to the Booty Cube with Seal of the Serpent (Print 2/4). Interact with the panels on the columns on either side of this to activate a pair of exolifts, creating a shortcut to return to the Breach below.
This round platform also has two Cuba production from 555 axions и 1 ingot ingot . Look at the ledge on the left side of the Exo-Lift that we have activated - there are a couple of pillars here that we can jump onto. One day they have the Cube Luta с 1111 Axions . Drop down to the Rift and use the Exo-Lift to get back to where we just plundered the Seal of the Serpent. We return to the previous corridor.
The door on the left leads to the last seal, and the stairs ahead lead to more goodies. Let's explore this further.
Follow the given path through the area until you reach a square room with a sculpture in the center. There is a Celestial Beast patrolling around it that we need to defeat, a door on the right and a staircase behind the sculpture. On the ledge above at the back of the room is the Congregator of Exorcists. There is a second on the ledge above and to the left, which we will not see yet. Climbing the stairs here is a surefire way to get both Congregationalists to start throwing projectiles at you.
Thus, enter the door on the right. At the top of the first staircase, we will see the Congregator, whom we could not see before. Take it away. Climb the stairs here to get to the second Congregator and destroy him. Jump off this ledge and go through the next door. Defeat the Melee Congregator in front.
We will be on a high balcony overlooking a large room with a giant blue orb overhead. Head down the nearby stairs to reach another narrow path overlooking the main room below. After going down the stairs, first go right - the small room at the end of the area has occult station and a loot cube with 1x Material: Beating Heart .
Go back to the bottom of the stairs and continue to the left. Kill the next melee Congregator you encounter in the corner. Follow the path to the right, kill the Congregation of Spellcasters and continue to the next corner. There is another melee congregator here, guarding the cube with weapons - Feral's apprentice .
We'll be back to explore the lower part in a bit. For now, head back through the previous areas to the room above the Exo-Lifts at the Breach. Now let's look at the last path leading out of this room. The door on the left leads to a staircase leading down. Downstairs there is an adjacent room with an exo-elevator that will take you further.
At the bottom of the exo elevator, continue through the door. Defeat a couple of crawling zombies on the far side and follow the set path forward, defeating more crawling zombies as you go. At the top of the second step on the left, you will see an exo-elevator leading to the bridge above. Ignore it for now and continue to the end of the walkway - there is a second Exo-Lift there. At the top is a door that we can open, this opens the way to the ledge below and through the gap from the Rift in the elevating chamber.
From the ledge above the bridge, you will see that the bridge is occupied by three congregators - two melee and one caster (if not, they will soon enter through the door at the top of the stairs when you enter or approach the bridge). If we return to the lower area and use the exo-elevator that we previously ignored, it will take us to the far side of the bridge from the Breach.
From this location, you can get Caster's attention and then pull the melee congregators one at a time... or just sneak up the stairs into the room to drop the aggro. There is also a Cube behind the stairs. Luta с 777 Axions .
In the room at the top of the stairs is a golden cube with loot from anima seal (print 3/4). On the ground next to him is a regular Loot Cube with Shield - Apprentice Shield . Enter the room on the left and interact with the green handprint. This will give you knowledge about the Patriarch.
Go back to the shortcut to the Breach that we opened a moment ago. Between the bridge and the Rift, there is a melee congregator and two celestial beasts. In the room opposite the Breach there is a trophy cube with a weapons Espadon . From here, find the stairs leading to the right (with the Breach behind us).
Head through the interior at the top of these stairs until you reach the main room on the opposite side of the broken bridge from the Rift. Follow the narrow ledge to the left along the wall until you reach a larger ledge with a Loot Cube containing 3333 axions .
From here, there are several platforms of stone columns below. Jump to the nearest one and note the Exo-Lift on the left. Jump over the next pair of platforms to get to the next loot cube with 999 axions . Return to the Exo-Lift and go upstairs. At the top is Loot's cube with 1x Material: Active core . From this ledge, look down and to the left (with the exo-elevator behind us) to see another loot cube on a pillar. Jump down and jump over through the columns to reach 222 axions .
Return to Violation.
The final Seal needed to activate the elevator is actually where we came from. Return to the corridor as if you were returning to the previous Destruction (Hall of Memory). When you get close to the door to the hallway, look to your right to find a small ledge behind the flag that we can jump onto, with a loot cube containing 777 axions . In the hallway where we fought the Congregator before, turn left.
Upon exiting the terrace, on the right you will see a golden loot cube containing Seal of Chaos (Print 4/4). Before returning to the elevator, there is one more thing to do. So follow the path here and enter the next corridor. On the left, there is a door that we can open that leads to a long staircase to the lower area.
The room at the end of this area is the first floor of the large room with the giant blue orb floating above it, which we explored on top earlier. There is a pit in the center of the room, and in front of it is the Spellcaster. There are six melee Congregators (three on each side of the pit). If you want to clear them - try to take them one by one with ranged weapons back to the previous corridor before picking up the next one. Next to the pit is captured cube with 1111 axions .
Take the door along the right wall from the entry point. When you enter, there will be stairs on the left. Before climbing them, jump into the room on the right to find a loot cube with cleansing ritual .
Get to the top of the stairs. Take the door on the right and follow the path along the path until you enter the next room on the right. Move carefully - there are a couple of celestial beasts here, and if we approach carefully, we can fight them one by one.
After clearing them, look at the glowing triangle where the left Celestial Beast was standing behind the Loot Cube with 444 Axions . In the light of the triangle behind where the Heavenly Beast's right hand stood, there is another Cube Luta с 1x Inselia Ingot . There is also a secret door on the wall here.
In the secret area, approach the pit and look down. Climb down to the next platforms until you reach the bottom. Go through the door to find a long corridor with three pedestals with loot cubes in the distance. Be careful - the tiles between you and there will fall after you step on them.
We can just continuously jump over the tiles until you reach the opposite side (I'm pretty sure there must be a better way to do this! Jumping works though). Take loot cubes for 22 axions , 1 diamond bar и catalyst conductor +1 и entropy hedron .
The door behind the pedestals has an exo-lift. To top it off, we can open a secret door to return to a room across the floor area with a giant blue orb. Now that we've done all the looting in the area (hopefully), we can head back to the Rift.
With all four seals in hand, insert them into the sockets around the pit. Once all four are in position, the control console will appear. Interact with this to activate and summon the lift platform.
Mausoleum
Instead of taking the elevator, the most efficient way to fully explore the Mausoleum from start to finish is to return to the area just before the room with the big blue orb and take the huge spiral staircase leading down to the Mausoleum area.
Upon arrival, you will see glowing blue pools on your left and right. They are radioactive and stepping on them can hurt you and also damage your radiation meter.
Grab the loot cube from the base of the large pillar at the end of the path. For 4444 axions . Head to the left of the starting entry point and in the corner, just past the radiation pool, is a loot cube with radioactive melee conductor + 1 . Climb the ladder at the end of the platform and grab the loot cube at the top for 1x purified carbon .
There is a ladder ahead, and another one is on the right. The right staircase leads to elevator stop 2F - Promenade and cuba production from 555 axions among the central columns. Walk up the stairs leading straight ahead to continue.
At the bottom of the stairs, you'll see another set of platforms opposite a giant gap in the floor. Follow the chasm until you find two stairs leading down to meet each other. Here is a trophy cube with 2222 axions . Right at the top of one of these sets of stairs is a narrow section of chasm that we can jump over to reach the far side.
Defeat the whip Zombie on the far side (and watch out for the other patrolling Zombie). Look behind the pillar to your right to find a loot cube with 1x Wand of Inselium .
Continue to the obvious secret door at the back wall. Before entering, follow the ledge to the right behind the Loot Cube with 1x Material: Accelerator and go down the stairs closest to the secret door, after another with 1x Refined Carbon . Enter the secret door to find 1x Coin and the Doba Cube with Armor - Goggles .
Exit the secret room and jump through the gap on the right. Enter the illuminated door here.
Head up the stairs leading down and defeat the melee Congregator patrolling them up and down. When you reach the platform below, you'll find two sets of stairs leading from it.
Go down the left stairs. At the first intersection, go left again to find a loot cube with firearms conductor + 1 и weapons - Mouth of Filth . The right path leads nowhere, so return to the previous platform and go up another ladder.
At the bottom, the right path leads to a dead end (but also an ambush as you run past several vents that spawn crawling zombies). Follow the left road. The room you will enter has either a small swarm of crawling zombies or a Congregator Spellbinder (or a combination of the two). Defeat them and continue down the many exo-elevators here.
After descending to the third exolift, defeat the whip and protect the zombie waiting for you. Look at the nearby wall to see a secret passage door. Open this to find a medical station and another exolift. At the bottom of this exo-elevator is 1x coin and a loot cube 3333 axions .
Exit the secret passage and go down the stairs to the bottom of the room. There are three vents here that can spawn crawling zombies, so be vigilant and deal with them if they appear. Take a loot cube for 1x purified carbon and exit the door. Defeat the whip and protect the Zombies outside.
Follow the narrow path down the stairs. Continue until you reach a split in the path. There is a right path leading to stairs leading up and a left path leading to stairs to the lower area.
The lower stairs lead to a cube with loot from 1x carbon waste . Under the stairs there is a radiation pool with a couple of flying fish in it and a small island with another loot cube containing 1x material: pulse mineral . Return to the fork in the path and take the upper path. Enter the room ahead to find Medical Station и Rift (Arisen Dominion - Mine Mausoleum), which we can activate.
Note the safe ground area below and the large blue radiation pool next to it. From the edge of the platform with the Breach, an exo-elevator leads to the roof. From here jump onto the crates and jump onto the large rocks in the radiation below (make sure you have full health or the fall will kill you!). Here is a trophy cube with 1x material: earth minerals .
Return to the large safe area below the Breach. Look under the Breach room to find a couple of zombies (crawlers) hiding among the pillars. At the end of this area, closest to the radiation pool, there is an orange circle that we can interact with to get information .
Look for a large pile of rocks on the far side of the bottom area from the Breach. Behind him there is an exo-elevator that we can use to get to the ledge above. Climb the stairs and follow the path to the right and through the tunnel until you reach a larger room.
There will be two doors and a switch on the left. This will bring up the large elevator we used - yes, that's elevator stop 1F - Mausoleum.
Both doors in this room have stairs leading up behind them. However, the right door leads to a dead end, so take the left stairs. Defeat the Congregator Spellbinder in the hallway below. Follow this path all the way to the end, killing another Spellcaster Congregator along the way. At the end of the room is a large purple glowing wall with a loot cube. weapon - a channel of light under him.
Return along the path we just explored to the corner overlooking the pit. Below you should see a ledge with a roaming Celestial Beast and a Zombie Whip. Run up and jump from this corner to land on the crates below (to minimize fall damage). Defeat the enemies here and go through the door.
Climb up the next ladder and defeat the Sky Beast in the hallway upstairs. From the end, we can descend again to the safe zone under Bresh.
Now that we've explored everything around, head to the secret area behind the current radioactive waterfall. Talk to the prisoner here if you like. Now is the time to use Sinister Monolith (if you want to).
Optional: Explore the ominous monolith
This area is essentially the same as we explored earlier, although some areas have been blocked and the entire area is mirrored. Flying Fish, Sky Beasts, and Zombies have all been replaced by Mind Flayers, and you'll find several smaller versions of the Archon Slayer boss in the Gatherer replacement area. There are also new cubes around Luta, and almost all of them contain Shards Nikhla or Nikhla rocks .
It is worth at least once to go around the territory to capture all the goodies.
In the area with glowing purple scribbles on the wall where we found the "Weapon - Channel of Light", there is a wall of fog that we can go through. This triggers a boss fight against the Fourth Archon Knight.
Boss: Fourth Archon Knight
The fourth Archon Knight is armed with a polearm and a large shield. He has several melee attacks that he can combo, a slash attack that creates residual fire on the arena floor, and a long range attack that can hit you from across the room. We can deal with him in much the same way as with most protected enemies - wait for him to attack and follow up with one or two of our attacks.
Defeating the Fourth Archon Knight will earn you 1x Patriarch's Eye . You will immediately be transferred to the last used Breach.
Once you've completed all of these robberies, head back to the main elevator and take it up to 4F - Ministry Auditorium Chamber to confront the area boss.
Ministry Audience
Arriving on the fourth level, the Ministry Audience Hall, you will see that there are two exits from the elevator. One leads to a staircase with a locked door at the top, and the other leads to a long corridor with sinister monolith on the left and a room at the end.
Enter the room at the end of the corridor to see several NPCs standing in the gallery above. Stand in front of them on a pedestal and talk to them. Advise the group you wish to speak to the deadpan Defas Nemundis and they will open the door at the top of the stairs for you.
At this point, we can get to the boss.
Note: before we do that we have to use Sinister Monolith in the previous corridor. Use this to get to the underworld and sneak into Troubled Dephas Nemundis's room to chat with him. As with Ozermi Goya, whom we spoke with in the Port Issoudun area, this guy will give us a task that we need to complete in order to obtain loot.
He wants us to get 10x Demon Fragment . They can be obtained by defeating demon enemies in the station - much easier than archon fragments! Doing his job and branching out more than 10x Fragment of Daemon will bring you 11111 axions и weapons - Etek Aveos .
Atrium Alma Mater
Union park
When we get to the Almer Mater Atrium from Ascended Realm, pick up the loot die in front of the tram to get 1x Material: Accelerator . Exit the station. Once you're outside, look to the right to highlight an orange circle on the wall that we can interact with to get information point .
Look for a gap in the fence ahead that we can drop down through and drop down to a large open area below. Walk around the large statue nearby to find a trophy cube with weapons - whale halberd .
However, before we do that, let's move on and activate a new violation. From where we dropped down, follow the fence to the left until you find an exit leading to the street. Follow the street to the end.
There will be a green panel on the door at the end of the road, an orange foggy wall across the door on the left (this will lead to a Consumer boss we'll get to shortly) and a golden loot cube with restricted access Arcology Passport . Right in front of this there is an open door with gaps (Alma Mater Atrium - Union Park).
Enter the park again - let's kill those artillery guards!
Cross the first bridge ahead. Make your way up the stairs at the back, to the left corner of the lower part. Climb them up until you reach a ledge with the first artillery guard, trying to take on any sky beasts you accidentally pull behind cover to avoid the projectiles (you should be able to get through most of them). After defeating the first artillery guard, follow the same ledge to the end and use the piles of rubble to climb up to the second. Defeating each of them will make them quit Weapon - Artillery P17 . Behind the second artillery guard is a celestial beast guarding 1 coin .
Return to the gate through which we passed from the Breach. Since the fireballs no longer bother us, we can fully explore this lower area.
From the gate, look to the left and in the corner you can see a friendly NPC by the fire. Talk to him to learn gesture - sit down . Talk to him here until you finish the dialogue.
Return to the gate and cross the first bridge. Climb up the stairs on the left. At the top, take a loot cube for 777 axions . Follow the path to the left and among the rocks you will see a green handprint on the wall which we can inspect for information point .
Go back down the stairs and go left. There are 3-4 Heavenly Beasts in the area between the first and second steps on this side of the area. Defeat them and take the loot cube behind the fence they have been guarding for 1111 axions .
Defeat the Sky Beast at the bottom of the second rung of the stairs (these are the ones we used to get to the victims of the siege). Next to them you will see another staircase leading down. We'll be back to investigate soon.
Return to the NPC by the fire. Drop down into the hole next to him. Send an enemy here - this is a new type of flying fish that can fire a laser at you. Note that both their attacks and lasers can raise your radiation meter, so be careful. Defeat him and follow the path. Defeat the second laser fish in front and get the Loot Cube here for 1x coal waste .
Continue down the path, killing more Laser Fish hidden among the rocks as you progress (and possibly a Sky Beast). Under the bridge there is a trophy cube with 1x carbon waste and another one right behind him 1x carbon waste . There are two Laser Fish patrolling here. Enter the cave at the end of this passage to find a purple symbol on the floor and a loot cube with set printed model for armor - revolutionary warrior (legs, gloves, chest, helmet).
Get out of the trench and go to the stairs in the far left corner of the park from the entry point. This time, from the bottom of the stairs, go down the corridor leading down. In the room below you will find a trophy cube with catalyst conductor +1 и hand of the prophet Nile ... There is also sinister monolith . Head into the corridor behind this and open the door at the end.
Back past the Sinister Monolith and return to the park. Climb the stairs to the area where we fought the first casualty of the siege. This is where the Celestial Beast will roam (if you haven't provoked aggro and killed it before). At the far end of this platform from the ladder we came to is another trench with a Laser Fish. At the end of this loot cube with 1x puppet of sanity .
Climb the ladder at the trench entrance to the next level up. Follow the path to the left and around the corner to find a loot cube with Model: reflex conductor melee . Lastly, check the gate nearby leading to the building at the top of the area. Here's where we're heading next.
However, before doing so, there is now a good opportunity to visit the Sinister Monolith again.
Optional: Explore the ominous monolith
This area is essentially the same as we explored earlier, although some areas have been blocked and the entire area is mirrored. Flying Fish (in most cases) and Zombies have been replaced by Mind Tamers, and you'll find several smaller versions of the Slaver Archon boss in the Artillery Guard replacement area. There are also new cubes around Luta, and almost all of them contain Shards Nikhla or Nikhla rocks .
It is worth at least once to go around the territory to capture all the goodies. In addition to the Nihl Shards/Rocks, which are too numerous to mention, there are other items worth mentioning, including:
- Breach Synchronizer - go through the door we opened at the end of the tunnel behind the sinister monolith. Follow the trench to the end and at the top of the stairs you will find this loot cube.
- Breach Synchronizer - in the center of the fountain closest to the big tree. It is difficult to see it as it is in a very bright place.
Finally, in the area with the glowing purple sign on the floor in the cave at the end of the trench where we found the Model: Revolute Warrior set, there is a wall of fog that we can walk through. This starts the boss fight against the Third Archon Knight.
Boss: Third Archon Knight
The third Archon Knight is armed with a polearm and a large shield. He has several melee attacks that he can combo, a slash attack that creates residual fire on the arena floor, and a long range attack that can hit you from across the room. We can deal with him in much the same way as with most protected enemies - wait for him to attack and follow up with one or two of our attacks.
For defeating the Third Archon Knight, you will receive Model: Archon Shield . You will also be transported outside the underworld and back to the Sinister Monolith.
Now that we're back in the real world, to continue, climb to the top of the area overlooking the park and go through the door to the large building.
Athaneum
The first thing you'll come across in this area is an orange mist gate. Head here to summon the Mistress of Prey boss.
Boss: Predatory Mistress
The Predatory Mistress is found in the Alma Mater Atrium area and is essentially a larger, tougher version of the stagnant enemies that were first encountered in the Issoudun Port area. She has a few combo attacks and a few offensive throws, but that's small compared to some of the previous bosses.
After defeating the Our Preying Hostess boss, you will receive 12 axions и diploma Alma mater institute . After the fight, we will have many areas to explore. Take a through the door on the right to find gap (Alma Mater Atrium - Athaneum) .
Alma Mater
Lobby
When you enter the Alma Mater area from the Alma Mater Atrium, you will see Break (Alma Mater - Lobby), which we can activate.
There are two smaller areas on either side of the entrance leading to a sculpture and an exo-elevator with a locked door at the top, respectively. Both areas are inhabited by several Mind Tamers.
The main part of this area consists of three floors with passages connected by stairs. On each of these floors, there are many Mind Tamers roaming (8-10 in total). Since they are quite mobile and patrol a lot, it is best to hunt them all down and kill them before we explore too much. As such, stick to the open areas and climb to the top of the area, taking out any Mindbinders in your path. Note that these guys also respawn very fast, so it seems like when everything is gone, you will have a few minutes of silence before they start spawning again.
Once the area is clear, check the bottom of the stairs in the middle level to find a Loot Cube with 88 Axions . Door on the left side of the site (empty from the entrance).
On the upper level, the central doors lead to a broken Ominous Monolith - Approaching it will have three walls lower and Mindflayers will appear inside them which will then try to swarm you. After fighting them, look behind the broken Sinister Monolith and find a cube with entropy shield conductor + 1 .
In the door on the right there is a smaller pantry with two Mindbinders. They guard the Loot Cube with 999 Axions . In the left door is captured cube with 1x insel wand (and sometimes the Mind Burner).
To continue, enter the elevator and go up to the next floor above.
From the elevator you will see stairs on one side. Ignore it for now - let's explore the current level. Go through the door to the right of the stairs. There is a Loot Cube with 1x Refined Carbon . Go into the next room to find a console with a green handprint. Interact with it to get information . The next room has a table with a Loot Cube. Model: Induction Shield Conductor .
Go to the left side of the floor from the stairs. You'll see a giant gap in the floor that you can't get through (yet). Look around the edge and next to one of the support columns there is a loot cube with 222 axions . On the ground near the gap in the railing to the left of the elevator there is a letter that we can read as information point .
Before continuing, send the elevator down, but jump off it to return to the current level. When he reaches the bottom, call him again. When he gets close to your level, jump down to the top of the elevator. When it reaches the top, you should be able to see the Loot Cube on top of the support beam that we can jump over. It contains vacuum insulator .
Offices
At the top, go right first. We'll see the breach here again...and a few Mindbenders on the far side - but still can't get through. Find an open door just before you reach the abyss and look inside to find a cube with Armor - Sentinel Set (boots, gloves, armor, crown). It also has an exo-elevator leading to the top walkway with a loot cube containing quantum light Omnicube .
From the top of the stairs, go left. Ahead, in addition to the main path, to the left and right are two open doors opposite each other. The left door leads to a dead end 1x coin (Watch out for the Mind Slayer to spawn behind you). The right door leads to the same room as the main corridor.
Head into the main hallway to reach a large semi-circular area around the floor. First go right, sticking to the bottom. Hide in the area with all the consoles here and Mindflayer here. Defeat the enemy and interact with the console on the back wall to get information point . There is also a trophy cube with 1x ration .
Through the mesh fence on the right you will see the Tool Raptor. Go ahead and fight him - if you pull additional Mindbenders (which is possible), try to defeat them (or use Tool Raptor's devastating attacks) before focusing on the main threat. Go to where the Tool Raptor was guarding.
There is a lower part with a corridor leading to the middle of the floor and two staircases leading to the outer rooms. At the far end of the room is the gap we encountered earlier. Notice the debris at the bottom of the second ladder here - we can jump on she and climb the collapsed path above for a loot cube with 1x Inselium Rod .
From this passage, you should be able to see a platform with Mind Slayers up ahead. Look along the left wall to see a narrow ledge that you can jump onto. Do this and then jump onto the platform with the Mindbenders - defeat all three and grab the Loot Cube here for Model: Light Melee Conductor .
While on this platform, look (roughly) to where the ladder we climbed is, you should see a hole in the wall. Jump onto the small stone pillar at the edge of the platform and then jump into the hole.
Follow this passage to the end to find a room with two cubes production from 1,111 axions и 1x material: solid plasma . There are also seven green handprints, each of which is considered information point .
Use the door to exit into the hallway at the top of the stairs.
Go back to where we found the Tool Raptor earlier. Go down to explore the lower corridor first - watch out for the Mindmate in the darkened corridor. We'll reach a service area (and another Mind Tamer. After sending it, look for a small passage on the right containing a trophy cube with Model: Apprentice's Damaged Shield . Follow the main path to the end to find another trophy cube containing gap synchronizer .
Climb any ladder on the other side of the Tool Raptor location to find a room with Breach (Alma Mater-Belvedere) and Loot Cube with 1x Daring Effect . There is an exo-elevator opposite the Gap, but the door at the top is still closed.
Return to the exit from the main corridor. Look for the stairs leading above the control panel area we entered earlier (beware if there is a Mind Tamer hiding under the stairs). Upstairs, enter the room on the left and send a couple of Mindbenders - there are captured cube with Omnicube Auto-Heal .
Return to the main floor and look for a door with a green switch on it - inside you will find Prolom (Almer Mater - Offices) and a door leading to the Almer Mater Atrium.
Explore the Alma Mater apartment building (optional)
If you enter the door, we will find that a demon/abomination is waiting for us. Defeat him and interact with Breakthrough (Atrium Almer Mater - Residential buildings), which he guarded. There are stairs to the left and right (from the side of the entrance to the breach).
Go down the stairs on the right and use the elevator. At the bottom, we can open the door leading to the street (just behind Union Park, in front of the consumer boss). There is also a ladder next to the door leading to a rooftop with a pair of Demons/Abominations. Here is a trophy cube with 1x inselium ingot .
Return to the Rift and enter the door on the left. Climb down to get into a fancy corridor with a black and white tiled floor. Enter the open door you come across and defeat the spiked prey, the zombie, and the warrior inside. There is a trophy cube here containing Armor - Tool Victim Crown .
Jump out the window here and defeat the Spiked Tool Victim / Whip Zombie and Warrior on the rooftop. Drop down to the next rooftop below and deal with the victim/spike zombie whip. Move to the right side of this roof and look over the edge to see some steel beams underneath.
Drop down to them and take Loot Cube with Shield - Scrapped Heat Shield . Follow the beams to the right (from where we fell, move towards the hole in the distance with a yellow glow. When you reach the hole you will find 1x coin and a loot cube with 1x material: pulse mineral .
Continue through the hole in the wall on the left, but be careful as there is a spiked victim/whip zombie in the narrow passage that will try to ambush you. Find a hole in the ground on the far side of the gap in the wall and go through it.
Carefully jump over the gap to reach the loot cube with Model: glaive officer Thule . Drop down into the room below. Again, carefully move around the edges until you reach a place where you can fall and which is unlikely to kill you on landing - this should make the damaged area right in front of the door to the floor below.
If you land here successfully, find a hole in the wall nearby and go through it to get to a loot cube with model: armor - tracksuit set (legs, gloves, chest, helmet). Go to the balcony and defeat the Spike and Whip Zombie. Jump over to the next balcony to defeat the second one. Drop down from the far end of the second balcony.
Jump over to another balcony on the lower level again and enter the apartment. Jump through the hole in the floor and return to the balcony. You will come to a door with a console on it requiring a door code. Enter a code 1-2-3-4-5 (Seriously!). Inside is a green handprint to be examined and a letter with information point .
Return to the street and drop down to the area below. We've seen a couple of Demons/Abominations here before. Climb back up and re-enter the Alma Mater area to continue.
Exit the green door and go right. The door opposite the door in the Rift (Almer Mater - Offices) has a Loot Cube in it with With weapons - Thespian Mace .
From the Rift (Almer Mater - Offices), head out the door and if you hug the right wall, just before you find a set of fairly large, important looking stairs, you should find a Loot Cube with 1x Inselium Rod. , Move to the bottom of the area and go through the tunnel on the left side of the room from the important stairs to find another trophy cube with 1x material: charged prism .
Head to the very end of this area until you reach a precipice - in the distance you will see a platform with the Mind Flayers we explored earlier.
Just before that, you will see three smaller stone pillars. Jump over them to reach the door on the right. Jump up the ledges in the room you will come across to reach the loot cube below. It contains Entropic Shield Conductor+1 .
From here we can jump over to a small ledge around the pillar ahead and then jump down to the narrow ledge opposite. This will be the floor where we left the parked elevator. Go back to the stairs and go up to the floor we explored again.
Now it's time to explore the whimsical staircase we've been ignoring before. You will see two groups of stairs facing each other. At the top of each of them, a Guardian awaits you. If you stick to one side of the area, you can drag them one at a time to the previous room and fight them there.
Note: there is a secret passage on the back wall between two stairs. We'll get back to this shortly as we first need to find a key to some of the goodies inside.
Both staircases lead to parallel corridors on the next floor. Between these two corridors is a large room full of enemies that we need to clear. This area is dark and has Mind Tamers and some other treacherous enemies (either Sentinels and Artillery Guards, or a few Mind Tamers and a congregator spellcaster). The Mindbenders stay at the bottom by the nearest doorways we can access, while the Artillery Guards/Spellcasters Congregator is on a raised ledge on the far side of the room guarded by two Guardians.
If you take the left stairs first, there are two entrances to the central room. The latter puts you pretty close to the Artillery Guard/Sorcerer Congregator. From this doorway, enter and taunt the nearest Guardian/Mind Slayer and drag it back out into the hallway to kill it. Return to the room and either pull the second Warden/Mind Flayer from range back into the hallway, or defeat the Congregator Artillery Warden/Spellcaster and then the Warden/Mind Flayer. When the three main villains are finished, go downstairs to deal with the Mind Tamers at the bottom.
Next to one of these guys, there is a panel on the wall that turns on the light. Both Mindguard Alcoves contain loot cubes with 1111 axions и 888 axions .
Look at the right side of the Artillery Guard / Caster Congregator platform with trophy cube containing 555 axions . Climb up the stairs leading from the room across from the Artillery Guard/Sorcerer's Congregator platform. At the top is a trophy cube with three parts Armor Set - Theurge (leggings, gloves, vest) and occult station .
Return to the main room and exit into the hallway with the only entrance to the room (to the left when looking at the Artillery Guard / Congregator of Spellcasters platform). In the corridor, find an open door along the left wall and clear the room of Mind Tamers. Take the Loot Cube for 1x Inselium Rod and use the nearest Exo-Lift. Move through the vents and avoid oncoming flames. At the end, go through the hole in the floor to reach the top of the sculpture in the center of the large room. Here is a trophy cube with 1x material: charged prism .
Approach the platform where the Congregator of the Artillery Guard / Caster was located. There is a small gap in the floor in front of him. Drop down into this area to find a Loot Cube with Armor - Underworld Sentinel Set (Legs, Gauntlets, Armor, Crown). Follow the maintenance tunnel to the end and drop down through a couple of doors. Below is a golden cube with booty с the key to the INB vault . Jump down through the next tunnel to get to the floor below where we previously parked the elevator.
Climb back up to the office floor and to the base of the bizarre pair of stairs. Remember the secret door we marked earlier but didn't explore? It's time to do it. Examine the back wall between the two stairs to see a secret passage door. When you enter, look on the right 1x coin and take the Loot Cube for Cognition Module . The wall next to the loot cube is also a secret passage door. Continue here.
When you enter the second secret room, look to the left to see 1x coin . Go down the stairs. At the bottom, check the note on the table to find information point . Use key from INB storages on the control panel to open the door in the wall next to it.
Inside the vault, the central column will rise up, revealing a cube at the bottom with loot with firearms guide + 1 и weapons - artillery OTX . There is 1x coin behind a pillar under the aisle at the back of the vault and another trophy cube on the upper aisle with 11 111 axions .
Return to the large central room upstairs that we cleared earlier. Behind the Artillery Guard / Caster Congregator platform, you will see an elevator ahead - it will take you to the next boss. However, before we do that, we can look to the left at sinister monolith and red text on the wall for information point, and on the right - a few more enemies and goodies.
First go to the right and defeat the Guardian in front. The left side area contains three Mindbenders and a ladder leading to a loot cube with 1x material: solid plasma . The door at the end of this passage is blocked (and the door on the left is just a small storage room).
At this point, we can contact the boss.
Explore the sinister monolith (optional)
However, before that, we must use Sinister Monolith at the elevator. Use this to get to the Underworld. This area is essentially the same as the one we explored earlier, although some areas have been blocked and the entire area is reflected. The Mindbenders and Guardians have remained unchanged, and you'll find several smaller versions of the Slaver Archon boss replacing the Artillery Guardian/Congregator. There are also new loot cubes, and almost all of them contain splinters Nila or nihl stones .
It is worth at least once to go around the territory to capture all the goodies. In addition to the Nihl Shards/Rocks, which are too numerous to mention, there are other items worth mentioning, including:
- ➤Violation Synchronizer - In the big room in front of the boss elevator, in the area with the light switch, there is a cube with loot.
- ➤Violation Synchronizer - at the end of the corridor from the top of the stairs to the elevator with the boss.
- ➤Healing Mastery - On a pillar in the center of the main room in front of the boss elevator. Use the side room and the top flame vents to get to it.
Use the elevator to go up to the boss room upstairs. Approach and talk to Uthos, Ashbirth, and he will give us a side quest. He wants us to bring him 10x Theater Fragment . The specific Thespians we need to defeat for fragments are Abominations, which can be found in Port Issoudun. Make your way there and process them until you get the necessary fragments.
Completing his task and branching over 10x Fragment of a Thespian will earn you 11111 axion и Weapon - Amber Prophet Hand .
Boss: Uthos, Born of Ash
Uthos, the boss of the Ash Born, is found at the very end of the Alma Mater area and, as one of the three Space Gods that govern Irid Novo, is one of the hardest fights in the game. He is some form of fire/lava creature, and so if he stands too close to him, your temperature gauge will be built. if it gets too hot, you'll catch fire and take damage over time. He's a rather slow boss with an emphasis on stomping/melee attacks (and a nasty grapple). It will also regularly summon fireballs that we want to avoid and lava veins that fill the floor of the arena that will hurt you if you step into them, restricting your movement. Try to stay close to him for him to use melee/stomping attacks and attack him when you see a gap.
After defeating Uthos, Ash Birth, you will receive 21 axions , 1x Uthos Fragment, Ashenborn и key from apartments Union . In his location will appear Violation (Alma mater - Agora Utosa) . It is already connected to others, so we can transfer to and from it.
Ikari Road
Of Rift (Arcology - Customs Bridge) approach and interact with the control panel. It will scan your Arcology Restricted Passport . He will ask you where you want to go - the Son area or the Ikari walking paths. Whatever you choose, one of the doors will open ahead.
The door on the right leads to the Ikari Paths. Go through the door and go down the corridor on the right. At the end, you will find a door that will take you to the Ikari area.
East Square
When you enter the Ikari walking path area, you will see in front of you Prolom (Ikari Walkways - East Square) . allows you to activate this for future use.
Exit the door to get to the open area. To the left you will see a staircase and an elevated walkway, ahead of you is a large open space littered with mountains of debris, and another step directly in front of you leading to a locked door to the Ortega tower. At the far end of the street there are two sets of stairs, one going up and one going down.
Move up the main street and try to get a couple of Thespians out of the walkway up and down to fight you. Head past the large obelisk-like sculpture in the center of the street and defeat the Abomination at the far end of the area (doing all of this, of course, while keeping an eye out for the Sanity Hand enemies coming out of the grates/vents). Once the area is cleared, we can loot.
Head up the stairs leading to the door to Ortega's Tower and pick up the Loot Cube here to get 1x Raw Inselium . Look to the left of the stairs and over the handrail to see a small illuminated ledge below - there is a cube in the corner with prey, containing 1111 axions . On either side of the large sculpture there are loot cubes with 1x carbon waste и 1x raw inselium .
Look for the door on the right just before the ascending stairs at the far end of the street to find a loot cube containing 1x Raw Inselium . At the top of the stairs leading down, there is a zombie with a whip and a cube with 1x Inselium Rod .
Get down up this ladder and use your quantum light Omnicube to the light on the path below to reveal a hidden platform. Jump over this to get to the far side. Take a couple of loot cubes and get 1x coal waste и shield - old warrior shield .
Go back to the door to Ortega's Tower and up the stairs to the walkway above, located on the far side of the street. Upstairs, take the Loot Cube and get 1x Daring Effect . go on go down this path to find two more loot cube, containing 77 axions и 1 inselium ingot (watch out for the zombie whip behind the crates that ambush you).
Find the path leading to the right and to the door - run and jump over the gap here to get to a small ledge with a door and collect the Loot Cube for 3 333 Axions .
Follow the path to the end (or jump down to use the stairs leading up (they both lead to the same place. When you get close to it, you will most likely be surrounded by a small group of 2-3 sentient hands, fight them off before continuing .
tram depot
To continue, we need to go right. However, before we do that, go to the dead end on the left and defeat the Abomination hiding behind the crates. Take the Loot Cube he was guarding to get 1x Refined Carbon .
Return to the top of the stairs and start to the right. As you do this, look for a stack of crates on the path with a ramp next to it on the right side of the path. From here we can jump over the railing to reach a small ledge on the side of the building below. Follow it to the end and drop down to the metal passage below.
Enter the door and defeat the Laser Fish and the Flying Fish inside. Find a small room on the left that contains a second laser fish and a cube with Omnicube (Program D) . Climb up the next ladder and defeat the Heavenly Beast at the top.
Use the console on the wall on the left. If you have ministry authority, you can play the message. Use the Exo-Lift opposite to reach the secure walkway at the top. There is 1x coin and two production cube, in which are located 999 axions и weapon - Hedron of Light .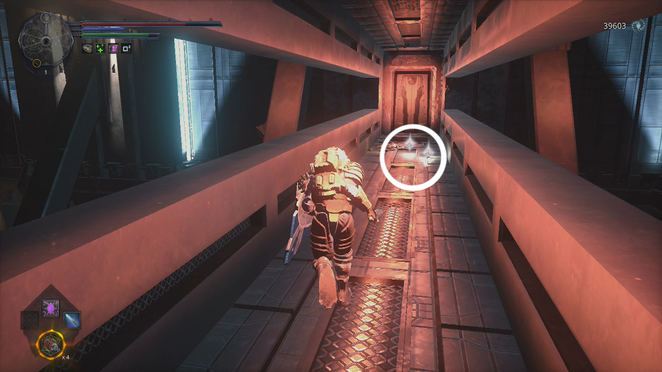
Drop down through the gap in the floor to return to be back on the raised walkway above the first area. Go back to the main path at the top of the stairs one more time.
Follow the path to the right again. Kill all sentient hands that come after you and find a door on the right that we can open.
Notice that there are two Thespians patrolling a little further down the main path - it might be worth taking out one of them before opening the door, as there's a second Thespian and a Sentient Hand inside immediately, and you don't want to fight both at the same time. if you can help. Inside this door there are a couple of loot cubes with 1x regenerative nanobots и model: refurbished heat shield .
On the path immediately behind this door on the right is an alley. At the end there is a loot cube with a vessel mind: FM .
Follow the main path and defeat the Thespians ahead. Be careful, as there is a staircase on the right that leads to the upper passage, and the Abomination will regularly patrol up this staircase. We want to kill him too, but preferably one bad guy at a time.
Enter the tram and take the loot cube on the right to get Reflex Melee Conductor +1, and look to your left to find 1x coin . Exit the tram to find Breach (Ikari Tracks - Broken Tram), to activate it. Look behind the crates next to this one to find another Loot Cube with Armor - Daemon Robe .
Head back across the tram and up the stairs that the Abomination patrolled earlier.
Climb up this ladder and at the top look to the left to see a window sill that we can jump over to. There is a switch box here. Click to lower the window and you will be taken inside.
Once inside, take the Exo-Lift on the left. Take the trophy cube for models: officer's glaive и 1x coin . Use the switch here to be outside again. Dial Loot Cube for 1x Material: charged prism . Jump to the bottom of the stairs we just climbed to continue.
Follow the overpass to the path at the far end of the area and continue down the stairs (keep an eye out for a Sentient Hand or two along the way). At the foot of the stairs, we will be able to follow the main path to the left or right.
First go right. You will see the Abomination wandering in the distance. Approach him and fight him - once you do that, a few sentient hands will probably join your fight from the doorway further down the path on the right, so deal with them too.
Find a path leading into the building on the left. Inside, go to the left and fight the Thespian, who is hiding around the corner and ambushing you. Take the Loot Cube to its location and get 1x Inselium Rod . Use the exo lift at the top of the nearby stairs to find 1x coin .
Return to the main path outside (where we fought the Abomination) and follow it to the end. Enter the door on the right. Defeat Tool Victim here and look right at the door we entered to find a Loot Cube containing 555 axion . Head up the stairs and defeat another Tool Sacrifice. Look for an open door leading to a balcony with a Loot Cube - it contains Weapon - Demon Scythe .
After all the robberies have been done on this side of the path, return to the stairs leading down from the overpass from the previous Breach. Let's go left this time.
If we go to the left, we will pass under the flyover we crossed from the previous breach into the building. There is an Abomination and a Sacrificial Tool (along with a few Sentient Hands). Fight them and take the Loot Cube for Omnicube Light , enter the room on the left to find another Loot Cube with 3x Material: Metal glass (there are ventilation holes here for a reasonable hand, so expect new ones!).
Exit the far end of the building to see another Abomination ahead. Behind the crates on the left is a victim tool, so drag the Abomination into the building we just cleared to fight him (and any reasonable hands) before moving up to deal with another enemy.
Head up the stairs to see an orange wall of fog ahead - it leads to the Artillery boss. We'll fight him in a minute. Before we do that, look on either side of the top of the stairs for additional, smaller sets of stairs leading up.
At the top we will reach the tram stop. Get on the first tram and jump on the next (normal jump - if you run, you will fly past and fall into the void). In the second tram there is a trophy cube with healing skill . Exit to the next station.
As with the station on the other side, there are two sets of stairs leading to the lower part. The Abomination will regularly patrol this staircase, so wait for him to pull him out (there is a second one downstairs, and two at once - not so much fun!).
Go down the stairs and ignore the open door on the right. Instead, go down the stairs. Defeat the Abomination hiding here in the shade, and take the Loot Cube for 777 Axions .
Climb the stairs again and head towards the open door - carefully. There are four weapon victims and two abominations, and most of them are motionless in the far right corner of the room. Try to first take out the two gun victims closest to us, and then the remaining enemies one at a time using ranged weapons.
After making room, go up the stairs to the left of the door we entered. When you go up this ladder, the Abomination will appear at the top and attack you while you are on it. Fight him and continue to the top.
Top of the stairs if you have quantum light Omnicube , direct him to the right. You will see a series of invisible platforms. Jump through them until you find a hole in the wall on the left and go inside. Here is a trophy cube with 2222 axions .
Go through the door at the top of the stairs. There will be a victim tool to your left, and two abominations patrolling the platform to your right. Once they are all dead, continue through the door on the right. Defeat the three gun victims here and take the trophy cube they were guarding for weapons - Rail Poignard .
Use the Exo-Lift here to get to the area above. Enter the room and send four victims of tools inside. There is a green handprint on the right wall that we can examine for information point . Next to it there is a Loot Cube with Breach Synchronizer . At the opposite end of the room, an exo-elevator descends.
At the bottom of this exolift, find the nearest staircase on the right that leads down and follow the passage to the end to find a blue switch on the wall. Hit it to extend the bridge to Rupture (Ikari Tracks - Broken Tram) .
There is an exo-elevator at the top left. Use this and at the top you will find a ledge with 1x coin .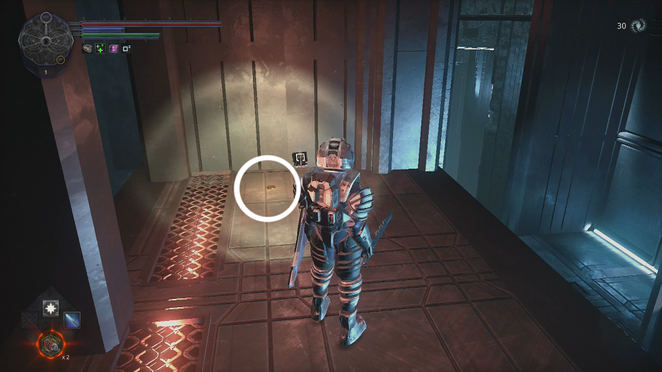
Follow the main passage to the end to find Door в black hole . We won't be able to access it yet, so remember the location - we'll come back to it later.
For now, back to Rupture (Ikari Tracks - Broken Tram) . From here, head back to the orange mist door we spotted earlier - it's time to fight the area boss.
Boss: Artillery
The Artillery Boss is found in the Ikari Tracks area - this is a large armored opponent equipped with a giant shield that can be used both to block attacks and to defend against blows or attacks. The boss has a large firearm that fires large fireballs from a distance and jets of flame at close range. Use various items in the room as cover when you close the gap with the boss, and dodge behind him when he uses flamethrower or shield attacks. Attack him from behind to deal damage.
After defeating the artillery boss, you will receive 7500 axions .
After the fight, we can explore two exits from the area. On the bottom floor of the boss room, there is a passage leading to an elevator that we can call. This will take us to the lower part of the Arcology.
From the upper level there is a staircase leading to the room above. When you enter, there will be a ladder in front of you and two tool victims against the back wall. Defeat them and check the wall they were guarding and discover that it is a secret room. There are some inscriptions inside that we can check for information , 1x coins and a booty cube with modulus of force .
Use the Exo-Lift here and jump through the hole in the floor at the far end of the path. Defeat Tool Victim here and use the control panel to summon the train, taking out the enemies on the far side of the tracks.
Climb up the stairs here. At the top, find another ladder on the left. Follow this passage all the way to find a floor vent that we can interact with. Do this and it will allow you to travel to the Alma Mater Atrium.
Note: this entry point puts you in a small room with two loot cubes containing 1x Refined Carbon и Model: Restored Heat Shield and a golden Loot Cube with Sun Hall access .
Drop down into the abyss behind the golden loot cube and turn right first. Defeat the Warrior Spawn here and in the room he was guarding there is another golden trophy cube with the key to the cabaret . There is also an elevator here. This elevator has three levels - the 1st floor is not accessible, we are currently on the 2nd floor and the 3rd leads to The door в black hole, with which we will deal with later.
In this form, return to the corridor and follow it to the end. Defeat Spawn Warrior and two Laser Fish here before grabbing the Loot Cube nearby and getting 1x Refined Carbon . Go down the stairs and open the green door - this will give us access to the main hall of the Alma Mater atrium.
Go back to the boss room and from the second floor, enter the room with the secret door again. This time, go up the stairs and grab the Loot Cube halfway to Armor - Disciple Robe , Disciple Chest , Prodigal Spawn gloves , prodigal spawn tiara и weapons - Disciple ferrules . At the top, find an open window. From here, drop down to the ledge below. Thanks to our tram call shenanigans, this platform should now be free of enemies. In the far left corner of this platform there is 1x coin .
There is a ledge in the far right corner that we can jump down to reach the tram platform just past the artillery boss room. There is also an Exo-Lift here that we can go down.
From the bottom of the Exo-Lift, jump over the gap and go to the end of the corridor. There is Breach (Ikari Tracks - Dungeon), which we can activate, and the door leading to the Atrium of the Almere Mother.
Note. Using this exit, we will find ourselves in an underground area under the cabaret area of the Alama Mater atrium, which we explored earlier. When you arrive, there is a Gap (Alma Mater Atrium - Cabaret Cellar). We will be able to descend to the same exit area as the other exit from the Alma Mater Atrium from the Ikari footpaths.
Ortega Tower
If you have picked Key from towers of ortega time of the Horde event in the area, now is the best time to go and check it out. Return to the beginning of the Ikari Tracks area and use Key from Towers of Ortega on the locked door.
After entering the tower, go forward a little until you see stairs to the left and right - you will be ambushed by a pair of sentient hands (one from each staircase).
First, go up the stairs on the right and clear the room at the top of the Flying Fish. There are two loot cubes here: 1x Refined Carbon и 1x Refined Carbon . Head to the exit at the back of the room to find another Loot Cube with 1x Refined Carbon .
Use the next ladder and follow the hallway here - there's a trophy cube here with, you guessed it... 1x Refined Carbon and Abomination at the far end. Continue along the set path here to reach a room with a huge pile of corpses in the center and a roaming protected tool victim. Here is a trophy cube with 4444 axions and a letter on the table that we can read for information point .
There is a door leading out of this area which will open a door to a passage above the street outside. Other than that, all robberies are over and we can continue our research.
Now that we should have gotten pretty much all the loot in all previously explored areas (barring a few tidbits), in order to grab the rest we can either:
- ➤Open the black hole doors (optional) and clear the rest of the loot.
- ➤Head to High Atelier, to end the game.
Black Hole Doors
There are several black hole doors around Irid Novo, each containing a large amount of loot that is worth it. While some of them open on their own at the right time of the day, others require us to track down some "five eye codes" (which look like orange circles on the walls in hard to reach places) and enter them at the top of the window. tower in the Arcology area.
- 1 Detection and correction of "five eyes"
- 2 Opening black hole doors
- 3 Black Hole Door Pattern (Son District)
- 4 Black Hole Door - Pattern B (Son District)
- 5 Black Hole Door - Pattern C (Alma Mater Atrium)
- 6 Black Hole Door - Pattern D (Ikari Paths)
- 7 Black Hole Door (Port Issoudan)
- 8 Black Hole Door (Embassy)
Search and correction of "five eyes"
To find the Five Eyes location, you first need to defeat the Arisen Congregators boss in the Sohn area. After the fight, activate the tram to the port of Issoudun. Instead of taking the tram, follow the path leading to the left and away from the tram to reach the door that will take you back to the Arcology.
When you arrive at the Arcology from the Son area, you will see a green panel ahead. Interact with it. This will open the main elevator in the building (the one that didn't work before). This will also trigger an elevator. We can get to three different floors.
- ➤1F - That's where we are! Has a door back to the Son area.
- ➤2F - There is a Mind Vessel reader and access to the Celestial Workshop. Outside is the bridge where we fought the Heavenly Beast boss and the entrances to the Son Area/Ikari Tracks.
- ➤3F - This floor is a small rooftop room containing panels that control the five "eyes". Remember the codes we wrote down from the orange round data dots? We can use it here!
Use the elevator to get to the 3rd floor. Upstairs take 1x Coin from the right wall (if you haven't already). Examine the five consoles here. You will find that Eye One is dead and Eye Two is disabled. We will need to continue our study to find an item to activate the second eye.
To activate Eye Two we need to find Eye Two activation key . It is located in an inaccessible part of the Alma Mater atrium. This location can only be found by entering through the door at the top of the Central Mall section of the Arcology Underside. You will find the key on the bridge connected to the ring lift.
Once you've collected the Key, return to the Arcology and take the elevator in the main building to the 3rd floor. Interact with the Eye Two console to reactivate it. Now that all eyes are active, we can start entering the codes we found.
Opening the doors of a black hole
Black hole doors are blocked by walls of orange mist, similar to boss encounters in the game. These doors only open when it's Black Hole Hour. This happens when the silver ring (indicating the location of the Black Hole) and the golden ring (indicating the current time) overlap. This happens once per day in the game and lasts approximately 10 minutes.
Also, the shaped eye doors (A, B, C, and D) will only open at this time when the corresponding Five Eyes codes are inserted into the correct panels on top of the central building in the Arcology area.
Black Hole Door Pattern (Son District)
- ➤Eye Two = 2602 9417 (located in the Arisen Dominion Mausoleum area)
- ➤Eye Four = 5624 7947 (located in the Silos area of Issoudun port)
Location: this door is the larger of the two black hole doors located near the Rebel Congregations boss fight. Enter the area through the Control Center and go up the stairs on the left. Follow this path to the end to find the door to the black hole.
This door contains a boss fight against the First Archon Knight.
Boss: First Archon Knight
As with the other Archon Knights, this guy has several melee attacks that he can combine into a combo, a slash attack that creates residual fire on the arena floor, and a ranged charging attack that can hit you from across the room. We can deal with him in much the same way as with most protected enemies - wait for him to attack and continue with an attack or two of our own.
For defeating the First Archon Knight, you will receive 11500 axions и model: archon spear . Defeating him will also allow us to enter the door behind his platform.
There are three more here production cube containing 3 333 axions , 1 diamond ingot и bloody ritual . You can also interact with the handprint on the back wall for information point .
Black Hole Door - Pattern B (Son District)
- ➤Eye Two = 3898 9450 (located on one of the rooftops in the Son area)
- ➤Third Eye = 5012 3677
Location: this door is the smaller of the two black hole doors located near the Rebel Congregations boss fight. Enter the area through the Control Center and go up the stairs directly opposite. Use the Exo-Lift on the left and follow the given path until you reach the elevator. At the top of the elevator you will find a door to a black hole.
This door contains a small chamber filled with loot. There are four production cube containing radiogardase , 1 inselium ingot , Mind Vessel: OB и 4 axions . The elevator leads to a previously locked door in the Son - Control Zone area.
Black Hole Door - Pattern C (Alma Mater Atrium)
- ➤Eye Four = 6080 7797 (located in Alma Mater Atrium shack)
- ➤Eye Five = 2856 5003 (located outside the tram stop in the Alma Mater Atrium)
Location: This door is located on the 3rd floor of the cabaret building in the Alma Mater Atrium. To get to this area, we need to get off at the Alma Mater Atrium at the end of the Ikari pedestrian zone. In this side area, there is an elevator leading to the 3rd floor, where we will find the door to the black hole.
This door to the black hole guards part of the platform games. First, we will need to jump down through a large hole in the floor, using successive ledges to safely descend lower and lower (don't forget to hook the cube with booty с 6 666 axions . At the end of the descent, use the exo-elevator. to go further down the path below.
When you land, there will be a path ahead that we will need to follow, and an artillery guard in its center. Dodge his projectiles to get close to him and take him out using your usual tactics. He guards three cube with loot containing 11 axions , 1 inselium ingot и shield - board of torture .
Before continuing, look back at the Exo-Lift we descended from earlier to see the second one on the opposite side of the column it was attached to. Climb down to reach the floor far below. There are six more loot cubes here with 44 axions , 1x purified carbon , 1x purified carbon , 1x purified carbon , 1x purified carbon и 1x diamond ingot .
Use the elevator behind the artillery guard position (this will cause information point ). This is the one in the side area of the Alma Mater Atrium (entrance from the Ikari walkways) where access to the 1st floor was previously blocked. The 1st floor will now be accessible (we're there!), so ride it all the way to the 2nd floor to leave the area.
Black Hole Door - Pattern D (Ikari Paths)
- ➤Third Eye = 5440 3585 (located in the observatory)
- ➤Fifth Eye = 2029 5238 (located on the way to the Son District in the Arcology area)
Location: To find this door, go up to the tram stop above the Artillery Boss entrance. Jump over to the opposite tram stop and follow the route through this area (and its enemies) to reach the Black Hole door.
This door leads to a dungeon where you will be ambushed by a horde of weapon victims - focus on taking out ranged enemies first and then on the melee types. Once you fight them you will find an NPC we can kill with Armor - Depraved (mask, torso, mittens, legs).
Black Hole Door (Port Issoudan)
- ➤Not required
Location: this door is through the door under the tram stop. We will need to complete the side quest The Prodigal Spawn at least partially, so that he opens the door for you.
Inside you will find a bridge ahead. There is Thespian to the left in the darkness, so be careful. After defeating him, cross the bridge and defeat two more Thespians on the far side - avoid the hole in the floor in the center of the platform.
There is an Exo-Lift at the back of the platform, but before using it, go back to the bridge we just crossed and look underneath it to find a small ledge we can drop down to. Here is a trophy cube with 999 axions . Climb up using the blocks on the left and then use the Exo-Lift behind the top platform.
At the bottom of the Exo-Lift, follow the narrow path to get to the door. Note that when you enter this room, most of the central floor will give way and a group of 6-8 Thespians will surround you and attack. To avoid this, we can hug the walls to stay on the upper level to get to the exit on the far side. If you make a mistake and fall, we can either fight off the Thespian enemies or find a small exit on the right side of the room where we fall from - there is an Exo-Lift at the end of this. This exo lift will take you to the same door at the back of the trap room.
The room has three Trophies Cubes holding puppet sanity , Axion Capacitor и Foresight channeler .
Black Hole Door (Embassy)
- ➤Not required
Location: you'll find this black hole door outside of the station, further down the path we found the Broken EVA Outfit earlier.
Enter the black hole door and you'll see a series of ledges that we can use to climb up to the platform above. When you arrive, you will immediately be shot at by four ranged victims. As you move to take them out, some melee will crawl out of the vents around the place to join them.
After you've cleared out the enemies, check the back wall for a loot hoard. There are three booty cube, containing 1x ingot inzelium , 5,555 axions и weapon - Hand of the White Prophet
The final
High Ateliers
After you defeat the three cosmic gods Ozermi Goiju, the Puppet Master (in Port Issoudun), the Steadfast Dephas Nemundis (in the Reborn Dominion) and Uthos, Born of Ashes (in Alma Mater), you will receive a message from the Author asking you to return to Embassy.
Interact with the control panel we used to talk to the author earlier to take the elevator up to the high ateliers area.
On arrival look around the room and find three Cuba production from 11 111 axions , Model: Melee Combat Explorer и 888 axions . Find and activate Breach (Embassy - Entrance) . Interact with the inscription on the floor by the door to open information point .
Exit through the door to enter a brightly lit room. Go forward and you will see a ladder ahead, on the right - a locked door. The door opposite is open - there is inside medical station , cube with booty с 1x insel rod and a letter on the table that we can read for information point .
Return to the corridor and go up the stairs. Follow them past another closed door and up the next ladder. As you climb them a black ghost appears, it seems to be equipped with a different outfit every time I passed through the area, so be prepared for anything!
After climbing the stairs, jump down to the open space below. This room contains technical station, loot cube material: pressure jet and a golden cube booty с the key to the Atelier laboratory . Interact with the switch next to it to expand the bridge at the top of the room.
Look on the wall below the dropdown to find a secret door.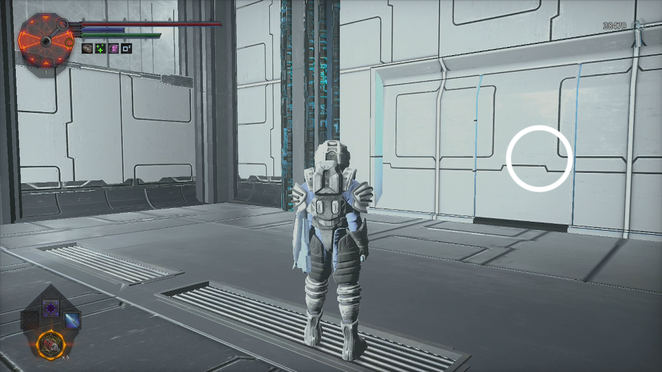
After entering the secret area, look to the left to find 1x Coin . Follow the path to the end to find a stream of radioactive liquid. If you have an EVA suit (or your best radiation protection, now is the time to put it on). Go through the radioactive deadly liquid and take the Cube with prey, To obtain 1 inselium ingot . On the platform at the end of the stream there is a second cube with weapons - artillery P17 . Use the switch on the wall to return to the previous room.
Use the Atelier Lab Key to exit the room and go down to the locked door we saw at the entrance. The Atelier Lab Key will lead us here - take the Loot Cube for Weapon-Artillery OTX . There's another one here technical station .
Return to the stairs where we fought the Spawn of the Black Ghost. Cross over the already widened bridge at the top of the stairs. Enter the large room at the end.
Upon arrival, you will see a couple of loot cubes on the right with Armor - EVA Equipment Set (leggings, gloves, chest, helmet) and endurance module .
When you're ready to continue, go through the door.
Endings
There are four different endings in Hellpoint, and below we will tell you how to get each of them. As you pass through the door, approach and speak to the Author. At this point, it will ask you to transfer the data you have collected. We can do this or opt out and keep the data.
Ending A:
If we pass the data, we will get the least happy ending - ending A. The credits will be awarded and we will start a New Game + when they are completed. Prodigal Spawn will appear and inform us that we "didn't execute the project" correctly and should work better this time (to paraphrase!).
If you refuse to transfer the data, the Author will get upset and a boss fight will start against the Interface.
Boss: Interface
The boss itself resembles a mechanical spider/scorpion/crab creature that stays still on one side of the arena, uses a few attacks, and then moves to the other. it will randomly change platform, creating steps/shelter every time it moves. The boss uses several ranged attacks. These include direct shot projectiles, a directed laser beam, and homing missiles - thankfully, everything except his direct shot attack can be blocked by his hands, making them a great place to use as cover and deal damage to the boss at the same time. From time to time he will use his arms to jump into the arena, so be prepared to avoid it.
For defeating the interface, you will receive 50000 axions и 1x material: interface fragment .
Ending B.
If we defeat The Interface without completing The Architect or Prodigal Spawn side quest chains, you will get the B ending. The credits will be awarded and we will start a new game+ when they are completed. Prodigal Spawn will appear and inform us that we "didn't execute the project" correctly and should work better this time (to paraphrase!).
If we completed The Architect side quest but didn't complete the Prodigal Spawn side quest, we will be thrown into a fight with a boss known as the Sentient.
Boss: Reasonable
Ending C:
defeating sentient will earn you ending C and credits will be awarded. New Game+ will start after the specified credits. Prodigal Spawn will appear and inform us that we "didn't execute the project" correctly and should work better this time (to paraphrase!).
If we complete the side quest The Architect and the side quest Prodigal Spawn, we will fight two bosses - Sentient and Prodigal. Defeating the sentient and prodigal will earn you ending D, the true ending of the game.
Boss: Reasonable and Prodigal Spawn
Ending D:
defeating the Sentient and the Spawn of the Prodigal Son will earn you Ending D and credits will start playing. New Game+ will start after the specified credits. This time, the Prodigal Spawn will not appear, although he will speak to you in your mind.
 Thank you very much!

