
Dive into the radioactive wasteland and test your knowledge of the world of Fallout! This quiz is designed for everyone, from beginners to series veterans. Answer questions about the factions, characters and events that shape this famous post-apocalyptic world. Take the test and find out how well prepared you are to survive in the wasteland. Your knowledge and skills will be truly tested here. Good luck, traveler
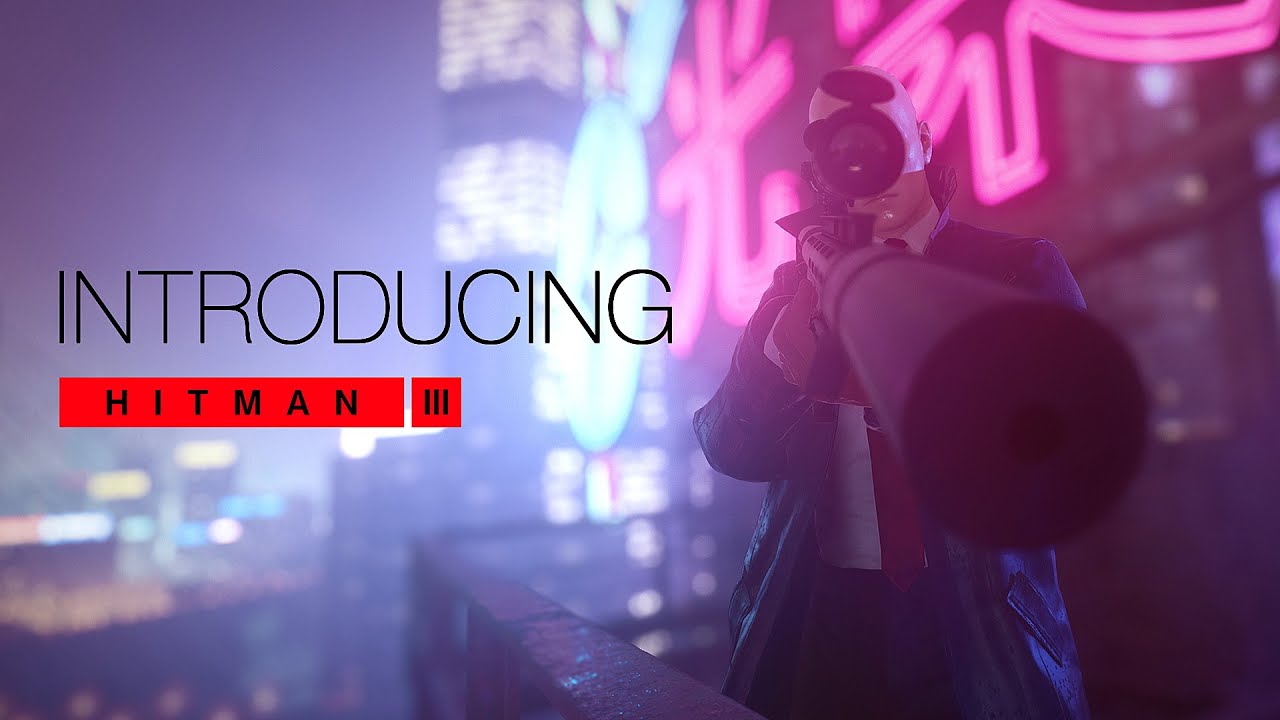
Hitman 3 Walkthrough Guide

Mission 1 - On Top of the World

Hitman 3 Walkthrough - Mission Start
Tasks:
- Eliminate Carl Ingram
- Eliminate Marcus Stuyvesant
Fall from the top (How to the Might Fall)
After the introductory video, move along the metal bridge and jump to the right. Climb even lower to the visor and press X to climb up the pipe. Once on the lift, hold the I key to open your inventory, and use the wheel to select the camera. Confirm your choice by pressing Enter, then hold RMB and scan the lock with red indicators. Your partner will hack it.
Move inside, through the technical tunnel. There is a coin on the floor to the right. You can pick it up (used to distract enemies), and then go up the fire escape on the left. Go through the curtain for Agent 47 to put on the tuxedo. So here we are.

Hitman 3 walkthrough - The hero will automatically put on a tuxedo
On the table to the right, with bottles, is the Welcome to the Spectrum pamphlet. After picking it up, press F1 to examine the data. Climb up the stairs to be in the atrium. You will see the guests ahead and the sheikh speaking before them. However, if you linger at the bottom, then the sheikh can end the speech, and you won’t even see him.

Hitman 3 walkthrough - Sheik's performance can be seen in the atrium
Look around carefully. Go to the right of the people and you will see terminals with various information. Interact with any of them, press S to select the FLOOR PLAN button and press E. You will see a floor plan in front of you, as well as get hints from a partner. You need to get into the personnel area. Go strictly along the marker (to the stairs you climbed here) and inspect the door in the wall. There is a terminal to the left of it. Interact with him. Your partner will use the surveillance system and use the cameras to find the board with the code combination. Enter it (4706) and infiltrate the personnel area.
In the corridor, turn on the vacuum cleaner and run back. When the janitor comes up, stun him and hide the body in the closet on the right. Do the same with the waiter around the corner. Equip the latter's uniform to make it easier to pass as your own. Move forward along the marker. There will be two guards next. Remember that even in other clothes you can arouse suspicion. Go to the indicated room and use the camera from your inventory to scan the terminals to open the windows. You are interested in the left window. Once the woman and the soldier are gone, approach him and press X to get out. Climb up the canopy to the right, then climb up the pipe and make your way to the marked spot. Open the window in the same way - through the camera from inventory.

Hitman 3 walkthrough - Hide behind any counter
In the corridor, move forward, but be careful, as there is a surveillance camera at the top. Go around it and open the second door on the left, leading to the pantry. Disarm the technician (you can change into his suit) and hide the body inside the closet. Go to the server room and inspect the terminal. He's blocked. Pull out any rack, causing the alarm to go off. Hide behind the counter on the left or right. Two guards will come. Wait for them to leave, and then follow the marker to the marked technician. Stun him and immediately hide the body in the closet. Pick up the dropped key card. Return to the server room, apply the key card and inspect the four racks. On one of them there will be not green, but yellow inscriptions (on the monitor). Get her out! The alarm will not work, and the terminal will become available. Interact with him and select the first item to arrange a meeting between Markus and Carl.

Hitman 3 Walkthrough - Carl's Penthouse Living Room Where Markus Comes
Follow the marker to the indicated penthouse and wait. Perhaps along the way you will see Markus walking towards Karl. Once both are in the office opposite the main entrance, and the guard comes out, use the dedicated terminal to block the room. Let your customer negotiate with Karl and Markus, while you can pick up the knife lying on the counter (next to the terminal that blocked the room). Approach Carl and Markus standing at the monitor. As soon as the customer orders Agent 47 to eliminate the targets, kill both Karl and Marcus. And it’s better to start from the first one, otherwise he will run to the terminal and unlock the room. Having done this, hide the bodies, remove the blockage and run to the exit - to the balcony with a parachute.

Passage of Hitman 3 - They certainly did not expect this!
On Guard ((In)Security)

Walkthrough Hitman 3 - You need to eavesdrop on the conversations of these guards
From the lobby, move left to the Black Gold Bar. Turn left on the steps (just past the entrance to the private balcony) to go up to the security office. Stand by the glass and eavesdrop on the conversation of two guards. Confirm the start of the storyline. Go back to the bar and go behind the bar when the girl is distracted (and the guy leaves). Behind the door will be a pantry with another waiter. You can stun him, change clothes and hide in the closet. Go through the door with the "code panel" (in fact, the code is not needed). Go downstairs and you will see two military men talking. When they disperse, stun the first one and hide in the container behind the door on the left (don't worry, the woman and the military won't notice you). Pick up his weapon so as not to attract the attention of another. The mouse wheel can be used to hide the active item.

Hitman 3 walkthrough - You are now Marcus' personal bodyguard
Follow the marker to the kitchen and go to the locker room. Stand near the naked recruit and wait. First, he will finish talking with Agent 47, then he will sit down and continue the conversation with the girl. And then he gets up and turns around. At this moment, take the documents from the bench! Return to the security room, go inside and show the documents. Wait for Marcus to appear. Talk to him, show the documents and follow together to the balcony. When his guard lays out knives on the table, take each of them and throw them at the swinging targets. You need to shoot down 4 targets with six knives. Aim a little higher for long range. You need to throw a knife (LMB) only at the moment when an aiming circle appears on some target (and the white curved line disappears, showing the trajectory of throwing the object in the hands). After that, he says goodbye to the former bodyguard. Wait a bit, and then push Marcus off the roof. First target eliminated!

Hitman 3 walkthrough - Don't forget to hide the bodies
Bird of Prey
To start this storyline, head out of the lobby to the right. But go further, past the terminals that allowed you to study the map. Turn right and you will see a staircase guarded by soldiers and a man and a woman. Eavesdrop on the conversation of the latter, after which you will find out that Mr. Kazim is a hired killer. Follow him. He will sit on the bench. On the side there is a corner with a panel that can be used as a distraction. Do this and stun Kazim. Change clothes, make sure there are no weapons in your inventory, and then go to the soldiers at the stairs. Let them search Agent 47 and then go upstairs and talk to Carl Ingram's assistant.
Climb up after her, go to the rally room and wait for Karl to appear. Sit in a chair and listen to the man. He asks to eliminate the reporter. Take the photo, go down to the lobby with the main guests and look for the man in the red jacket. Found? Talk to him so that he follows the Agent. Go to the toilet nearby, go into a separate booth and stun the reporter. Take a photo of it. It's not necessary to kill! Return to the assistant and show the photo. Follow her to the penthouse where you can talk to Carl. Unfortunately, he will be accompanied by bodyguards, so it will not work to kill the enemy covertly. To eliminate Karl, I recommend that you complete all the actions from the first storyline (only now Markus is dead, and Karl will be alone).

Hitman 3 Walkthrough - Follow the Private Investigator
Mission 2 - Death in the Family
Tasks:
- Eliminate Alexa Carlyle
- Find dossier
Means, motive and opportunity (Means, Motive and Opportunity)
Move forward along the road until you see a gate. A private detective will pass through them - and this is your chance to eavesdrop on the conversation and start the story arc. If you confirm it, you will need to follow the detective to the mansion in order to get closer to Alexa. The first thing to do is to go to the right of the gate, hiding behind the bushes, and climb over the fence. Then follow the stream to the right and over the bridge. Ordinary workers will not raise the alarm. The security service is to be feared.

Hitman 3 walkthrough - Alexa and the butler
In the courtyard, move to the right behind the bushes and stand to the right of the entrance. You will see how the bodyguards search the private investigator, after which he goes inside. There is an open window to the right of the entrance. Climb through it into the mansion and wait, hiding behind the suitcases. Eventually, a private detective will enter the corridor. Stun him, change clothes and hide the body in the closet on the right. Made? Then go to the lobby to meet Alexa. After listening to the woman, interact with the butler to begin the investigation. Climb together to the second floor and get to Zachariah's bedroom.
Get inside. Go to the bed, get the camera and scan the corpse of Zacharias. By doing this, you will find out that he died from poison. Go to the right corner to find a laptop. Interact with him. You learn that Zacharias tried to buy shoes last night. Doesn't quite look like a man who was about to commit suicide! To the right there is a fireplace, next to it there is a table, and on it lies a suicide note. It is necessary to compare the handwriting in the note with the documents of Zechariah. Go back to Zachariah's bed and scan through the camera a bottle of whiskey and a glass standing on the bedside table.

Hitman 3 walkthrough - Fernsby the butler
Now go to the left side of the room, if you look towards the balcony. There are bookshelves here. One of the books can be interacted with (to the left of the stairs) to open a secret passage. This is the fifth clue. And the sixth is the card that lies in this cache, behind the mirror. Leave the premises and go down to the foyer to speak with Mr. Furnsby, the butler. After the conversation, press F1 to open the data menu and see a list of suspects:
- Gregory is the eldest son of Alexa
- Edward is the middle son of Alexa
- Rebecca - Alexa's youngest daughter
- Emma - Gregory's wife
- Patrick is the son of Emma and Gregory
- Mr Furnsby the butler

Walkthrough Hitman 3 - You need to scan the corpse with a camera
Now we need to interrogate the suspects. Walk out of the lobby into the room on the left (the library) where Patrick is playing billiards. He will say that he is busy and ask to meet him later. At the time of Zacharias's death, Patrick was with the maid Rosie. He considered Zechariah himself to be without ambition. And about the situation, he believes that Zakharia really could have killed himself. Or you should pay attention to the butler.
Go a little further from the library with a pool table. On the left there will be a door to the bathroom, and a little further - to the courtyard. Exit through the last one and eavesdrop on the conversation of the bodyguards. You will learn that there is a certain cell in the bank, which may contain a copy of the case against Arthur Edwards.
Return to the building, go left and enter the room on the left. This is the trophy room. Rebecca, Alexa's youngest daughter, will come here. Talk to her. You will learn that Edward and Gregory, after drinking alcohol in the mansion, went to a local pub. Emma has been acting strange, but Rebecca doesn't know how she spent the evening. Patrick disappeared after dinner tonight. Rebecca believes he "might be in trouble". Rebecca herself at the time of Zachariah's death was in her room, where she used a laptop and participated in a conference conversation. She also remembers Mr. Furnsby leaving Zacharias's room that evening.

Hitman 3 Walkthrough - Dress Up as a Photographer
In the upper room (open the map and press M), opposite the trophy room, are Gregory and Emma (Aleksa's eldest son and his wife). Interrogate them in any order. From Gregory, you will learn the following... At the time of Zacharias's death, he was in a bar with Edward. He left for the reason that he could not look at the restless Emma and the unbearable sister Rebecca. Regarding Zacharias, he will say that he liked to drink and had a passion for rare plants. Gregory is also amused by his mother's obvious mistakes and is now "enjoying the whole show."
As for Emma, he went to bed the moment Gregory and Edward went to the pub around 8 pm. The reason is migraines. Zakharia always felt awkward in company, but he adored rare plants. She believes that Alexa is partly responsible for Zacharias's suicide, as she herself made him a hermit. Zacharias appeared depressed after he stopped communicating with his sister.
Go to the room opposite. This is the dining room, and Edward will be here. Interrogate him. Edward will confirm that he was in the pub with Gregory at the time of Zacharias's death. He is also unsure if Zacharias could have killed himself, and suggests that you interrogate Rebecca and find out what she and Zacharias had such a long conversation about. Edward is worried about Alexa's fake death and Zacharias's suicide, but has nothing more to add.

Hitman 3 walkthrough - Family get together for a group photo
As a result, we have: everyone is interrogated, only Gregory and Edward have an alibi.
From the dining room, go to the kitchen and into the maid's room below. There will be several maids, but one of them - a blonde - sits separately on a chair and holds her head. Talk to Rosie and she will confirm Patrick's alibi. If you leave the staff room and look to the left, you will find the office of Mr. Furnsby, the butler, but you do not have a key to the room.
Climb to the second floor and go left. Opposite is the door to Rebecca's room, but it's locked. To the right is the end of the corridor and a window. Climb out the window and follow the parapet to the right to find another open window leading to Rebecca's room. Once inside, examine the laptop lying on the table, and then scan Rebecca's notebook lying on the table next to the fireplace. The handwriting is different from Zacharias's suicide note, so Rebecca is definitely innocent.
Go to the other wing where Gregory and Emma's bedroom will be. It is obviously closed, so follow the bathroom on the right and get out through the window. Move to the right around the wall of the building until you reach the balcony. From it, go to the bedroom and start exploring it. Examine the letter from Emma's mother on the bedside table on the right. It states that her real father is Montgomery, Alexa and Zachariah's older brother. And according to rumors, the last two killed him. Then inspect the cane with the head of a dog, standing to the left of the front door. In the corner near the cane (behind the screen) are shoes. They need to be scanned with a camera. If you go down to the living room where Emma and Gregory are, and go through the glass door to the terrace, you can find footprints on the ground through the camera. They match the sole of these shoes. Finally, there are suitcases next to the screen by the fireplace. Between them and the screen on the floor is a tag from the key to the greenhouse. The key is no longer there.
On the second floor there is a corner with books. In one of the corners is a point of interest behind a wall. Look for the button in the floor there and use the cane on it to get into the secret room. Inside is Montgomery's letter and a couple of coins. It does not affect the investigation.

Walkthrough Hitman 3 - A small cemetery near the mansion
It remains to infiltrate the office of Fernsby. There are two ways. The first is to pick up the moment and stun the butler, and then take his key. In this case, when you do everything, you will have to go up to the second floor and go closer to the office where the lawyer works (studies the laptop). There is a staircase to the third floor, but they won't let you in. But sooner or later, Alexa herself will come down, and you can tell her about the results of the investigation.
But let's focus on another option. There are several attractions around the mansion. One of them is a greenhouse behind the garden. Move there. All doors are closed, but there are 2-3 workers behind the greenhouse. There is a mount on the box. Pick it up and return to the doors to Furnsby's office, on the first floor by the servants' room. Break down these doors. Examine the room. On the left is the master key. You can also find Zechariah's diary in the fireplace, and a list with Furnsby's handwriting on the table. There is a jar of poison on the windowsill, but this is not the poison that killed Zechariah. Therefore, Furnsby is not guilty.
Before you talk to him, go to the greenhouse.
To get inside, use the crowbar to break open the side door that no one is looking at. Inside, inspect the mini-laboratory, and then scan the manual on the right with the camera. It turns out that Emma was going to poison Alexa as well.
Now go to Fernsby, talk to him and tell him that you have studied everything. Only if you have interrogated everyone and looked around the greenhouse (maybe not necessary, but you can indicate to Alexa that she was supposed to be next), Rebecca's room, Emma and Gregory's room and Furnsby's office, the butler will escort you to Alexa. Follow him and talk to the woman. You can blame the butler. I don’t know what will happen in this case, but I went along a simple branch. The container itself is located outside the mansion, against the wall, sort of like not far from the living room where Emma and Gregory are located (when you exit to the terrace, go left). In this case, after accusing Emma, you can ask Alexa not for money, but for a dossier on Edward. She will open the safe, you can pick up the dossier. Alexa will come out onto the balcony. And you still need to kill her. Therefore, follow and push the woman down.
If you can't ask for a dossier as a reward (or simply don't want to), then choose money. Throw Alexa off the balcony and then return to her office. Wait. Two guards will come out to the same balcony. Eavesdrop on their conversation and learn that the safe is behind the painting with the dog. If you previously found the guide There is a button on Alexa's chair. Click on it to remove the painting and reveal the safe. Now you need a four-digit code. There are clues in the form of four pictures - a clock, a telescope, a fireplace and an elk head. The table clock is on the side of the room, opposite the fireplace (to the left of the door to the strange interrogation room). Under them will be the number "1". Look for the telescope up the stairs. Above it, on the wall, is the number "9". The fireplace is located below, and accordingly, the number "7" is displayed on the wall inside it. Finally, the number "5" should be looked for on the side of the head of an elk hanging above the front door. Enter the code 1975, pick up the documents and leave the location.
A Day to Remember

Hitman 3 Walkthrough - Photographer and Fountain Maid
After you find yourself on the territory of the mansion, look for a greenhouse on the side. At the very beginning, there will be a photographer interacting with a maid preparing for a photo shoot. So you will learn about the second storyline. Wait for the photographer to leave, follow him, stun and change. If the guard interferes, you will first have to get rid of him. Behind the bushes, on the side of the electrical panel, in which the fuse is missing, there is a box. Hide bodies in it. As a photographer, run around the mansion and stop at the hearse. Nearby there is a side entrance to the mansion, where two guards are talking. From them you can learn about the safe deposit box, which has a copy of Edward's file. There is a fuse next to the box. After taking it, return to the shield and insert. Take a couple of photos of the maid, after which she will call the whole family. First you need to find a screwdriver, ruin the outlet and pour water from the fountain. In this case, during the photographing, Alexa, sitting on a metal chair, will die.

Hitman 3 Walkthrough - Fuse Location
Her Final Resting Place
On the territory of the mansion, look for a cemetery with a destroyed building on the side. Before entering, the maid and the cleaner will communicate. From them you will learn about the next storyline. Go to the cemetery and see the birds. There are three nests in the trees. If you have a pistol with a silencer, then you can shoot them down without any problems. Just stand somewhere inconspicuous. Then pick up the moment and neutralize the undertaker. Put on his costume and tell the servants that you are ready to meet with Carlisle. Alexa will arrive at the cemetery. Communicate with her, go from one place to another, and when she stands at the pit, push her down. Then you can bury the body. It remains to find documents.
There are two ways to get documents:
- Through the safe in Carlisle's office.
- Pick up a copy from the safe deposit box, having previously received both access tokens - from Rebecca and Fernsby (the butler). As you understand, they will have to be stunned or killed.
Mission 3 - Apex Predator
Tasks:
- Eliminate 5 ICA agents
At the beginning of the mission, pick up the phone and dial Olivia. She won't answer. Go forward. In a small courtyard near the gas station, you can find a flyer. Turn off the road to the right where the car is heading. Along the way, you can pull the knife out of the agent's corpse. Eventually, you will reach the object.

Walkthrough Hitman 3
Follow down the mountain, but take your time. The agent will go from left to right. You need to neutralize it, and then pick up the communication device. Finish off the agent and go down to the club, equipped inside the plant. They won't let you in here, so go to the right, to the water channels. Make your way past the opponents, and then eliminate the girl near the red door, in the far corner. A key will drop from it. The body can hide in the container to the left of the door. Then go through it inside.
Enter the room on the left, you can climb through the window, and look in the closet on the right for the clothes of the work club. Having changed, go out into the corridor and go to the first floor of the club. See the red lines leading to the stairs leading down? Don't be in a hurry to follow this path. Instead, turn right, go past the people, and exit to the open area on the right. There will be a bar here, and the first ICA agent (in fact, already the second one) will come here - Swan.

Hitman 3 walkthrough - Gas station at the beginning of the mission
There are several characters in this location that can identify Agent 47. Not all of them are agents, but there is a white circle above each such character. You need to look for them, follow them and wait for them to use the communication device. In this case, Agent 47 recognizes them as ICA agents. And instead of a white circle above your head, a red target will appear, indicating that you need to eliminate the agent.
So, in the bar outside there will be a bald man with glasses and a faded dark green T-shirt. Hide behind the counter and wait for him to get in touch with the rest of the agents. Now follow him. He will go into the distance, stand at the table, and then come to the canal. Get close to him and push him into the water. Maybe other people will notice you. In this case, run along the canal, around the corner and into the bushes ahead. As soon as the search stops, you can exit. It may be best to change disguises by stunning another character.

Hitman 3 walkthrough - One of the agents outside the club
Return to the beginning of the bar on the street. Do not rush to leave, but stand at the bar and wait. Another agent will come out of the factory - Davenport. He is dressed in black pants and a T-shirt, wears glasses, and will use a communication device when leaving the factory. Then he will stand with the rest of the rest at the table. After that, he will return to the corridor, go to the right and visit the toilet. But there are a lot of people there. Then he will come back and go to the left. I suggest we go back to the restroom and stun the guy in the back booth where Davenport is looking. Open the "staff" door on the left (you already have the keys) and stand against the wall behind it, pressing close to the "Space". Wait. When Davenport comes here, he will see the stunned guy and will approach him. You boldly sneak up behind and attack. Get an agent.

Hitman 3 walkthrough - Another agent who goes out into the yard
Now go down to the very bottom, to the dance floor. Another agent walks through it (in the form of a security guard). Another agent (Montgomery) is also equipped with security attire and is constantly followed by another guard. Chamberlain will enter the security room, follow him and immediately turn into a small utility room to the right. Inside will be the clothes of the guard. You can disguise yourself. You have to eliminate two more agents. In addition to Montgomery and Chamberlain, there is another agent a little higher, in the Tech Only zone. He stands on the bridge and constantly looks down. It is easier to eliminate it than others. Walk forward, past the other two technicians on the other side of the bridge, and behind the wall on the left, find the fuse box. Disable it, then eliminate the two technicians who will come in turn to repair it. Behind there is a box in which you can hide the bodies. After them, an agent will approach the shield. Kill him. Past this place will go and Montgomery with another guard. Shoot Montgomery and then stun the second guard. Five agents have been eliminated, which means you can leave the location.

Hitman 3 Walkthrough - Agent Technician in the Tech Only area above the dance floor
Hitman 3 walkthrough - Mission 4 - End of an Era
Tasks:
- Eliminate Hash
- Eliminate Imogen Royce
You need to eliminate Hash and Imogen Royce.
Self-control (Impulse Control)
Go forward along the path, climb the stairs and open a new location - the square. Turn left, go up the stairs. There will be a mini-karaoke building ahead, a laundry room on the left, but you go to the right. This path will lead to a building with a blue sign called The Block. If you go inside, you will be stopped by the guards, who will say that the building is closed. Go outside, go around the building in a circle and see a white van. Tramps will stand nearby: eavesdrop on their conversation to start this storyline.

Hitman 3 walkthrough - Eavesdrop on the conversation of the homeless
Return to the square and go down from where you came. To the left sits a homeless man on a bench. Stun him and change clothes. You can hide the body in a box nearby. Pretending to be homeless, go to the shelter. It is located forward and to the left of the square, with a blue sign called The Block. There are guards inside. And if before they could not let you through, now you can talk to one of them. Follow the guard (you need to go through the search procedure), wait for your turn upstairs, sitting on a chair, and go to the laboratory assistant. Listen to her and leave the building, following the guard.
Go around it and go up the stairs near the place where the homeless were eavesdropping. Having done this, climb inside through the window. There is one staircase upstairs, which is guarded by two guards, as well as another staircase upstairs behind bars. The latter requires a mount. Follow the stairs with two guards and go down. This way you can find the clothes of the street guard. Go through the street with two enemies (barred courtyard) and enter the door ahead. Behind it you can find a mount. Use it on the grating of the second floor and climb higher. At the very top, exit to the balcony and climb up the scaffolding. There will be two doors with a code. A board is visible through the window, on which the old ones are crossed out and the new code is indicated - 2552. Go through the left door. Stun the doctor and guard. Equip any clothes and hide both bodies. It is important!

Hitman 3 Walkthrough - Confronting Hash
Having done this, exit to the main hall with Khash. Follow the subject into the room, stun and change clothes. After hiding the body, go to Khash. When he sits down, do the same. If you do not resist, it will be more difficult to eliminate Khash. You will have to break open the door on the side, bypass the guard in the blue suit, eliminate him, and then the bodyguard and Hash himself. If you resist in the chair, Hash will go to the back room. As soon as he comes out, eliminate the bodyguard and Khash.
Certainty Principle

Hitman 3 walkthrough - The person to disguise as
Once in the first square, enter the diner with red signs on the right. Eavesdrop on a conversation between a man and a woman standing at the table. Confirm the start of the storyline. Go outside and look around the corner to the left. See the stairs? Climb up it and go along the bridge until you see a courtyard below on the left. There will be a female chef standing there trying to remember the password. Eavesdrop on her until you hear the code 0118. Now return to the square. Opposite the diner with red signs is the entrance to the corner building with a blue sign. Go inside, go up to the top floor and find a door with a code terminal there. Enter 0118 to get inside. Go to the back room, the bedroom, and pick up the form P41 lying under the bed.

Hitman 3 Walkthrough - Lab Tour Guide
Now we need to disguise ourselves. Follow the marker, back to the restaurant where the man is sitting. There is always a waiter nearby. Go through the door on the right, duck down, sneak up and stun the distant cook. Hide it in the drawer and then examine the table. Prepare the dish and press the bell. The waiter will come here. Run back, stun the sitting man and change clothes. Drag it a little further and into the toilet on the right, where there is a box in which you can hide the body. Run to the marker and chat with the guide girl. Follow her inside the lab and hand over Form P41 below. Then throw away all weapons and approach the guards. Let them search you.
After meeting with the guide, follow the girl forward. When you find yourself in a room where the guide will give you time to look around, go back a little and look to the right. There is a laptop on the shelf that needs to be hacked, but a woman is sitting behind the transparent glass. Use the camera and scan the device on the wall to the right of the laptop. This will close the window. Look around. If no one is watching, hack the laptop and move on. Move forward until you meet Royce. Then follow her and listen in her office. Royce will then leave. You use the terminal to fire her guard. You can fire two more people if you wish. Then go outside and ask the guard to call Royce. Return to the office and use the wall panel to close the windows. When Royce arrives, eliminate the girl and hide the body inside the closet.

Hitman 3 walkthrough - Meeting with Royce in the story
After both Hash and Royce are dead, it will be possible to go to the core. If you first got rid of Khash, and then followed the current branch, it will be easier. If everything was the opposite, then after the current branch you had to leave the laboratory and go after Hash. In this case, you can return here in the same way as in the case of a guide. But in the room where the laptop was hacked, you will have to look into the pantry on the left (however, you get into it through the ventilation from the adjacent dressing room, since the path to the room is closed) and find the level 1 access key. Then it will be possible with the help of a camera to crack the panel at the door. After reaching the core, interact with the terminal several times. Eventually, the alarm will rise. There is ventilation behind the terminal. Make your way through the first one and wait. When the guard appears (he will be alone), return to the core and eliminate the target to change clothes. Disguised, you can get out of the laboratory. Just run past the other guards so they don't have time to recognize you. Go to any exit point.
All-Seeing Eyes
Move to the square, go up the stairs on the left and enter the laundry room on the left side. There will be a code door here. To open it, enter 0118 - the same password that you heard from the woman in the courtyard on the right. You used it in the second story to get into the room with the P41 uniform. Another option to get to the roof of the laundry is to stand on the square, enter the building on the left (to the right of the stairs to the alley with laundry and karaoke), go upstairs, exit to the balcony and cross the fence on the left. Move along the balcony of the building and climb up the pipe. In the end, you must climb to the topmost roof and find a broken drone. Scan it with your camera. Go down a little lower, neutralize the guard and pick up his sniper rifle.

Hitman 3 Walkthrough - Huge Server Room
Go back upstairs and stand under the billboard. There are extra ammo on the side. Shoot all drones flying ahead and to the right. Some will be further than others. When shooting, use slow time and breath by holding Shift. If the drone is far away, try to shoot slightly to the right or left along the path of its movement. After shooting all the drones on the right, deal with the drones on the left. History will end. Now, when you get to Royce's lab, Olivia will summon her, and you can follow the girl, trying to find the right moment to eliminate her.
Mission 5 - Farewell (The Farewell)
Tasks:
- Eliminate Don Archibald Yates
- Eliminate Tamara Vidal
- Protect Diana Burnwood
At the beginning of the mission, go to the observation deck and chat with Diana Burnwood. She will issue an invitation, and also indicate two targets - Don Archibald and Tamara Vidal. If you suddenly do not take an invitation from Diana, you can find him a little lower, in a flower bed from the side of the trailer, next to a smoking man.

Hitman 3 Walkthrough - Party Location
Excursion/Tour (The Tour)
Go to the winery and the venue of the celebration. Enter the building on the left and eavesdrop on the conversation between Corvo and the military on the right. After that, confirm the start of the storyline and follow Corvo. When he goes outside and goes for a smoke break to the outskirts, stun him and put on a suit. Hide the body in the nearest flower bed. Move in the role of Corvo to the indicated place and talk to the administrator at the reception about the sightseeing tour. Exit through the door on the right and go down to the vineyards. Chat with Diana and Tamara.

Hitman 3 walkthrough - Corvo and the military
Now you need to jump over the fence so that no one notices you, and then move between the rows of grapes. Get to the chief winemaker and eavesdrop on his conversation. Chase the worker, stun and equip his clothes. The body can be hidden in a box by the road. It will also drop a worker's key. Next, go under the roof of the shed. Keep in mind that people with a white dot above their heads can recognize you even in a worker's suit. Under the roof there will be a table with a knife for cutting grapes. Take this knife. Now you need to find three large grons of dark grapes with round berries. There are many such grapes here, but only the largest grons will be allocated. Just walk along the rows of dark grapes (on the other side of the barn, not where the main winemaker is) and look for the grons available for interaction. Not every row will have one like this, so don't worry if you can't find the right one for a long time.

Hitman 3 walkthrough - These are the grons you need to cut off
After cutting them, take them to the main winemaker, then change into Corvo's clothes and get out of the fields. Go to Tamara and Diana, to whom the main winemaker will also be pulled up. And so the tour begins. Go after the chief winemaker and listen to him. He will then ask if anyone has any questions. Say you have them. Four markers will appear. They lead to four different devices that you can use to eliminate Tamara:
- There is a press next to it. If you ask about it, the winemaker will offer to take a photo together. Stand next to Tamara and Diana. Then Diana will distract the winemaker, while Tamara will remain under pressure for a while. But there is a nuance here: you need to interact with the remote control at the press twice, and after the first of them, the winemaker will be distracted by you. Somehow it turned out that even with the winemaker looking in my direction, I managed to press the button a second time, thereby killing Tamara and not arousing anyone's suspicions. Perhaps there is some other way.
- Next, there is a huge barrel of wine. Go up to it, ask the winemaker and wait. When he and Diana leave, Tamara will linger a bit. Stun her and then drag the body to the barrel and drop it there.
- There is a crusher in another room. Ask for her, and when Diana turns on the radio and thus distracts the winemaker, push Tamara into the crusher. Cruel death.
- Finally, in the far part of the same room there is a freezer. On the way to it, there are wooden barrels behind the entry point. A screwdriver is stuck in one of them. Take it away, because it will come in handy for the freezer. Once the winemaker and Tamara are inside, you can interact with the panel on the left (you need a screwdriver) to lock them in the freezer and kill them. Or you can wait for the winemaker to come out and lock only Tamara inside.

Hitman 3 walkthrough - You can crush Tamara under a huge wine press
The second and third options are, in my opinion, the easiest. After them, the winemaker will not be distracted, but will escort you to a room with wine barrels. Don Archibald will appear. He and Diana will leave and the storyline will end. But here the next, hidden - Closing Statement begins.
Closing Statement
This line only starts if you follow The Tour story below. When the chief vintner escorts you to a meeting with Don Archibald, let everyone leave, but don't be in a hurry. Watch for the guard who will come to the glass on the right and talk to the sommelier. Mr. Yates will ask you to bring him 1945 wine. The door to the inside is closed, but there is a hole next to it through which you can jump down. Preliminarily take a screwdriver sticking out in a barrel to the right of the entrance to the winery (as you entered it from the side of the fields, in a room with a freezer and a crusher). Use a screwdriver to open the ventilation below and go up to the room with the sommelier. There will be two of them, so pick up the moment and eliminate both. Change your clothes, you can drop the bodies down. And if there are guards outside, first use the panel on the wall to close the windows.

Hitman 3 walkthrough - Encounter with Don Archibald Yates
After dressing as a sommelier, open the vault by entering the code 1945 (the note above the code panel indicates that the code is a vintage year; winemakers call one of the most fruitful years for grapes a vintage year, and, accordingly, the wine made from it is very much appreciated). 1945 is the year when the wine was created, which is in storage. Not too secure and original password, but still. Take the bottle and go to the meeting with the guard. You can first drop all weapons and other prohibited items (marked with a red label in the inventory). Follow the head of security, let yourself be searched, and present the wine by standing at the edge of the table. Then wait. In the end, Diana will be tied up and taken to Archibald's house.
Follow the marker and open the far door. Climb out carefully. You can disable the guard. At the top of the stairs is an enemy looking down. Run up to him and melee attack (Q key). Or try to find another way (I failed). Then hide his body on any balcony. On both balconies, stun the guards and talk to Diana. Sit on a chair and wait for Archibald to come. Watch his monologue until Diana sticks a knife in the ribs. Kill both guards and finish off Archibald when Diana asks. Hide his body, put on the Agent 47 costume and go outside. Dance with Diana at the indicated location.

Hitman 3 Walkthrough - Don's Last Words
Keep an eye on the target (Eyes on Target)
Move forward to the entrance to the feast, but look to the left. There is something like a protected dam here. Make your way to the forbidden area on the left side, go around the enemies and enter the building ahead. Disable the fuse box on the wall on the left to lure the soldier here. Defuse it and equip clothes. She is needed for the mission. Next, drag the body to the closet inside the room.

Hitman 3 walkthrough - Snipers to help kill Tamara
Follow the marker and go up to the snipers. If you see a person with a white dot above their head, then try to avoid direct contact. Upstairs, eavesdrop on the snipers and activate the storyline. Go downstairs and steal a communication device from the indicated box. Do this after the enemies leave. Then pick up a camera and scan any object on the table. Then give the order to fire. After that, it remains to go to the party, find Tamara, scan her and give the order to shoot. And you need to do this in the form of a military man.

Hitman 3 Walkthrough - Tamara on the Terrace
On top (Over the Top)
This mission will allow you to lure the sommelier out of the room, and somehow flows into the Closing Statement storyline (the only one that allows you to kill Archibald). Head inside the building where you took the first story mission. Go to the far end, to the stairs leading to the winery (to the plant itself). There are two workers on the stairs. Eavesdrop on their conversation and agree to start the story. Follow the senior worker until he communicates with his subordinate. Next, you need to change into a worker. No need to stun anyone. Go to the left hall where the crusher and freezer are located. To the right of the freezer, behind the tables, there is a door to the locker room, where there is a bag with a worker's uniform.

Hitman 3 Walkthrough - Winery Cleaners
Change clothes, find a screwdriver in a barrel to the right of the exit to the grape fields. And look for the wrench at the bottom right of the crusher. Be careful as the worker may recognize you. The key lies on a mobile tool box, to the right of the table against the wall. After receiving both items, go to the pipe. Throw a coin so that the worker turns away. Having done this, interact with the pipe. Repeat the steps and interact with the terminal to sabotage the winery. History will end. A sommelier will run out of the room with the barrels. You can pick up the moment to stun him. But in general, I did not understand the meaning of this plot.
Hitman 3 walkthrough - Mission 6 - Untouchable
Tasks:
- Eliminate Arthur Edwards
Watch the introductory video. Move forward following the visions, blow up the car, and then wake up in some kind of laboratory. Stun the doctor and change clothes. It will also drop a key card. Open the door ahead with it, go past the couple on the right side and open the far room. There will be a door with a combination lock. On the wall on the left hangs a poster with large numbers (year) - 1979. Enter the code on the panel and take the mount from there. Use it to open the door. Get out of the car and move along the ledge to the right. Climb to the roof in the place where the logo is shown. Stun the guard and equip his suit.

Hitman 3 walkthrough - Agent 47 in his tuxedo
In the next car, at the very end, look for a yellow valve that needs to be applied to the mechanism in the middle. Get out, go into the new car (it's useless to climb on the roof) and get out through the window on the left or right. After going around the door, climb through another window and follow the guards. The only one who can see you is looking down.
Next will be a room with a compartment. You can hide in the compartment on the left so that the enemy passes by (he can identify the Agent), and then move on. Next will be a wagon with three enemies. Let the one who can identify you stand by the window on the left. And you go ahead. Then there will be a car with billiards. In front of him, on the left is a room with fuses. If you found a rusty nail earlier, you can crack it and divert attention. If not, take your time and stop in front of the billiards counter. Remove the key to the passenger car from the wall, and then go back and open the door to the room with the shield. Or you can just get out of the car through the window and go around the enemies across the street. You decide. If you turn off the light with the shield, hide in the closet and wait for the enemy to appear. Stun him and hide in the same closet.

Hitman 3 walkthrough - Not far from the head car
Get into the bar through the side window of the car. Follow the bar to hide from enemies. In the next car, get out again through the window and climb into the compartment with the sleeping soldier. Equip the clothes from the bag lying on the bench. Next will be an open wagon with one soldier. There is also a fuse box and the fuse itself, lying on the floor. Better not spend it, but stun a soldier in hand-to-hand combat. If you spend, in the next car, find the yellow valve and open the car behind you. Inside there will be a weapon and another fuse. It is extremely important, because further there will be another open car with five enemies. Insert the fuse into the box, and while everyone is stunned, run to the very end. Enter the car and hide in the box on the left. Wait until the enemies outside stop looking (because one of them will enter this car). When everything stops, stun the commander and equip his uniform.

Hitman 3 walkthrough - Decide the fate of Arthur Edwards
It remains to go forward past the soldiers, get over the armored personnel carrier and disconnect all the cars. Pre-put on an office suit and make your way further. Talk to Arthur, and then decide what to do: you can shoot, strangle (the string is in the wardrobe in front), finish him off with a fire extinguisher. Or you can take a syringe from the table and stick it in his neck so that he forgets about everything, as happened with Agent 47. Watch the end credits.
Was the article helpful?