While playing Horizon Forbidden West, players will encounter red crystals known as Fire Glitter. Here is a guide to help you...
Horizon Forbidden West Reach for the Stars Walkthrough

Walkthrough of the story mission "Reach for the Stars" in Horizon Forbidden West.
Job level: 3
Demand: Automatically starts after the opening cutscene
Reward: +500XP
Mission information: A long search led Aloy to a mysterious ancient object. Together with her friend Varl, she must scour the ruins for a backup copy of GAIA - her last hope of rebuilding a terraforming system that can heal the world.
Objectives:
- Assemble the Medicinal Skybrush
- Eat healing berries
- Go to Ancient Ruins
- Examine the carcass
- craft arrows
- Go to Ancient Ruins
- Find the entrance to the ancient ruins - scan the car (optional)
- Find the entrance to the ancient ruins - Kill the car (optional)
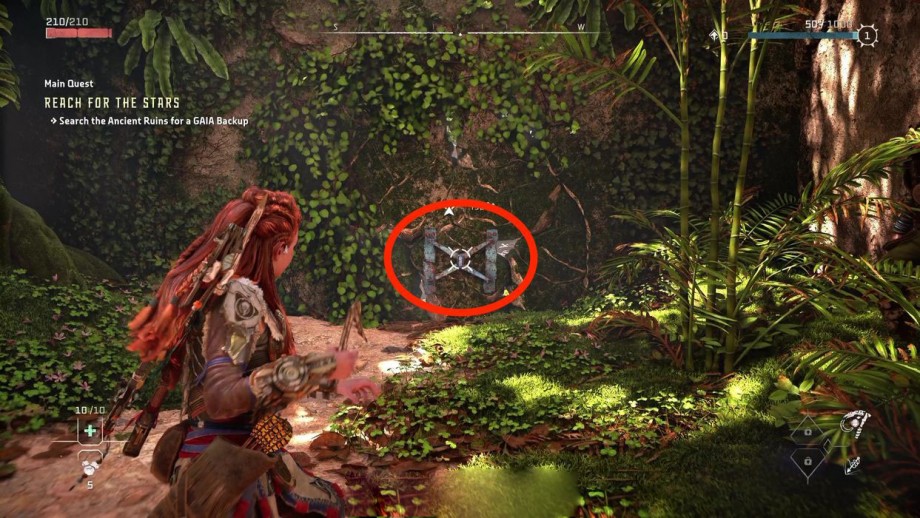
- Find the entrance to the ancient ruins
- Search the ancient ruins for a GAIA backup
- Examine the ruins of the collapsed wall
- Examine the corpse
- Searching the camp for tool repair parts
- Create a Tool
- Clear rubble with the Pullcaster
- Scan area
- Using the capture point
- Gaia Backup Ancient Ruins Search (GAIA)
- Lower the ladder
- Gaia Backup Ancient Ruins Search (GAIA)
- Kill a rohrer with a silent blow
- Gaia Backup Ancient Ruins Search (GAIA)
- Kill the machines
- Gaia Backup Ancient Ruins Search (GAIA)
- Console Inspection
- Talk to Varl
- Go to data center
- Go to the shuttle
- Finding Shuttle Clamp Controls
- Climb the starting tower
- Shoot the shuttle cable connectors
- Kill the car - Destroy Slytherfang's Acid Sack
- Go to data center
- Gaia backup search (GAIA) in the data center
Walkthrough "Reach for the Stars"
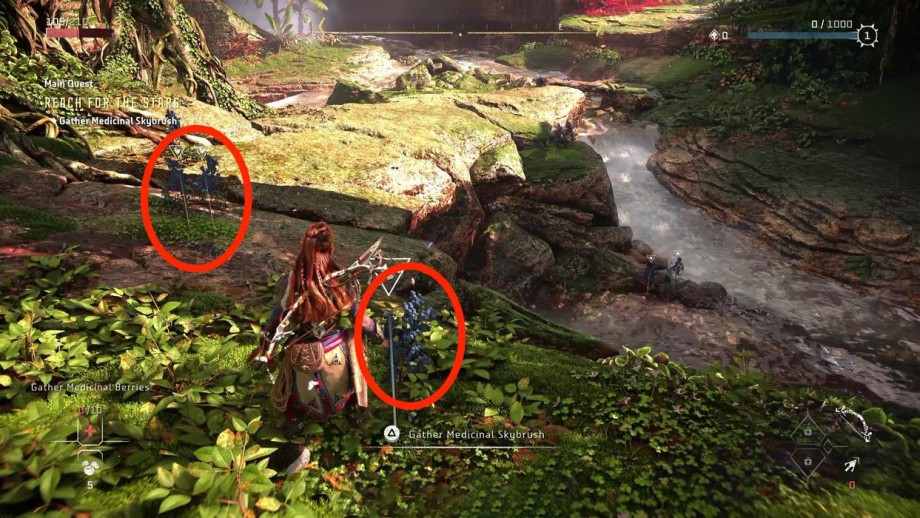
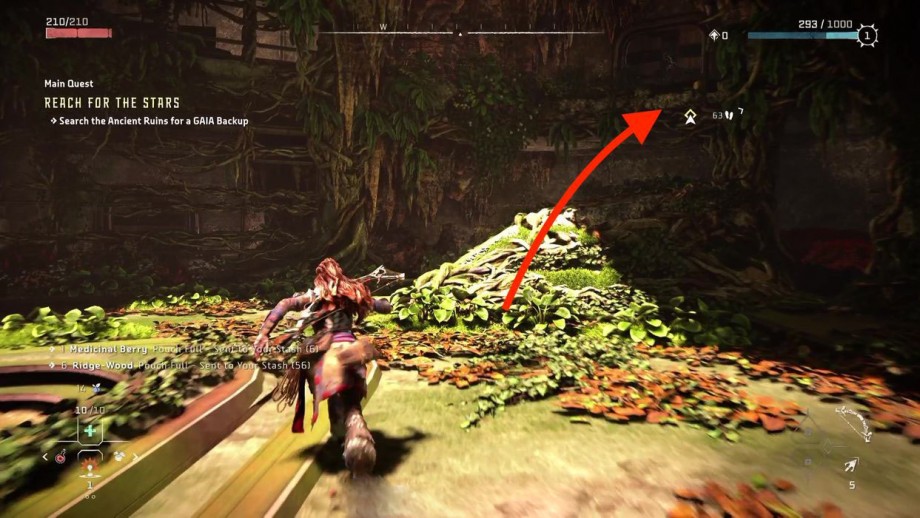
Once you can control Aloy in Horizon forbidden west, go forward to the nearest Medicinal Skybrush Berries (purple flower). You only need three berries to advance to the next objective, but you can collect more. Then just press "up" to eat medicinal berries and heal. Once you've collected enough Medicinal Berries, cross the river and climb up the ledge to reach a fork in the path.
Choose any direction to make your way forward. If you decide to go down the cable car, be sure to search the small cache of supplies that is located under the start of the cable car. Once you've made it all the way down, continue on to the next waypoint. In the end, you will reach a wide open area with the remains of cars. Approach the corpse to inspect it. The car was recently removed.
Follow the instructions on the screen to create some arrows. Feel free to explore the area for resources before moving on to the next waypoint.
Target the red lock on the ladder opposite the car's body to free it, then climb up it to continue forward. In the next area, go forward until Aloy and Varl hide in the red grass so that the digging machine doesn't see them.

Now you are given the opportunity to study the machine. To do this, follow the prompts on the screen. In addition, you can use the D-pas arrow keys to switch between different parts of the car and identify those that are removable, those that create explosions on impact, etc.
Once you have researched the Burrower, the game gives you the option to kill him. We suggest doing this to get details and resources. Here you can choose a stealth path or a precise approach. If you choose the latter, we suggest aiming for his eye, which is his weak point. After killing the Burger, another one will appear. It is up to you to decide if you want to keep practicing or move forward towards the next goal.

Head up the hill where the second digger came from and knock the red lock off the ladder to free it. Climb up it and continue along the linear path to the left until you can crouch under the rocks. After hiding under the rocks, you should find a ladder that you can push down to create a shortcut at the end of the path. Then go to the right, where the secretary with the hologram is waiting for you. Approach the red door at the end of the entrance to open it.
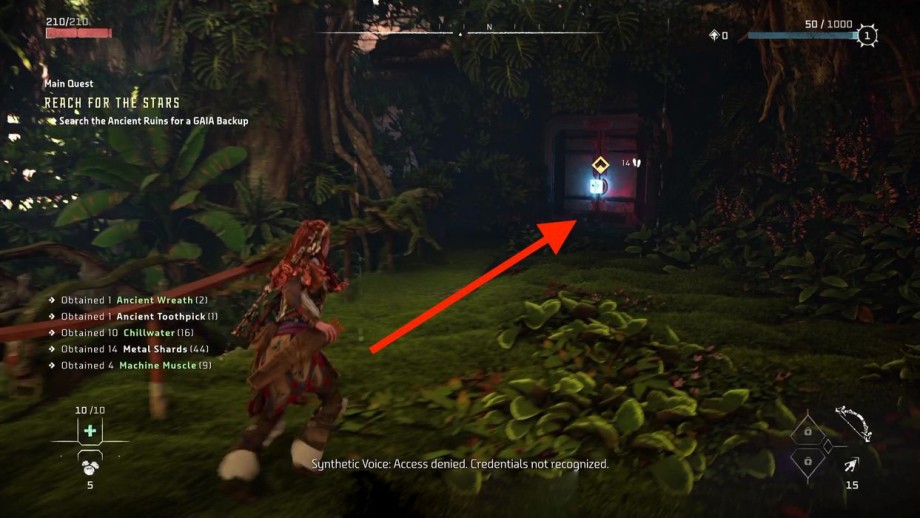
As soon as you break open the door, you will find yourself in a burning camp. Approach the debris in the collapsed wall to inspect it. Now approach the corpse lying next to Varl. We need to fix the instrument. Focus Aloy has already scanned the parts we need (the glowing purple triangles). Approach them to pick them up. Now go to the workbench, as shown by Varl, to start making the tool we need. On the create screen, simply hold "X" to create the Pullcaster, a new tool introduced in Horizon Forbidden West.
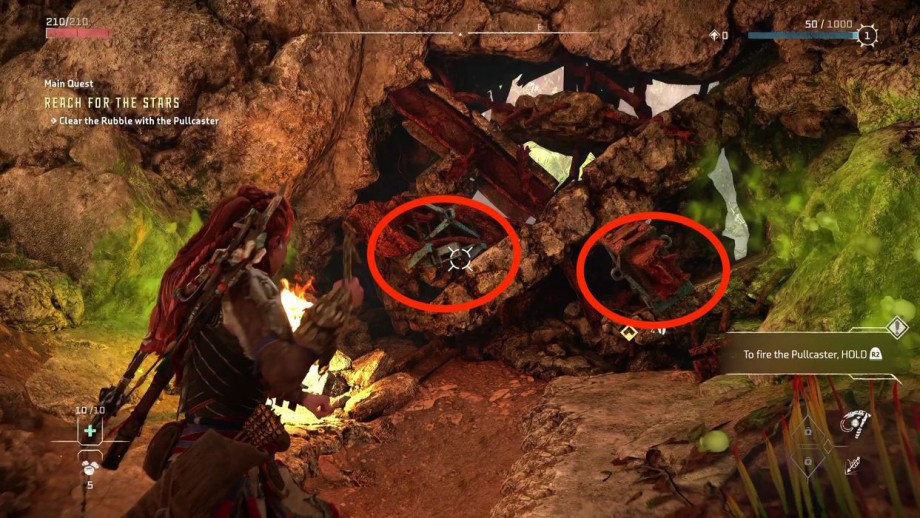
Now approach the fallen debris to remove the debris with the Pullcaster. Follow the instructions on the screen to drop it. To completely remove the debris, make sure you aim the Pulkaster at the rust on the blue parts. You need to do this twice, left and right.
In the next area, scan the area with your Focus for points of interest. Activate the console there and listen to the hologram. Then find the yellow part of the broken ladder and scan it. Now go up the stone ramp. Jump off the ramp and use it while in the air to automatically grab onto it. Keep climbing the ramps until you find the second grapple for your Pulkaster. Then follow the on-screen instructions to continue.
Now we need to lower the ladder for Varl to join us. Just jump down and lower the ladder for Varl. Open the doors opposite the stairs and a cutscene will start. Once you've regained control of Ala, continue on the next set of waypoints until you need to use a tractor to clear the rubble.
Follow the instructions on the screen. First learn the Digger's path by activating Focus. Then equip the stone by throwing it when Aloy says. Make sure your rock lands close to where you crouch so you can easily get close and stealthily kill a burrower with a silent slam without being seen. Varl will stealthily kill another burrower in the area. After getting rid of the digger, continue climbing the rock.
Now that you've mastered the two main ways to kill machines, it's up to you to decide whether you want to go for their weak points or a silent strike. Proceed to the next set of waypoints and be sure to search the diggers for parts and resources. Disarm the traps by shooting them with an arrow.
Inside the cave, Varl suggests that you make explosive traps in case of collision with machines. First collect the required resources found in the area, and then if you have heeded Varl's advice, hold "down" to start crafting.

Once you've finished crafting, keep climbing the wall and be ready to crouch in the grass, as some Scrounger machines (weak to frost and acid damage) will be waiting for you. It's time to use the traps we just created. Scan the cars with Focus, then find their path and once you're out of their line of sight, place an explosive trap in the path of any of them. Once you've done that, hide in the grass and wait until the car explodes. Now take care of the other Scrounger the way you like and don't forget to scout out the details once the area is cleared.
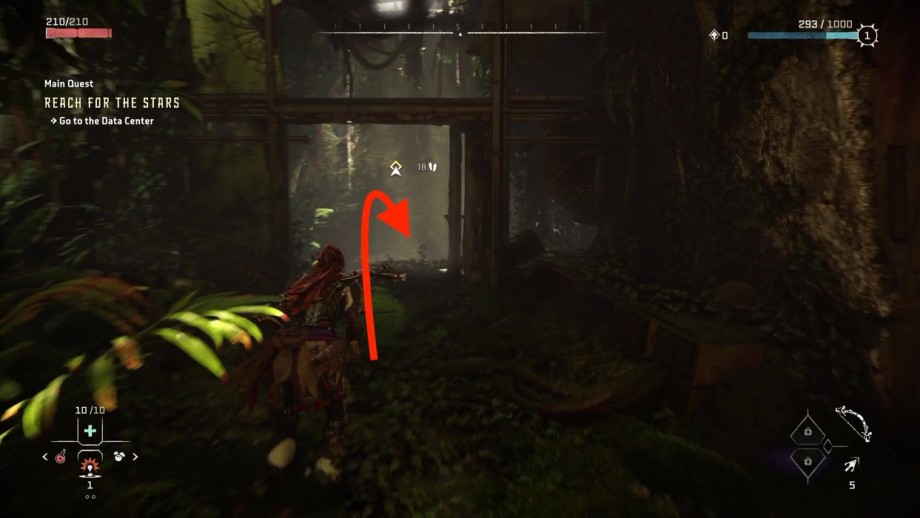
Now head up the ramp to the door to open it and access a new area with a new door to open.
In this new area, Varl will bring down a ladder for you to use as a shortcut. There is a wall next to the hole with a ladder that you can climb (the part that you can climb is painted yellow). Then slide down the ledges until you reach the meeting room. Now approach the console to examine it to trigger a new cutscene.
After the cutscene, approach Varl to talk to him. He will give you Blastsling, a weapon that launches bombs that hit large areas. This weapon specifically fires ice bombs. You can use bombs against any type of enemy to reach the Fragile state. In this state, enemies are more vulnerable to any arrow damage.
Open the door to go back outside and find Scrounger.
Defeat it any way you like, and then continue on to the next set of waypoints until you encounter a few more vehicles.
Again, choose the approach you like best. At the back of this area, shoot the red lock on the yellow ladder that hangs from the ledge above. Climb the stairs as Varl suggested and then go up the second ladder and then keep going until a new cutscene starts, revealing some Slippery Fangs.
Before you go down the rope, you can mark all the enemies and their paths. Hover over an enemy to mark them and mark their paths. Now get down. In the next area, there will be several machines that you need to destroy. This area has a lot of parts and resources for you to collect, so don't miss them. Proceed to the next waypoint to free another ladder (shoot the red lock at it). Keep climbing up. When you reach the top, do a sprint jump to grab onto the ledge on the other side.
Keep climbing the yellow parkour objects. You will eventually reach a new area where Aloy will mention that there is a new console station nearby.
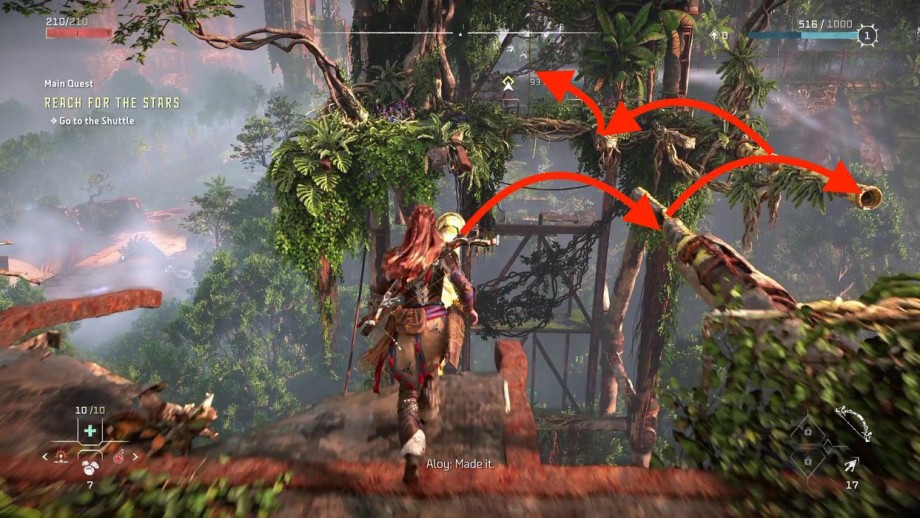
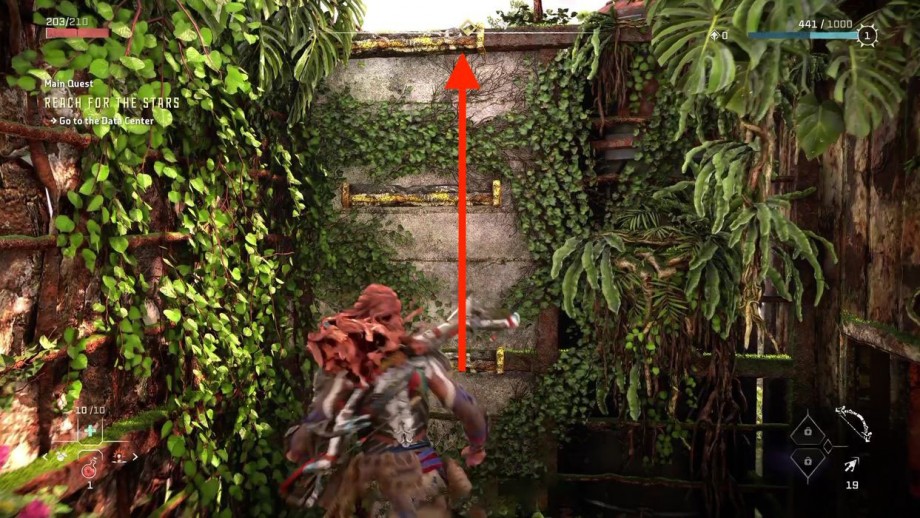
In this new area, don't forget to collect any resources you find and get rid of the Scrounger and Burrower machines. Once you get rid of the cars, approach the console to release the clips. However, things don't go as planned. To climb the tower, go to the elevator (the main rusty tower) and start by releasing the elevator by pulling the blue brick with your Pulkaster. Then climb through the hole in the middle of the elevator roof and keep going up until a new target appears.
Over the next few minutes, you need to climb the tower and shoot two cable connectors. The first cable connector is halfway up (follow the waypoint).
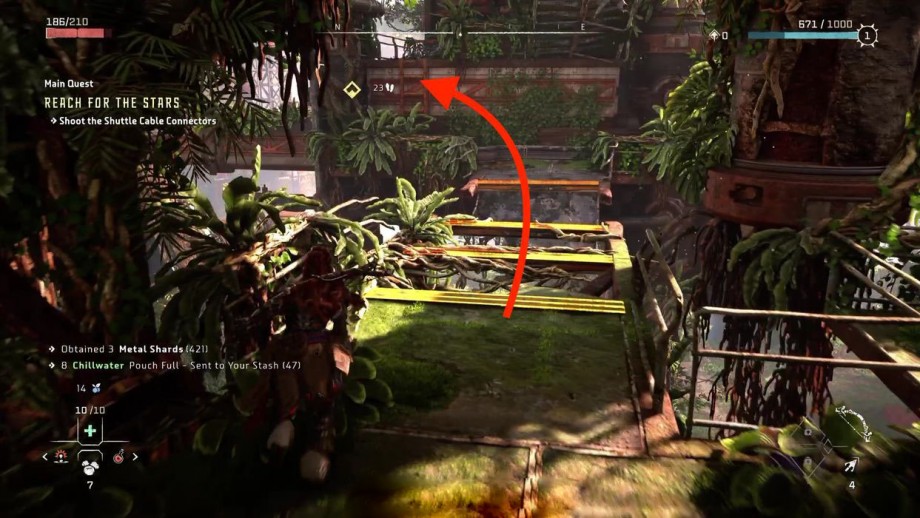
The second one is at the very top of the starting tower (follow the waypoint). If necessary, use your Focus to highlight the yellow ledges and hooks to see where you need to go. Slippery Fang survived! Time to kill him. As usual with any new machine, start by scanning for its weaknesses and elemental weaknesses. This will also add it to the machines directory.
Slither is weak to fire, frost, and plasma. It has strong shock, cleansing water and acid. In order to start dealing some damage, you have to target Slipperyfang's Acid Sac that is in its lower part (yellow part when looking for weaknesses). Once you get rid of his acid sac, keep scanning it for other parts you can hit until it disappears. Don't forget to clear the carcass of a significant amount of parts and resources. It's time to return to the data center.
Climb up the rubble (the only waypoint in the arena where you fought Slippery Fang) and open the door.
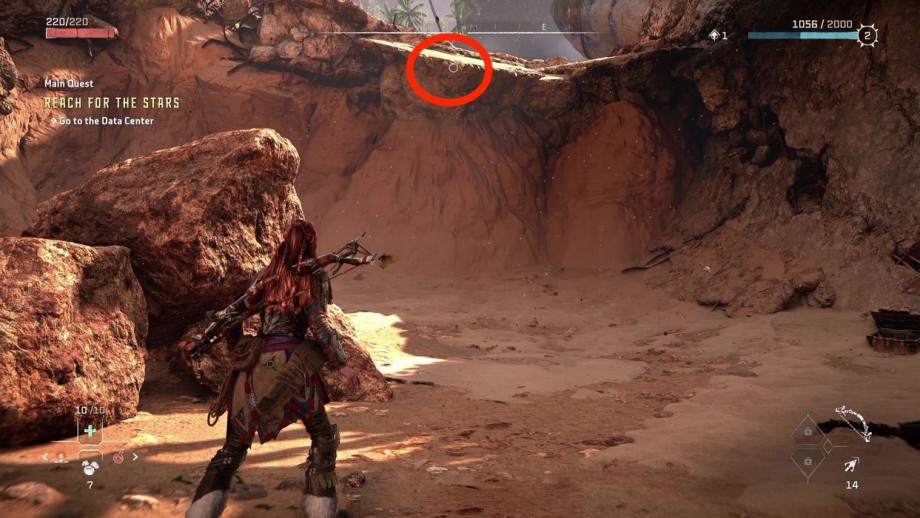
In this new area, keep going down until you can interact and open a new door. This will trigger a new cutscene.
Was the article helpful?