While playing Horizon Forbidden West, players will encounter red crystals known as Fire Glitter. Here is a guide to help you...
Horizon Forbidden West "Death's Door" Walkthrough

Passage of the plot mission "The Door of Death" in Horizon Forbidden West.
Job level: 10
Demand: Automatically starts after completing the quest Посольство
Reward: +5000 XP, +2 Points
Walkthrough "Door of Death" Horizon Forbidden West
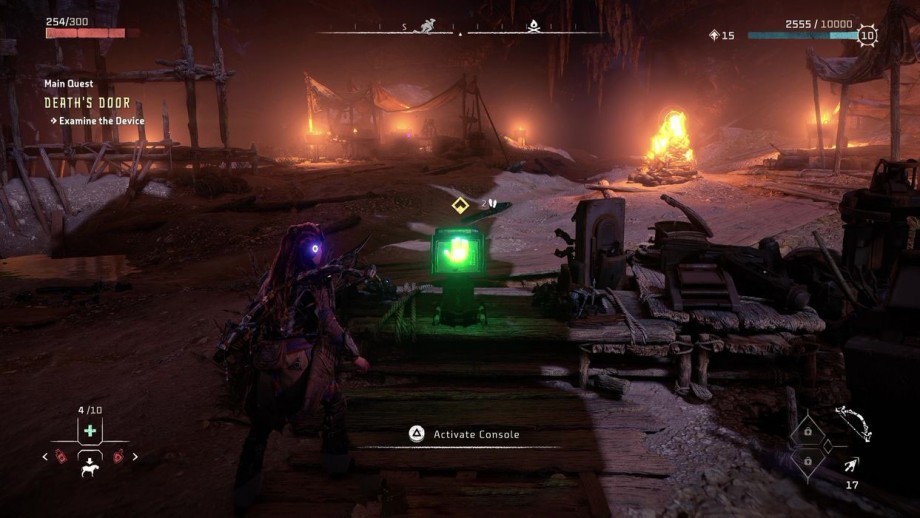
Before heading further into the Forbidden West, make sure you recover any parts or resources from the camp where the massacre took place in the previous mission. On your way to the next quest marker, you may encounter a Longneck. Feel free to stop and redefine it to reveal more of the map. Once there, approach the panel with the green light to unlock the next objective.
The device triggers a hologram of Sylens. Just watch the interaction between Sylens and HADES to activate the next target. Now we need to follow the trail of the Sphere. If you like, you can search Sylens' workshop for parts and resources and learn more about Sylens' attempts to gain the knowledge of HADES. Exit the cave and continue around the lake past the Corruptor machines.
In the end, you must travel to the Scrapper and Glinthawk biome. Engage or ignore vehicles and continue following waypoints. Pass the Merchant and eventually you will find yourself in a place that looks like a ruined mined cave. This is the AIDA Testing Lab. Keep walking past the dead Slippery Fang and you should unlock the next objective.

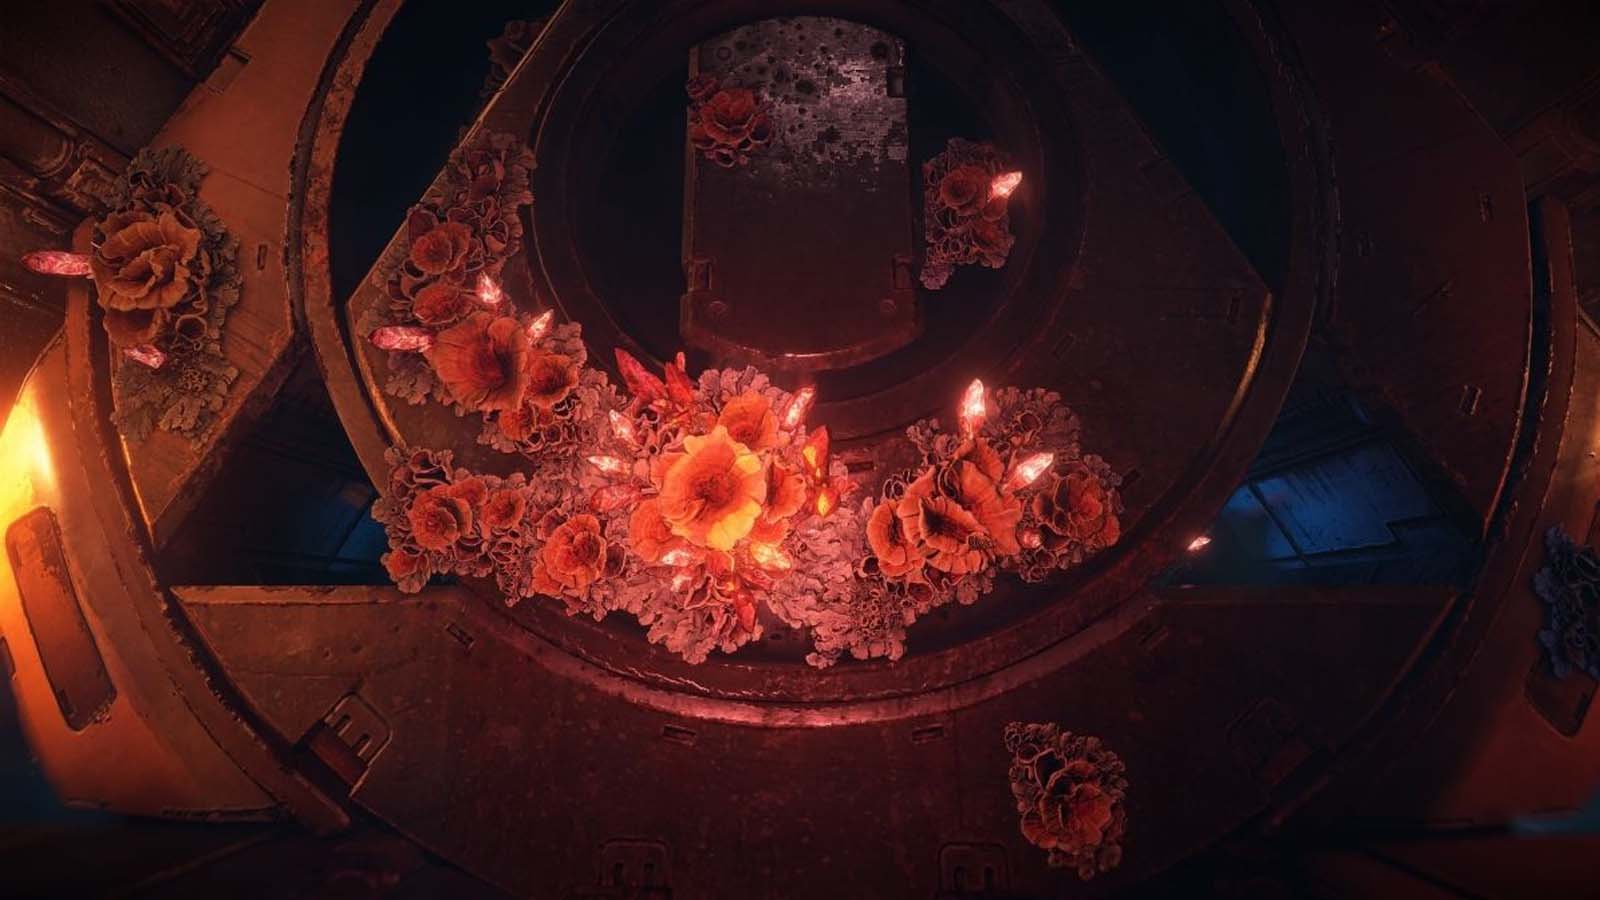
Approach the Sphere to inspect the HADES. After talking to Sylens' hologram, you can approach the laser door to enter the facility. However, we can't open the door yet. We need some parts to build an igniter to burn the flower crystals (Firegleam) stuck on the wall of the door.
Gather Resources for the Igniter - Build Leaplasher Spark Coil
We need to start by collecting the Leaplasher Spark Coil. Exit the cave and you should see some Leaplasher cars by the lake. Scan them to add them to the Machine Catalog and find their weaknesses (Purgewater and Regular Arrow), then get rid of them to get the resources you need. Once you have killed at least one Leaplasher, approach him to collect the part you need.

Return to the cave entrance, but do not enter. Instead, go to a nearby workbench to create an Igniter. Scroll down to Special Gear to create an Igniter. Now return to the cave and use your new weapon to burn the Flame Glimpse from the genetic lock hatch.
After opening the door with the igniter, go to the next room and open a new door. You will now be in an area of water where you will need a platform to access a hatch that gives you access to another door.
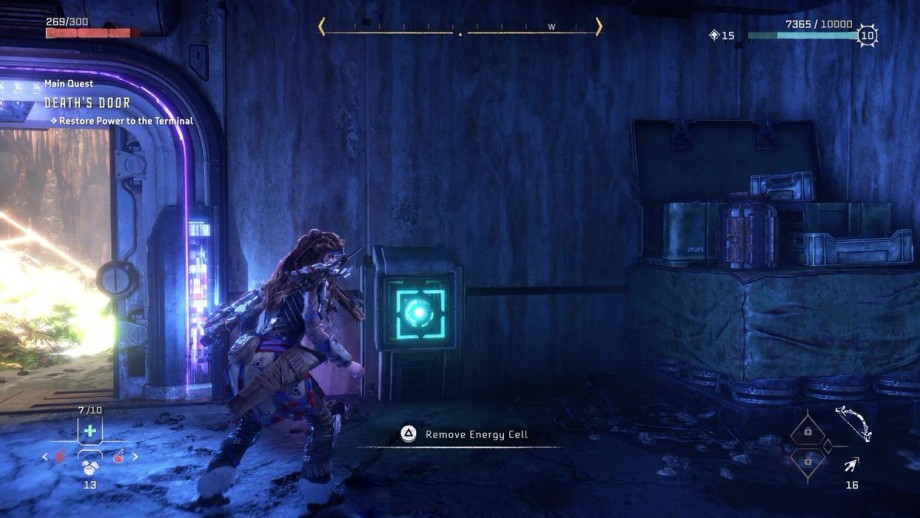
Once you climb through the hatch, grab the power cell to activate the door and enter the next area. In the new area, use your Pullcaster to pull yourself up and push the box through the hole.
Drop down into the same hole and then move the crate across from where it landed to create a platform. Light up the Firegleam and go through the hole in the wall. You will end up in the same area where you previously used the energy cell to open the door. Take the same energy cell and take it to the room you came from. Place an energy cell in the right slot (one opens a loot chest) to activate the next target.
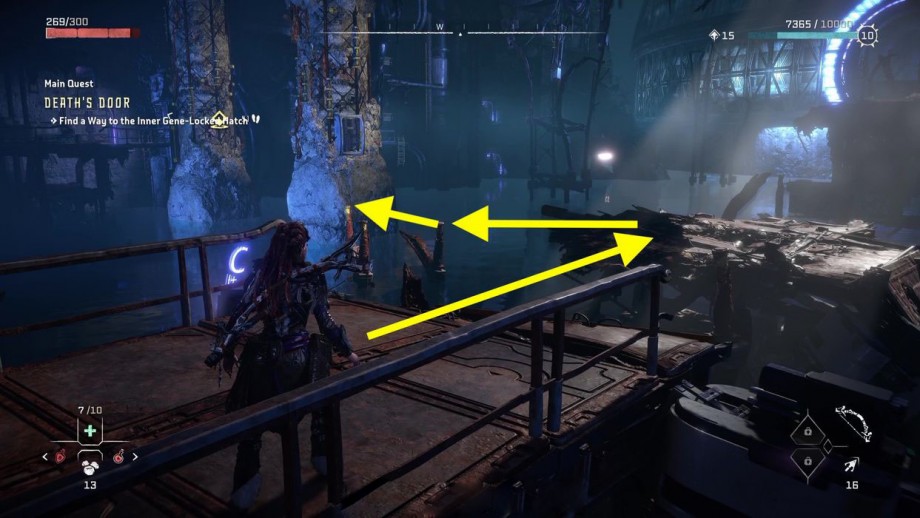
Climb back to the platform and open the door. Enter the door and you will find yourself in a much larger area of water than before. Start by climbing up the only ladder available, and then jump down to a new platform from which you'll see some tilted poles that you can attach a pullcaster to. Remove the plate, jump and cling to the point.
Climb up the pole and then jump onto the nearby yellow climbing paths until you can't jump anymore. Instead, slide to the platform in front of you. Jump down the ladder to take a short cut if you fall into the water. From here, throw yourself towards the capture point. From the pole, slide to the next marker on the map, where you'll see more fiery reflections.
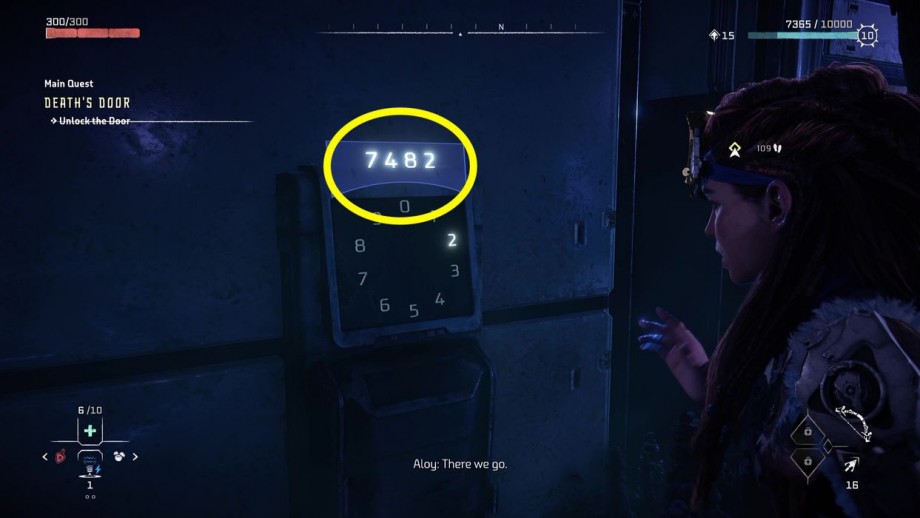
Light it up and enter the new laboratory. The chest contains the recipe for Vertical Traps. The code for opening the door is 7482. The code can be found by scanning a data point found in the same room where the chest is located.
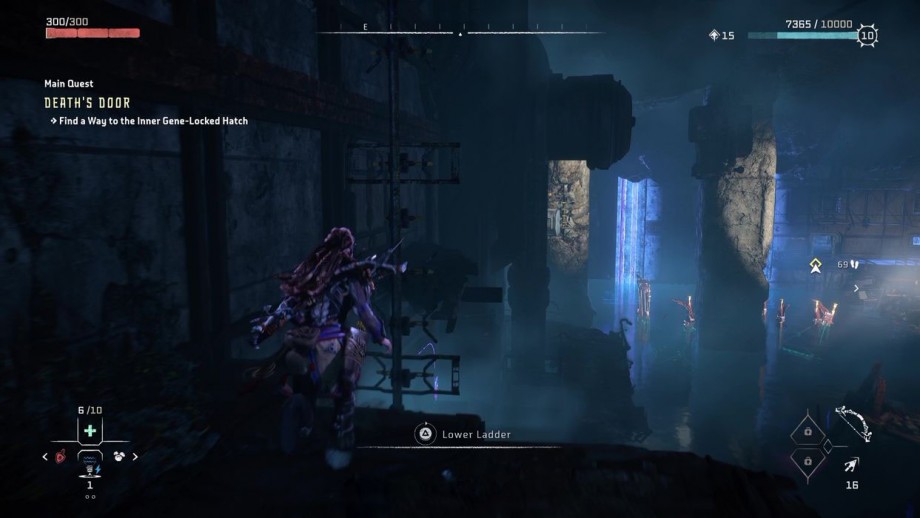
Enter the new corridor and open the new door for another climbing section. Climb up the yellow dots and enter the door to open a new room with another door. Open the door and get ready for another platformer. First, lower the ladder in case you need a faster way back.
Now go to the small yellow board protruding from the platform and aim at the pillar where there are more yellow climb points. Climb up the pillar until you can't anymore and then move the camera to the right to find a grapple point for your Pulkaster. Get up and down.
From here, look to the left to find a target for the Pullcaster. This will bring down a ledge that you can use to move forward. Shoot down the next Pulkaster lock and then jump towards it to pull yourself up to it. Then, right before landing, press "circle" to shoot in the air and slide to where the mission marker is and open the gene lock hatch. Enter the room and approach the console.
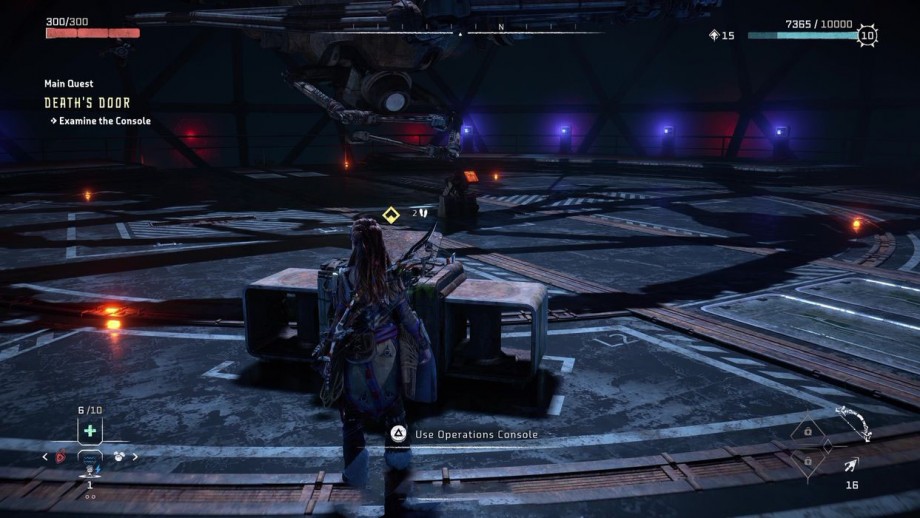
Now approach and examine the access console with a green light in the middle. To disconnect the cables, aim at the red component on the movable arm. Now you can go check it out. Approach the wheel to inspect it. Now we need to kill a mysterious intruder who seems to be immune to arrows or a spear. This means that it's time to drape.
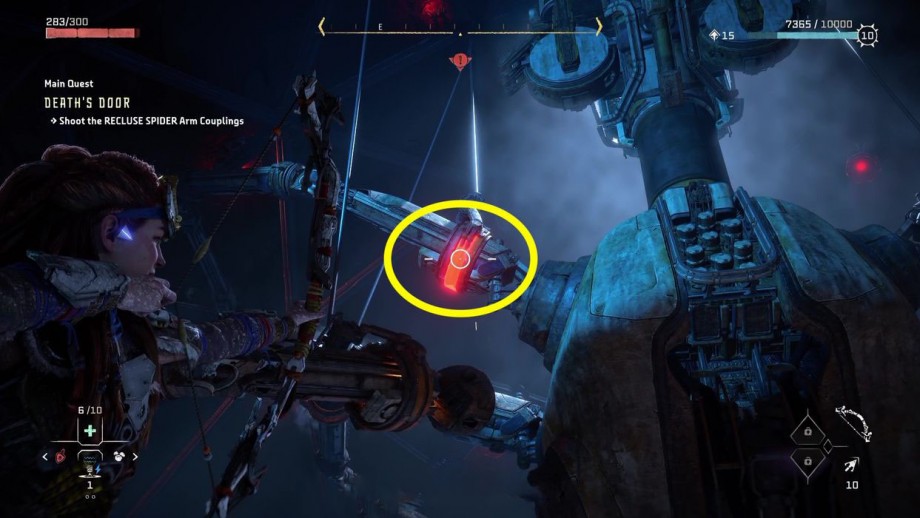
Shortly after the start of the fight, you are allowed to knock down a few of the HERMIT SPIDER's arm joints. As before, aim for all of the red pieces to disengage their hands when they can be removed. Once you have destroyed all the lever couplers, we need to start assembling the stem couplers.
The stem sleeves are located in the neck of the robot, so activate your Focus to highlight them. Remove all stem sleeves until the next roller starts. Swim forward until you reach a room patrolled by Specter vehicles. Quickly scan them to add them to your machine catalog, but then ignore them and keep them underwater, resurfacing for oxygen only when needed. Swim across the room and then use your Focus to highlight a door that you can open.
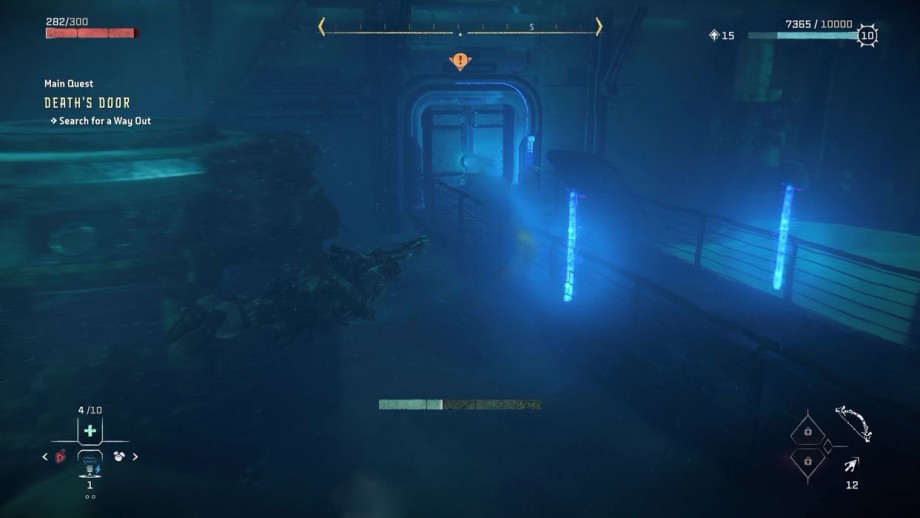
Swim through it and use the acceleration points to overcome the strong current. Once you can swim back out, do so and you will find a platform to rest. Form here, target the vent to open it with the Pulkaster, and continue through the vent itself.
Again, swim underwater to avoid the next group of Scepters and keep going until you can open a new door, then swim back up and you'll find a ladder and several climb points that will lead you to another vent. Get inside the vent, jump down and open another door. In the next energy room, light the Firegleam to move forward.
Was the article helpful?