While playing Horizon Forbidden West, players will encounter red crystals known as Fire Glitter. Here is a guide to help you...
Horizon Forbidden West "The Dying Lands" Quest Walkthrough

Passage of the story mission "Dying Lands" in Horizon Forbidden West.
Job level: 15
Demand: Automatically starts after Door of Death
Reward: +7500 XP, +2 skill points, +1 Utaru Whisperer
Walkthrough Dying Lands Horizon: Forbidden West
Aloy has recovered and is ready to continue her search for MINERVA in Plainsong. Let's go there, shall we? On the way there, you will most likely meet a long-necked one. Feel free to override it to clear more fog from the surrounding land.

Once you arrive at the camp, greet Varl and Zo who are waiting for you at the entrance. The choir is assembled and it's time to meet them along with Varl and Zo. However, feel free, as Zo suggests, to roam the area to stock up on parts and resources. When you're ready, join Varl and Zo back.
Talk to Varl and Zo and tell them you're ready to talk to Horus. Aloy will beg Horus to enter their sacred cave to continue their journey. However, Chorus is not too happy to break their own traditions. Soon after, the situation is broken by an alarm. Time to explore.
We need to follow Zo into the Cordon Highlands. However, on the way there, we will encounter some enemies. While following Zo, you can fight any enemy you want, or ignore them altogether and continue to follow Zo. The cars surrounding your route are new variations of Apex cars you've encountered before, so be sure to scan them to add them to your car catalog.

Eventually you will come to a new open area with more Clawwalkers and Scrappers. We need to get rid of them before we continue. Withdraw them in any way convenient for you. Keep in mind that Ravenclaw's weak points are its tail and back, while Scrapper's is its back, so aim for those parts to deal maximum damage.
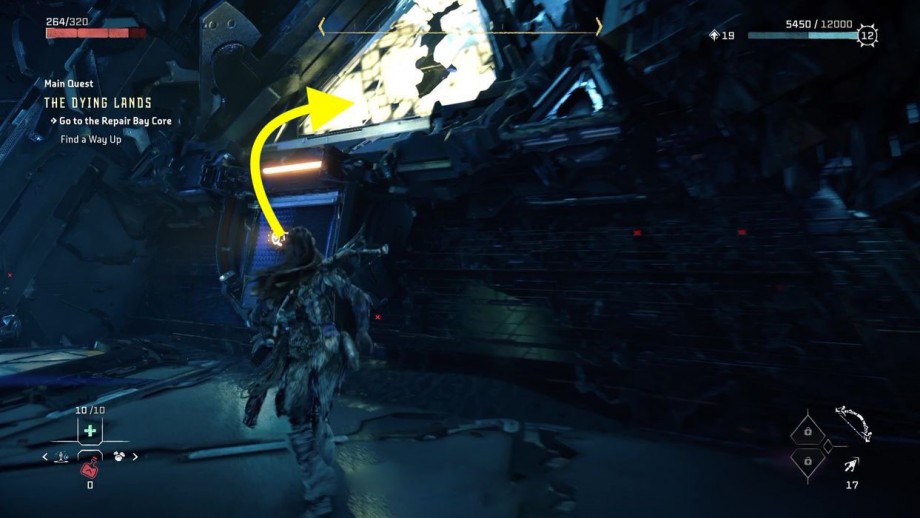
Keep following Zo and Varl towards Cordon, clearing out any vehicles in your path. After reaching Cordon, enter the Sacred Cave. Time to explore the Sacred Cave. The door is locked, so we need to find an alternative way. Luckily, there is a ledge we can climb up. Go back and jump over the gap to be able to continue your descent and go past the barred door. In the end, you will come across a boiler door with a red light, which we need to turn off.
Approach the door to close it. Enter the newly opened area and you will soon come across several Leaplasher vehicles. You know what to do. With Leaplashers, you can target the green canisters on their backs. This is one of their weak points. Approach the second door with the red light to close it.
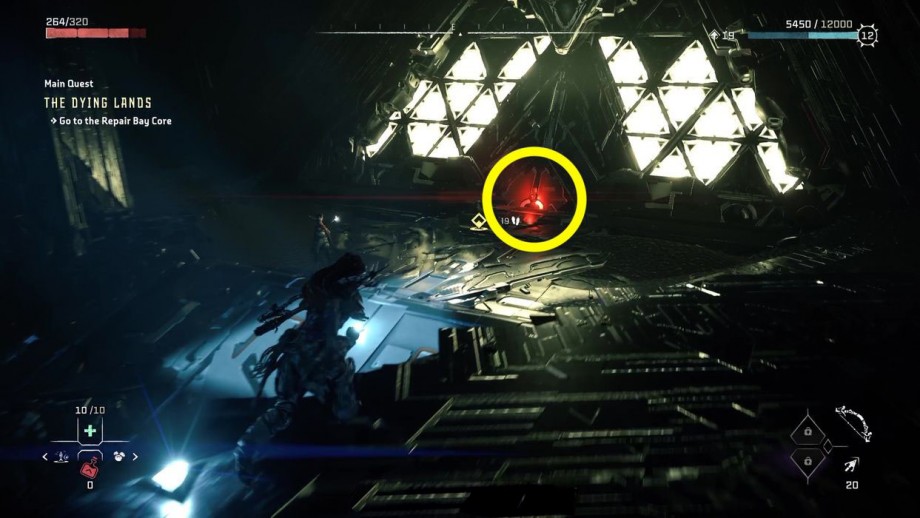
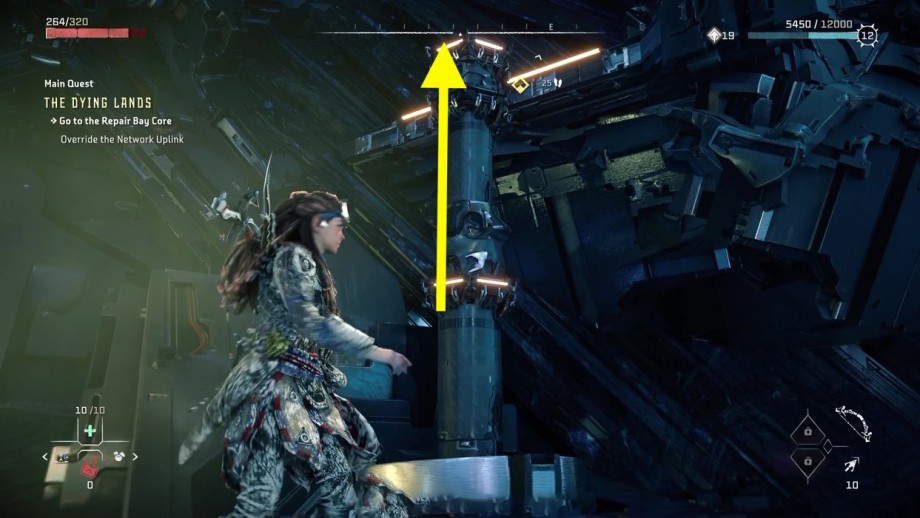
Now we need to disinfect the area from the damaged HEPESTUS cables. Start by standing on the floor panel shown in the screenshot below.
This will activate a rotating platform with several locks that you can click on. Shoot the castle when it glows gold. Repeat the same for the second and third turntables. Once they lock into place, you can climb them using the small yellow plank on the side of the floor panel. As you climb the pillars, remember to move your camera around to look for hooks and climb points to continue on. They indicate how you should ascend.
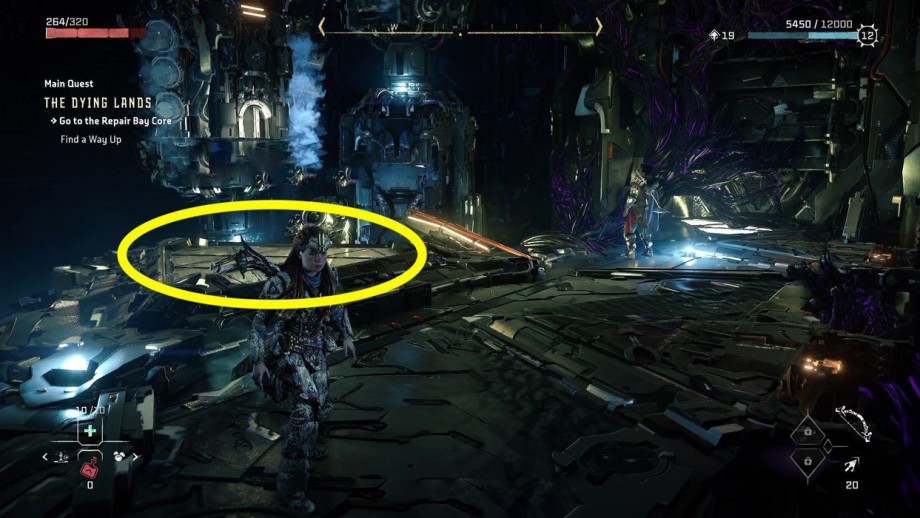
Now we need to fix the second set of rotating platforms. However, first we need something to activate the floor panel. Standing on the floor panel, we cannot see the locks to shoot at them. The second floor panel has a small lift point that gives you access to a dilapidated door. Break it completely with your spear to find a hexagonal purple crate. Push the crate over the shield to lower it down and then drag it to the floor panel.
As before, shoot the castles when they turn golden, and when the rotating platforms stop moving, use the small yellow plank to continue forward using the yellow lift points. Jumping here can be a bit finicky, so take your time focusing on the lift points and boards. Stand on the panel of the third floor again and wait for the locks to turn gold to put them in place. Once they are all locked in place, climb them up to reach a new platform.
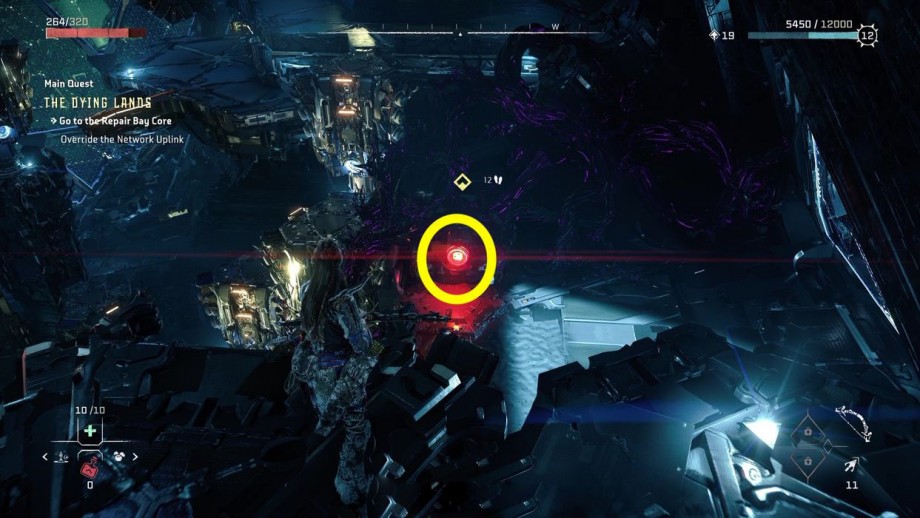
Go down below (to the left of where you jumped from) and turn off the uplink of the network by approaching the red light. The cables will now resume moving. Now move on to the next area where we need to override the second uplink network link.
From the entrance to this new area, go left and jump from the yellow board to the mechanical branch below. Wait for the branch to momentarily lock into place and then aim for one of the two yellow climb points in front of you. Then jump forward to the next board. From here, go to the opposite end of the platform, where two more climbing points are waiting for you. Shimmy forward and then climb to the next set of points. Then finally redefine the second uplink network link.
Time to redefine the third node. There is a panel next to where Varl and Zo are standing. While you can't interact with this particular panel, you can use it as a vantage point to slip away. Aim at another illuminated panel. From here you should be able to see steam coming out of some climbing splits. You have to be quick here because the splits will close after a while. Then climb the pillar and finally the board.
Now you need to time your jump so you can grab onto one of the moving conveyors. Hold on to one of the cars and let go when a new platform appears below you. You will then have to slide off the new board to get to the new yellow panel, and from there, redefine the new node.
Continue down the newly opened corridor to reach a new red illuminated door that you need to bypass. Hephaestus damaged the machine, so we need to redefine the new network communication channel to disable it. Rope down and turn off the nearest uplink network link. However, this will release the Grimhorn, a new type of machine (don't forget to scan it), which will lead to a fight. Grimhorn is weak to cleansing water and acid damage. So, shoot those Acid Arrows and don't forget to aim for his weak spots.
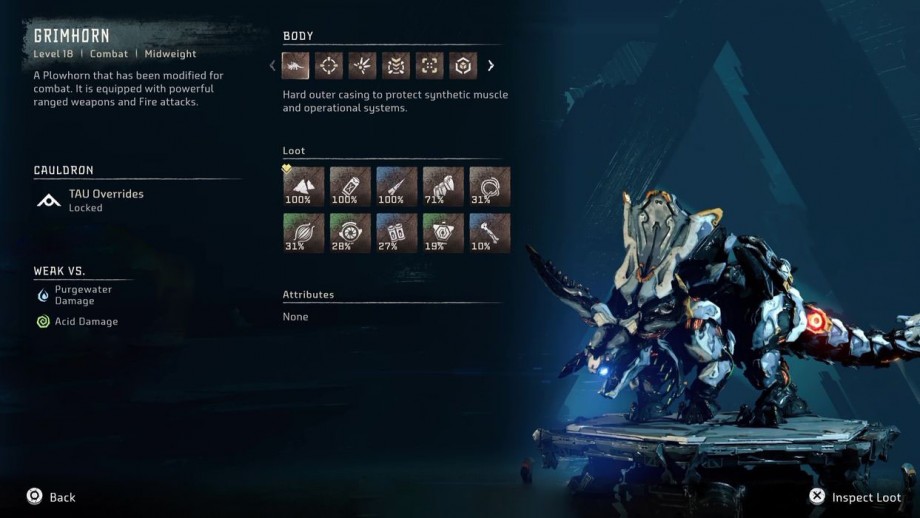
Immediately after the fight begins, Grimhorn will be joined by other machines, namely several Longlegs and Scrappers. We suggest you get rid of the smaller machines first and then focus on the Grimhorn. One of Grimhorn's weaknesses is the cluster launcher. On hit, the Grimhorn will drop it, allowing you to use a surefire way to deal tons of damage against it. Finally, finish off any of the remaining vehicles, if any.
Redefine the final Cauldron core, which also gives you the ability to redefine some previously unseen machines and the familiar Bristleback.
Was the article helpful?