King's Bounty II has many rare items that will help your character become more powerful. In this guide, we'll show you where...
King's Bounty 2 100% Walkthrough Game. All Choices and Consequences.

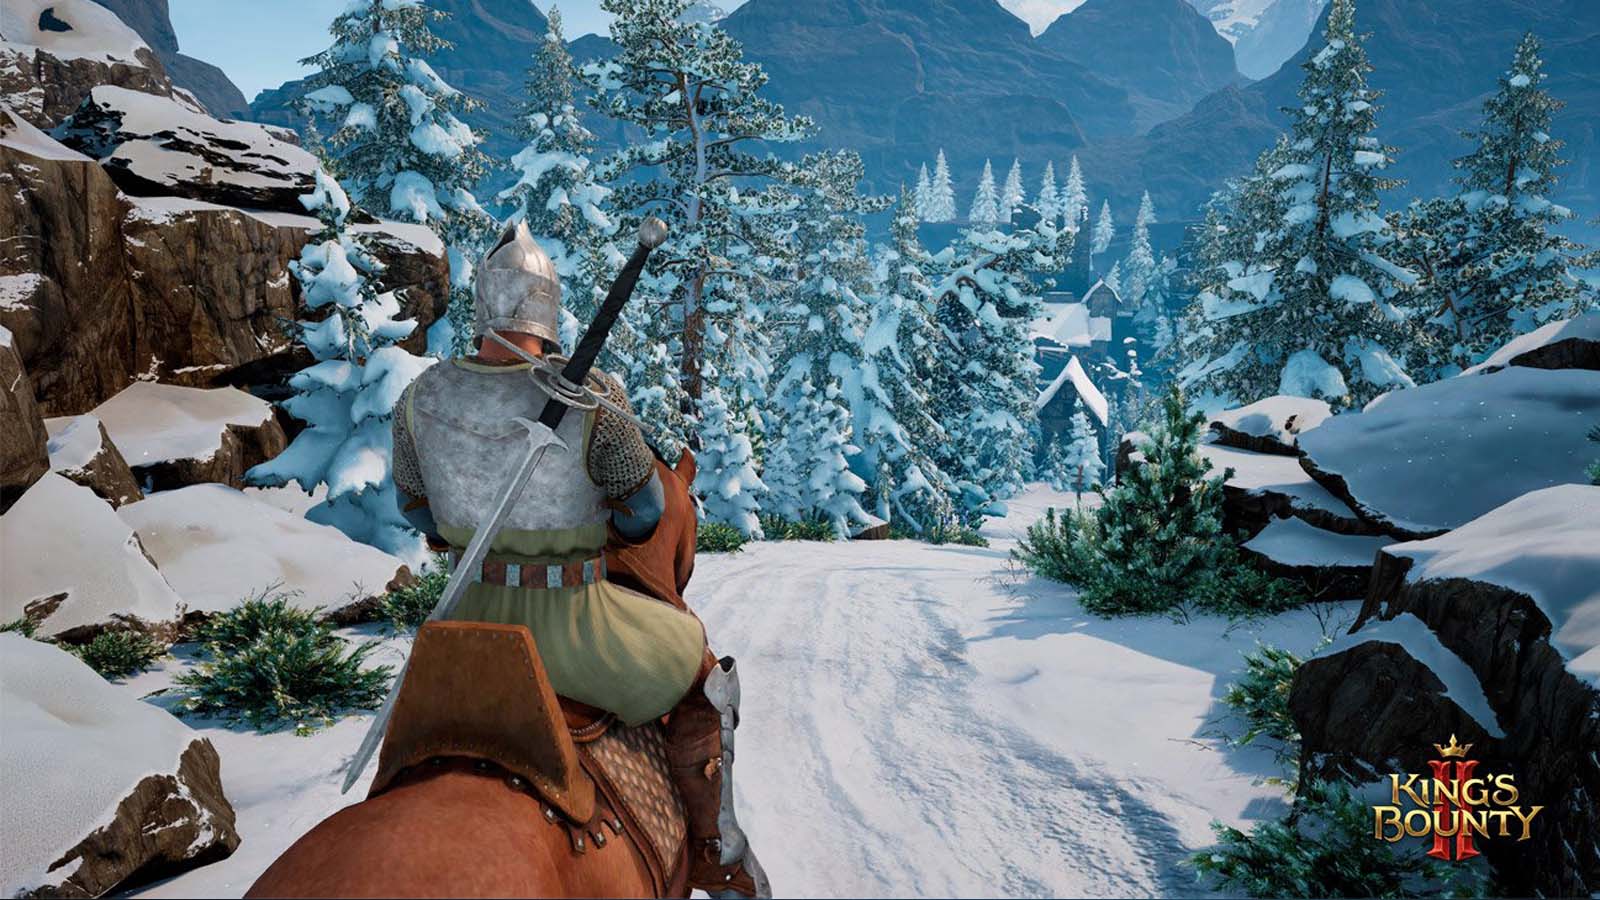
Darkness descends on Nostria. Conspiracies, sabotage, witchcraft - there are countless reasons for alarm. But perhaps the savior - the last hope of the kingdom - is already among us, and he will be able to fight back the forces of evil!
King's Bounty II has several conversation and dialogue options. This walkthrough shows all the choices and the consequences they lead to in King's Bounty 2.
Throughout the passage, we played for the character of Ivor. Depending on the character you are playing as, the exact content of the wording may differ and some options may not be available. However, for the most part, it's a similar dialogue with similar options and consequences. We focus primarily on the immediate consequences of your decisions as this is a huge game and it would be impossible to understand the consequences of each decision going forward. However, for the most part, these are minor differences. Changes in rewards, various dialogues, etc. There are some big changes, but as long as you read the dialogue, they are obvious. We offer save money before every important decision in case you change your mind.
Important note: The reward tables in King's Bounty 2 are somewhat randomized. This means that as long as I have a legendary item X as a reward, you can get another one. You can save the game before turning in or completing quests, and then reload it if the original reward was not specified.
All Elections and their consequences in King's Bounty 2
Attack humans or attack dwarves (Axes and wood chips quest)
If you choose "Attack Lupin's people",
you will fight with a gang of deserters and two squads of robbers. When you defeat enemies, you get order points and some gold. This is the easier fight of the two and the "good guy" choice. Mark, a nearby recruiter, unlocks dwarven militias for recruitment. The nearby dwarf camp survives and you get 300 gold and soldier's boots. When you return to the city, you will see the dwarves delivering lumber.
If you choose "Attack Dwarves".
If you decide to attack the gnomes, you will encounter two dogs and a dwarf. Lupin and Rald appreciate the help and will continue their plans to plunder the supplies of the dwarf castle. For this choice you get Anarchy point . The nearest recruiter, Mark, will open the robbers for recruitment. A small group of people occupy a nearby town and kill the dwarves standing nearby. You get 300 gold and soldier's boots from the warehouse.
Destroy the prison golems or subdue the golems with the help of their master (Ruins of A New Hope)
If you choose "Destroy Prison Golems",
you will receive power points for this choice. This is your only choice as Ivor since you need to be a mage. You kill golems and gain the Summon Golem spell.
If you choose "Pacify golems with their master",
you will receive finesse points for this choice. If you're not playing a mage, you can't make this choice. You solve a small riddle and then convince the mage to call the golems back. You get a Stoneskin Scroll - a great spell worth saving to learn it.
Give the note to Horace or Tenebros (Enemies among men)
If you choose "Give a note to Horace".
If you give it to Horace and he gives you information about the crooked guard, he will head to Irok Castle. Ivar offers to kill Fero, and Horace agrees. you get a point Order.
If you choose "Give note to Tenebros",
Tenebros said it was a wise decision and provided some information about the crooked guard. He tells you to follow him into the castle. you get a point Anarchy.
Deal with the cutter or talk to the magistrate (Priceless Chickens)
If you choose to deal with the Cutter gang,
this solution gives you a point Order. You must attack Cutter and his men, which will lead to a fight. Killing his men will give you 4 mana and 500 gold. You will also receive a chicken. The end of the quest is the same for both options.
If you select "Talk Magistrate Tweet",
you will get a point Anarchy for this choice. If you talk to Magistrate Tweet, Ivar will complain about Cutter's thieving habits. The tweet pays you 50 gold as an apology. When you return to Cutter, he is angry. You will receive a chicken.
Choose Bludgeon or Guerric (Seeds of Betrayal)
If you choose "Come to terms with Flail",
this choice rewards you with a point Anarchy. You go to his camp to talk to him. You will learn that Kisten tried to kill a man and steal the document by which he legally obtained ownership of the property, despite the fact that this is an illegal acquisition. You must pay 10 gold to find the document. You will have to fight the trolls. They heal every turn and behave well. When you return to the Flail, you will have another choice, check the "Deal" option below.
If you choose "Come to terms with Herrick",
this option rewards you with a point Order. You will have to talk to people in the city and go for lilies nearby. You were ambushed by several undead enemies, not cool ones. A few more small errands - he agrees to help the village if they help in return. When you complete this part of the quest, you will receive Gordian's ring, a legendary item with +50 leadership and +1 morale to strength. You still receive the Abandoned Catacombs quest (which is also available when you give the document to Flail). In terms of awards, this is the best choice.
Return the case to Sylvain or give the case to Kisten (Refugee Camp)
If you refer to Kisten.
You will receive 500 gold if you give the case to Flail and unlock the mercenaries and free archers from the nearest recruiter, he will send you on a quest to the catacombs. This is a very difficult quest as the battle will be tough if you are still at an early level. However, you can avoid the battle entirely. Check out the Chimera selection below. Otherwise, it's a battle against elementals and chimeras. Eventually you give your heart to Logras and he returns to the material realm. You gain the Summon Chimera spell.
If you talk to Sylvain.
If you want to give the document to Sylvain, you will have to fight your way out of the camp. When I tried, it was an "unbeatable" fight. It's very difficult, so make sure you have a save before entering the camp so you can leave if you need to.
Defeat the Chimera or find a way to distract the Chimera (Abandoned Catacombs
)
If you choose "Defeat the Chimera", then
it will be for points Energy. To defeat the Chimera, you just need to join the fight and kill her. Once you kill him, you will find a heart in a nearby container. When you return the heart to Logras, you will receive the Summon Chimera spell.
If you choose "Find a way to distract the chimera", then
it will be for refinement points. If you want to distract the Chimera, you need to pick up some parts from the dungeon. Right in front of the door you enter the garden through, there is a scroll, a cauldron, and a barrel with a glyph floating above it. Take the scroll, then the cauldron, and then you can get the chicken out of the barrel. Then, right before entering the portal in the garden, there are two herbs nearby. Collect both. Then return to the catacombs and go up the stairs to the left. There is an oven here. Put everything in the oven, read the note on the wall and cook food. You gain the Summon Chimera spell.
Return the pig to Mellar or Rochus (Mellar's only friend)
If you choose "Return Pig to Mellar".
This choice gives you + 1 point Anarchy. If you return it to Mellar, you will receive 100 gold and a leather collar, a legendary item that grants -100 leadership, +3 armor, and +3 resistances.
If you choose "Return the pig to Rochus", then for
this choice You'll get + 1 point Order. If you give the pig to Rochus, you will receive a Scroll of Healing and a Leather Collar.
Investigate the crime or give the amulet to Dwayne
If you select "Investigate Crime",
this option rewards you with +1 point Order . You learn about the children killed and they have the opportunity to report the incident to Prim, the head guard. You will learn that Dwayne was the culprit. When you return the amulet to Kirr. He joins your cause as skeleton archers.
If you choose "Give the amulet to Dwayne",
it will be +1 point Anarchy . If you give it to Dwayne, he will be happy that you gave him the amulet. He takes the amulet for sale. You get 600 gold and a promise to pay extra later. You won't get any extra pay as Dwayne runs away.
Calling the Eagles or Attacking Vincent's Council (Die Hard)
If you choose Vincent's Advice Attack
This is the choice of strength, you will receive strength points. You attack the camp directly, this is a very difficult fight in the early stages of the game. When you win a battle, you receive the Knight's Sword, a piece of equipment that grants +400 Leadership. When you talk to Vincent after the fight, he tells you the location of the stash, which contains 500 gold and 1 Call of the Wild 1 spell.
If you choose "Help Tivir summon the eagles",
choosing this option, you get +1 point Order . You have to do some quick errands, easy and free. The combat is exactly the same, except that a squad of AI controlled eagles join the fight. They take out an entire squad of archers single-handedly and can easily do the same to two more if they're lucky and healed. This makes this fight a lot easier than the alternate route. You get Assassin's Daggers (+4 War, +4 Crit, +8% Damage). Talk to Tivir after the quest to get 500 gold and the Ancestral Call spell.
Plant a crystal or recover a stolen soul seal (Marcellus Aqueduct)
If you choose to install the crystal, summon the undead.
This choice rewards you with power points. If you return the crystal, the aqueduct will work as usual and you will be ambushed by an undead army led by Valiant. At the moment it is a very difficult fight. When you win "The Valiant Defeated", you receive the "Legendary Order +1" medal, just like the other option.
If you choose "Retrieve Stolen Soul Seal", then for
this choice You'll get order points. If you return it, you will find that Garret is trying to sell the Soul Seal. Valiant is impressed by your honor and honesty. When you place a Soul Seal in the slot, you are transported to the underworld to complete the fight. Valiant promises to keep his word. Valiant will become a recruiter and sell you ghouls, skeletons, skeleton archers, zombies and ghosts. You restore the crystal and the world is restored. As a reward, you receive a legendary medal.
Deliver an invitation to Hyenne or deal with Cleaver and his gang (Brand's Bride)
If you select "Deliver Invitation to De Guienne".
If you choose this option, you deliver a letter to Gienne, you gain Finesse Points, and then you are teleported. Guyenne then gives Bonnie her freedom. Bonnie tricked you so she has evidence to convince the leader to let her stay, but she frees Marlene anyway. She is disappointed that you saved her and gives you the Ring of Brand like the other option.
If you choose "Deal with Cleaver and his gang".
If you choose this option, you will have to fight Cleaver, who has a pretty strong army. When you win, you free the girl. Marlene is upset that you saved her and not her lover. You get the legendary Ring of Brand, which grants +3 Critical Strike Chance and +1 Bandit Initiative, as well as a few power points.
Talk to Sneap or report the Act to the head of the guard (Gang at the old outpost)
If you choose Snip,
it will be +1 point Anarchy . If you talk to Sneap, he will tell you that the best archers in Nostria are available. You will unlock the ability to hire free archers in the Recruiter Snips store. Quest completed.
If you choose to build an Act,
this + 1 point Order . If you choose to report the Act, you will testify to Primus and give him information. You get a few crossbowmen for free and can hire crossbowmen from Recruiter Dexter. Snip will be arrested and will no longer be able to work as a recruiter.
Arrest Titus or appease the farmers (Riqueville under siege)
If you choose "Arrest Titus and his men",
it will be the choice of the Force. You will have to fight Titus and his men, but there are only a few troops there. When you win a fight, you get Weakness I. George thanks you for your help. You will learn that the soldiers were deserters. Titus explains that he will be executed if you send him back to the city. You get the Sword of Titus, which is a legendary sword with +2 war, +2 critical hit, +15% damage for the Nostrian army.
If you choose "Calm the Farmers",
this will be the Finesse selection. You manage to coax the farmers and convince Titus' people to leave the area. You also receive the Sword of Titus by making this choice.
Take an artifact from the wolf Lobo or change the mind of Aros (Trappers)
If you choose "Take Artifact from Lobo the Wolf",
you will have to chase the wolf on your horse to get the totem and then return it. You get 3 eagles and Edgar opens up for a set of Elder Wolves.
If you choose "Change Aro's Mind",
you must complete a quick quest for her and then grab the Totem to return to her brother. It seems that everyone is happy with this outcome, you get 3 eagles.
Find the intruder or attack the golems (Code Red)
If you select "Find intruder",
then for this choice you will receive points of finesse. If you choose this option, follow the floating glyph spell she casts. You will find out that the intruder is working with Flail, and drive him into another dimension. Here you fight elementals and spirits. You get a Scroll of Resolve (+1 Morale per 1 fight). Roan is invited to study at the Magic Tower. You will receive 2 iron golems.
If you choose Attack Golems,
you will receive power points for this choice. You will have to win a battle with a bunch of golems, not a hard fight. You receive Elleu's Light I scroll.
Give Koras' wallet to Hugo or tell Garlon what George (Prodigal Son) said
If you choose "Give Cora's Wallet to Hugo",
it will be the choice of anarchy. Hugo gives you an Ancient Letter as a reward to start the Mysterious Treasures quest. This is a short quest. One fight on the route, and at the end - a quick puzzle. You get Gloves of the Noble, a legendary item that increases the sell price by 5% and reduces the purchase price by 5%. However, if you choose the other option, you can still head to the location and retrieve the gloves.
If you choose "Tell Garlon what George said"
this choice rewards you with command points. This choice is the same, Garlon tells you that the boy will receive several vices and be set free. You will also receive the Mysterious Treasures quest.
Fake Silver's grade or give Rozens to the teacher (Rozens and Silvers)
If you choose to fake an estimate,
this will be the choice for anarchy points. If you choose this option, you will give Rozens' friend a passing grade and receive Rozens Feather, a legendary item that grants +2 resistance and +3% health.
If you select "Report Rosen to Instructor", then
Selecting this option earns points. Order. You also receive Rosens Feather for this choice.
Deliver a bouquet or refuse a request (Promised Magic)
If you selected "Deliver an apology bouquet".
If you choose this option, you will return to Yvonne and remove the spell. You deliver flowers and find out that Yvonne is being mistreated and unhappy. You receive a Scroll of Magic Shackles.
If you choose "Refuse the request".
If you refuse the request, you will return to Yvonne and remove spell. You will receive a Scroll of Magic Shackles.
Destroy the spirits from the Palatinus cage or solve the riddle of the Palatinus
If you choose "Destroy the spirits from the Palatinus cage",
this choice will give you power points. If you make this choice, after you break the cage, you will immediately fight a large group of Grace's spiritual enemies. You get a scroll for winning a battle.
If you choose "Solve the riddle of Palatinus".
This choice grants finesse points. Once you solve the riddle, you will get 3 agility points. The rest of the quest is the same, you just avoid the fight.
Choose a book or choose a sword (Marlene happiness)
If you choose Book,
this decision will earn you Finesse Points. Nikas told you that this is a book about elemental behavior. It must be incredibly rare. You will need to go and steal some extra books from the nearest settlement, no fights. The magician makes you an amulet, which you deliver to Brand. The amulet changes Brand and Marlene falls in love with him, they get married. You get an Illyrian chicken, a legendary item that gives +70 leadership and +1 morale for animals.
If you choose the sword,
this choice will give you power points. Selecting the sword will immediately teleport you into the battle with the elementals. There are no additional rewards in the other dimension, so don't waste time exploring it. The rest of the quest proceeds in the same way as choosing a book.
Attack the gang with your head or find a weak spot (Reckless)
If you choose to attack the bandits
for this option, you just jump in and fight. It's a choice of strength. The enemy has more units and you won't get help from Ghosts. This is a more difficult battle, but you get double the gold, no ghosts.
If you choose "Find a weak spot",
this is the 'Elegance' variant. You will need to find some flowers and perform a ritual to summon spirits angry because their tombs have been desecrated. This is identical to the first option, except that you get one unit of Ghosts to help in the battle. Three ghosts will join your army after the battle
Trust Molino and return to Bernard or destroy the Melinos Artifact (Harmful Artifact)
If you choose Molino's Trust and return to Bernard.
This choice gives you anarchy points. The curse on the village has been lifted. You don't tell him you let Molino live, you will get Knight's Armor.
If you select "Attempt to destroy the Molino artifact", then for
this choice You'll get spectacles Order. If you try to destroy the Artifact, you will immediately be transported to another dimension, where you will fight against Molino's undead army. Not a particularly tough fight. In addition to the extra gold and mana from combat, you also get knight armor.
Give the stone to Rosens or give the stone to the troll (Troll Mind)
If you choose "Give Stone to Rosens", you will receive
reward points order. The result is the same. You get a stoneskin troll, but instead of a troll owning a shop, Rosens does it.
If you choose "Give Stone troll",
you will receive anarchy points. If you choose this option, the Troll will break free from the chains and open a store, imagine? You get 1 stone troll for your army and you can hire more from the trolls. He sells trolls, stoneskin trolls, and troll chieftains.
Ask Rick for help or attack Fisher yourself (Windport Conflict)
If you choose "Ask Rick for help",
this choice awards points for finesse. Rick will send you in search of a very powerful legendary item. You need to fight the trolls, it's in a cave at the end of the beach. You can still go to the cave and get the legendary item if you choose the other option. When you fight, several ice elementals will join you.
If you choose to attack Fischer on your own,
this choice grants power points. If you make this choice, you will immediately fight Fisher and his men. They have 3rd level archers available, but other than that they don't pose much of a threat. Once you win the battle, you will unlock the nearest shop.
Tell Bloom about Cedric or talk to Damien about a delicate matter (Dark Deal)
If you choose "Tell Bloom about Cedric and the broken deal",
this choice will earn you order points. You tell Bloom that he gave up and that Cedric is dead. As a reward, you receive the same medal.
If you choose "Deal with a sensitive matter with Damien",
this will give you anarchy points. You tell Damien that someone tried to poison his people. You are rewarded with an unusual medal.
Uncover the secrets of the Order of Mages or bring back the Gray Knights
If you choose "Enroll gray knights in the guard",
this choice gives points Order. You testify to Ollagar and he finds out that the guard was framed. Greflet has been rehabilitated. A total of 350 gold rewards. You head towards Dupont to attack him, some of Grefle's knights join you in the fight.
If you choose "Reveal the secrets of the Order of Mages",
this will give you anarchy points. Unfortunately, this quest was unsuccessful for me. I couldn't interact with the Runes at all, so I couldn't advance to see the result of the selection.
Side with Gladrance or save Willmore (Willmore's Revenge)
If you choose "Take Gladran's Side",
this choice will give you order points. You claim that Willmore is a monster and immediately fight Wilmore and his bandit army. This is an easy fight.
If you choose "Save Willmore",
this choice gives points Anarchy. Willmore appreciates the help, and then Gladran attacks you with a high-level Order army. You get a green ring with +1 bandit morale and +5 crit.
Fight the artisans or make a deal with Damien (Through Quarantine)
If you choose "Fight Artisans for Stolen Goods".
This choice rewards you with order points. This decision leads to an immediate battle with Damien. You get Iron Gauntlets, which is a rare item from the set . As you head towards your next target, you receive a legendary plague mask that offers +6% health.
If you choose "Make a deal with Damien",
this option rewards you with anarchy points. If you agree with Damien, you will get a legendary sword that gives +20% melee damage, and a nearby recruiter unlocks sentry golems and berserkers. You will then need to sneak into the quarantine city and kill Kandor and his mages in order to enter. You get Iron Boots for winning this fight.
Find another mine entrance or fight your way (Looking for Lindsey)
If you select "Find another entrance to the mines", then for
this choice will give you finesse points. You will have to run around the tower looking for parts to fix the elevator. You can then ride it to the mines and bypass the fight. There is some loot on the way, nothing special. Then you need to fight Lindsey.
If you choose "Make your way to the main entrance to the mines".
This choice gives you power points. If you make this choice, you'll need to fight graceful enemies to get to the mines. It can be a tough fight if you're not ready. When you win the battle, you will receive 3 sentinel golems. You can also loot the mines, like the other choice, once inside. The rest of the quest goes the same way.
Find and summon Rosalyn's soul shards or clear the statue of the mourners (Julian and Rosalyn)
If you choose "Find and Summon Rosaline's Soul Shards", then
this choice will give you subtlety points. You will need to run around the cemetery and its surroundings, grabbing soul shards. You combine the Soul Shards and Julian and Rosalyn are reunited. You will then fight the undead, but Rosalina gives you 5 death knights to help in the battle and hold them off if you win. You will also receive a legendary helmet, Renalds helmet.
If you choose "Clear Mourner Statue",
this choice will give you power points. If you go straight into battle, you won't get help from death knights and you won't get them as a reward. You still have to collect the shards. You can still recruit death knights from the nearest recruiter. As a reward for this choice, you will receive another legendary helmet of the King.
Side with Saber or Garou
If you choose Saber,
this choice will give you points Anarchy. If you choose this option, Ivar will tell Saber to hide the papers and wish her good luck with the mages. You get the rare item Star of Glory, which gives Warfare +4 and grants 15% experience gain for units.
If you choose "Side Garou",
this choice will earn you Order points. If you give it to Gar, Ivar says the documents prove he was right. The rewards are the same.
Destroy the shield or raise the shield (Deceived Witch)
If you choose "Destroy Shield",
this will give you power points. I couldn't make this choice because I had too many sophistication points.
If you choose Raise the Shield, you will receive
sophistication points. You have to solve a simple puzzle. After the decision, you will receive the legendary item Enialius' Greaves as a reward.
Summon allies of the undead or attack the harbor with Bloody Sadie (Harbor of the Enlightened)
If you choose Summon Undead Allies
This choice rewards with a point of Finesse. You will have to complete a couple of quick errands. She suggests calling on hordes of the dead to help with the attack. You are fighting Dupont and have a squad of 5 Dark Spirits to help. This decision sees Sadie's brother killed and she is angry about it. You get the Count's Coronet as a battle reward, a legendary item that makes things 10% cheaper to buy and 10% more money to sell.
If you choose "Attack Harbor with Bloody Sadie",
this choice rewards Power Points. You receive no help from allies. You get the Count's Coronet as a battle reward, a legendary item that makes things 10% cheaper to buy and 10% more money to sell. You save the life of Sadie's brothers and they are both grateful.
Attack Flail or Talk to Madame Guinenne (Secrets of the Merchant Guilds)
If you choose to attack Flail,
this will award a power point. If you attack Flail, you immediately fight his army. You can loot a pair of legendary gloves from his lair after you win the fight. When you return to Oliver, you tell him that you found some rock crystals and papers as evidence.
If you choose "Talk to Madame de Guyen",
this will award a point of Finesse. When you talk to her, you propose that she marry Kisten and she accepts. You then gain the right to Irok Castle and must return it to de Guienne. When you return to Flail, he allows you to plunder the lair and promises to settle in marriage. Both of them will now live in Irok Castle.
Attack Tenebros or attack Horace (Shadow of Aranox. Major spoilers)
If you choose to attack Tenebros
you will get points Order for this choice. This decision destroys your relationship with the Dark Adepts, you will no longer be able to recruit these units. You immediately fight Tenebros. Adrian thanks you for your help. Tenebros was captured and his men either killed or fled. Tenebros quickly avoids capture. You then need to chase Tenebrae through the portal. Tenebros tells you that Aranox is behind the attempt on the Prince's life.
If you choose to attack Horace,
you will receive anarchy points for this choice. You will no longer be able to recruit Royal Guard units. You defeat Horace and his men. Tenebros explains that he thwarted his previous master's plot and that Aranox had exhausted the last of the traitorous guards left. Tenebros tells you where to find Aranox's body and you go through the portal.
This is the main choice that forms the final chapters of the game. Choose carefully. Towards the end of the game, you learn that Tenebros intended to capture Aranox alive in order to teach him how to return from the dead.
Open the Gate or use the codes Belindas (Beauty and the Beast)
If you choose Unlock gate,
this will reward you with a Strength point. Choosing this option means you don't have to solve the puzzle. I couldn't choose this choice.
If you choose Use Belinda Codes,
You solve a basic puzzle and then get ambushed by elementals and chimeras. Some Gargoyles will join you in combat. You can keep the Gargoyles if you win. Erasmus is surprised that Belinda was attached to such beings. Erasmus realizes that the trap was set by someone else. You also get Erasmus' Amulet, a legendary amulet that gives +6 Resistance and +25% damage to Magical Creatures. A Gargoyle Recruiter spawns nearby, allowing you to recruit Chimeras and Gargoyles.
Present the coffin to Heinrich Ohr Uwe (Heinrich's Legacy)
If you choose to Gift the item to Heinrich,
you will receive order points for this choice. Heinrich understands Uwe's attempts to steal the treasure, but promises to take him under his wing and treat Uwe with dignity and respect.
If you choose to Give the item to Ove,
you will receive anarchy points for this choice. I couldn't select this option because I had too many order points.
Steal a silver bracelet or buy a silver bracelet (beyond expectations)
If you choose to steal the silver bracelet
This choice grants anarchy points. If you steal the bracelet, you won't be noticed, and it's free, obviously. When you give it to Hermia, there is no mention of theft.
If you choose "Buy Silver Bracelet",
this choice will give you Order points. If you decide to buy a bracelet, you pay the merchant 10 gold. The rest of the quest is identical.
Destroy the widows' kiss or give Ursula a retort full of poison
If you choose to give Ursula a Retort full of poison,
this choice rewards anarchy points. If you give it to the Palatine, he will forget that he sent you to get it in the first place. He successfully destroys the poison and is very grateful for your help. He cures the poison from himself and cleanses it from the earth. He says he will return to Marcella to find his daughter, but I couldn't find her there.
If you choose to destroy the kiss
widows, this choice will give you order points. She thanks you for saving her and her husband and gives you the jewels.
Was the article helpful?