
Passage of the game Lost Lands 9: Tales of the First Brotherhood 100%. All the secrets, puzzles, mini games, collectibles and achievements in one place...
Mortal Shell Walkthrough, Guide, Guide
0
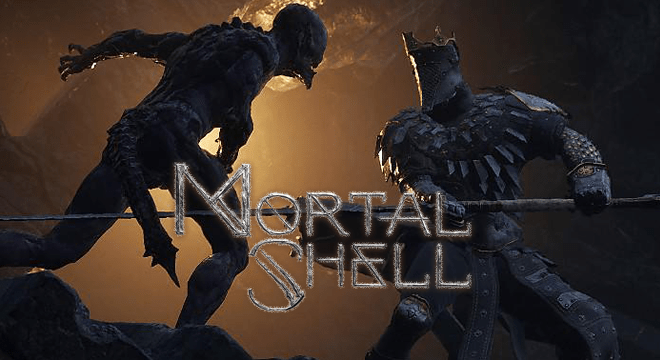
Mortal shell promises us furious hand-to-hand fights, strong enemies and bright action. Here is our walkthrough guide and game feature center to help you.
Home
The prologue consists of teaching the basics of the game and navigation. Everything is simple here: take the sword from the hands of the statue, and then, taking into account the combat skills, make your way to the end of the level. Don't forget to collect your first collectible Mark of Mortality. Defeating the last enemy is optional. One way or another, the prologue will end, but at the beginning you can kill the Boss, attack immediately, petrify, hit, dodge, and so on until victorious, for this they will give 15 points for pumping
Folgrim
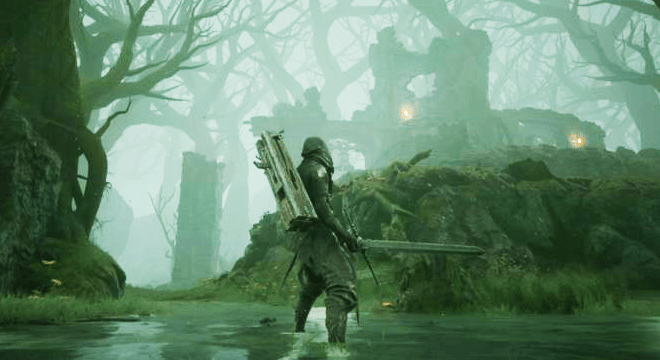
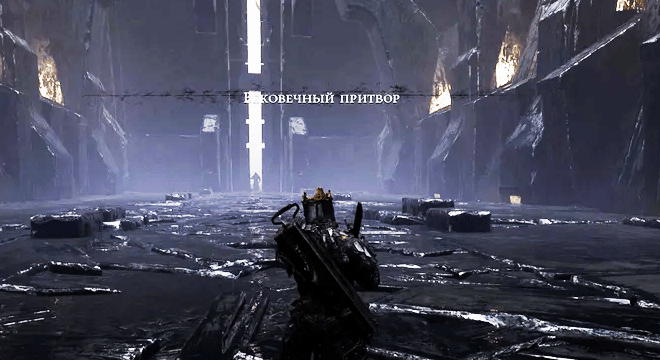
Fallgrim is the central link in the game. From here you will move along the paths that will lead you to other areas: the Temple of the Ash Idol, the Pavilion of Eternity and the Altar of the Great Martyr.
Go through the detour space ahead and once you get to the other side, follow the path ahead, then go left at the fork to pick up your first shell warrior knight in heavy armor. All stats are balanced in this shell: medium health, medium determination and medium stamina.
Head back down the other path and you'll end up in Fallgrim itself. Pick up the fly agaric on the ground on the left, then enter the camp on the right. You can pick up an item Glimpse of futility and view "Feel the instinct» with the statue in the middle to get a hint on where to go first. Then look behind the tent at the back to find a chest with Simple lute и The rest of the container.
As you descend into the swamp, a short cutscene will appear hinting that you should follow the path straight ahead. This is exactly what you want to do, so cross the swamp and go up the path. Five weak enemies crowd in this area, they will die from three hits of the Holy Sword. Seeing their ally die causes enemies to retreat most of the time, so you can use this to take them on one at a time. Enemies on the left and right are waiting in ambush, so be prepared for a surprise attack. Also, look out for bear traps on the ground, which leave you incredibly vulnerable to attacks.
After removing the enemies, continue along this path. Check the right side of the path to find low grade moonshineand Glimpse of Wisdom. In one of the cauldrons you will find an item boiled frog. You will hear a roar and see a cave on the right side. Instead, enter the doorway on the left to enter Fallgrim Tower.
Folgrim Tower.
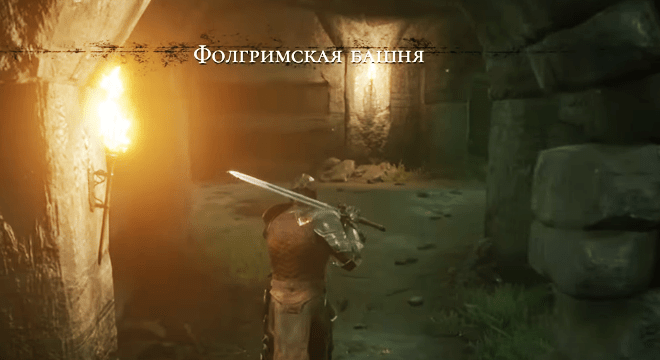
Think of this area as Fallgrim's main hub. Right inside you will find Sister Genessa, who you can talk to to open the upgrade menu for your current skin. For 250 tar you can determine the name of your current shell, Servant Harros. On the first floor of the Tower, you can see three instincts that will show you where you can find the other three shell . There are three more instincts upstairs that will show you where you can find the other three weapons , as well as a workbench that you can use to upgrade weapons. Here you will be able to unlock a firearm - a ballistazooka. To do this, you will need to buy tools from the merchant above. To fire a ballistazooka, you need to press Caps Lock. You will also have to find and / or buy heavy bolts. But on the other hand, with one shot you can kill any ordinary opponent, including a big man with an axe. Enter the room on the second floor where you will see a large shackled creature and it Old prisoner.
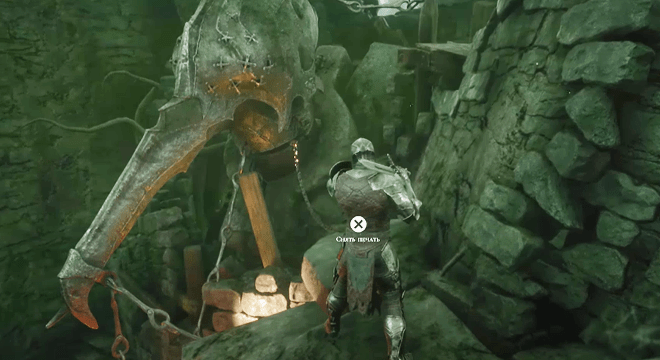
Pick up tattered robe off the ground and climb the ladder to take off Dull print.
Dim Seal allows you to parry enemy attacks and perform an empowered riposte while you have one bar of resolve. After removing the shackles, the beast will talk to you and ask you to bring him three sacred glands of the venerable. Return to the workbench, then exit the Tower through the doorway on the left. Follow the path under the bell and go up the stairs, where you will find the merchant Vlas and pet his cat. That's about all there is to see in Fallgrim Tower right now, but now we're set up and ready to take on the first boss. Exit the Tower through the first floor door you entered through and go down that awesome cave you saw along the way. Don't fall into bear traps along the way, take Glimpse of futility along the way, then carefully approach the large beast in front of you.

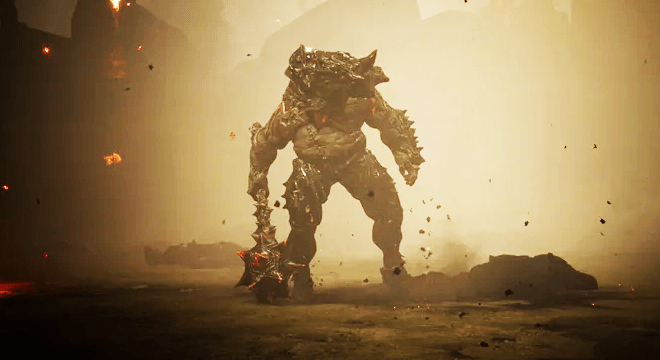
Boss Grisha
Grisha is big, loud, slow, and easy to defeat with even the simplest equipment. As with Hadern, your strategy here is to wait out Grisha's attack and then retaliate with your own. Most attacks consist of two or three combinations of hand swings. Since Grisha telegraphs all of these attacks with a loud roar, they are easy to pin or pass through. Because they're so obvious, Grisha's attacks are also very easy to parry, allowing for massive damage, but risky if you can't get the timing right.
His signature attack is his uppercut. He signals this by dropping both hands and roaring. You can't block this attack with Parry or Temper (your dim seal will flash red to warn you), so it's easiest to avoid it by dashing backwards as he turns towards you. This attack also throws him off balance and opens up the possibility for two or three hit combos. However, I do not recommend staying behind Grisha for too long because it makes it difficult to read his attacks. Come forward if possible.
Defeating Grisha will bring you 6 reflections, 750 tars and weapon upgrade Mechanical Spike from the chest he was guarding. If you go to the back of the arena, you can find a hole containing another shell, Solomon the Scientist. With a new shell, return to Fallgrim Tower. Upgrade the Sanctified Sword by using the Mechanical Spike at the workbench to get your first weapon skill. For two bars of resolve, you can land an invulnerable knife strike that instantly stuns an enemy. It is very effective against bosses.
From here, you're ready to explore Fallgrim and begin capturing the three main temples on the outskirts. We recommend doing them in this order:
- ➤ Ash Idol Shrine
- ➤ Altar of the Great Martyr
- ➤ Eternal porch
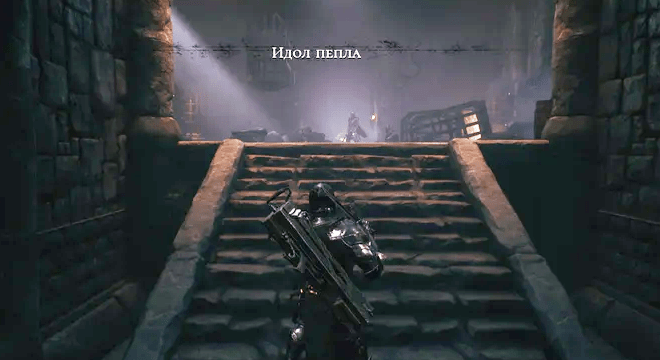
Temple Idol of Ashes
To get to this location, exit Fallgrim's tower through the door and go to the right. Circle her. When you see the rise up, follow a little to the left of it. Last time you turned left to get into the vicinity of Fallgrim. This time go straight through the gorge. Behind it you should see a smoldering tree. If it is, then you are on the right track. Behind the tree on the left hand there will be a passage. Go there, kill the enemies and climb up the stairs. There will be an entrance to a new location.
After entering the Temple Ground, run forward and wake up Sister Genessa to set a spawn point, then head down the corridor and use the book to fight the Boss Hadern and get smoking maceif you haven't already. If you have Quenching Acid, you can use the Anvil to upgrade your weapons. Despite an easy boss fight, this temple can actually be quite challenging, so upgrade your weapons if you can.
Go to the temple. The first room contains four foot soldiers and one enemy with a shield and sword. Clear the room and go to the next room to find a split path. Take the bottom path to find a small room with a Crypt inside. Interact with the crypt to get the smoking mace upgrade, awakened stone, as well as a reflection of affection. This will also spawn several flame ghosts that will haunt you when you try to leave the room.
Head back to the main path and up the stairs and you'll see a new type of enemy spawn in front of you - an armored claymore enemy. This enemy can be frustrating due to his fast combos and high health. You can fortify yourself with his attacks or parries, but the easiest answer is to just burn your resolve and use your weapon skill for an easy kill. If you don't have the resolve, take advantage of his slow overhead swing and harass his jump attack. Pick up the Penance Scripture on the bridge and look out for two grunts waiting to ambush you as you approach the iron door.
Through the iron door is a large room containing two foot soldiers and another enemy with a sword and shield. Clear the room, then move forward to a divided path littered with corpses. Watch out for the two grunts waiting around the corner to ambush you and collect the Death Tokens from the bodies once you defeat them. The right path is a dead end so far, so follow the left path to a new room where two Claymores will spawn. Lure them back into the small doorway by having them group up so you can combine them both at the same time. Just be careful not to overdo it because they will get you back in no time. Once they are dead, search the iron maiden on the right side of the room to get acid, then continue forward to a large pit guarded by foot soldiers. Find the Bronze Bell in the coffin and keep moving forward.
Now you will find yourself in a large room, looking at a new fiery enemy. These enemies will spit fireballs at you from afar, but they're low on health, so I recommend just dashing down before he can attack. There are a few foot soldiers in this room, two claymore enemies, and a guy with a sword and shield at both side exits. DO NOT aggro them all at once. Lure them one at a time until the room is clear and then start looting. Find the Big Bolt in the coffin to the left of the flame demon, then turn left to find another crypt guarded by two more claymore enemies. Take Scripture of Repentance, then open the crypt to get Stuffed Till и reflection of wisdom (and another fire wraith ambush).
Then go to the other side of the room, go up the stairs and enter a new room with four foot soldiers and another fire demon. Look behind the Flame Demon to find a chest containing solemn offering и tar ointment. The iron door next to it is the shortest path to the entrance to the temple, and the other exit from this room is a dead end, which we will ignore for now.
Return to the large room and exit through the back exit to the open area. Kill the three foot soldiers in front of the stairs, then climb them to find another crypt. open it to get reflection of futility и unpainted mask, then speak to the Sister behind the crypt to set your save.
Go down the stairs and turn left and you will see a new type of enemy, a powerful dual swordsman with flames. This guy is pretty strong, but luckily his combo has a long pause at the end. Get him to attack, then back away quickly until he completes his combo, then counter him with a jump attack. You will have to flush and repeat this strategy several times due to his high health pool, and feel free to use some weapon skills to speed up the process if necessary. Once he is defeated, take everything you find in the arena. Climb up the stairs and interact with the iron door on the right to open another shortcut. Go through and kill the two guys with swords and shields in the hallway, then pick up acid from the iron maiden and take Scripture of Repentance from the top of the barrel.
At this point you can use the shortcut to return to the anvil and upgrade the weapon if necessary, the boss will appear shortly. Return to the deepest part of the temple and continue down the corridor. You will come across a wooden bridge guarded by two foot soldiers and a claymore knight. Play very carefully here, because it is very easy to confuse you and knock you off the bridge. If necessary, lure them back to a safe corridor. Once they've been defeated, search the crypt on the bridge to get reflection of futility and a second mace upgrade, awakened stone (note the grumbling behind the crypt).
Cross the rest of the bridge and open the door to enter the last room of this temple.
Sanctum of Flame
Take reflection right through the door, then drop down to the platform below, where two grunts are waiting under the stairs to ambush. Without aggregating the Flame Knight in the center of the room, go down the stairs and search the chest under the stairs to get a tare and a death token. This will spawn more flame ghosts. Head back upstairs and fight the Flame Knight using the same strategy as before. Search everything nearby, then go up the stairs to find the last Sister. Talk to her to save your respawn, then drink the nearby nectar to fight the boss.
Imrod the Unrepentant
He starts the battle with his dash attack, swinging his mace twice. Strengthen with both strikes, then use a three-hit combo. While in melee, he will choose between several different attacks. A shuffling step and a slight shrug means he's about to hit with his mace, and if it completes, he's about to throw his big baseball hit. Both are easy to bypass and you can counter full combos. If he raises the mace above his head or directs fire at it, he prepares for an overhead strike. Again, you can easily dodge and counterattack.
The last attack is his fiery breath, which he telegraphs by throwing his head back. Move away from him to avoid it and attack back. Imrod has no combos in this phase, so you can safely punish any of his attacks by staggering easily. Keep your resolve and items for the second stage.
On the second stage Imrod is learning some new tricks, mostly he has combos. If he stands up straight and raises his mace to waist level, he is preparing to unleash a three-hit combo. He also has a new fast mace attack similar to a gap that closes from the first phase. Step back and wait for the ground hit, then punish with your combos as usual. Luckily, he also retains most of his attacks and habits from the first phase, so keep dodging and punishing his slow attacks as usual.
He also has a new signature attack: his kick. Imrod randomly kicks you to the ground, causing a sustained attack as he picks up one of the corpses on the field and sets it on fire, then throws it at you. For you, this means the opportunity for many attacks. Once you're back on your feet, run after Imrod and land as many attacks on him as you can, then just dodge when he tries to drop the body. There's also a chance he'll just taunt you instead of picking up a body that you can punish anyway.
When you defeat Imrod you will receive glow of annihilation, reborn resin and then Inflammable gland. Plundering the Gland causes the temple to take on a more dangerous form with new enemy positions and blocking off certain areas. Carefully go through through the new formation and return to the entrance, and be aware that after leaving Fallgrim it will be in a state of fog.
NOTE: If you have an Unturnished Mask or Tarnished Mask, you can use them to teleport back to the last sister you saved on, allowing you to do a little exploit here. If you save with the Sister in Fallgrim Hold or at the temple entrance, and then don't save anywhere else before grabbing the Sacred Gland, you can use the mask to teleport instantly and skip the escape sequence.
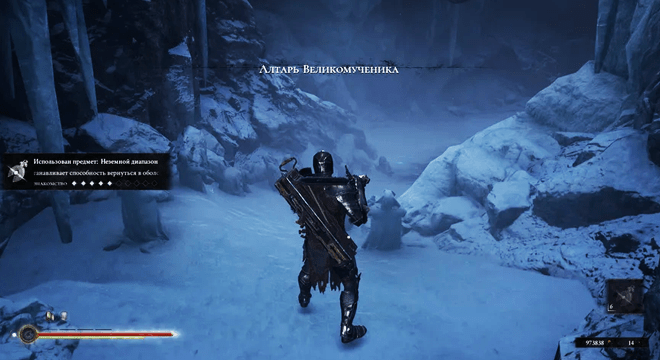
Altar of the Great Martyr
abandoned halls
After entering the Forsaken Halls, run ahead and wake up your sister to set a spawn point, then go to the next room and use the book to fight Hadern and get the Blade of the Martyr if you haven't already. If you have acid, you can use an anvil to upgrade your weapon. This is probably the easiest temple in the game, but the bosses can be a hassle, so I recommend fighting them with the most upgraded weapons.
When you're ready, go to the temple. In the first room, you will face two demonic fighter enemies with a Ghost Token in the corner. At close range, these enemies will poison you with quick strikes, or they will jump at you from afar with a kick or multi-hit grapple. If you see your Dim Seal flashing red, fortify it to block both of these attacks.
As you move into the next room, you will encounter a new enemy, an undead with swords sticking out of its body. At a distance, the zombie will throw its swords at you, and at close range, it will attack with a swing of the sword over your head. I recommend approaching with a jump start and then moving on to combos. At low health, the zombie will rip off its head and throw it at you, then die in a poisonous cloud. Hold on tight to resist all of his attacks.
At the end of this short corridor, you will come to a large open room with several exits. On the right, two grapplers are waiting to ambush you, and in the corner, the undead. Find Tarspore behind the coffin on the right, then immediately enter the hole on the right side of the room and take the Martyr's Blade upgrade, Petrified Winterglass. Return to the previous room and go straight through the left exit leading to another small room with two more fighters and the undead. Kill the undead looking down from the cliff and loot big bolt, which he is guarding, then turn around and take another exit from the room.
Kill the undead in your path, then focus on the creature waiting in the corner. This enemy waits for you until you get close, then swings its claws furiously. Luckily, his attacks are very readable and therefore easy to prevent. Approach him with a jump attack to take him by surprise and then do a stunning combo to kill him easily. Collect the acid from the chest behind it (go back to the anvil to renew it if necessary), then follow the path deeper into the crypt.
The path splits here, with the boss room on the left and the other half of the Abandoned Halls on the right. We didn't miss anything, so turn left, kill the creature waiting at the end of the corridor, then loot after it. Look through the doorway and you will see bosses waiting in the distance. Before you go down to it, check the left and right halls, where you will find the Holy Scripture of Disobedience and Rotten Food.
Enslaved Grisha
If you remember how you fought the previous Grisha, this fight is about 50% the same, with a few differences. This Grisha now has a new pass grab attack that he will use to start the fight. Fortify to block, then move into melee and wait out the attack. He uses the same two- or three-handed combos that are easy to dodge or parry. I recommend breaking through them and then damaging Grisha with a combo to try and hit him. If you have a weapon skill ready, such as the Sanctified Sword Mechanical Spike, it will instantly stun Grisha, giving you a chance to deal massive damage.
If your Tarnished Seal is flashing red, Grisha is most likely about to headbutt, so stand back and prepare to punish after the second hit. The same goes for his arm jump attack, which causes the arm to get stuck in the ground (the arm has a hitbox on it when he pulls it out, so beware of that). For an easy win, stay at mid-range and wait out these attacks, punishing those defenseless positions to build up your resolve, and then move on to weapons.
Once you defeat the boss, exit through the back, where you will find a new sister, as well as a chest with a Solemn Offering and a Golden Bell.
WARNING: if you set a respawn point on this Sister, you will not be able to leave this second half of this temple until you defeat the area boss. Before you wake her up, make sure you are well equipped.
Shrine of the Flame
Pass by the Sester and you will find yourself on a bridge leading deeper into the temple. If you look down, you will see another path below you. After going down there, you will be able to open the iron door shortcut that you may have noticed next to the Sister. However, if you try to go deeper into the temple using the shortcut, you will run into an impenetrable ice wall created by the ghost, so we are not going to go that route now ( Note : If you have the Dirty Censor's Hammer and the Chisel or Balistozouk Weapon Skill, you can kill the ghost from afar and access the shortcut earlier).
Instead, we are going to cross the bridge into a snowy area. Go down the stairs to the left to find a chest with reflection of Wisdom and the Sign of Death. Head back up and down another set of stairs and you'll come to a platform that connects to a thin bridge and two undead waiting in ambush. Kill them and cross the bridge. Again, you'll notice that you can jump down to another part of the temple from here, but it's best to just progress as normal.
This bridge is guarded by a new enemy with a shield and mace. He can use the shield to hit and knock you down, as well as block your incoming attacks. If you boost an attack with a shield, it will break instantly, and if you have a hit skill, it will also destroy the shield. Otherwise, wait out his mace swing and then punish him as soon as he inhales. Pick up the item to the right of the room, then head forward to the next area where there is a staircase in the middle guarded by three undead. Once you've cleared the room, head down the stairs, grab the Glimpse of Wisdom from the coffin in the corner, then enter the room directly to the right.
In this room, you will see another shield enemy, but there are also two undead waiting for you inside to ambush you. Lure enemies with your sword to purge them before taking on the undead with your shield. Once the room is clear, grab the chest to get the second Martyr's Blade upgrade, Shining Winterglass. Now return to the temple with the stairs and continue to move further into the temple.
On the way down the stairs, you will be attacked by another undead with a sword, as well as undead with shields. Continue down the stairs and you'll see an item on the floor guarded by one of those resting claw creatures. There are also undead behind the ice wall that are waiting for you to ambush you, so draw them out before attacking the creature. Jump creature attack, combo for a stunning kill, then you can get reflection of affection and keep moving forward. Continue down, killing undead along the way, until you reach a clawed creature guarding a doorway and a new staircase. Kill the creature, then start up the stairs. This brings us back to the previous label.
As you go up the stairs, you can move into the snowy area on the right to encounter another claw creature and an undead with a mace. Keep moving from here until you find a large platform with two enemies. Keep in mind that the ice wraith will summon a freezing spell from the ground if you don't interrupt it, so consider throwing it down first. Clear this area, then head up the stairs to get to the other side of the door, next to the Sister. Along the way you will find useful items. Collect them. There is also another workaround, a second ladder, you can go down to fight the shield undead and find a chest containing eredrim and two tokens.
After you've completely cleared the path from the shortcut (and rested with the Sister if necessary), head back to the doorway where the clawed creature was resting. Here you will find another rebirth, reflection of affection and crawl space on the left side. Enter this space to find an alternate path littered with ice wraiths. You will also find Holy Scripture of Ardor in a coffin and a chest containing acid and a Ghost Mark. Exit the crawlspace to be back on the stairs as you were before (the sword of the undead and also the shield of the undead).
Going down another set of stairs, you'll come across another space to bypass. Enter it and take Holy Scripture of Ardor, Holy Scripture of Despair and Holy Scripture of Repentance from the chest inside, then turn around to protect yourself from the fights that spawned behind you. Once the room is clear, exit the crawl space and continue down the stairs until you see a chest locked behind ice on the left side. Kill the shield enemy and keep going down until you find an icy corridor leading straight to the boss room.

Altar of the Great Martyr
First of all, take three Glimpses of Futility and ghost tokens from the corpses at the entrance, then wake up your sister to start the respawn. Buy skills if you need to and then head straight ahead to the boss arena. Before you drink the Nectar, use the hole in the far left corner to reach a small room with a chest containing Glimpse of Truth and Scarecrow of Eredrim. Return to the main room and drink the Nectar to fight the boss.
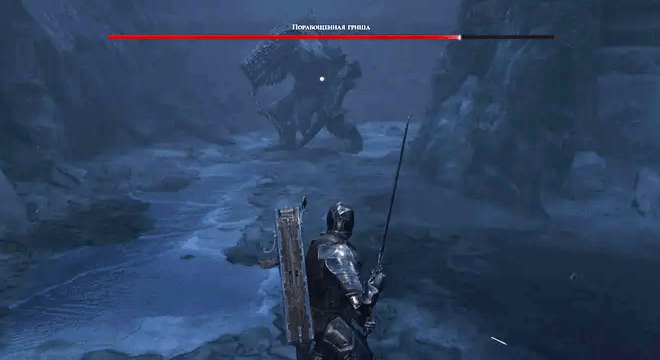
How to defeat First Great Martyr Tarrus
Tarsus always starts the fight with two or three jerks. You can either harden or simply dodge when you hear an approaching sound. Eventually, he will materialize nearby and you can start fighting him properly. Keep this in mind, because Tarsus will keep disappearing and reappearing from time to time, trying to sneak attack.
Most of Tarrus's attacks are slow and very readable. His most common attack is a four-hit horizontal combo. He pauses between attacks, which can make you think there's a gap where there isn't one. Like most bosses, you'll want to wait until he hits and then attack him with a jump attack or three-hit combo. Try using a hard attack as a combo expander, or if you're confident these slow punches can be parried easily.
If he slips back and sticks his sword into the ground, he is preparing to summon an ice storm. This is the perfect time to land a few attacks (if you react fast enough, you might stagger), but then make sure you get out of the illuminated area before the attack ends. Alternatively, if you have enough resolve for a weapon skill, you can interrupt it with this. He can also throw his sword at you and then charge forward, so don't get too close. Repeat this tactic and eventually you will reach the second phase.
In second phase Tarrus moves casually around the area, making him hard to catch in combos. His attacks become incredibly inconsistent and sometimes he will go for 15-30 seconds doing nothing but sliding. If he just slithers past, you'll be able to land a quick hit, but for the most part, you'll have to wait for him to engage. One way to parry an attack is to move away from him, which will trigger his long-range dash. This attack can be parried, but the hitbox is tricky and this attack also has two variations with different speeds. An alternative strategy is to simply dash to avoid a stab attack and instead do a quick combo.
Another one of Tarrus' common attacks is a three-hit combo that starts with a quick uppercut and ends with a slow sword slash that causes his weapon to momentarily get stuck in the ice. If you see a hit coming, it's very easy to dodge and land a three-hit combo while it's stuck.
If he starts spinning his sword in his hands, he's about to do his signature move, which summons an icicle field that freezes you in place and deals damage. To counter you will need to get close to Tarrus and then solidify before the icicles are summoned. Hold tempering until the ice clears and Tarrus stops. After this attack, he takes a long break, leaving him wide open for a sustained counterattack.
His erratic attacks and movements can be very frustrating, but his lack of aggression leaves plenty of room for healing, stamina recovery, and hardness recovery. Play patiently, wait for your discoveries, and kill him slowly for an easy win.
After defeating the boss, you will receive reflection of insignificance и nascent tar. Back in the Nectar Room, take crystal gland and prepare to return to the surface. New enemies have appeared to block your path, and some areas are no longer accessible. Fight your way back to the surface and know that after leaving Fallgrim, it will be in a state of fog.
NOTE: If you have masks, you can use them to teleport back to the last sister you saved on, allowing you to do a little exploit here. If you save with the Sister in Fallgrim Hold or at the temple entrance, and then don't save anywhere else before grabbing sacred gland, you can use the mask to instantly teleport and skip the escape sequence.
Eternal porch
Exit Fallgrim Tower and head to the right of the door. Follow the direction of the toad that you can talk to. Before the toad there is a turn to the left, leading between large monoliths. Follow this direction and kill opponents. Eventually, you will reach a high tower. In front of her, among the monoliths, there is the last shell of Eredrim. Pick it up, and then go inside the tower, after killing the enemy.
After entering the porch, run to the left and wake up the Sister to set a spawn point, then use the book to fight Habern and get the Hammer and Chisel if you haven't already. If you have Quenching Acid, you can use the Anvil to upgrade your weapons. This temple is a glove, so be as prepared as possible.
Pick up the item in the middle of this large room, then head down the corridor where you will encounter a new enemy, the Hammer Knight. He is one of the most dangerous enemies in the game.. His most dangerous attack is his jab knockdown, which almost always results in a hammer blow that deals massive damage. Since this attack is difficult to read, I recommend always tempering before the first attack. His other attacks are heavily telegraphed overhead strikes that can be easily avoided. If you stand directly in front of him, he will raise his hammer in front of him and hit him three times. To avoid this, simply press the dodge button to retreat and then punish after the third hit. If you have the resolve for a weapon skill, you should deal with it quickly.
Defeat the hammer knight and go through the door to enter the first massive area of this temple. Turn left and you will see a strange structure a little to the side. This is a teleporter that takes you to another set teleporter in another part of the temple. Use this and you will find yourself near the giant staircase in the center of the room. The stairs are guarded by three red knights. They use their rapiers to strike quickly but do not deal much damage. They can be easily staggered with a jump attack, opening up a combo for them that should kill them before they can retaliate.
After dealing with the red knights, go down the stairs to the fiery bowl, which is located in the center of the room. Interact with this torch to activate it, causing phantoms to appear around you. Kill them or run away from them, just beware of their area of effect rock attack that instantly knocks you down. From this torch you want to turn left, then go around a large pillar where you will see a second torch on a platform in the middle of a large hole. This torch is guarded by four crossbow knights and one hammer knight.
These crossbow knights are perhaps the most annoying enemy in the game. Once they grab you, they fire three shots and almost never miss, even if you're running. If you see him coming, just harden up and wait out the third shot, then run and jump to attack them. They have low health and are easy to kill once you create this hole, just be aware that they will sometimes jump backwards when approached and have a melee attack that they will resort to when you get close.
In this case, kill all four Crossbow Knights using the pillars as shields from the others, then draw out the Hammer Knight to clear the area. Approach and activate the second torch, and be sure to take the Hammer and Chisel upgrade, petrified censer, from the ground behind him. Then go to the red knight and crossbow knight. Defeat them, then find the chest under the rock ledge that extends over this side of the room. Search the chest for acid.
Now return to the giant staircase that was originally guarded by the red knights. Go up two flights of stairs and turn left at the giant gold button. Defeat the hammer knight or run past, then teleport behind him. This will take you to the far right corner of the room. Look to your right and you'll see a large ramp that connects to a bridge that crosses this entire area. Climb to the top of this bridge to avoid all the ground level enemies and watch out for the torch on the platform to your left. Once you see it drop to ground level, head up the ramp that leads to the torch platform.
This platform is inhabited by a small army of foot soldiers and one ax enemy. Take your time or you will provoke them all at once and be overwhelmed. Instead, try to lure them one by one, place your emphasis to stand your ground and counter the kill combo. Once all enemies are defeated, you can loot items on the ground (reflection of futility, Base and Superior Moonshine) and then activate the third and final torch. Instead of walking back, you can exit to the main menu and then reload your save to return to the Sister at the entrance. Then return to the giant staircase and press the golden button to open the large stone door.
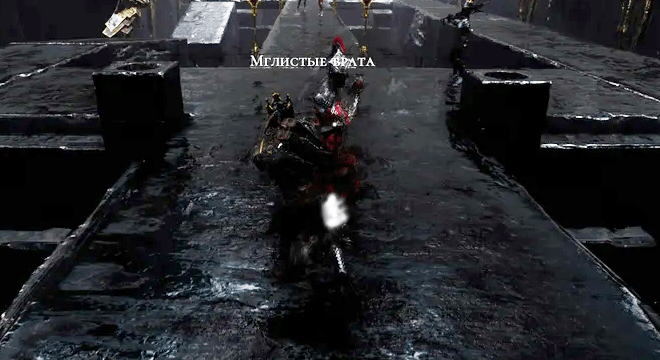
misty gate
Climb up the stairs and go through the doorway to get to the next area. The bridge ahead is guarded by two red knights, two crossbow knights, a spear knight, a dual wielding knight, and a hammer knight. This is a very dangerous encounter, as one bad throw or knockdown can send you off the bridge to instant death. On the other side of the bridge, to the right of the giant statue, stands the Sister. If you're worried about dying, just take the right path and run past all the enemies, then activate it to protect yourself.
When you're ready to progress, go past the giant statue and find a staircase behind it, guarded by a polearm knight, a double wielding knight, two red knights, and two crossbow knights. The halberd knight can be easily staggered with a jump attack combo, and his rushing attacks are easily parried by hardening or retreating. However, a dual-wielding knight is far less predictable. He will almost always open with a jump attack that you can easily dodge to punish, but he lashes out quickly with a lot of hits, so be ready with a temper or parry. If you can get stunned, he will die quickly, but you will most likely end up exchanging a hit or two in the process.
Next come the crossbow knights. You need to hurry up with them before they can punish you with their accurate shots. Luckily, the red knights move quite slowly, so you can probably kill both crossbow knights before they get in range. After clearing out the enemies, you can start the long climb up this tower. The main thing is to watch your gait, but at the same time keep moving. There are crossbow knights sitting along the stairs at the top, and they will start shooting at you as soon as you get into their line of sight. I wouldn't recommend using that many jump attacks when fighting them, as it's easy to slip off those thin paths and fall to your death.
Follow the path up and you'll end up in a large hallway with a shallow arena in front and sunlight falling in the back. Kill the ghosts guarding the perimeter and ignore the arena for now, instead head towards the torch in the middle of the corridor at the back. Activate this torch to receive Scriupture of Ardor, Glimpse of Disdain and Tar Remnant. This will also summon four more phantoms, so run quickly to get some distance and avoid getting hit. Take out these phantoms (carefully, don't forget about their area of effect), then continue to the back wall, where you will find two red knights and a hammer knight. Deal with them, then CAREFULLY exit through the opening on the right side. There is a thin ledge here. glow of affection.
If you want to kill the enemies in the arena, you can loot the Corrupted Nectar sitting on the golden saucer, but otherwise exit this floor using the stairs on the opposite side from where you entered. The next two rooms are guarded by a crossbow knight and a red knight (deal with them in that order), then climb the next ladder until you reach a platform with a slatted floor. There are two more crossbow knights here. Use the stairs on either side of this floor to finally reach the upper level, which is once again guarded by two crossbows and two red knights.
After you defeat them (crossbows first, as usual), look for two teleporters in the back corners of the platform. Next to one of them is reflection of wisdom, which you should grab but not teleport.
Instead, go to the opposite one and activate it to get to the far platform with the golden button. Take reflection of wisdom next to the teleporter, then step on the elevator to return to the base of the tower, allowing you to use the Sister if needed. When you're ready to exit again, take the elevator up and look for a path from the platform.
Kill the red phantom patrolling the path, then follow it down until you see a polearm knight guarding a treasure chest. Kill him with a jump attack combo (careful not to jump off the edge), then search the chest for Large Bolt and Bronze Bell. Head back down the left path to the large center platform where you'll see a Hammer Knight patrolling, while a Red Knight and a Crossbow Knight are hiding behind the walls on the left. Wait for the hammer knight to go far, then engage in combat and defeat those enemies so you can fight the hammer knight one on one. Once he is defeated, return to the middle where you will see a spear and a dual wielding knight guarding an item (Euphoria scripture).
Note: You can get soothing acid at this stage, but the process is a little tricky. If you remember another teleport that we haven't used before, it will take you to a platform that leads to acid. To get to the item, you need to go down the ramp next to the teleporter and then find the stone platforms floating below you. Jump on them carefully. They act as stairs leading to the last platform with another teleporter on it. This teleport will take you to the acid, but you have no other way back than to use masks or exit the main menu. If you're planning on getting this acid, save in Sister near the giant statue, take the elevator up, and then send the elevator back down without going down with it. That way, when you teleport back to the Sister, you can use it to get back upstairs.
When you're ready to go through the last section of this temple, return to the top of the tower and look out at the sky bridge stretching into the distance. Start on the top right path, which will take you straight to the Crossbow Knight, which looks out over an area with two Red Knights and a Hammer Knight. You know the drill: first deal with her, then provoke the red knights and finally 1v1 the hammer knight who is guarding ethereal range.
The next section of the bridge is filled with powerful enemies, but if you look to the right side of the bridge (where the crossbow knight sat), you can see the path ahead running over the upward sloping cliffs. Running on this side allows you to avoid all these collisions and move on to the next section of the bridge.
Here you will find a particularly treacherous encounter: a rising ramp with a red knight and a hammer knight presided over by a crossbow knight perched. If you are approaching slowly, you can lure the crossbow knight from her perch and then draw her out first, but if you have ballistosuka, you can also shoot her. In any case, approach this meeting carefully and observe. Your. step. One bad hit from the hammer knight will send you to your death. Behind the hammer knight you will see two paths up and one path down. First follow the path down to find Extinguishing Acid, then return to the ascending paths and head right ahead.
Remember what I said about watching your step? Keep this in mind as you walk along these thin paths, and also watch out for occasional holes in the ground. The area ahead is again guarded by two crossbow knights and two red knights. There is a spawn area next to the wall. Follow the correct path once again, continuing forward as it will lead you straight to the two crossbow knights who rule this section of the bridge. Once they are defeated, your path forward will be clear but treacherous as the bridge is heavily breached. Slowly make your way down the last section of the bridge and reach the Removable Archives, guarded by the last Hammer Knight.
records
When you enter the Shifting Archive, look to your left and you will see an item lying on a ledge, surrounded by pillars of stone tablets. Find an opening between these pillars on the left side and go around them to grab the item, but then turn around and move deeper into the pillars until you find a teleporter. Activate it to get to a remote platform with an item on it: second upgrade Hammer and chisels, A stinking censer (This upgrade is especially noteworthy if you're a Hammer and Chisel player, it gives you access to a powerful long-range attack. This is also an instant boss kill).
Return to the archives platform, exit the pillars, and run down the corridor towards the giant face in the distance. Pay attention to the giant Sister sleeping next to the platform on the left. Wake her up to set a spawn point, then walk up to the giant face and drink the Nectar when you're ready to get to the area boss.
How to defeat Crucix the Twiceborn
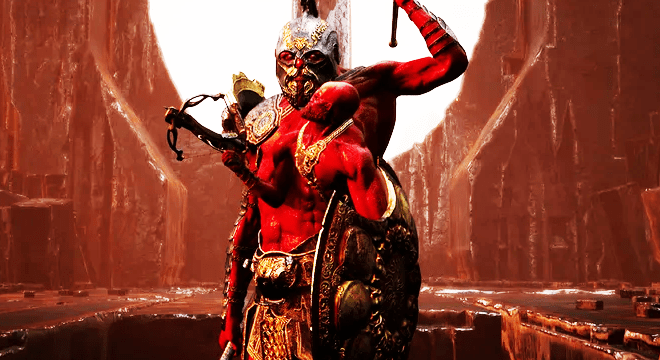
After you drink the Nectar, the floor will open and you will enter the boss arena and take fall damage. If you die, get your shell back, then I highly recommend using the aether range you got earlier to restore the respawn charge, because this is, in my opinion, the most difficult boss in the game. Otherwise, just heal up and walk forward to trigger a boss cutscene.
Crucix, unlike the other two bosses, actually has some quick combos, as well as an effective ranged attack and a menacing signature move. When you're at close or mid-range, he'll alternately swing his ax and spear in front of him, and then finish with a long thrust or wide slash.
Both of these combinations have a long delay at the end, ideal for a two or three hit combo. When he regains his composure, he will quickly launch another combo, so be ready to harden up and then keep attacking for a stagger. When he is hit, the miniature twin will start shooting at you with a crossbow. These attacks are annoying, but worth absorbing to deal damage to the boss. If you start to run out of health, use the gap between one of his combos to eat one or two healing items instead of attacking.
The boss's two signature moves are a backwards crouched slide, from which he will start shooting at you with his crossbow until you get close and start attacking. The second is a giant leap followed by a strike with a homing spear. Don't try to run away from this attack! Just lock in place and strike to avoid massive damage. I highly recommend NOT using any weapon abilities in this step on the right, as you will need as much resolve as you can get for its second form. Instead, repeat the above strategies until you reach the second phase.
In second phase the younger dies, causing the main body to go into a fit of rage. His attacks are much faster, deal much more damage, can inflict knockdowns, and worst of all, there is almost no delay between his combos. Punishing him at this stage becomes much more difficult, but possible. His new combo enders are a powerful ground slam with a spear and a multi-hit ax slam followed by a kick. Luckily, he doesn't punish you after hitting you (he taunts you instead), so don't worry if you get hit by accident.
The plan is similar to the first stage, but this time a little more precise. As soon as you think he's finishing one of his combos (like when he finishes hitting the ground with his spear), you need to launch a running jump attack that will land as soon as he becomes vulnerable. Combine this into a normal attack combo, but be ready to harden up as soon as he launches his next attack. You may have to exchange one or two hits, but using this method you can almost guarantee a free roam and therefore a lot of damage (also, this time without a crossbow). Additionally, it will allow you to build Resolve to abuse weapon skills (such as Mechanical Spike or Foul Censor).
The good news is that Crucix won't bore you in this form. If you need to heal, regenerate stamina, or wait out the hardening cooldown, just run away and watch him slowly walk towards you. If you're struggling to beat him, this is the only fight where I would recommend overusing items. Choose a Carapace with high resolve, such as Varros or Solomon, then drink Moonshine between attacks to replenish your resolve.
When you defeat Crucix you will receive Glimpse of Oblivion, Nascent Tar, and then Knotted Gland. Plundering the Gland causes the temple to take on a more dangerous form with new enemy positions and blocking off certain areas. This dungeon in particular has been completely redone, with some incredibly dangerous encounters on those unreliable platforms and bridges.
One encounter I'd like to point out is the bridge back to the top of the tower, which is now guarded by six crossbow knights. If you hit the target of all of them at once, they will kill you almost instantly. If you try to run through, they will almost certainly hit you enough to kill you. What you want to do is run towards them while watching their animation to see when they spot you and when they raise their crossbows. Just before they fire, solidify and hold him to block as many arrows as you can, then break free and start running again until you're safe.
As you descend from the tower, there will only be one path ahead, so carefully make your way through the encounters until you finally reach the entrance. Leave the temple with the Sacred Gland and remember that Fallgrim will be in a state of mist while you hold the iron.
NOTE: If you have a plain or faded mask, you can use them to teleport back to the last Sister you saved on, allowing you to do a little exploit here.
How to defeat the Unshackled
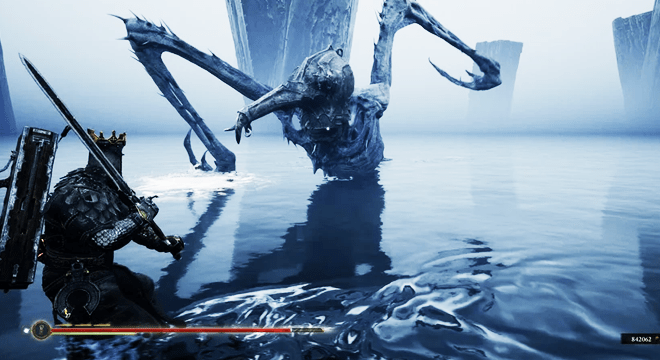
No matter what order you complete the Temples in, you will eventually return all three Sacred Glands to the Old Prisoner. After receiving the last Iron, the prisoner will turn on you and tell you to testify to his ascension. Enter the hole in the ground where the Old Prisoner was once imprisoned to watch the final boss cutscene and begin the fight.
Before we move on to the boss strategy, I highly recommend that you enter this fight using either Harros or Solomon and equip either the consecrated Sword or the Hammer and Chisel (assuming you've exhausted them). Weapon abilities are incredibly effective in The Unchained, so you need a Carapace with at least four determination. Sword и hammer and chisel have the best weapon abilities for this fight, allowing you to make the most of your resolve.
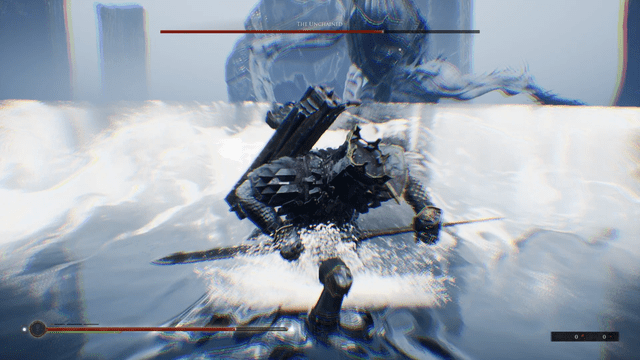
Liberated always starts the fight with a long dash followed by a wave of the hand. Run to him when he gets close and then start combos him to try and hit him. After one or two strikes, it will attempt to respond with either a flick of its tail or another flick of its arm. When you see him launch an attack, you should fortify to block and then complete the combo to complete the stagger.
Annoying that the head liberated has a hitbox when he hits the ground after being staggered, so always try to approach him from the side when you are about to deal damage. Each time the Unshackled rebounds, he repeats this exact process, so just repeat to reduce his giant health bar. Your goal at this early stage of the fight is to build up as much resolve as possible so you can use your abilities at a later stage.
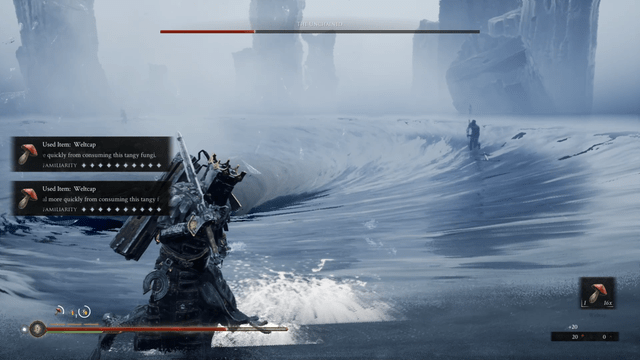
When his health approaches two-thirds, the Unshackled begins to cause waves in the water whenever he jumps. If you don't break through these waves, they will deal damage, knock you down, and leave you immediately open to attack. I recommend throwing yourself at them at least twice to make sure you get through them as the hitbox is a bit twitchy.
The Unbound will combine these waves with his normal swing attack, but luckily your weapon abilities offer an easy response. After he jumps a second time, dash through the first wave and run forward, getting into the path of the second wave. When the Unshackled charges towards his attack, activate your weapon skill to dodge both the wave and his attack, AND inflict a knockdown immediately. It's the perfect punishment for this annoying attack.
About half the health of the Unshackled will begin to summon dark warriors to the battlefield, who need to kill with one blow. They will charge at you and start attacking relentlessly, and their attacks will easily overwhelm you, especially if the boss helps them. Your best bet is to run around until the shadows form a group and then power up your attack to take them all out with one hit. If you still have the resolve, this is also the perfect time to burn it down to bring the boss down and deal with the shadows while he's incapacitated.
When he is below half health, the Unshackled will dive into the water and summon a giant whirlpool. The shadows will run towards the whirlpool and be drawn into it, and anything that falls in the middle will be eaten and heal the Boss. At this point, you need to get to the edge of the whirlpool and start attacking the shadows as they enter its pull. If you kill them before they reach the center, you can prevent the freed one from healing. Just do not fall into the whirlpool, otherwise you will die instantly.
After the maelstrom, the Unshackled will return to battle along with his shadow soldiers. Luckily, you should have four Resolve bars at the ready, so give him some weapon ability combos. He will repeat the same series of attacks, sometimes mixing a headbutt attack (dodge to the side if he plunges his wings into the ground and raises his head in the air) and a flying attack (he will try to position himself in the air) and fall on you. (harden for light counteraction).
As long as you play the waves carefully and don't let the shadows heal the boss, everything should be smooth for the last third of his health. Defeat him to get othe light of delusioni and go to New Game+. In this game, you have everything that you managed to accumulate in the previous game. Enemies at the same time will become many times stronger.
Was the article helpful?
 Thank you very much!


