A Plague Tale: Requiem is the sequel to the third-person action-adventure game A Plague Tale: Innocence. Amicia and her brother Hugo will embark on a new journey. Heroes will once again face a deadly plague, swarms of rats and hostile soldiers. In the sequel, the girl's skills have grown up, so it will be easier for her to deal with opponents.
Walkthrough A Plague Tale Requiem - Chapter 10 "Bloodline"
Bloodline is chapter 10 in A Plague Tale Requiem. This step by step guide will guide you through all the tasks of the tenth part The Plague Tale Requiem.
Collectibles: 1 item for Hugo's herbarium, 1 memory, 1 secret chest, 1 knife, 1 tool chest
Trophies: ![]() Blood Line
Blood Line

Walkthrough Bloodline in A Plague Tale Requiem
The first part Chapters 10 - Bloodline в Plague Tale: Requiem puts before you the task is to find the fort and get to it. Our walkthrough explains where the round tower is and what to do on the way to the fort. You will also learn how to get inside.
Find a round tower
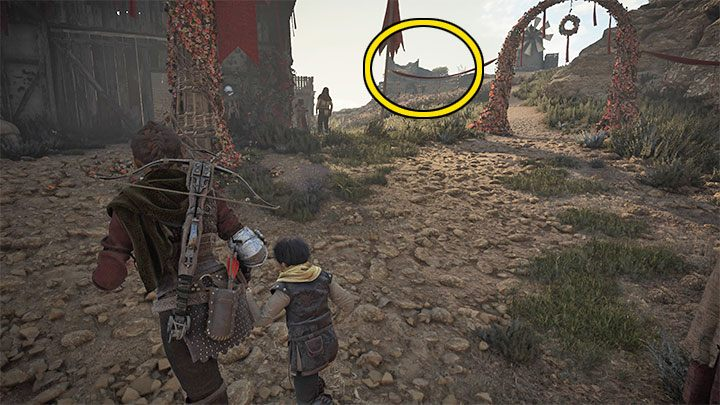
You will return to a half-open island, again getting the opportunity to explore it.
To advance the story, head straight ahead, passing the harbor entrance and areas where the islanders celebrate. Your destination is a ruined tower to the left of the windmills on the hill marked in the picture above.
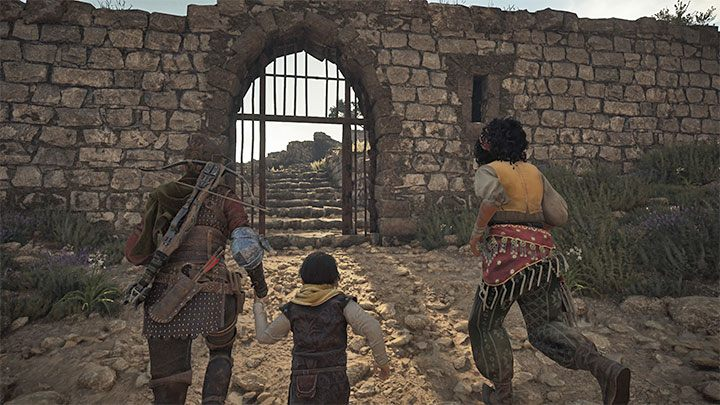
You will see an open gate pictured above. Now you can follow the path blocked in chapter 9.
Find your way to the fort
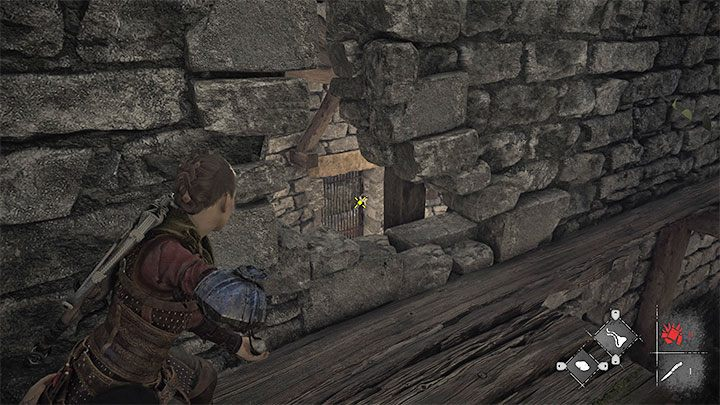
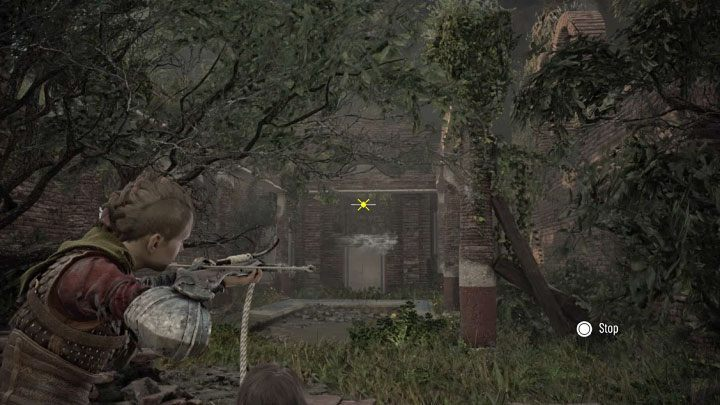
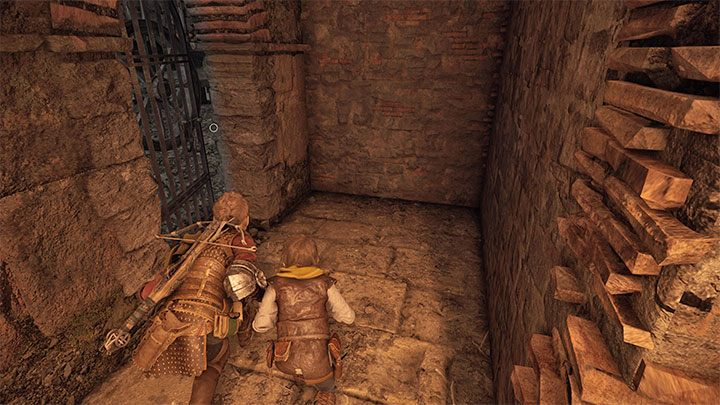
you will reach locked gate at the base of the round tower. Step aside and find a hole in the tower wall. Get through it.
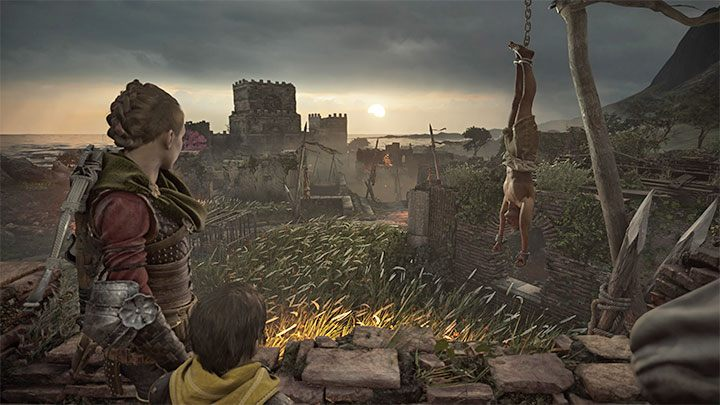
Climb the stairs up, go along the edge and reach the hole in the wall. Shoot with a sling. Go back to the entrance you just opened. Use the stairs and go to the next gate. You will trigger a cutscene during which you will notice the fort far in the distance.
Find a fort
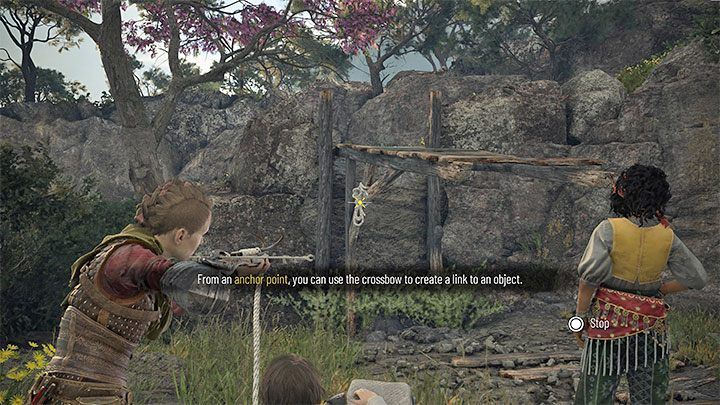
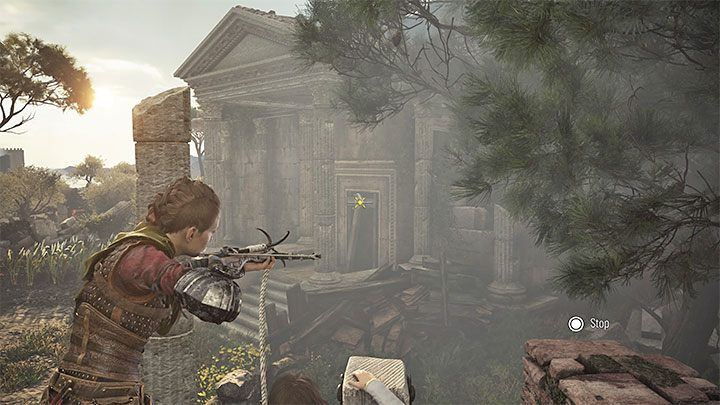
Climb down the path and jump down to reach the broken bridge. Stand near the anchor point and shoot the hook from the crossbow. This will lower the platform, allowing you to continue your journey. You will arrive closer to the fort.
Get to the fort
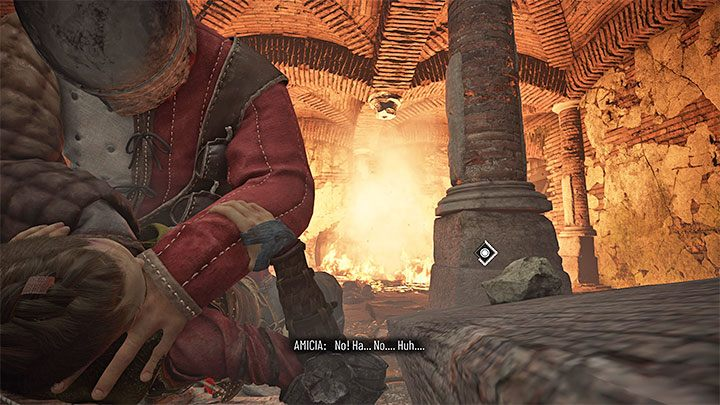
You will come to the first area inhabited by slave traders. As soon as you enter it, Amicia will fall down - you must complete the QTE, to survive.
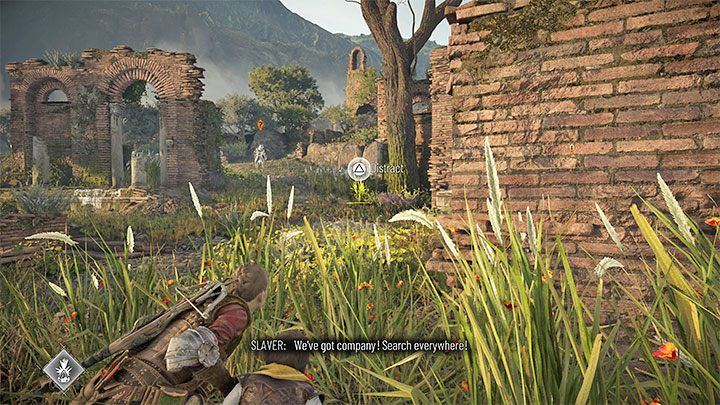
Fortunately, the enemies will not be warned. Leave the ruins and return to your allies. The slave traders are hostile, and unlike previous chapters, stealth is no longer mandatory. You can kill them if you like..
- If you're going for a sneaky approach, hide in the tall grass and have Sophia use the prism to distract the enemies and set up ambushes. You can also avoid some bandits by going through the basement.
- During open combat, use resin and ignifiers or your crossbow. Watch out for shield wielders - if they spot you, lose them and wait for an opportunity to strike from behind. There is a lot of general loot here that you can use to resupply.
Can you get to second part of the ruins along the path shown above. There are more slave traders here - be prepared to start sneaking up or retreat if you are spotted. You can quickly make your way to the tower on the right, from which you can plan your next moves.
We recommend securing the entire area, as this will make it easier to unblock the path ahead. As before, you can blind the bandits by shooting bags, setting them on fire, or killing them with a crossbow. Watch out for the archer on the upper level of the ruins.
Ultimately, you must reach anchor pointspictured above, on the top floor adjacent to the gated exit from the area. Use your crossbow to unlock the next passage.
In the big ruins you will see a locked door you must destroy by solving the puzzle.
Find the nearest winch and ask Sophia to use her (command button - L1/LB).
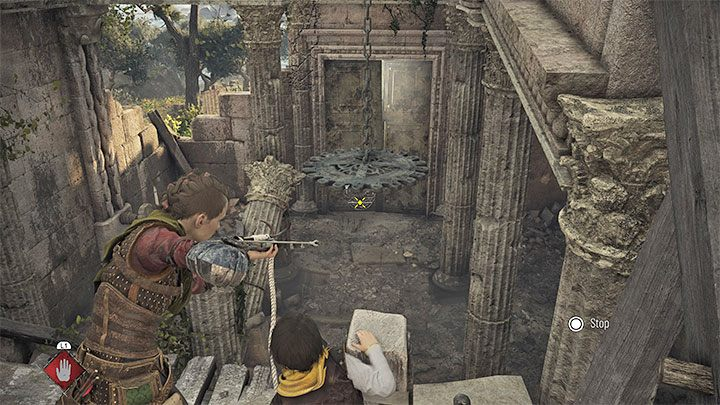
Now look for a place where you can climb to a higher shelf. You will find another reference pointshown above. You can now use the crossbow to grab onto the chandelier Sophia is holding up and swing it around, crashing through the door and opening a path forward.
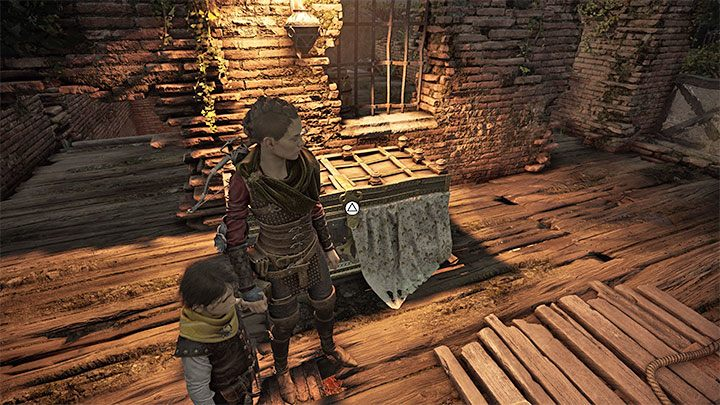
Start walking on a new path. On the right you will find crafting table. You can also deviate from the main path and turn left leading to the water. There's a secret there pen for herbarium Hugo: Raven.
Follow the main road to trigger a cutscene involving the slavers, during which Hugo will use his powers.
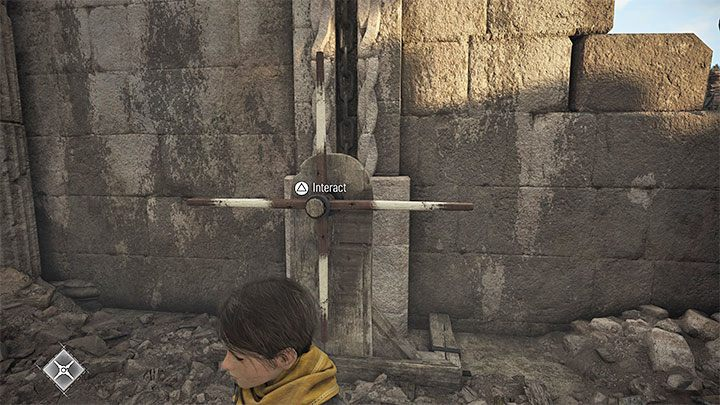
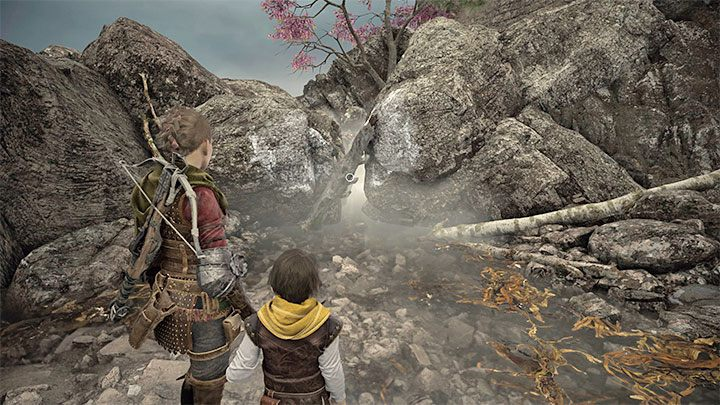
After the cutscene, approach Hugo and talk to Sophia, who is leaning against the ruins. Explore the ruins and find fulcrum. interact with him and point the crossbow at the wall, pictured above. You will destroy the wall and open the way to a new collectible - souvenir: rag doll. You will find him by a tree.
Return to the ruins. To advance, you must use the passage with hanging bodies behind it. You will reach a new area filled with slave traders.
One more time, you must go to the fort. How you do this is up to you. You can hide in the grass and distract the enemies with the Sophia Prism or ambush and kill them with your sling, crossbow and ignifiers. Try not to be attacked by more than one enemy at the same time. Watch out for archers and shield-wielding enemies.
Explore the surrounding buildings if you can resupply. In one of them you will find secret chest.
As soon as you approach the fort, the drawbridge will be raised, which will prevent you from entering it along the main path.
Ignore the enemy still on bridge, and go down into the moat. Turn left to find narrow passagepictured above, which will take you out of the area.
Get to the door. Amicia will be attacked by a guard, but Sofia will save her without the player's involvement.
There's another one here crafting table. Ignore the rotating mechanism and get to the new gate. You will enter the fort, sneaking aboard a wagon of slaves.
In the courtyard
cross the yard
Still inside the cart, light the nearby fire and Sophia will reunite with us and use her prism to create a path forward. Climb down the cart as directed by Sophia and get to the fire.
Use the prism of Sophia
Light the second fire, and then instruct Sophia to use her prism on it, thereby refracting the light and allowing us to walk on rats. Continue until you are inside the tower in the corner and head upstairs to find Secret chest #8.
Return to the bonfire with the Sophia Prism and then light the lantern.
Go to it using Sophia's prism again, and then again on the fire near the small chest.
From here, drop the pot of Exstinguis on the nearby flame, then light the stick from the stash and cross over to the other side to the torch near the stairs.
Go upstairs and look at the courtyard when asked.
Get to the courtyard
From here, have Hugo control one of the rat hordes below and use it on killable enemies to clear the area a bit until Hugo's stress level allows it.
From where you are, there is also a chest with upgrade materials in front of you.
Another chest with upgrade materials is behind you and below, outside of the building, in the general direction outlined below. Use the stick from the stash and light it up with the torch and then get to the chest.
Now make your way to the other side of the last section of the yard, making sure you use Exstinguis in the line of fire first. Then take the stick from the cache, light it up and go to the other side where the lantern is.
Now let the rats eat you for a bit and Amicia will automatically use pyrite to progress.
Climb up and light the stick, then go to the chest to open it.
Now go back down the stairs and walk along the fence to the other side.

Climb up and get rid of the enemy patrolling the area, then go back down for the chest and up again until you can access the handle that opens the gate.
Head back down and get rid of the torches the two soldiers are holding so the rats can kill them and then create a path to the gate.
Chapel
Enter the chapel
Walk towards the chapel to enter it.
Find traces of Elia
Continue down into the crypt of the chapel and go to the marble altar with the chain.
Now we have a new header. Now go back upstairs where Milo is waiting for us.
Milo knocks Amicia down, but Sofia saves everyone by killing Milo.
Survive the attack
Having witnessed Milo's death, the soldiers are now everywhere. The very first thing you want to do is take knifewhich we will need in the next chapter. Head around the right side of the arena and you'll find it stuck in a crate next to a bolt.
Now you need to kill all the advancing enemies before the next cut-scene, during which Hugo releases the rats into place.
Luckily, Sofia finds a way out to sea. On the boat, Sofia scolds Hugo for not listening and Amicia for not setting a good example for her brother. Exhausted, the three continue on their way to their new destination.
This concludes chapter 10 "Bloodlines" in A Plague Tale: Requiem. Now begins chapter 11"Cradle of Ages».
For all other chapters in A Plague Tale: Requiem, check out the full Walkthrough A Plague Tale: Requiem.
Was the article helpful?