Dead Space is a remake of a third-person action-adventure horror game set in a sci-fi setting. Isaac Clarke is a private engineer sent to the huge USG Ishimura for repairs, upon arrival on which he learns of a terrible tragedy.
Walkthrough Dead Space Remake (2023)

Passage of the remake of Dead Space (2023). In this guide, you can expect a complete walkthrough of each of the game's chapters, all of the magazines (both text and audio), all of the nodes, all of the schematics, where to find all the best weapon and armor upgrades, and more.
What this guide will offer:
- Complete walkthrough of the game from start to finish.
- Detailed strategies to fight enemies and bosses.
- The location of each collectible item in the game is indicated in the game.
- Location of all magazines
- All schema locations
- All nodes
- And much more!
Management
Walkthrough Contents

- Arrival (New Arrivals).
- Intensive Care.
- Orbital correction (Course Correction).
- Death is inevitable (Obliteration Imminent).
- Lethal Devotion.
- Dangerous impurities (Environmental Hazard).
- Step into the void (Into the Void).
- Find and save (Search and Rescue).
- Dead on arrival (Dead on Arrival).
- Last days (End of Days).
- Alternative solutions (Alternate Solutions).
- Dead space (Dead Space).
- Game achievements
1. Arrivals
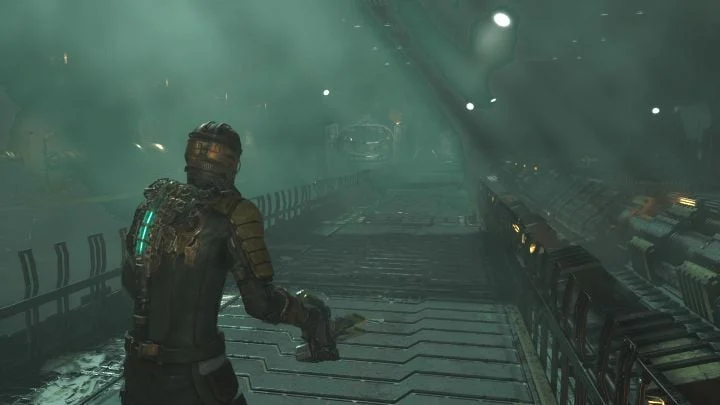
At first, you can only look around. You may leave the deck of the USG Kellion only after completing the docking procedure on the USG Ishimura.
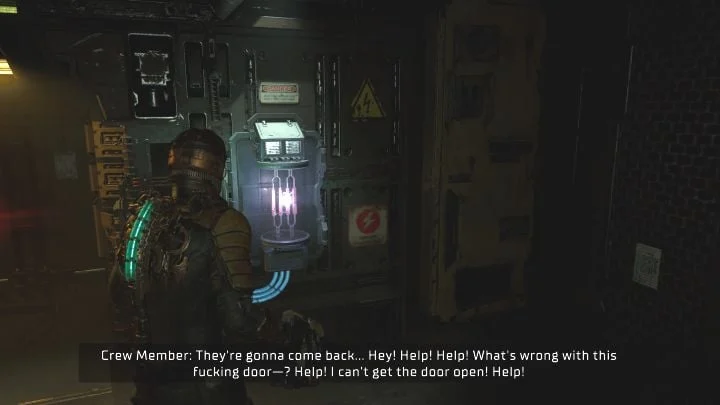
Follow other crew members. In the first security room, stand in front of the door - Isaac needs to be scanned.
The security console is located in a separate room. Interaction with him will lead to necromorph attack.
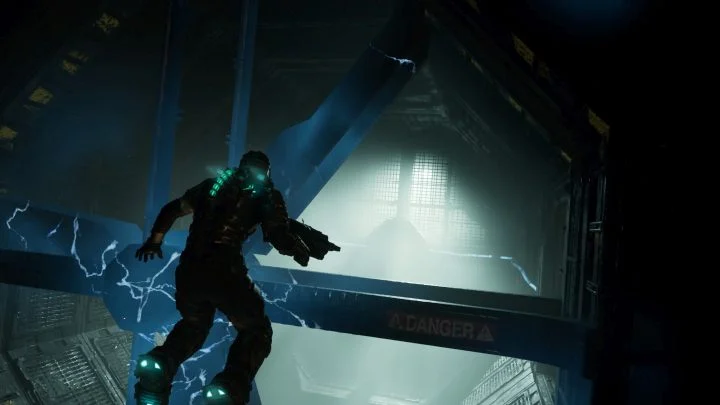
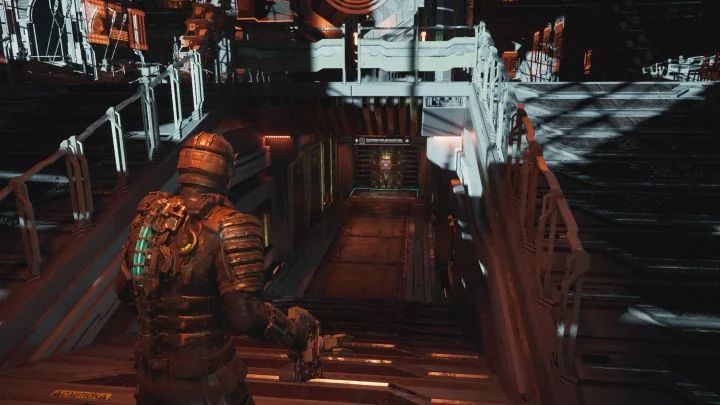
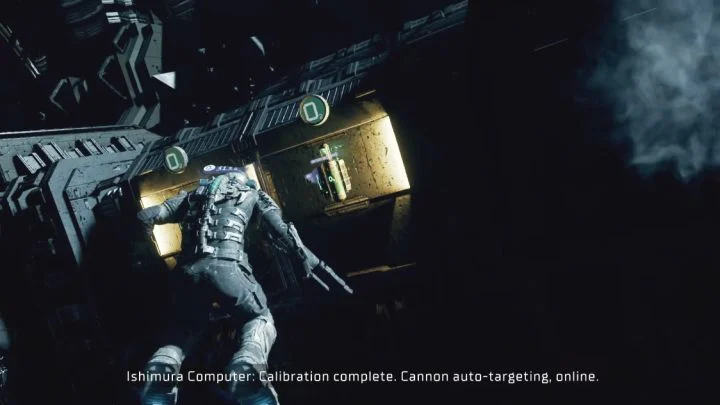
Don't try to fight Necromorphsbecause Isaac doesn't have a firearm yet. Open the door and start running through the dark corridors - pressing the left stick activates the sprint.
You must run to the elevator, but unlike the original Dead Space, you don't need to call it. Run into the elevator, turn 180 degrees and start it. Ignore the monster's attack because you are safe.
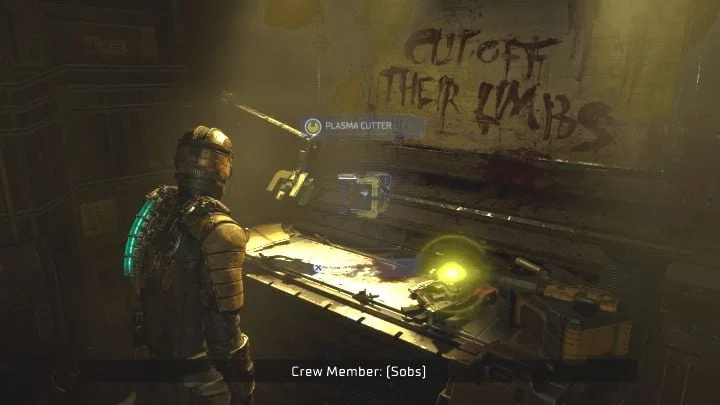
In the pantry, on the workbench, is The Plasma Cutter is the first pistol in the game..
From now on, you can find loot (including plasma cutter ammo) either lying around or in containers that can be stepped on.
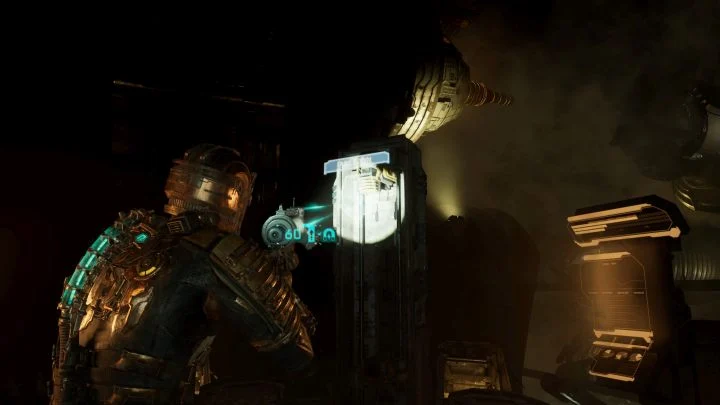
Get to locked door and perform a melee attack on the console on the wall (screenshot above). Destroying it will open the passage. The first Necromorph will attack you - don't forget to aim at the monsters' limbs and step on them (extra loot).
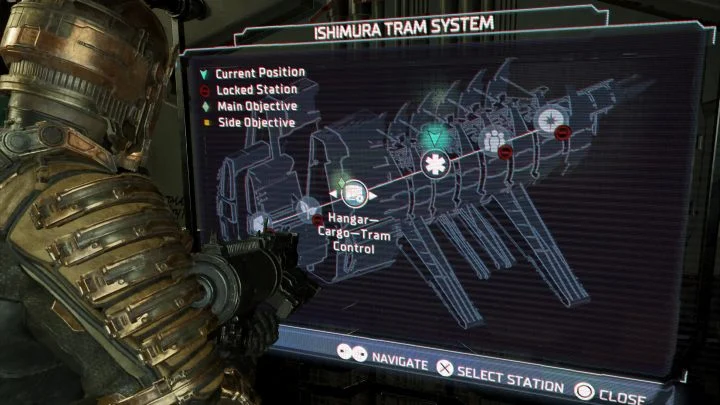
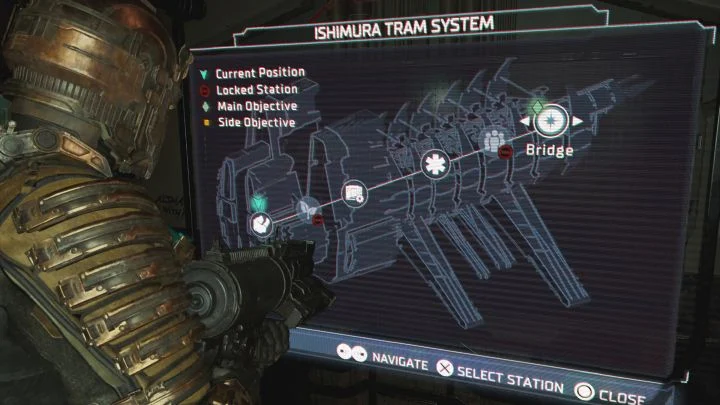
New corridors will lead you to tram control room - Listen to the conversation with your companions. You will receive 2 new mission objectives and you can complete them in any order. If you press the right stick, the tracker will take you to the current mission objective.
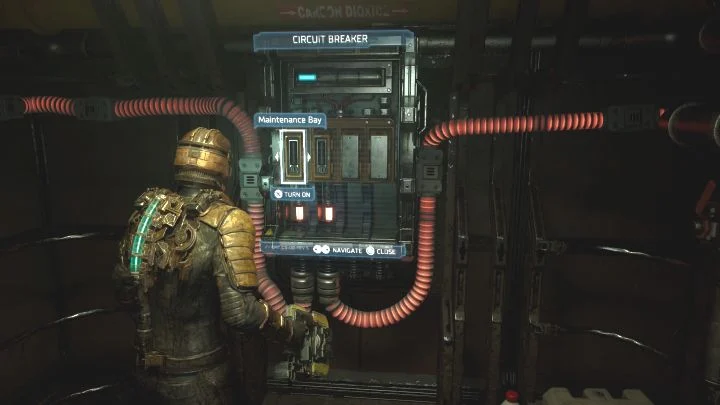
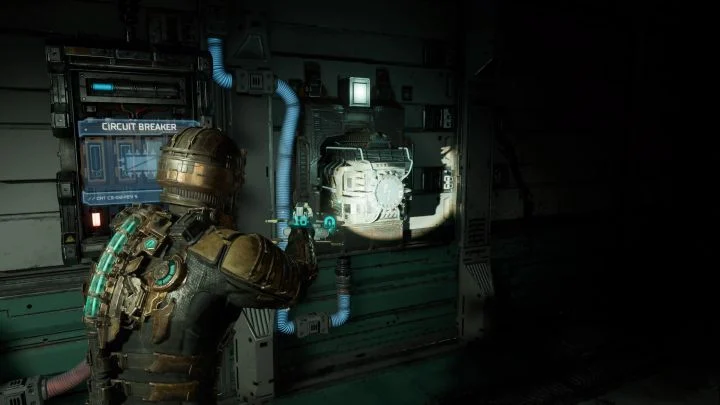
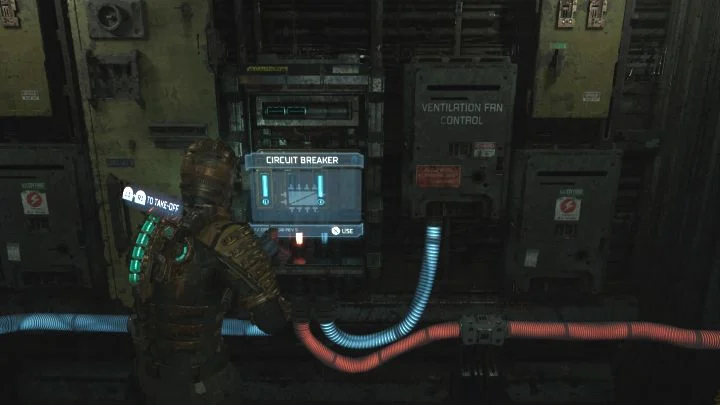
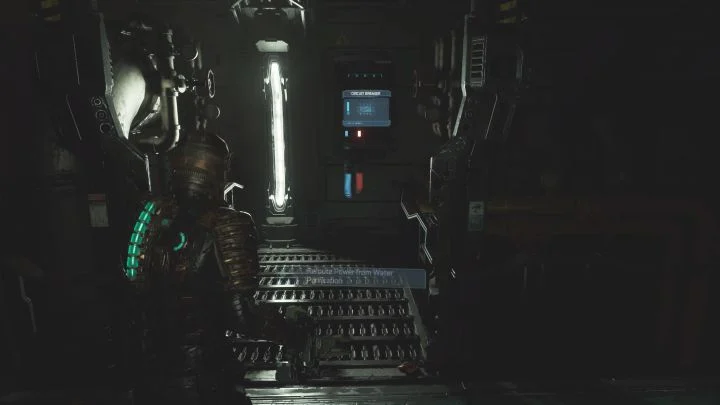
Take the east exit to the Cargo and Baggage Hall. Walk down the corridor to switch - you need to interact with it and turn on the fuse for Maintenance Bay. This will restore power to the large door next to the circuit breaker.
Alternatively, you can also activate a fuse for a vault you pass by and look for it. However, only 1 fuse can be active at a time..
In the great hall take the small elevator, which will take Isaac to the upper balconies.
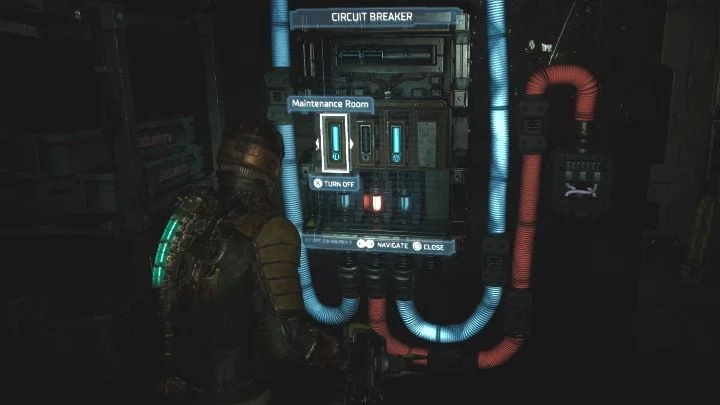
You will reach another switch - you need to turn off the lighting fuse and provide power to the Maintenance Room (screenshot above). From now on, you will have to navigate in the dark - help yourself with aiming, which also includes a weapon flashlight.
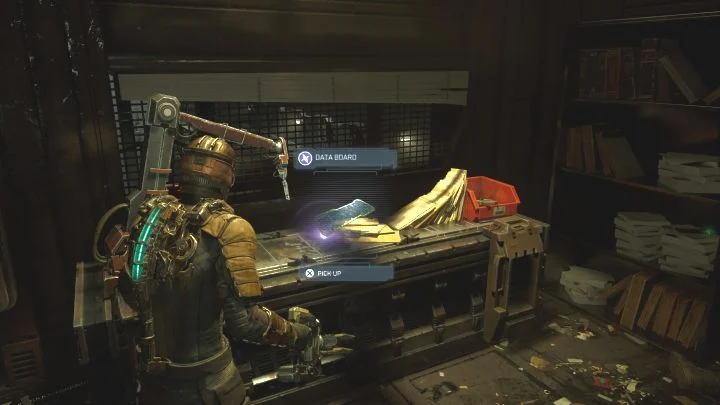
Go back to the elevator, go down and get to the Maintenance Bay office - with power restored, it is now open. In that the room has a data board.
You can now leave this section and return to the tram control room. Install data board to the big console.
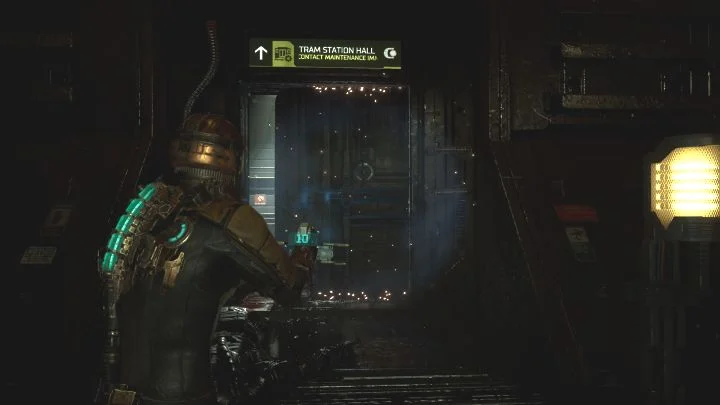
Take the south exit to Tram Control. You will reach the tram stop hall, and Isaac will find stasis module. He will install it in a suit.
Need to immediately use stasis to slow down the door mechanism - aim at the door and press the stasis button (Triangle/Y on controller).
You can refill Stasis for free by finding stations on walls or by finding/purchasing Stasis packs.
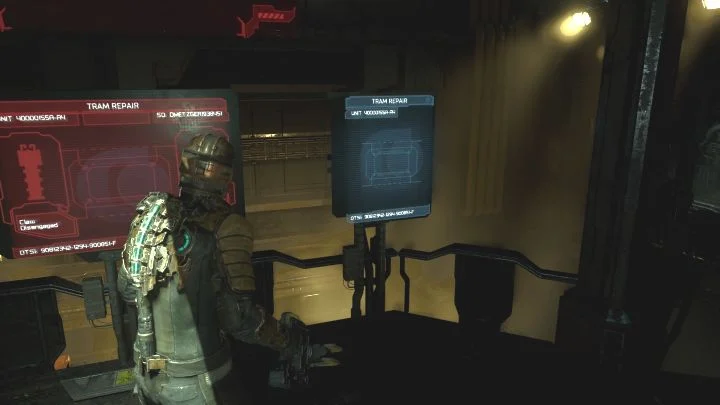
In the new corridor get to the tram repair shop. There is a puzzle to be solved here, involving the replacement of a train car.
First, get to upper terminal to open the blinds.
You must manually attach 2 claws to the basket. The panels for extracting them are located to the left and right of the central screens.
The right grapple retracts immediately by default. You need to use stasis on the grapple (screenshot above) to keep it connected.

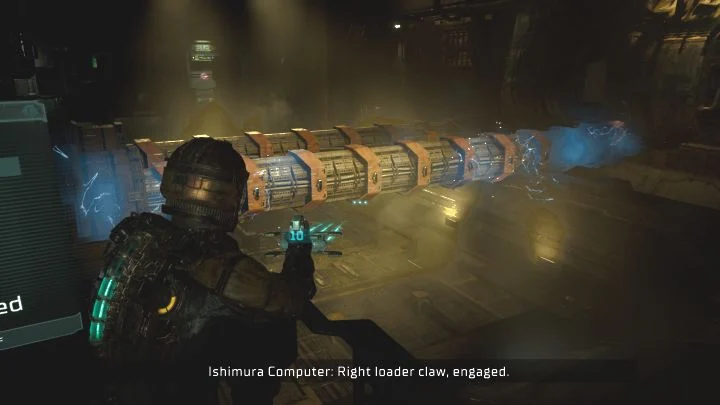
Return to the center screens to confirm train car replacement.
You will be interrupted by the appearance of Necromorphs. Get rid of them on a regular basis and remember that you can make up for stagnation in this room for free.
This target becomes active once:
- find and install the data board;
- replace the damaged wagon.
Return to the tram control room. The central terminal is now active.
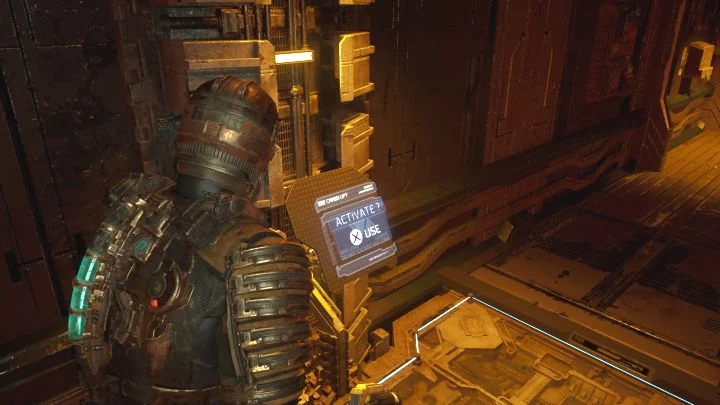
Return to the elevator, which you used to escape the Necromorphs at the start of the game. Use it.
Continue towards the flight hall and flight deckwhere the USG Kellion is docked.
On the USG Kellion, go to the terminal next to the chair where Johnston was sitting.
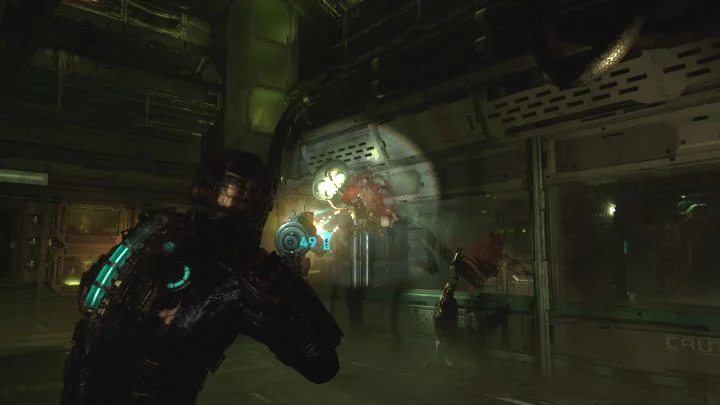
Necromorphs will attack. Defend only after the explosion and attack the approaching monsters. Try to eliminate them before they surround Isaac.
The locator will take you to railway station: flight deck tram station. You can use the store and storage here for the first time (for example, to purchase costume level 2).
Near the cable car station you will find a small elevator - use it. Go through the corridors to the medical section - you will automatically start Chapter 2.
2. Intensive Care
Intensive therapy is the title of the second chapter DeadSpace Remake. Our guide shows, among other things, where to find hydrazine tank, where to find the drum padhow to destroy the barricade, what steps to take to get to the captain's body and pick him up RIG, and finally how to leave the medical deck.
When you start the chapter, look around the first room for Kinesis module and install it.
You you will immediately use Kinesis to move containers. To perform this action, hover over an object and press the Kinesis button (Circle/B on consoles). The range of movement is indicated by rails on which the containers are located.
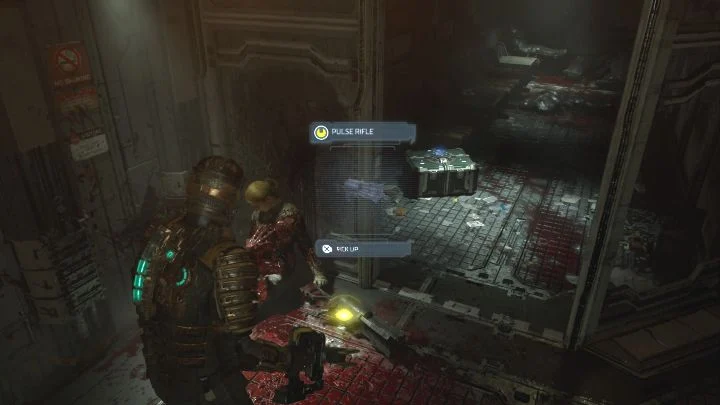
You will reach a tram stop where you will meet a dying security officer - take the Pulse Rifle from her. We're going to equip it right away - to do this, select it in your inventory and place it in one of the 4 active weapon slots.
While you are at it, you can optionally use the terminal and unlock tram station Medical Deck. This will allow you to easily return to that location later in the game.
Go through the southern corridor and use Kinesis again to move the containers. You will get to security stations. Listen to the conversation with your companions. You received 2 new mission objectives and you can approach them in any order.

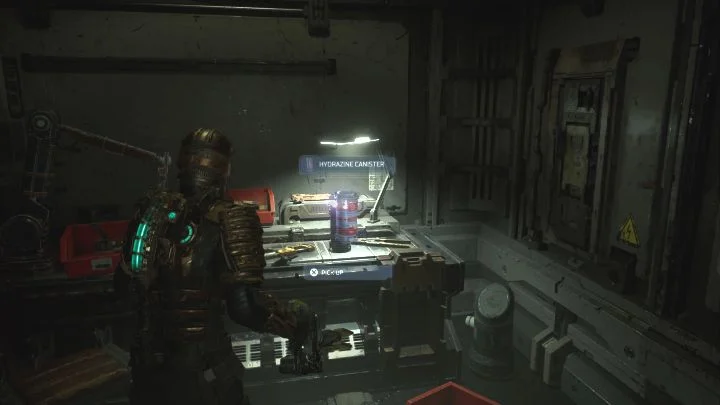
To get the Hydrazine Tank you will need to go through the west door and enter Image Diagnostics.
Once you reach the large object blocking the path ahead, use Kinesis. Let's start by restoring the power supply - find the Power Cell, grab it with Kinesis and place it in the red slot.
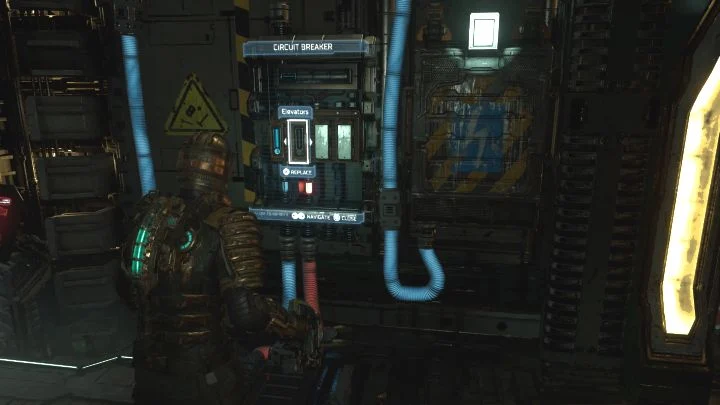
Time of interaction with the circuit breaker - activate the elevator fuse. This will allow you to take a small elevator and get to the upper balconies.
You can also activate the door fuse and explore the previously closed locked room.
Once on the upper balconies, use Kinesis to move the object, use it to cross and reach the long corridor.
You will enter the first open space location. While crossing, you can additionally pick up levitating objects with Kinesis. Be sure to get to the next door without running out of oxygen.
Follow the pathuntil you reach the first point of weightlessness - here you can bounce off surfaces (L1 R1 / LB RB), levitate (use the left analog stick to move faster) and land on ledges. Once you're done fooling around, head to the exit at the opposite end of the room.
Hydrazine canister, which you are looking for is located in the Zero-G Therapy Maintenance Room.

Once you get the item, go back. There will be several Necromorphs in the zero gravity room - attack them when they fly towards you or only when they land on some surface.
In a room with a vacuum, you need to climb the corridor - bounce off a stable surface and fly up. There is an oxygen refill station along the way - use it if you want. The next sequence of flights will take you down - you will reach the coolant pipelines. At the end of the corridor, destroy the console by the door with a melee attack.
The first step to finding a strike site is to navigate the south passage from the security station. you will reach Main laboratory - once you're there, use the small elevator to get to the lower floor. Defeat all the Necromorphs encountered in order for the Quarantine to be lifted. Remember to only use up to 2 monsters at a time.
In the next area, you can make a detour to visit Nicole Brennan's office on lab level 1 - there's an audio log there - collecting it will unlock the Scientific Methods side mission. To view a step-by-step guide to it, visit the dedicated guide page.
To continue, go through the door in the northeast to reach main lab locker room.
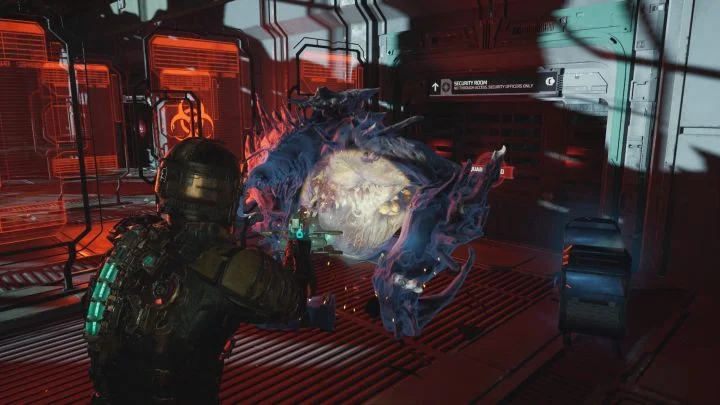
When you enter Center for Biological Prostheticsto you have to fight a new type of enemy. These opponents can attach themselves to walls and ceilings and attack from a distance. To quickly neutralize them, cut off their limbs (once they are revealed, there will be 3 of them).
Use the small elevator and after defeating the smaller monsters, get to limb stimulation rooms.
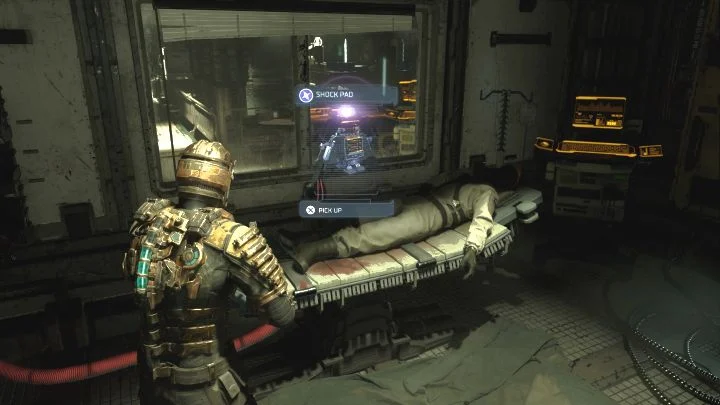
Interact with the switch and turn off the fuse, thereby eliminating electrical discharges. Activate the door fuse and take shock pad. Follow the newly unlocked path and return to the Security Station.
This target becomes active once:
- received hydrazine reservoir;
- shock pad received.
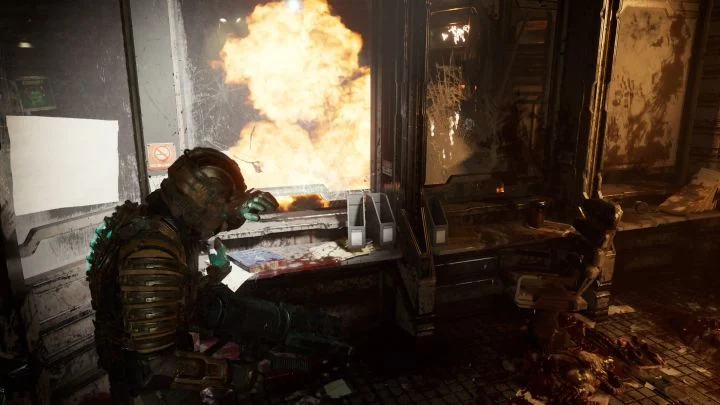
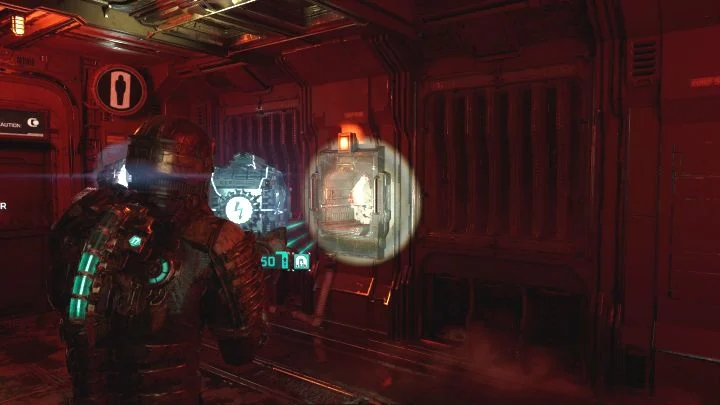
At the security station walk up and interact with the barricade to place the bomb. Hide in the side room (screenshot above) and wait for the explosion. The way forward is now open.
A new path will lead you to large emergency room. Find the circuit breaker in the room and turn off all fuses.
Use Kinesis to Transfer a Power Cell. Bring it to the red slot on the opposite side of the room. This action opens a door leading to corridor ER Hallway A. Head west and then south through corridor B.
You will eventually reach the chamber intensive care units. Watch the cut-scene with the doctor and select the western corridor.
After the explosion capture a power cell with Kinesis and take it to the red slot. In this way, you will return energy to the elevator leading to the morgue. Head to the autopsy room.
Monsters are waiting for you here. Focus primarily on the monster that was introduced in the cutscene - taking care of him will quickly ease the fight and reduce the risk of taking serious damage. When it comes to other enemies, use Stasis to slow down the creatures.
Once the battle is over, pick up the captain's equipment from the table. You now have security clearance level 1.
New ground clearance allows opening level 1 locks on doors and containers. We'll use it immediately to unlock the elevator in the autopsy room. After riding the elevator, use Kinesis to move the containers blocking the path ahead.
Directions to medical tram station. If you haven't already, unlock the station. Enter vehicle and select Hangar - Cargo as a destination.
Use the Locator to return to the Lounge and head to flight deck from there. Chapter 3 will start automatically.
3. Orbital correction (Course Correction)
Third chapter in DeadSpace Remake called Course Correction. Our step-by-step guide suggests, for example, Where are the Ripper and Flamethrower?how to get to the engineering deck, how to refuel the engines, how to activate the centrifuge, how to get out of the centrifuge compartmenthow to manually start the engines in the engine room and how to get back to the tram station.
The chapter starts at Angara Bay in the conditions weightlessness. Careful study of the first part of the hangar is optional.
You must head east. After Isaac flies through the large gate, the passage will close behind him, and you will be in the void. Fly southeast towards the hole from the painting. Defeat small monsters. The well also has an oxygen replenishment station.
In the big shaft, go down and get to the airlock to leave the void. The following corridors will lead Isaac to an elevator.
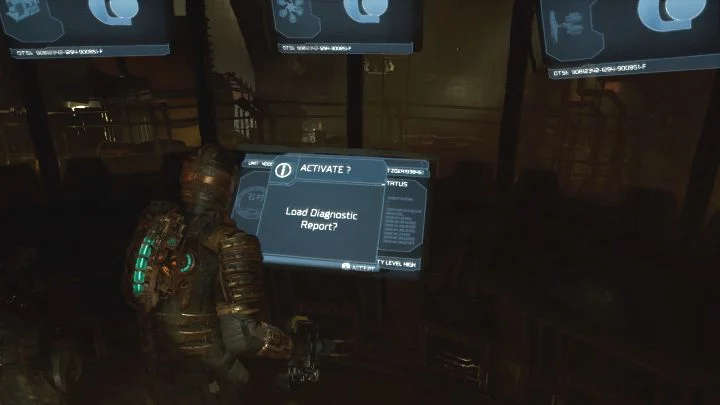
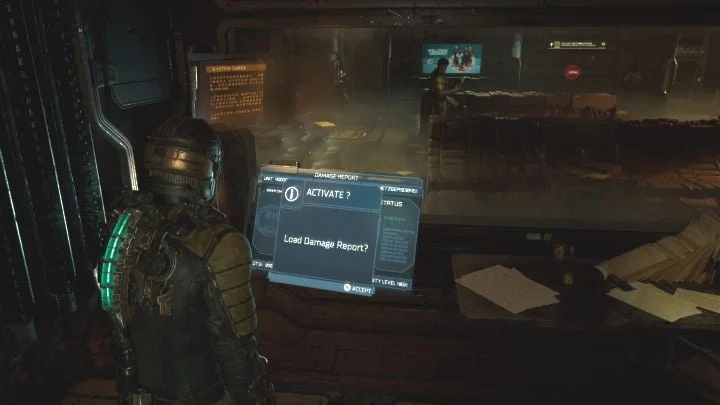
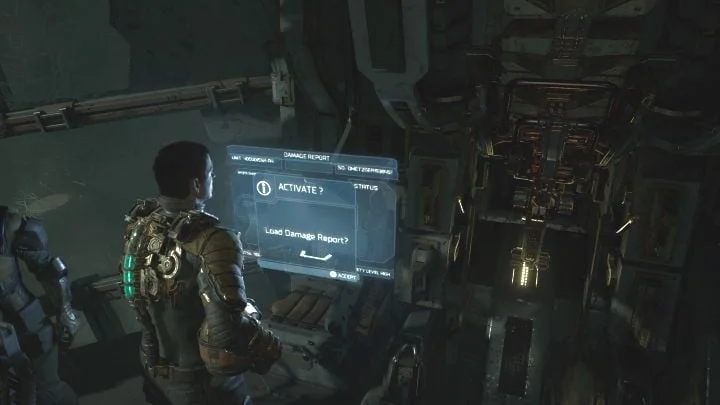
Head south towards control room. Go to the console and download the diagnostic report.
After talking with Hammond, you will get 3 mission objectives and you can complete them in any order (both refueling targets are in the same area).
Take the west exit from the central location which leads to preparation room.
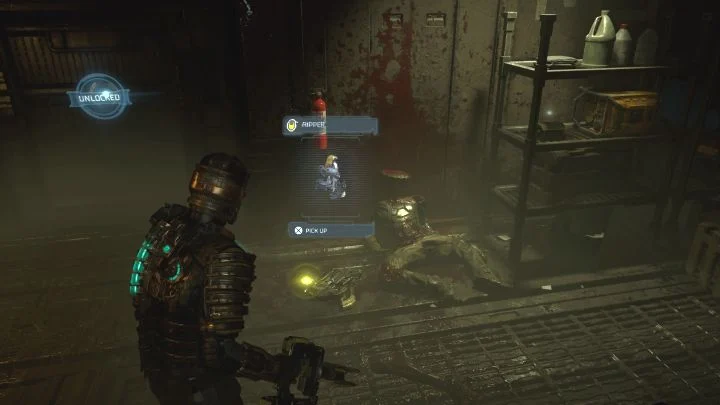
Go down the ramp to mechanical shop. Near Ripper is waiting for you as a corpse - be sure to take this weapon and set it as active in the inventory window. The Ripper is perfect for stopping and destroying larger Necromorphs.
Follow the south passage to filling stations.
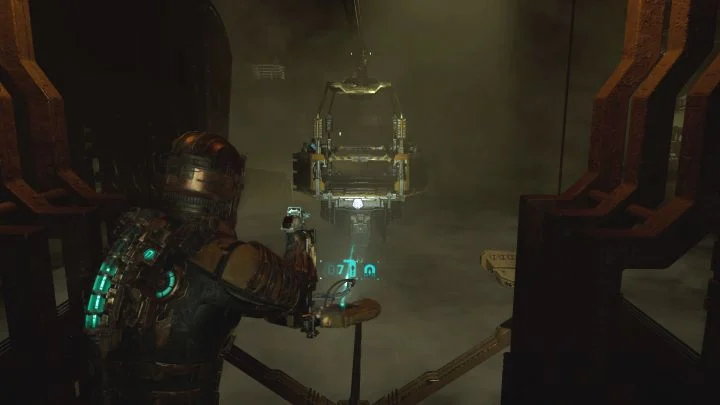
The moving platform leads to the southern gas station. Use kinesis to pull the platform towards you. Install it on the board and activate.
New Necromorphs will start spawning in the distance before the platform reaches its destination. First, attack them from a distance, and then select the Ripper to stop them in melee. You can also target explosive red containers.
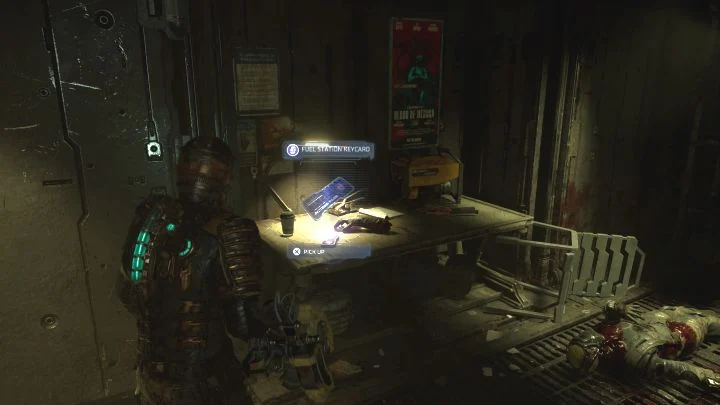
After the fights, explore the area to find gas station key.
Go back to the small room fuel managementthat you just passed by.
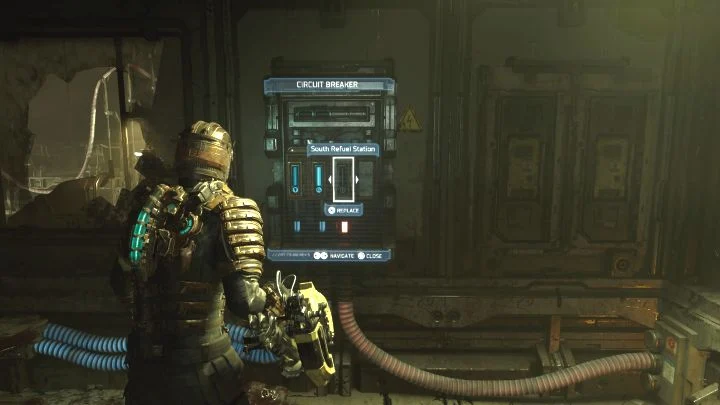
There is a switch inside the room. Your task turn on the fuse for the South gas station. This can be done in 2 ways:
- turning off the Lights fuse - you will have to travel in the dark and use a flashlight;
- by turning off the Life Support fuse - you will need to regularly replenish oxygen supplies.
Whatever your choice, get to gas station South, following the blue connection. You must use kinesis on the moving mechanism. You must knock him down.
Now you can return to the moving platform.
This mission objective also requires you to travel to fueling control stations - you must get to its northeastern part.
Defeat Necromorphs and get to the North gas station. Just like in the case of the southern station, you need to use kinesis on the mechanism and knock him down.
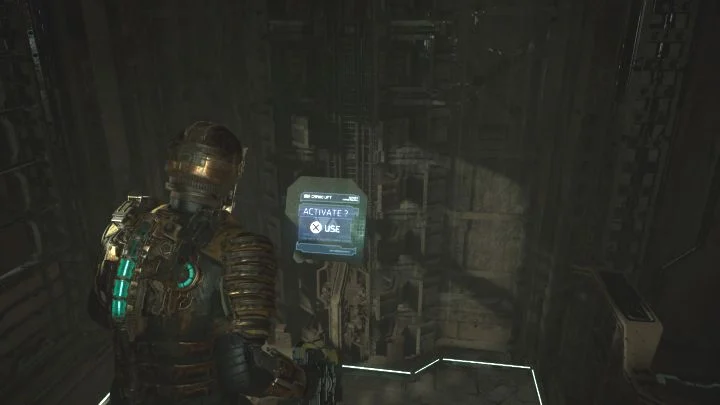
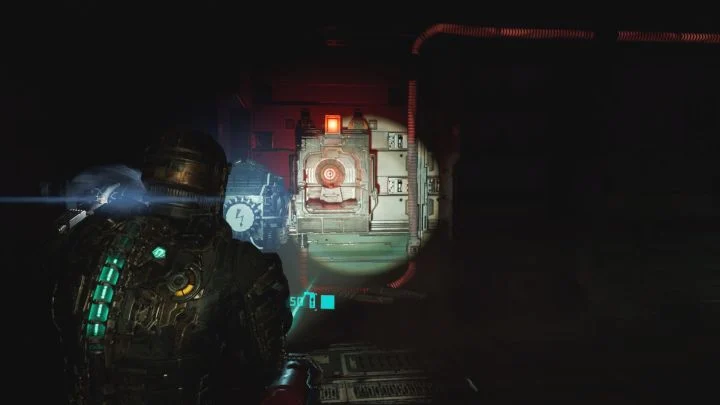
Now back to the control room. You can unlock the shortcut at the current location - go to the north door and use a melee attack on the console next to it (picture above).
Take east elevator in a central location that moves towards the level of the centrifuge.
You will get to decontamination rooms. After using the center console, you must survive the battle with necromorphs. Help yourself with a flashlight.
- Use the Plasma Cutter and Pulse Rifle on small monsters.
- Use the Ripper to kill larger Necromorphs.
Try to quickly destroy the creatures so that they die before new ones appear.
The exit will open after killing all the Necromorphs. Reach the long corridor surrounding the centrifuge and go right. Save the game before entering a large room, because it is easy to die in it.
In the new location you have to complete centrifuge puzzle. This area has 2 clutches. You must fly to them and use kinesis to connect them. Necromorphs will attack you during this process.
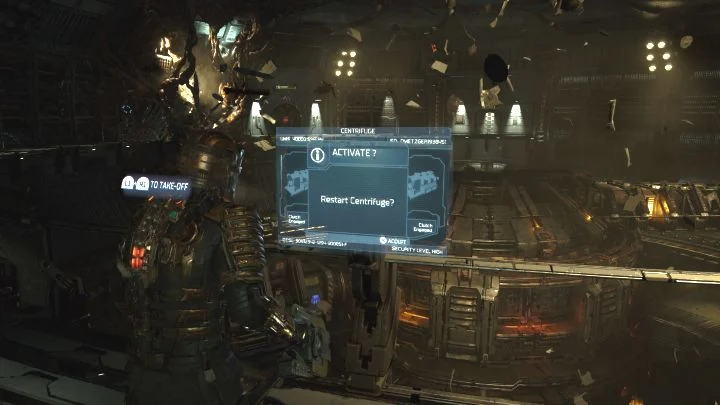
Having dealt with the couplings, find balcony with interactive console. Land on it and confirm what you want restart centrifuge.
Now you have to escape the centrifuge room. Now there is a void and you need to keep an eye on your oxygen supply (you will find a station along the way to replenish it).
Use the elevator. You must avoid the huge mechanism of the spinning centrifuge. Head on the left. Hide in the spaces on the sides and wait for the big mechanism to pass Isaac.
You will encounter Necromorphs along the way - don't fight them outdoors. Remember to quickly retreat to a safe place. You can also use stasis to slow down monsters and make them hit with the centrifuge mechanism.
Get to the new small elevatorthat will take you to the top. Defeat more Necromorphs and leave the centrifuge room. Be sure to save your game, because the next part can be a test.
On the way back Isaac is grabbed by a giant tentacle. Protect yourself - you can't let him drag you into the hole. First you must free yourself.
Target large tentacle growths - It is best to use a plasma cutter or a pulse rifle. Don't save your ammo because you need to hurry up.
Return the same way to control room. Open the east lock at this location.
You will find yourself in weightlessness. Resupply stasis (there is a console nearby) and use stasis on a large running fan. This will slow down the blades, allowing you to fly to the other side.
There is a switch behind the fans. The fuse for the fans must be turned off and turn on fuse for Airlock 2.
You can now return to the balcony and select the airlock that was previously inactive.
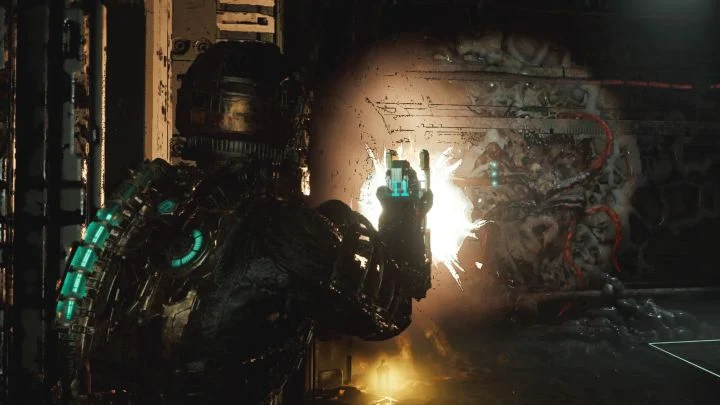
In a new location shoot the orange growth - by destroying it, you will open the passage.
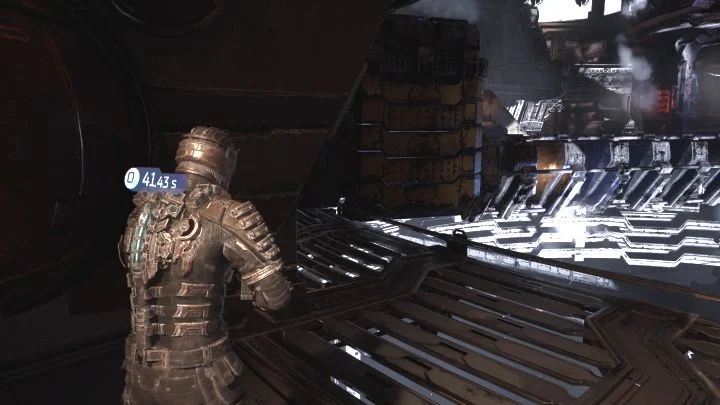
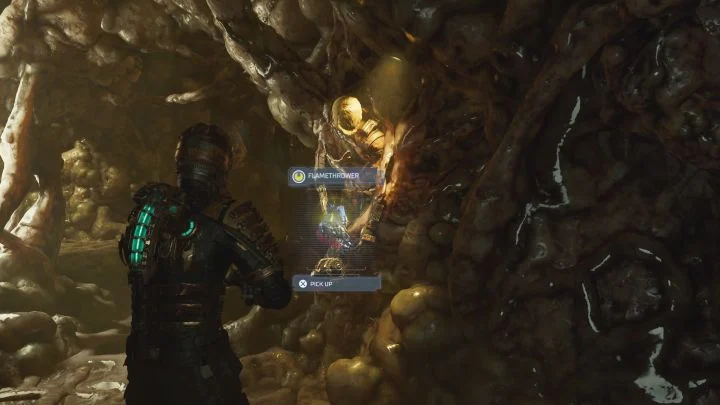
You will also find a flamethrower by the corpse. In the same place. Take it - you should immediately select it as an active weapon. The flamethrower is very useful, for example, when destroying small monsters. Squeeze through the narrow passage and reach fuel storage.
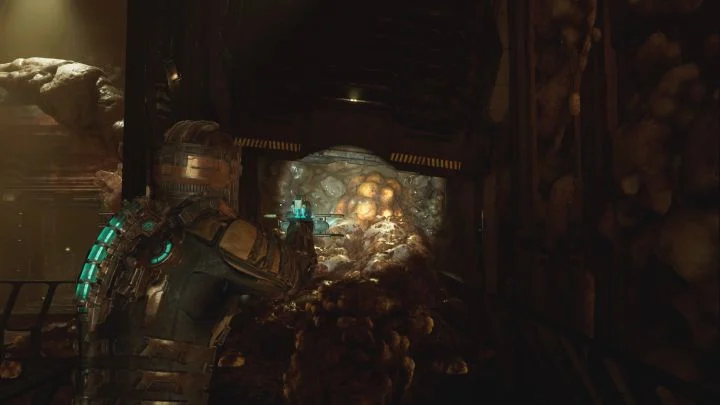
Use the small elevator to go down to the lower level. Aim for new growth - by destroying it, you will open the passage.
Small crawling monsters will appear - A flamethrower is great for eliminating them. If creatures jump on Isaac, quickly press the interact button to drop them. After the fights, get to another small elevator that moves to level 3.
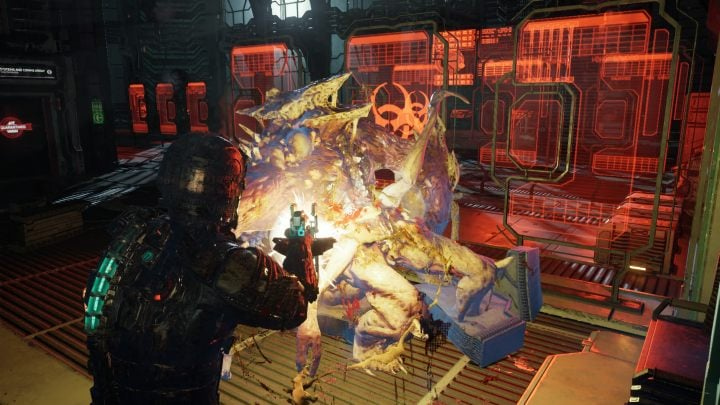
You will meet a new type of Necromorphwho holds little creatures in his big belly. Avoid shooting at this part of the monster's body or use the flamethrower to kill it easier.
Use stasis on the west door and head south. Burn more crawling monsters or throw explosives at them.
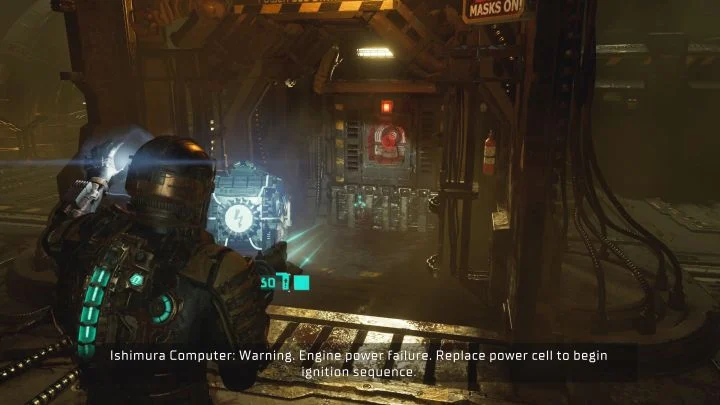
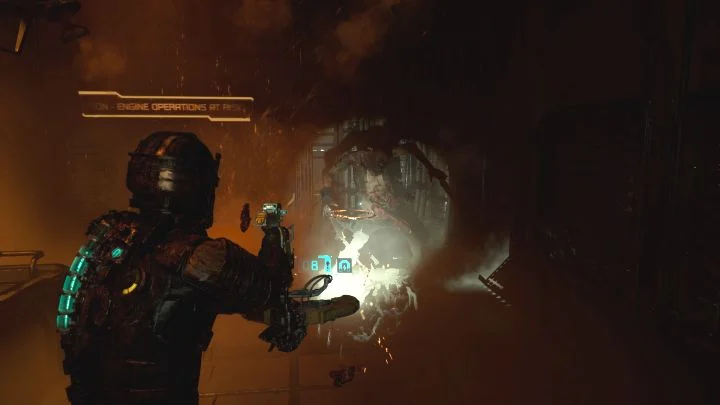
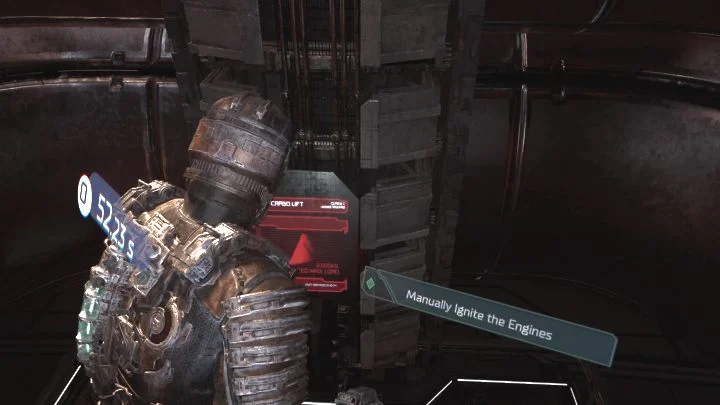
Your destination is the engine room and, entering it, defeat the Necromorphs (the ripper and the flamethrower will be great here).
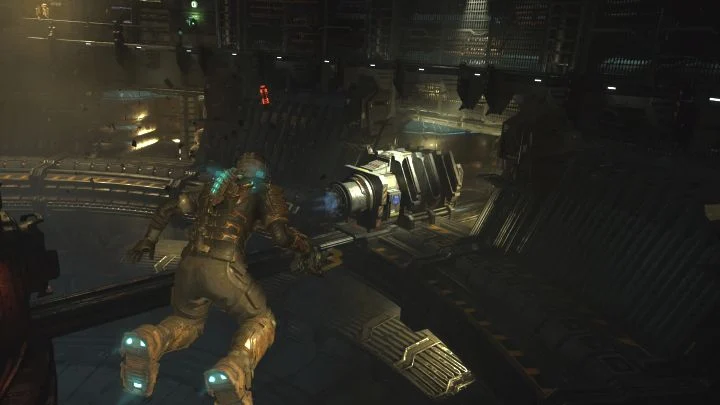
Necessary find the power cell and deliver it to substation 03.
A big battle with Necromorphs will begin. Use kinesis to pick up stasis containers - the explosion will slow down all nearby monsters.
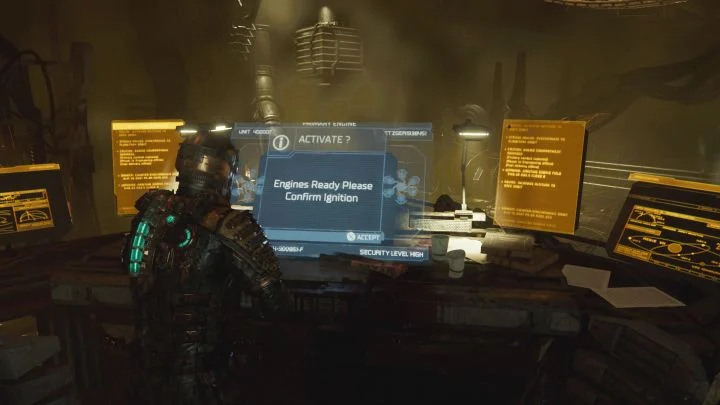
Fight until the procedure is complete. Get to kernel restart console.
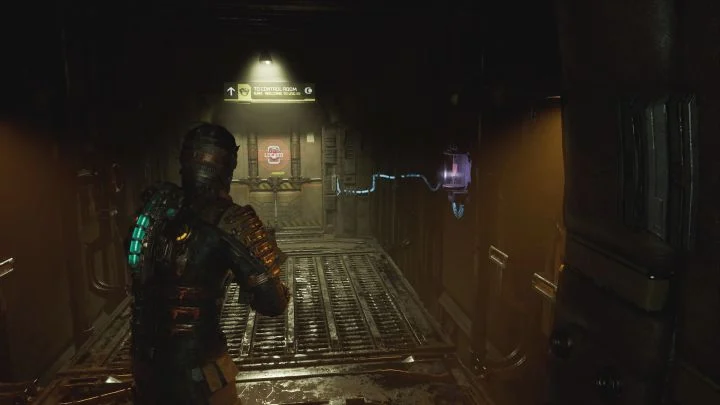
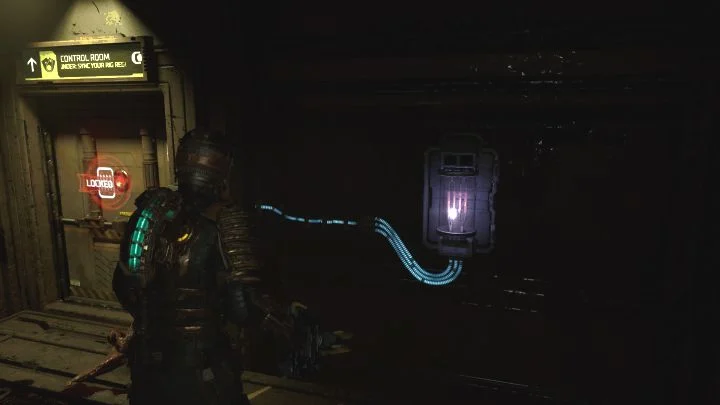
Exit the engine room and follow the corridors to the north. you can unlock control room label - use hand-to-hand combat on the right console, show in the picture. Please note - monsters can appear in the Control Room. Defeat them before you can save the game or use the store.
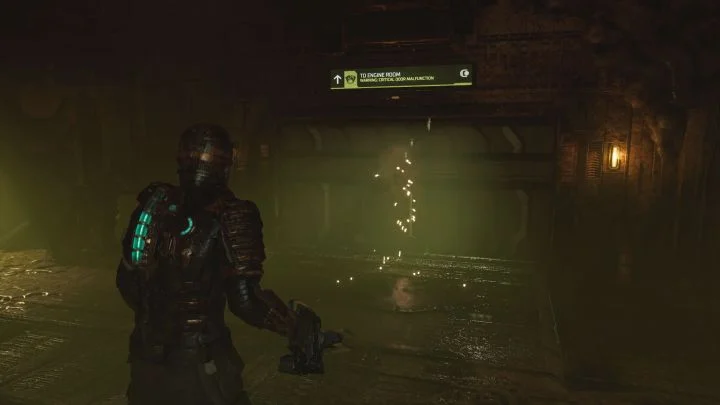
The engineering tram station is located northwest of the control room. Reaching it you will go to chapter 4.
4. Death is inevitable (Obliteration Imminent)
Obliteration Imminent - the title of the fourth chapter DeadSpace Remake. Our guide shows, among other things, how and where the meeting with Hammond will take place, how to defeat Brutus (boss encounter), how to start elevators, where to find Contact Beamhow to redirect power to 3 ship sections and finally How restart and calibrate the three ADS guns.
The chapter begins after arriving at the Engineering Deck tram station. Start by activating the station (if you haven't already), then get in the car and drive to Mosta.
Once you arrive, go to Main Atrium (west path). You will enter the location from the west. Use the nearby ramp and take the elevator leading to Captain's Nest.
During a meeting with Hammond you will receive security clearance level 2. From now on, all doors and containers with level 2 locks can be opened.
There is an interactive terminal in the Captain's Nest - use it to unlock the side quest You Are Not Authorized. You can find a step by step guide for it on the dedicated man page.
Exit the Captain's Nest and take the opportunity to save the game. Return to the Main Atrium. Once in this area, go to the eastern part of it to find security room. The boss will appear (Brutus).
During this fight, the key move is to slow down the Brute with Stasis. Try to have full stasis before starting the encounter, and if possible, have a stasis pack in your inventory. There is loot in the atrium - comb the area before you get close to the security room.
Look for weak spots on the Brute's back. Each time you slow down a beast, move quickly behind it and shoot at weak spots with your firearms. Shoot away to deal as much damage as possible before the Stasis disappears.
If your Stasis is depleted, wait for the monster to recharge, dodge right before hitting, and quickly target the weak spots on the Brute's back.
After the defeat, be sure to pick up the Node left by the monster. Go to the security room and examine it carefully. you must face with elevator activation terminal. 3 new main tasks will be introduced You can do them in any order.
Use the locator to find the correct elevator in the Main Atrium. Once you find the right one, go to floor 2.
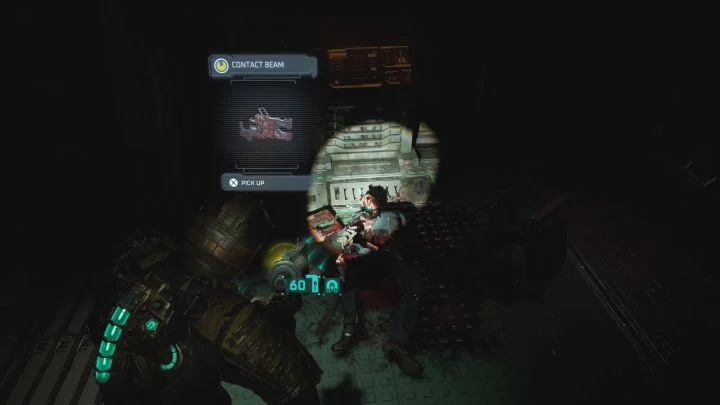
The ship's hull has taken some damage - you'll have to get to the next door before your oxygen supply runs out. Along the way you will encounter Record Office room, which can be opened and explored thanks to your security clearance level 2. Here there is a new weapon for you - Contact Beam. The weapon fires at a slow rate, but each hit hits.

Keep moving forward until you reach the large hall of the Office of the Mining Industry. Here you can try the Contact Beam on larger Necromorphs.
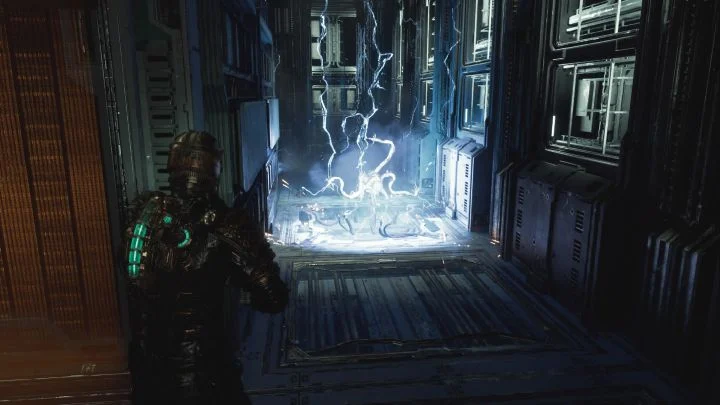
Watch (here and in the following areas) for electrical discharges - stay away from them. In the case of discharges that appear and disappear at intervals, run through the discharge area as soon as it is turned off.
Your next task is to find the circuit breaker. Turn off the fuse for mining and enable ADS Cannons.
Head back to the elevator (watch out for resets and revived necromorphs along the way). Ride on this time 1 floor.
Follow the corridors until you reach the front door in Electrical systems. In this place you will again face discharges. Move past the danger zones once the discharge is turned off, and make sure that you do not fall into the discharge zone when falling back during the fight.
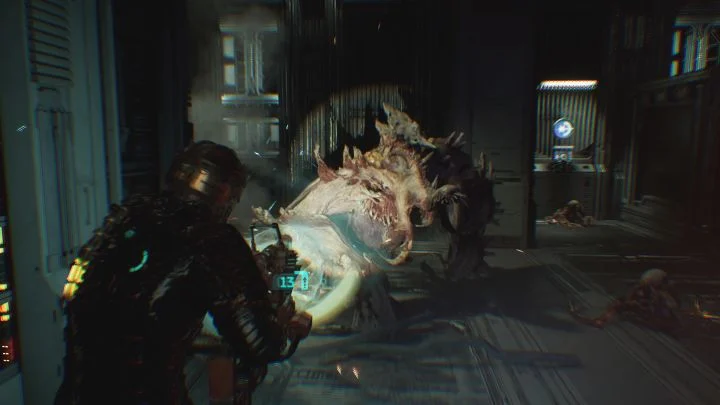
New Brute will appear when crossing the main hall. Just like before, use Stasis to slow the beast down, get behind it quickly, and shoot at the weak spots on its back. Remember to avoid getting into the unloading area.
Once defeated, pick up the remaining Node and take care of the remaining monsters in the area.
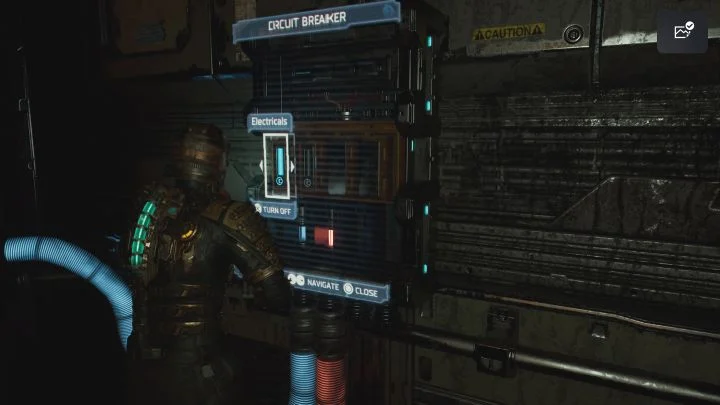
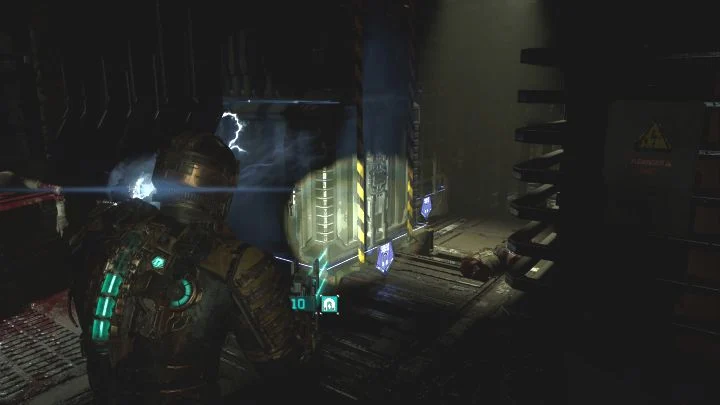
At the end of the hall there are live cables and be sure to avoid them as they are deadly on contact. Use stasis on them. This will allow you to safely cross and reach the switch - at the box, turn off the Electrical Systems fuse and activate the fuse ADS Cannons.
Once again return to Main Atrium, defeat new monsters and make your way to the western elevator (this is a separate location, not similar to the two initial ones). You can ride it up to water purification.
Your destination here is another circuit breaker - you need to turn off the water purification fuse and activate ADS Cannons.
Approach the circuit breaker in the water purification (level 5) (if the water purification switch was not the last one), and from there head east. You get to the prep room EVA.
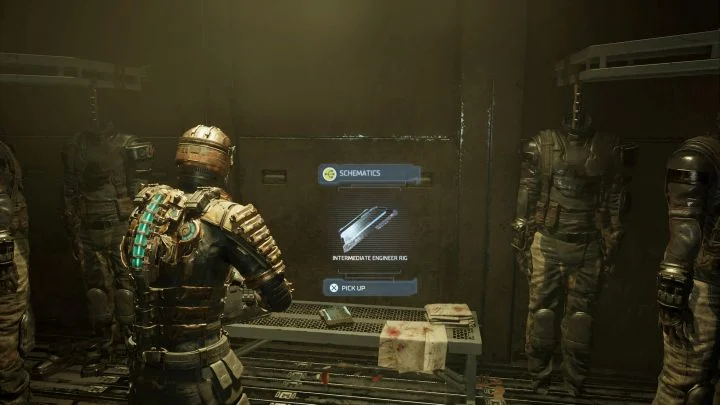
Look around the room at looking for blueprints RIG Intermediate Engineer. Delivering them to any shop will unlock a purchasable armor buff (up to 10%) and an inventory upgrade (up to 22 slots).
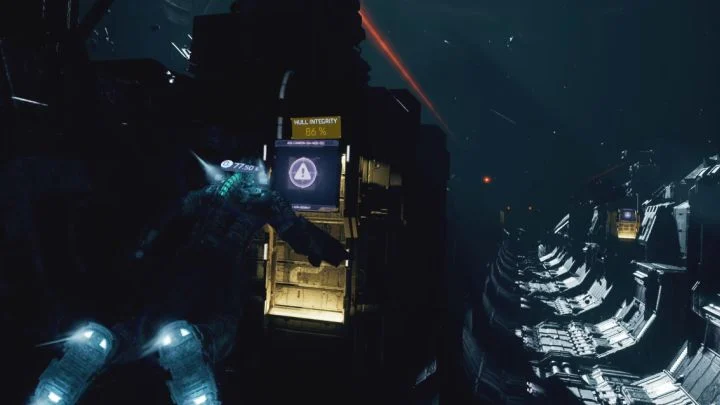
Your task here is to calibrate 3 ADS guns. To do this, you need to enter a vacuum - enter it through an airlock. This objective has a time limit (you need to complete the objective before the hull integrity drops to 0%, but unlike the original Dead Space, there is no additional reward for keeping it above 50%).
![]()
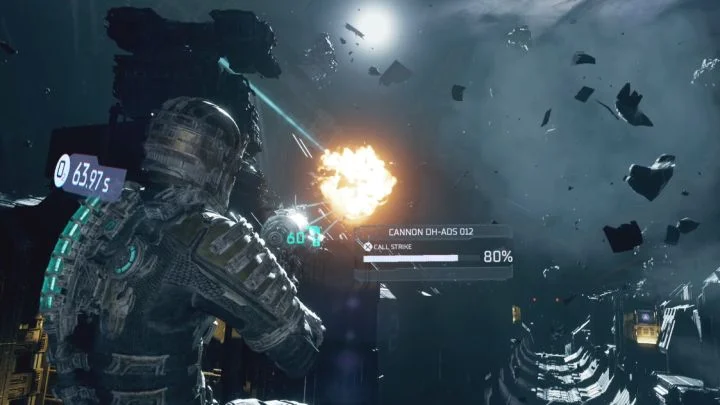
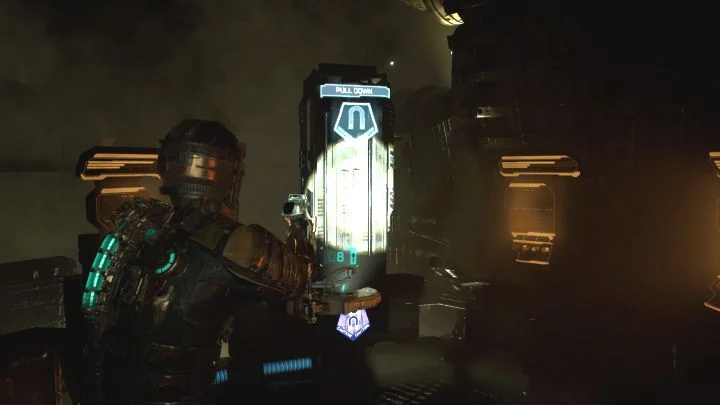
The calibration action will require some interactions. They are as follows:
- hold aim button (L2/LT on consoles);
- give the command to shoot (Cross on PS, A on Xbox) and aim at asteroids (if possible shoot at those that are closest and in the path of collision with Ishimura).
Each successful hit will increase the calibration percentage. You need to fully calibrate the gun (reach 100%).
Repeat these steps with the 2 remaining ADS guns. In the meantime, quickly eliminate the encountered Necromorphs and replenish oxygen at stations. Calibrating all 3 guns will complete this task.
In the area where the calibration was carried out, also has a RIG connected to the side mission You Are Not Authorized. You can find a step by step guide for it on the dedicated man page.
Return to the gateway. This chapter ends and chapter 5 starts right away.
5 Lethal Devotion
Fifth Chapter Dead Space called "Deadly Devotion". Our step by step guide will tell you where to find the transmission source and how to turn it off, how to escape from Mercer's Hunter and how to stop the unstoppable monsterhow to remove blockage, how to get rid of poisonous gas and where to find liquid nitrogen.
After the chapter starts, listen to Nicole's message and return to the train station. Select medical deck from the list of places.
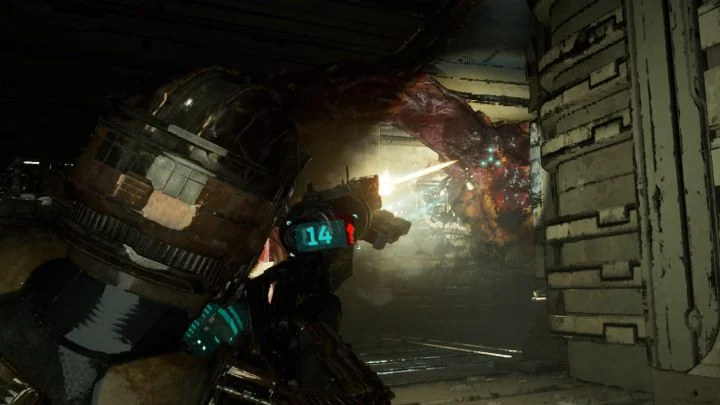
The new destination is Chemical laboratory - use the locator to determine the correct route. Destroy growth along the way. You will also face the first monster with tentacles stuck to the wall. Attack him from a distance, because approaching him means instant death. Also eliminate the lone tentacles that can fire projectiles.
Use the small elevator. Aim at the orange growth fragments to unlock further passages (don't forget to use a flashlight in dark rooms).
Get to the next elevator and the chemistry lab. The hologram recording will be played. Interact with the transmission cut-off terminal. A cut-scene will start - Isaac will not be able to move for a while.
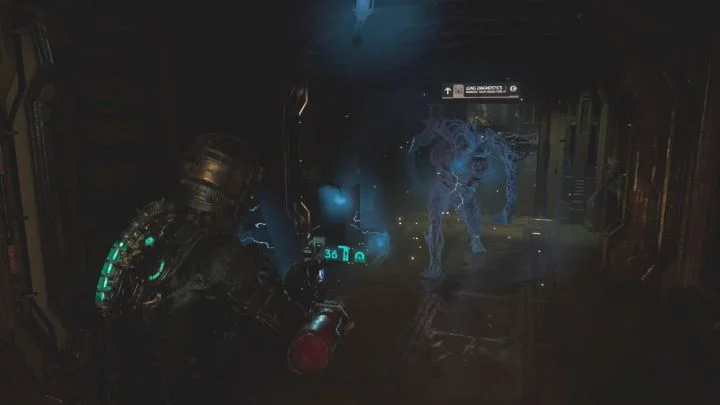
A Hunter will appear in the room - an elite type of Necromorph. After attacking the beast, you quickly learn that the Hunter is indestructible - the monster is able to restore lost limbs. Don't waste any more ammo on him because you can't defeat this Necromorph normally.
Use stasis to slow down the Hunter. After unlocking the exit from the laboratory, you must return to the security station. Use the locator if necessary and avoid unnecessary fights along the way - stop monsters with stagnation or run past them.
The new destination is office Dr. K. Mercer - 2SO - It is located southeast of the central location.
You must go through again emergency room. Get rid of the regular Necromorphs, and if you run into a Hunter, slow him down with stasis and destroy his lower limbs. In the main hall find the power cell and move it to the red slot.
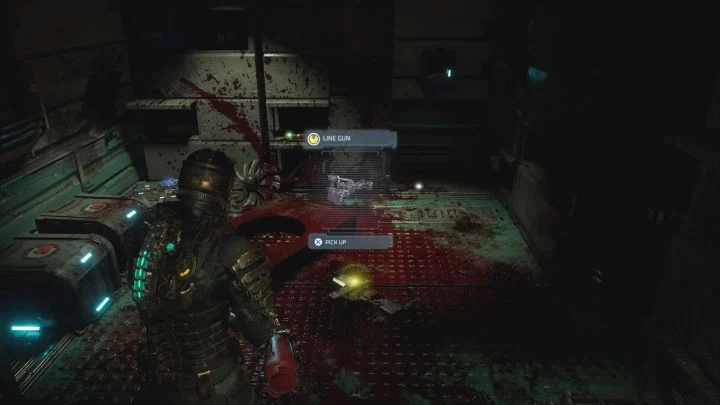
Do not forget to check emergency equipment storage along the way - you have security clearance 2 so you can open it.
Appeared in the repository new weapon - Line Gun. It is good for cutting off limbs and can also create traps.
In the ambulance corridor, watch out for the monster with tentacles on the wall - attack it from afar.
В Dr. Mercer's office use lock console.
You cannot immediately take care of the main objective of the mission, because poisonous gas will be sprayed when you leave Mercer's office. You must get rid of him before Isaac's suit runs out of oxygen (there is an oxygen filling station in the ambulance corridor).
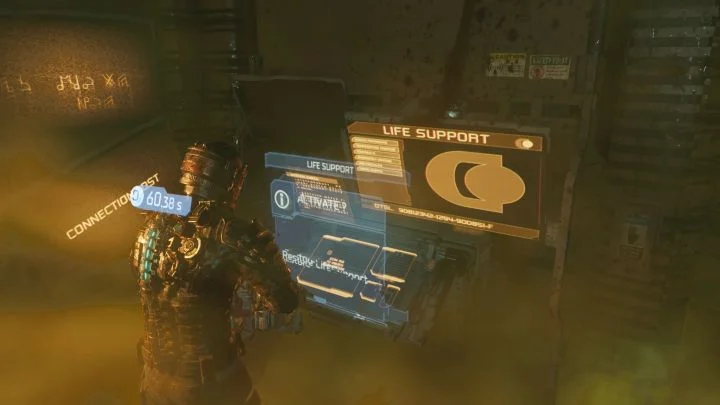
You need to return to the Security Station. - use the locator to find the right path. Don't fight Necromorphs along the way, just use stasis or quickly avoid them. Once you get to the station, use life support consoleto remove gas.
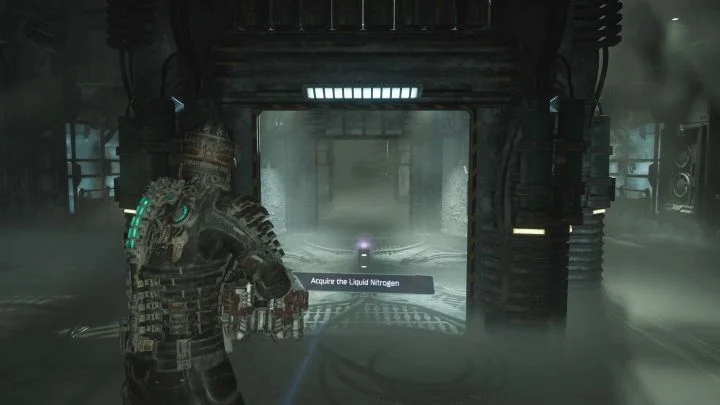
The new destination is the room Cryogenics west of the central location. You will have to go through visualization diagnostics again - you will encounter new Necromorphs.
Try to take a liquid nitrogen. Dr. Mercer will reappear.
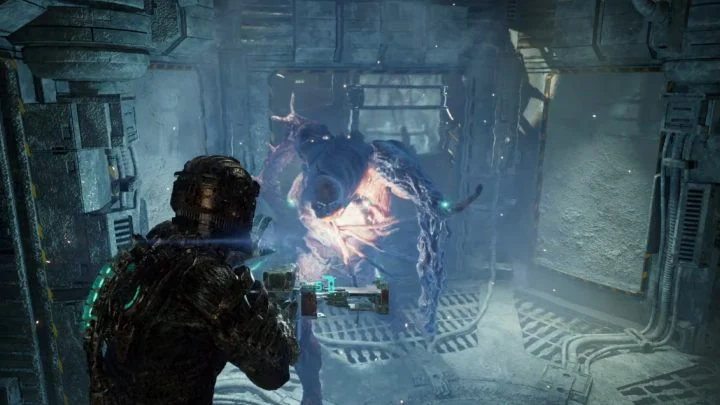
After Mercer's speech ends, the Hunter will attack you again.
You must stop the Hunter by being cunning. Stand in the central chamber, which was filled with liquid nitrogen. Wait for the hunter to appear and use stasis on the monster. If you want to increase your chances of success, you can first cut off the hunter's lower limbs and then use stasis.
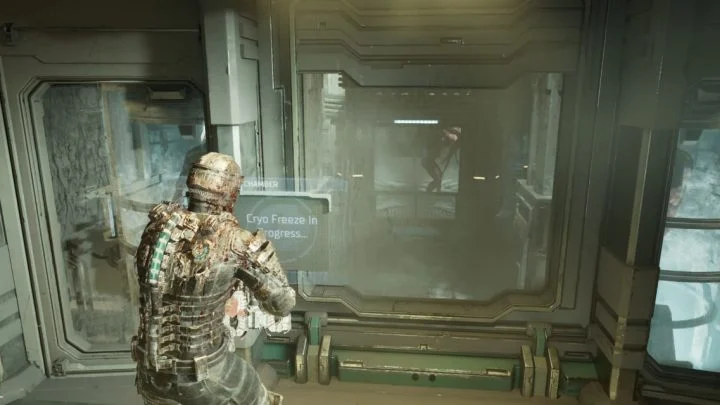
Quickly run to the cryogenics control roomwhere Dr. Mercer was. You will need use the cryofreeze console to freeze the Hunter - this will only work if the slowed monster has not left the central chamber. This will put an end to the confrontation with the Hunter.
Once you've dealt with the Hunter, get rid of the common Necromorphs that may have spawned in the area. You complete the stage and skip to chapter 6.
to be continued….
Was the article helpful?