

Passage of the game Lost Lands 9: Tales of the First Brotherhood 100%. All the secrets, puzzles, mini games, collectibles and achievements in one place...
Walkthrough Five Nights At Freddy's: Security Breach 100%
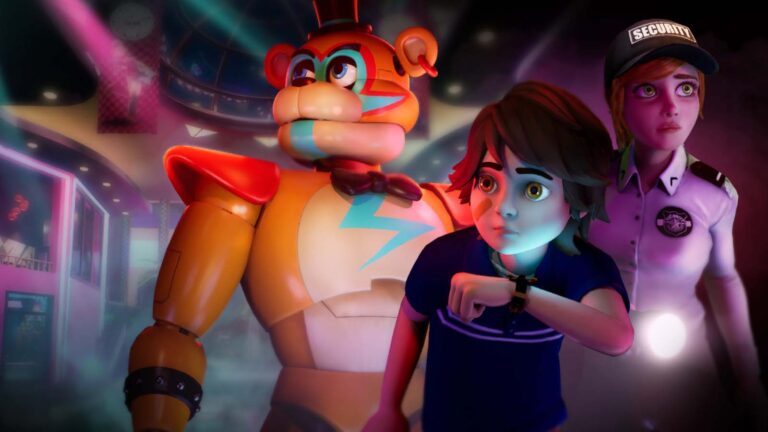
The Five Nights At Freddy's: Security Breach walkthrough includes all the tips and tricks you need to conquer the game's main campaign and escape Freddy Fazbear's Mega Pizzaplex alive, including how to navigate areas, find hidden items, and defeat bosses.
Unlike previous Five Nights at Freddy's games, Security Breach is a time-based adventure. Below you will find a guide for each hour.
Prologue (11:30 to 12:00)
Meeting with Freddie Fazbear
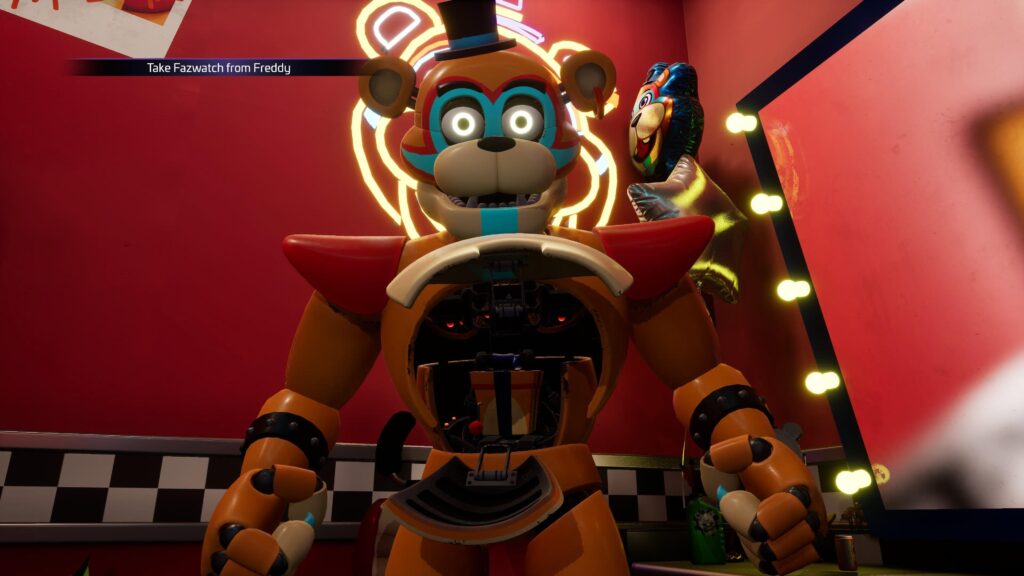
As expected for a franchise filled with haunted cupcakes, nightmarish dolls and purple serial killers, Five Nights at Freddy's: Security Breach starts on a strange note. After a short cutscene in which Freddy, Roxy, Chica and newcomer Monty enter the stage, Freddy will wake up in his dressing room, looking in the mirror.
It doesn't take long for the overly friendly robot to realize something is wrong, as Gregory's voice comes out of his stomach. After a short conversation, you will be able to exit Freddy's interior and take control of Gregory for the first time.
Freddy will continue to communicate with you through this section, although you will have several smaller goals, including look through parting in the curtains behind you to watch the guard pass by. You will also have access to faz watch, that can be grabbed from Freddy's stomach.
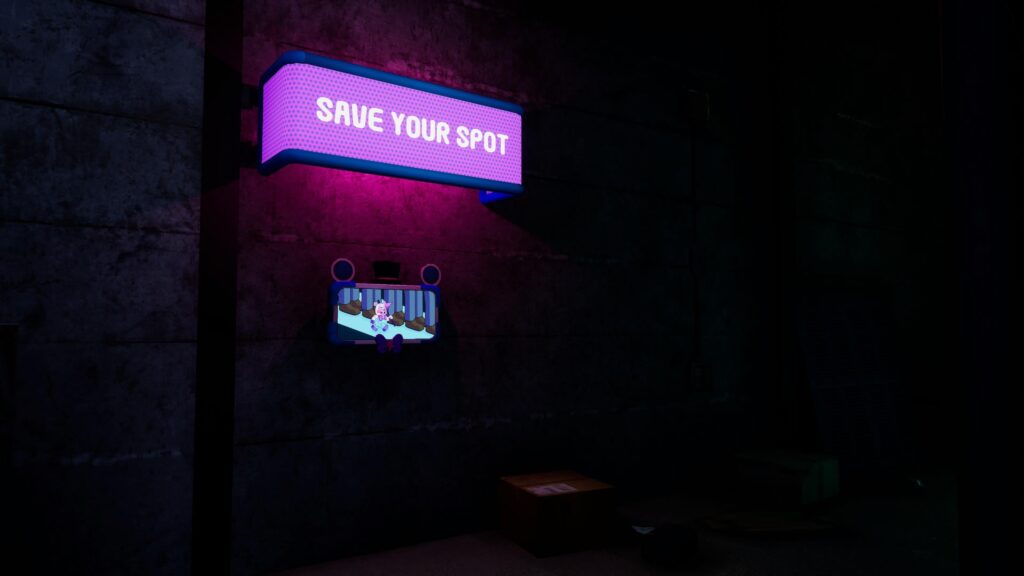
Your first objective will be to help Freddy out of his room so he can drive you back to the entrance. For this you'll want to head for arcade machine to the back of the room and press the button in the shape of Freddy's head. He will open a maintenance room and take you to your first terminal Save Your Spot.
Save your progress holding the interact button, and then make your way to the stack of boxes next to the charging station. Jump up to them and enter the vent. Follow the path ahead. You should be able to see Chica, Monty and Roxy in their rooms though they pose no threat. Once you're in the lobby ahead, head back to Freddy's room.
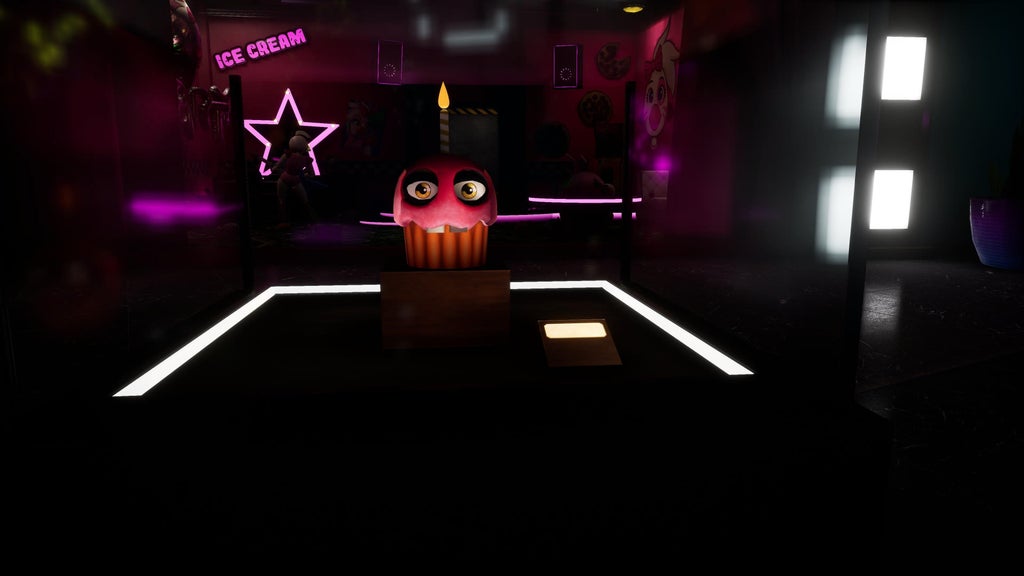
There are some fun Five Nights at Freddy's features in the lobby if you want to stop for a quick look. It's definitely worth tinkering with and none of the animatronics will attack you while you're looking around the area.
Obtaining a Photowalker
Upon reaching Freddy's door, you will be sent on a new mission: free entrance ticket. It's not too far from Freddie's room. Turn around and head towards the chairs under the giant statue of Freddy. Grab the bag there to get your first collectible message. Now head towards the giant gate on the right side of the hall.

On the opposite side of the room ahead, there should be a cardboard cutout of Freddy in his space helmet. Under the decoration you will see present. Open it to get a Photo Pass. With this in your possession, return to Freddy's room and open the door.
Down into the engineering tunnels
When you return to Freddy's door, he will allow you to climb back into his chest and pilot him. This will be your first experience as Freddy. Exit the room and head towards pair of red doors next to the shutters that led to the photo gate. You will come to a staircase leading down. Follow them down and through the engineering tunnels ahead.

As you continue through the tunnels, Freddie will suddenly sense that Gregory needs medical attention, automatically running to the first aid room. You will be thrown out of his chest and left in a room with a large medical booth. As soon as you go outside, you will hear the footsteps of the guard. Jump into the cover of the medical booth, and a cutscene will play.
Once this is completed, jump back into Freddy's chest and continue through the tunnels. Eventually, you will find Freddy's power levels running out. Climb the stairs right at the end of the tunnel, and Freddie will shut down completely, throwing you out and running to the nearest charging station, leaving you alone.

Walk towards the many double doors ahead and grab the bag on the left. Then record your progress in the Save Your Spot terminal on the right side of the door. After that, go through the doors.
Meeting with Chika, Roxy and Monty
When Freddy leaves you to your own devices, you are ready for your first taste of animatronic action. Go through the doors and go to the set of cans on the table in front. Chica is in the room on the right, eating garbage in the corner, so you'll want to use jars to cause distraction,forcing her to leave the room.

Hit the banks and it will move, allowing you to continue on to the next area. Make sure you squat during this section, to make sure you stay as quiet as possible. Once you pass Chika, continue following the path ahead until you reach the Save Your Spot terminal on the wall on the left. Record your progress and then move on to the next area. ADVERTISING
It won't take long for your first real piece of action to unfold, as Monty Gator will break through the gate behind you. and will chase you down the corridor ahead. Run as fast as you can and try not to worry too much about the taunts coming from behind you. Roxy and Chica will end up joining the chase so just follow the path climb the stairs и move on until you reach the security office.

Once you are in the office, the doors will automatically close and you will be safe for a while. In the office Freddie will grant you access to the security cameras, scattered throughout the building, allowing you to spy on the animatronics. After you've finished dealing with the cameras, one of the security doors will open and you'll be free to move on.
Log your progress in nearby terminal Save Your Spot and jump back to the cameras. You will be fighting Chika during this next section, who will walk around the square room, stopping at each corner to eat some trash. Take a gift near the entrance to the zone,retreat back to the save location and then watch the cameras until Chica is in the corner of the room to the right of the entrance.

Once she's there, follow her at a distance, making sure you're out of sight, until she moves into the next pile of trash. On the opposite side of the room you entered, you will find double door set leading to the entrance to the Pizzaplex. Sneak through them unnoticed and the clock will officially strike 12:00 at night.
12:00

Entrance to Pizzaplex
After you leave Chica during the 11:00 pm section, you will find yourself at the entrance to the Pizzaplex. Unfortunately, the shutters will just be closed in front of Gregory when he enters, ensuring that he is here for an extended stay. Before doing anything, go to terminal Save Your Spot on the left side of the entrance.

Keep this terminal in mind as you will be returning here several times during the first half of 12:00 am. Near the terminal you should find gift, containing free entry ticket. Catch it and head back to the Pizzaplex entrance. The gate ahead can be opened with a pass.

Next to the Free Entry Pass field, you will see your first Cleaning Bot. They are generally obedient, however, don't get too close to them. They will signal for help and an animatronic will appear behind you.
How to get Comp Pass - Glamrock Gifts
Upon entering the main hallway, you will come face to face with two threats: a security bot and Chica. Luckily, both stick to pretty rigid patterns during this section, so you'll be able to block their specific patrols.

Upon entering, you will notice that the security bot is guarding bag on the fountain(highlighted with a blue circle in the image above). Make sure Chica isn't around, then wait for the bot to loop close to the bag and head to the left before quickly lunging forward to grab him. Running security bots will not cause them to sound the alarm, as they will only be alerted when they capture you. Once the bag is in your possession, stick to the right side of the fountain and hide in the nearby stroller(highlighted with a green circle in the picture above).

Inside the hideout, raise the cameras and keep an eye on Chica. She will move in a triangular pattern,going up the stairs on the left side, going through the third floor, and then going down the stairs on the right side before repeating the loop. Wait for her to go up the stairs on the left before following her from afar. Once she's down the stairs on the right, head to the right side of the balcony and cross the nearby glass bridge into Glamrock gifts.If Chica spots you, she can be fooled using the level layout. Climb down the nearest ladder and make sure it follows her, then go around the loop and return to the third floor. you can use photo booths in the middle of the walkway as a shelter.

You will find yourself in a giant ball pit and come face to face with a brand new animatronic named sundrop. He will jump from the platform high above the arena and come to talk to you. While literally nightmares, Sundrop is actually docile, moving you into the arena area to have a dream party. The only problem is that he won't let you leave on your own.

You can get around his obsession with locking you in one place, knocking over towers of pillows around the play area. He will try to clean them up, giving you enough time to go explore. It is wise to go into the arena and mentally note how to get to each generator inside. The playpen is essentially a maze, and knowing where all the generators are will help you a lot in the next section. Don't worry, Sundrop won't enter and drag you back to the main area if you're inside the arena.
After you have looked around, go to security rack. It is located next to the large wooden door leading out of the arena. Once you reach it, go to Freddy Fazbear's big wall head on the left side of the table and interact with her to get the torch. It's better that this leads to the next section. Then save your progress in the terminal on the right. When you feel ready, you can move on and grab the security badge from the table. It has the form small head of Freddy Fazbear with a protective hat, so it's hard to miss.

This will trigger a cutscene where the power will go out and Sundrop will painfully transform into his nightmarish alter ego: moondrop.
Moondrop Boss Battle
Moondrop can be a tricky boss fight, both because of the overall mechanics and because it's quite buggy. The main goal is to find and turn on five electric generators located around the play area. They are all inside the playpen, so you don't have to worry about finding the staging area unless you're using it to quickly move between play structures. During first phase Moondrophe will just roam the open area around the arenas, meaning you probably won't even have to fight him.

However, as soon as you turn on three generators,Moondrop (for lack of a better term) will go to Super Saiyan, getting red eyes and suddenly thinking he's ready to enter the game structure. At this point, it's pretty much up to chance whether he's going to catch you or not. Sometimes he stays in one place and plays fair, which allows you to keep an eye on him and use the environment to keep him at bay. Other times, he teleports around the arena like Chuck-E Cheese Nightcrawler.

The best strategy is using the first three generators as a planning step. After all, Moondrop won't enter the arena until you reach your third generator, which will give you all the time in the world to build your perfect run. you want first pull out two generators that you hate to find under pressure, and then chart a route between generators three, four and five.
So, with that in mind, it's good to know the overall layout of the playpen and generators. V The arena has three different sections,all of which are interconnected but can be accessed from a common play area. Looking away from the security post at the beginning of the fight, you will see areas of the arena left, to the right и in the middle. The arena section on the left has one generator on the top floor. The arena section on the right has one generator downstairs. The middle arena has three generators, one of which is located on the lower floor and two on the upper floor.

The Super Saiyan Moondrop is actually easier to control when it's outdoors, especially since you can buy yourself some time. knocking over nearby pillow towers as a distraction. As a result, a good route is in turning on the generator in the arena on the left и generator located through the tunnel on the top floor of the middle arena. Then head to the generator for the upper floor of the middle arena with a blue slide. Turn it up and then go down the blue side and exit to the open one.
You want to go around front of the right arena и follow the path on the lower floor. The generator will be on the left side. If you keep following the path,you will be able to exit through the opening on the left, which leads to the main area. Drop down and then run to rear entrance of the middle arena. The end generator must be on the left when following the path. It's worth practicing running during the Sundrop section or the first phase of the Moondrop to make sure you get it right.

If your torch runs out, return to the security desk and use the Freddy Fazbear Charging Station. This will allow you to replenish your charging meter and get back into the fight.
Once you activate all five generators, the encounter will end immediately, so don't worry if Moondrop is on your tail. Once that's done, head back to the security counter, charge up your torch, save your progress, and then head through the large wooden double doors.
Kindergarten Escape
As you leave, Sundrop will wake up from his Jekyll & Hyde episode and continue to ban you from daycare while yelling for help and calling for Chica, Roxy and Monty. Luckily, Freddie will arrive just in time. Jump into his chest and you'll be safe. Before climbing the stairs to leave, pilot Freddy to the back of the Lucky Stars gift shop. You will find gift inside.

Now go up the stairs opposite the arena doors. Freddy will inform you that the building's power is being diverted (as it happens at the end of every hour) and that if he and Gregory don't reach the charging station soon, they will be thrown outside while Moondrop patrols. Take Freddie and head towards the Kindergarten entrance. Along the way, you will see a green door with balloons inside. Come in inside and you will find a bag.
Now quickly return to the Kindergarten entrance and Freddy will jump into the nearby charging block. Watch a short cut-scene and then the clock will officially sound at 1:00 AM.
01:00 AM - Loading dock
Having survived the Vestibule and the Kindergarten, Gregory will be able to travel for the first time to the Atrium. Here Freddy will offer him the opportunity to go to one of the two locations: loading dock or prize counter. Here's everything you need to know if you're planning on heading through the loading dock.

Atrium
С kindergarten teacher Gregory and Freddie can return to the main lobby. Go down to the fountain on the lower floor and go to the glass elevator sandwiched between both stairs. Next to you will be waiting present. Grab the collectible device and go back to the top of the stairs before jumping into elevator behind the photo booths.

The elevator will take you to the Atrium and finally give you a glimpse of the Freddy Fazbear Mega Pizzaplex. Upon arrival, you will be spooked by a roaming robot that will provide you with a map of the area. Once the card is in your possession, you will have to choose between visiting the loading dock or prize counter. The choice comes down to whether you prefer going through the arcade to avoid Roxy, or through the underground tunnels to avoid Chika.
Entrance to vents
Now you have decided to follow loading dock tracks,go down the nearby escalators to get to lower floor of the Atrium. The main part of the territory will be blocked at 01:00. However, if you look to your left, you will see a row of eateries guarded by patrolling security bots. Navigate them (remember that the sound won't warn them,so run as much as you want) and then log your progress at the save station next to the open vent.

If you're struggling to find an air vent, look for a shop Side dishes and salads. He should be right next to him. After saving your progress, squat down through the vent until a cutscene is triggered. He will see Gregory come face to face with miniature Musical Man,which will clap a couple of characters together and then give chase. Turn and crouch and go through the vents until you are prompted to slide.

Don't worry too much about Mini Music Man. Though he can kill you if he gets his symbols on you he is relatively slow and you can outrun him. Just make sure you keep pushing and don't worry about turning around to mark his position.
Reunion with Chica
You will find yourself in a back room with vending machines and posters. After taking a moment to catch your breath, move on to the next room.
As you enter the next area, you will find yourself on a series of walkways surrounding Freddy Fazbear's signature silos. Unfortunately, you won't be alone. Chica is here and she's out for blood. Using the silos as cover, you'll want to sneak around Chika and enter the office from which she left. This can also be done when you are being chased. All you have to do is lure Chica to the path you entered from and then use the paths to bypass it and run to the office.

If Chica isn't following you, you might be able to get some goodies out of the office. To the right of the door on the table lies a bag, and under the middle table is a gift. When you're done, exit the back of the room and follow the walkway through the kitchen area and into the nearest security office.
The door will close behind you, so don't worry if Chica is chasing you. Save the game to a save point and charge your flashlight if necessary. Then go to the table and take security icon, to start the next part of the level. Once the security badge is in your possession, Chica will start knocking on the door, draining its power. You'll need to find a way to get rid of her, and Freddie presents an interesting distraction tactic...
How to beat the pizza delivery mini game
After listening to Freddy's serve, press the Freddy Fazbear button on the table to start the pizza delivery mini-game. The aim of the game is simple: make chica pizza through remote control delivery bot, present in the kitchen you saw earlier. The only problem is that Chica is still trying to break through, so the whole game will be timed. You can see how much time you have left, through the red bar on the left side of the screen. You will be transported into the robot's perspective once you start the mini-game and provide a piece of dough.

As a robot, you will need to find several pizzerias in order to build your food. The stations you will need are sauce, cheese, meat, not meat и oven in this order. Don't worry if you forget which station is next, as you will be notified by a target marker in the top left corner of the screen. It's worth mentally marking where each station is as you wander around.
As soon as the game starts, get to work as soon as possible (even before the automatic message with instructions ends). You will start at the back of the kitchen and want to head straight to the front to find sauce station. It's just next to the double red doors on the far left from where you spawn. All stations lit up with lights, making them easier to spot, so keep an eye out for any well-lit areas.

Once you get to the station, hold the interaction button to distribute the sauce over the pizza. After that you will want to find cheese station. This is pretty much exactly where you first spawned in the level, at the back of the kitchen area. Go there and do the same with the cheese. Meat is nearby, and, turning around, it should be to your right. Head forward and turn right to the other side of the kitchen.
With the addition of meat, the instructions will tell you to move on to not a meat station. You should be able to see it after turning 180°. He is in the middle of the kitchen a little to your left. Go to it and add non-meat. Finally, you need cook pizza in the oven. Return to the meat station and go past it. The oven should be on your left.

Try not to use the stations in the wrong order. Picking the wrong one will force you to remake the pizza from scratch, making the mini-game difficult to win given you're limited on time.
After that, Chica will suddenly appear in the kitchen and pounce on the robot, allowing you to leave the security room and continue your adventure.
Laundry
After being distracted by Chica, save your game and go down the stairs to the left of the security room door. You'll want to briefly head to the left and pick up the bag lying by the set of red double doors. Return to the bottom of the stairs and go through the doors to their left. You will know that you are on the right path, as a sign withthe inscription "Exit to the docks"will be found above the doors.

You will find yourself in the kitchen and, unfortunately, Chica hasn't left yet. Luckily, she is distracted by snacking on the gourmet pizza you made during the mini-game. You can use this to your advantage. Sit down и hook the bag on the left from you as you walk across the room and then walk through double doors ahead of you. Don't worry too much about Chick. As long as you keep your distance and stay low, she won't notice you.
After that, Gregory will have a short conversation with Freddy where he will ask him if he can see some of the controls. Approach a nearby table with several monitors on it. Freddy will inform you that something is wrong and ask you to come and find him again. Head to the left side of the room и look for a door next to the flashlight charging station. Walk through it and you will find yourself in a dimly lit bathroom.
As you might probably expect at this point, You are not alone. Chica will suddenly enter the room and enter the door ahead of you, signaling that you are entering another hidden section. This can be tricky and there are a few things worth noting about it. One of them is that Chica will be able to go through doors that you can't. She mostly patrols circle,passing through the bathroom to the laundry and then back. The small hallways mean she can easily catch you off guard, so make sure you're careful moving between covers and relying on their cameras.

Head towards the door through which you saw Chika exit, and instead of going through it, look for second door on the rightfrom you. Pass through it and go to the end of the corridor. To your right you should see bag в end of a long line of showers. Grab a bag and then check your cameras to make sure Chica isn't in the laundry room. Turn around and walk back along the soul line. There should be two laundry baskets ahead that you can use as hiding places. Jump and wait for Chica to pass by.
As soon as she leaves, jump out of the baskets and go down the short corridor on the right side. If you haven't seen Chica for a while, jump into the laundry basket directly to your left, when you reach the end of the corridor, and wait for her to pass. If you just saw her leave, continue across the room and exit through the corridor on the left side. You will find yourself in a room filled with shelves that leads to a large laundry room.

Head straight to the back of the shelves to find present. Now double back and look for the entrance to the next laundry room. This section can be chaotic or simple depending on your timing. The laundry room is full cleaning and security bots. You'll want to make your way through the maze-like layout as quickly as possible, trying your best not to get too close to the cleaning bots and stay as far away from the security bots as possible.
Easiest stick to the sides of the room, as the security bot moving through the middle is the hardest to dodge. At the back of the laundry room, you will find a path leading to two doors. It's right in the center of the area, so it's hard to miss. Go through the doors to trigger a cutscene and complete your third hour at Freddy Fazbear's Mega Pizzaplex.

If Chica or security bots spot you in the kitchen section, run around the room instead of hiding. You will still enter the cutscene when it ends, so you won't have to fight it after leaving.
Was the article helpful?


