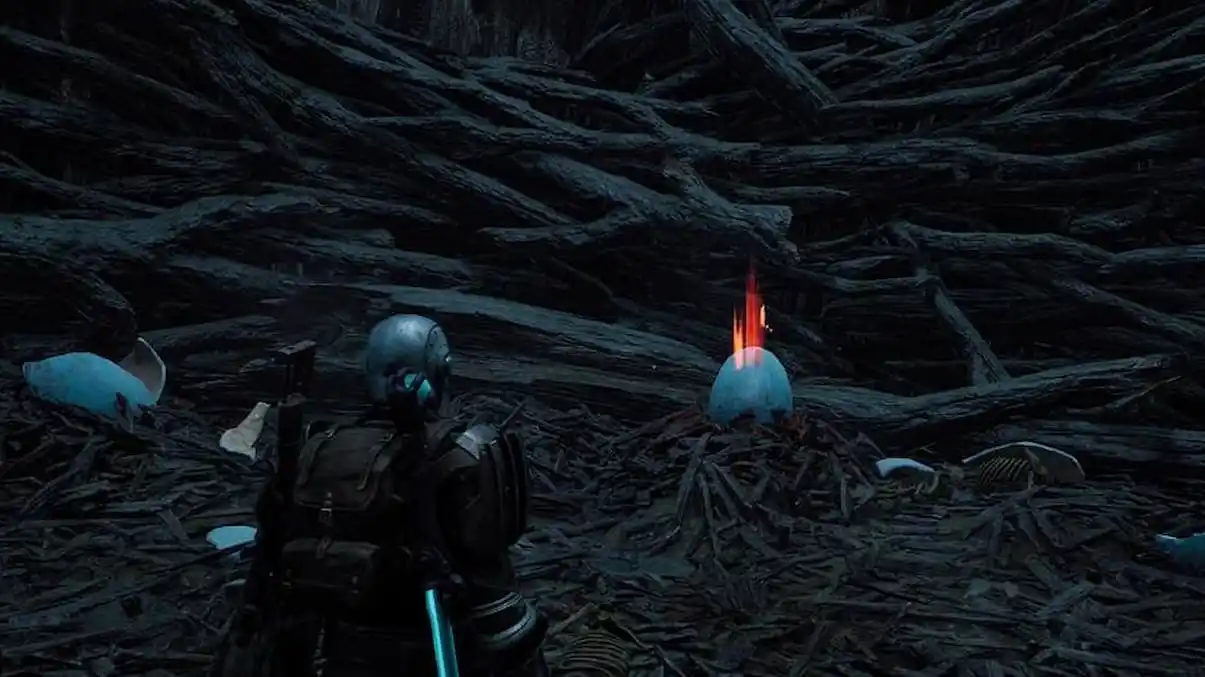
Sekiro: Shadows Die Twice is a hardcore third-person action RPG from the creators of Dark Souls and Bloodborne. The story of the game tells about some ancient cult that sacrificed local residents and experimented on them. The main character of the game is a ninja with a special hook attached to his prosthesis. The hook can be used by the character for jumping, as well as in battles with enemies.
All bosses in Sekiro: Shadows Die Twice. How to win, Tips, Walkthrough.
What really captivates Sekiro: Shadows Die Twice, so it is with its variety of game characters, each of which has its own unique and inimitable combat technique. Often, in order to win, you need to make maximum efforts.
In this guide, we will tell you in detail about all the bosses in the game and help you find the key to defeating them. These are not necessarily the best decisions and you can fight the enemy in your own way, but still here you will find good advice that will definitely help you in passing the game.
The bosses that appear in this guide are in order of Sekiro: Shadows Die Twice gameplay. That being said, some bosses may be played in a different order depending on which area you visit first.
As with any boss in the game, it's best to understand what type of attacks the enemy uses when fighting. If you get involved in a fight unprepared, you will see death, and quite unremarkable.
Preparation includes upgrading the character to the maximum and collecting resources such as health items and armor items. That's why it's best to explore all areas and collect such useful items and upgrades. However, the only way to level up your character is to defeat the bosses in the game. Therefore, read the tips on how to defeat all the bosses in the game.

COMMANDER NAOMORI KAWARADA
This boss is located in Ashina Outskirts, in the passage through the wall gate to the Outskirts. You will meet him after the carver's idol, he will be waiting for you in the courtyard.
The best way to defeat him is to go to the rooftops on the left so that the warlord does not notice you. Then you can sneak up on him from behind and stab him in the back to take his life.
Now all that needs to be done is to proceed with sword attacks, blocking all incoming attacks. Blocking his attacks is not that risky, and after a chain of his attacks that you block, you can attack him again. Repeat this until his concentration breaks and you defeat him.
The rewards that you will receive after defeating this boss are - Rosary bead и pumpkin seed.
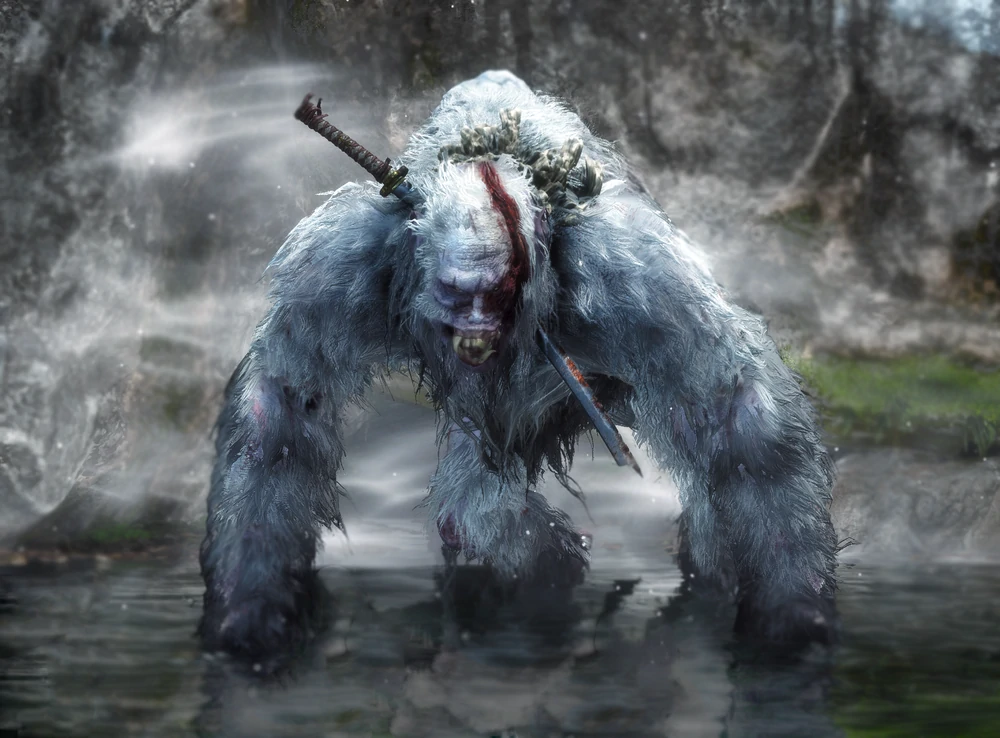
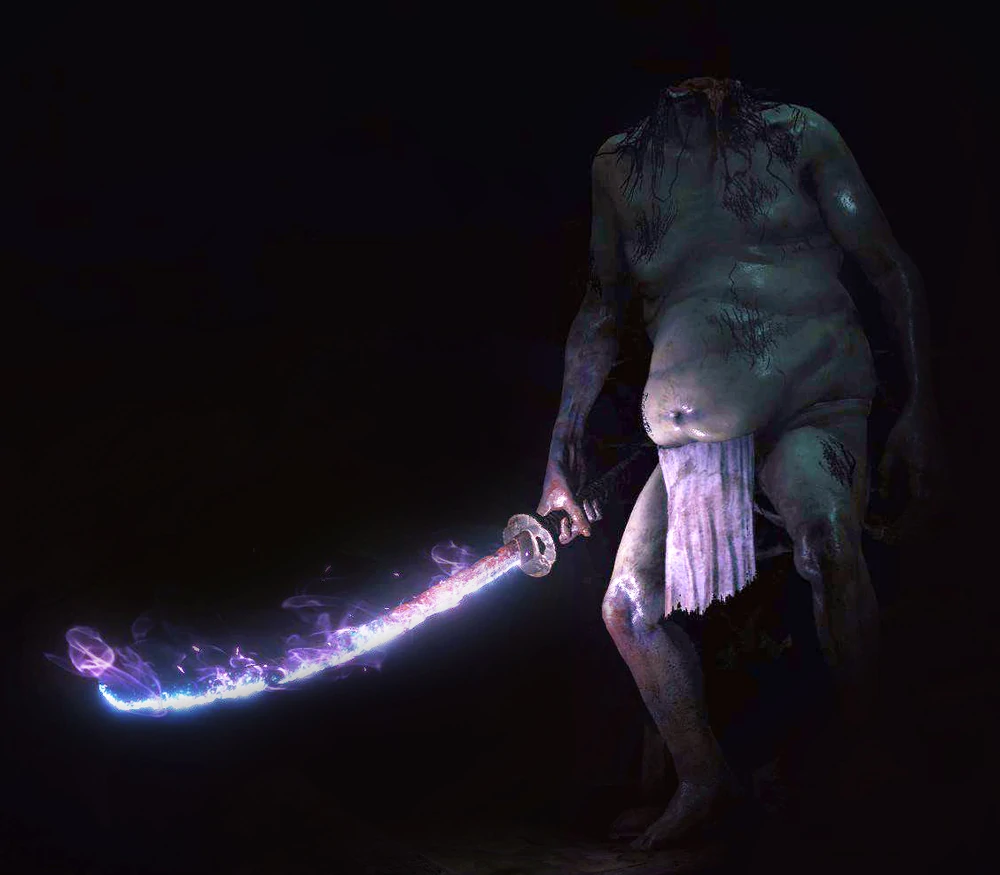
GIANT IN THE BOTTIES
This boss is located in Ashina Outskirts, on the Wall Stairs. He will be right after the carver's idol and up the stairs.
To defeat this enemy, you must first kill the smaller enemies in the area before you focus all your attention on the Giant. As soon as you go upstairs, turn left to kill the enemy with a spear. Now you can fight the Giant in the stocks one on one.
The best way to attack is to dodge the giant's attacks in such a way as to get behind him. This way, you will be able to land at least two or three stabs in the back. Repeat this until you kill the giant.
After the battle you get a reward Shinobi medicine lvl 1 и Rosary bead.
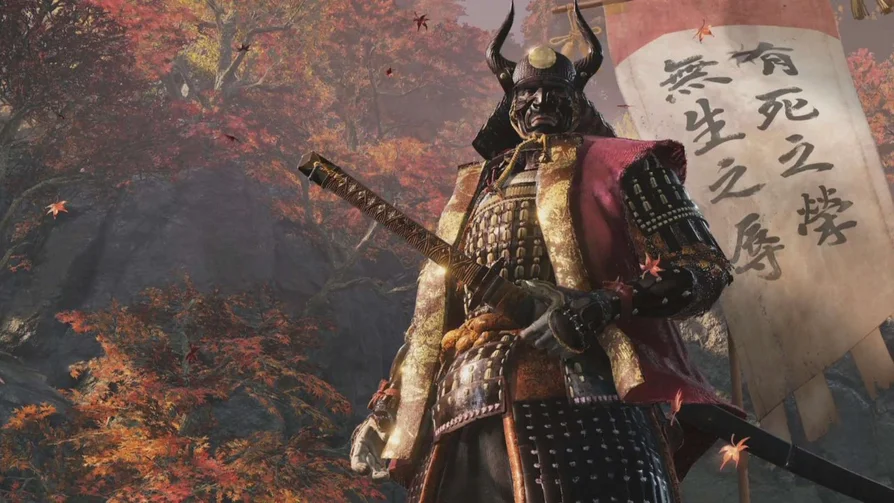
COMMANDER TENZEN YAMAUCHI
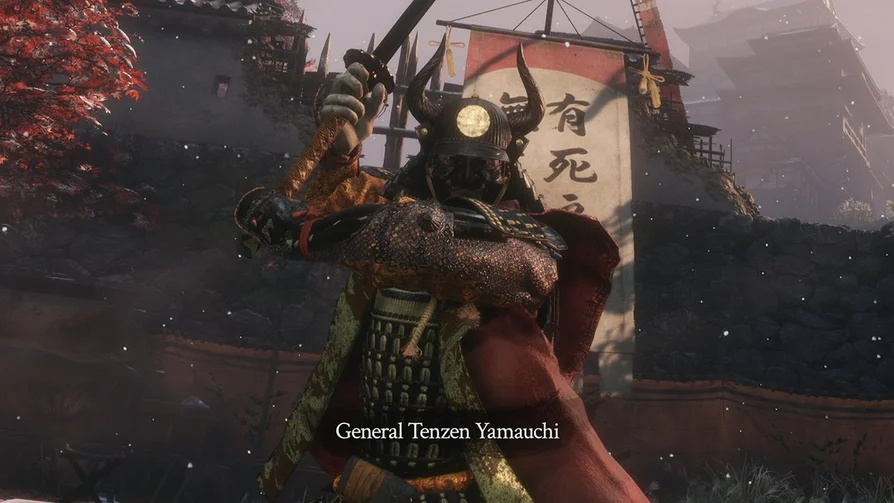
This boss can be found in Ashina Outskirts, on the Wall Stairs. This area will be after the place where you fought the Giant in the Stocks.
In this fight, it's best to take care of the smaller enemies first before jumping into the boss fight. Don't lose a lot of health here and save your heals for the bigger fight.
After defeating the smaller enemies, move out of the battle zone and hide from the warlord. You can now sneak behind him and attack from behind to instantly kill him.
Now your attacks should be carried out according to the same principle that you used in the fight against the Chained Ogre. Dodge and move behind the warlord and attack two or three times. Repeat this until his defenses break.
After this fight you will be rewarded Bead from the rosary.
SHINOBI HUNTER ENSHIN FROM MISENA TEMPLE

This enemy is located in Hirata Manor and the Way to the Manor. At this point, you must use the Bell that you received from the old woman in Ashina Outskirts. You encounter her between the fights with the Giant in the Stocks and Warlord Naomori.
Use the bell at the Altar in the Ruined Temple where the Carver is located. You must then follow the path to the estate until you encounter two shielded enemies on the bridge. After this area, there will be a garden where you can finally meet the white coat boss.
The best way to fight this boss is to take out the smaller enemies first. Stealth kill the torch enemy closest to the bridge and then kill the archer with two other small enemies.
Now you need to run until the boss loses sight of you. This way, you no longer have to deal with smaller enemies. Walk back across the grass to your left and sneak attack the boss. It will take two of his lives.
Now for your attacks, dodge twice until you're behind him and you can hit him twice. Repeat this until you defeat this boss. Reward for defeating the Shinobi Hunter - Rosary bead.
YUZU THE DRINKER
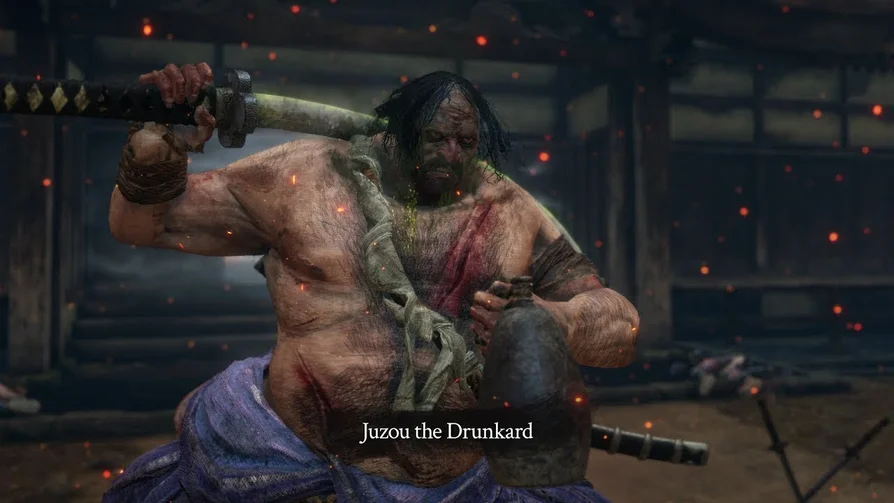
This enemy can be found in Hirata Main Hall. Head back to the bridge where you had to defeat the two shielded enemies, just before the fight with the Shinobi Hunter. Jump into the river and swim upstream until you see a branch to your left that you can grab onto.
Now follow this new path until you reach an area where you need to jump over the well wall and reach the burning mansions. This is the area where you will meet the boss.
Before the battle, you need to talk to the Samurai, who is standing in the shallow water. This samurai will be dressed in a blue robe and will stand by the rock. Talk to him and he will help you in this fight.
With it, you can confuse Juzo enough to divert attention from yourself and take out other lesser enemies around. The samurai dies but gives you plenty of time for a 1v1 boss fight at the end.
The best way to attack is to grab the boss and dodge in his direction. By making sure you dodge him, he won't be able to hit you and in turn will let you get behind him. Hit him when you get back and repeat the process until you defeat him.
After the fight you will be rewarded Rosary bead и Unrefined sake.
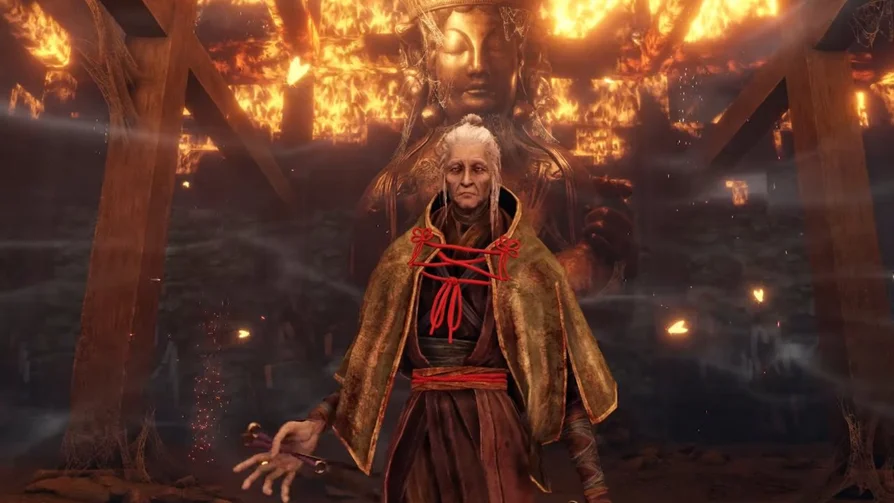
LADY BUTTERFLY
This enemy is located in the Hirata Reception Hall in Hirata Manor. You get to this location right after defeating the previous Juzo boss. He guarded the entrance to this place.
An archer will be waiting here, and behind him there will be a platform in the floor that you can interact with. This is the path you need to take, but it is blocked. To open it, you need a key, which you will get by following the path after the Shinobi Hunter boss fight. On the way, you will meet a friend in a burning courtyard who will give you the key. With the key you can open the gate.
When you face Lady Butterfly, you should know that the battle starts in two stages. Although Lady Butterfly only has one life, she returns after your first kill.
There are many different movements in her attacks. You have to dodge her attacks very quickly because she is also very fast. You can practice dodging most of her attacks until you're good at it. You should also equip your Whirlwind Attack martial art before the fight to deal damage to her. You should now dodge and use the whirlwind attack. Repeat this process until she dies the first time.
You can now deal a lot of damage if you prepare before she respawns. Go back to where she first came from and stand behind her as she respawns. This allows you to quickly attack her from behind, with the same tactics as before, continue your attacks.
In the second stage, her attacks will include two more additional attacks. First, she will summon illusions to fight for her. You need to quickly run and jump behind the wooden pillars and the ghosts will disappear. The second variant of her attacks are bright lights, which she shoots at you. You cannot block them and they can only be avoided by dodging.
She summons illusions again, but you can run away until they disappear.
After the battle, you will receive as a reward Memory Lady Butterfly, which can increase attack power, and A drop of sakura.
GYOBU ONIWA
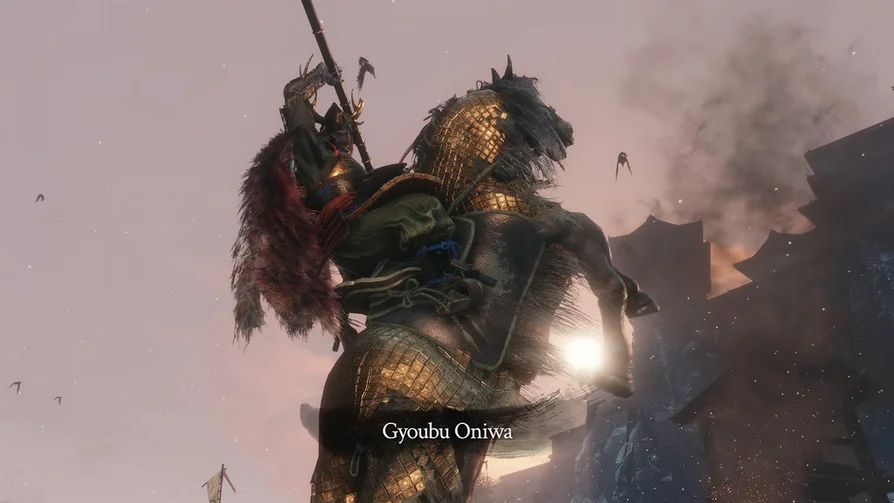
Gyoubu Oniwa is located in Ashina Outskirts, in the Ashina Castle Gate Fortress idol. The fight can be tough, but this boss can be defeated if you know when to hit the enemy.
The best way to deal damage to this boss is to wait and block attacks until he is ready to take a heavy hit. In the process of his heavy strike, he becomes defenseless for 2-3 seconds. That's enough time to hit him twice. Repeating this process makes the whole fight easier and is the best way to defeat Gyoubu Oniwa.
While the previous method is the safest, you can also try another method by grabbing onto it when the green circle appears on the boss. This stuns him for 2 seconds, allowing you to double strike again.
It is quite possible to beat this boss if you wait for the right moment to strike: when he is either stunned or preparing for a strong blow. Repeat until you take his second life, and then grab him to execute the warlord.
After you defeat this boss, you will be rewarded mechanical barrel и Flashback: Upgrading Gyoubu Oniwa's Strength.
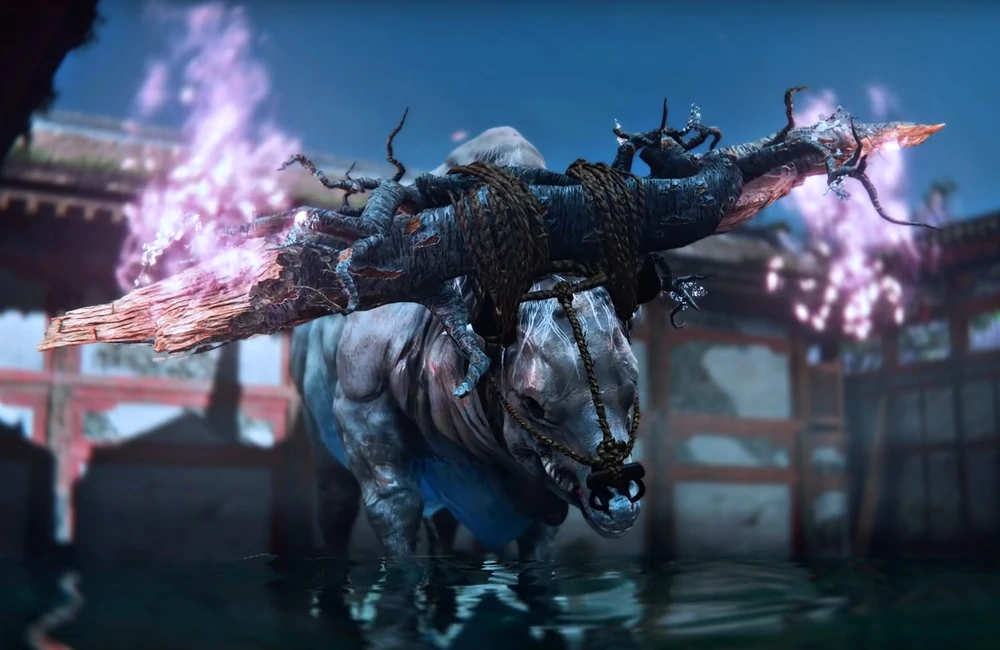
BURNING BULL
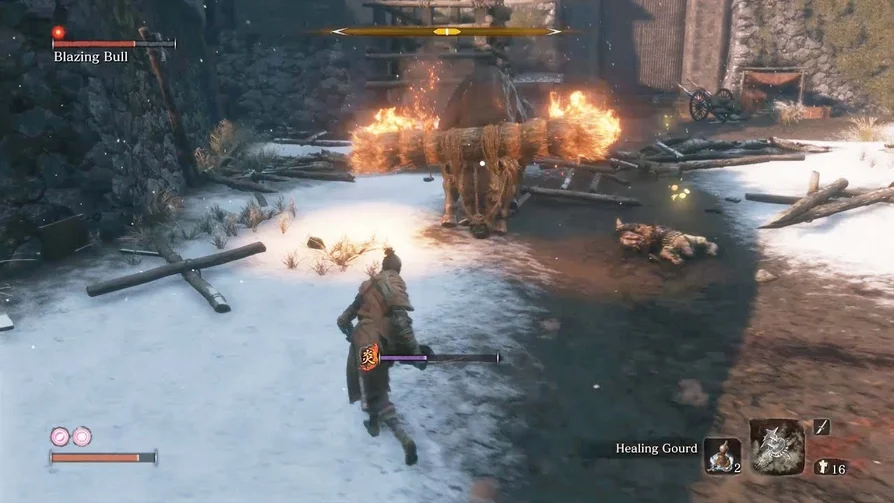
This boss can be found in Ashina Outskirts at Ashina Castle Gate. Raging Bull can be found after defeating Gyoubu Oniwa, inside the main castle.
The Bull has fire hay as his horn and uses it as his main offensive weapon. He has two ways to attack, and both are strong enough to take a lot of health from you. The two main attacks include one when the bull charges at you and another when it hurls its fiery horns at your position.
The bull's attacks can be blocked, but they still deal damage due to their enormous strength. The best way to avoid an attacking bull is to dive forward towards the bull. This will allow you not only to avoid damage, but also to get behind the bull, and this is the best place to cut the bull and deal damage.
Being behind the bull, away from his horns, you can manage to deliver 3 to 4 blows to the back or sides. But it's best to stay in the back as its wide horns can reach you from the sides.
When you are at a sufficient distance from the bull, he will always attack you. As soon as the bull's health drops, you can launch a shuriken attack to build up damage from a safe distance.
The bull only has one life and defeating it will end this boss fight. Reward for defeating the Raging Bull - Prayer Bead and Shinobi Medicine Level 2.
GENERAL KURANOSUKE MATSUMOTO
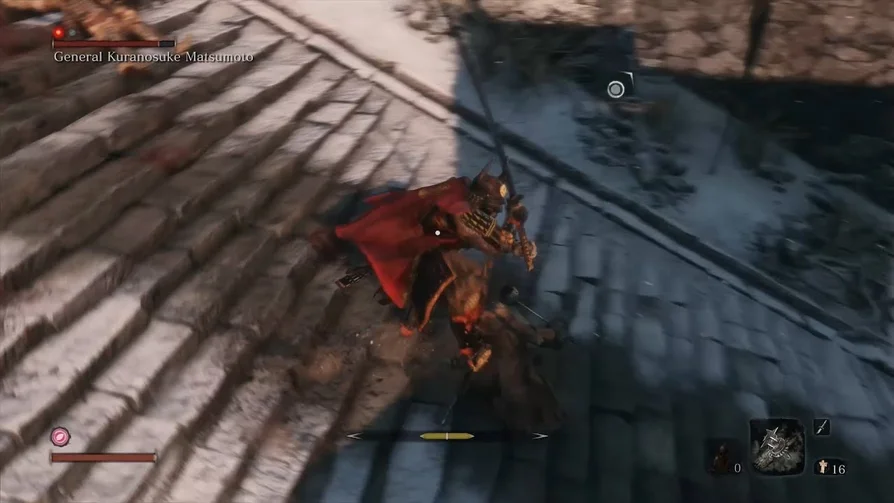
This boss is found in Ashina Castle, where he can be found after defeating the Raging Bull. Once you defeat the bull, go straight upstairs. Upstairs, you will find 4 shooters along with the warlord Kuranosuke Matsumoto.
This boss and its fighting style is the same as the first boss in the game, Warlord Naomori. However, the only difference is that he has more health and hits you for more damage.
The best way to fight this boss is to deal with the other smaller enemies around it first. Kill all 4 shooters and run back so that the warlord loses sight of you. Then you need to sneak up on the warlord from behind to take one life from him.
Grab onto the rooftops to get behind him and perform a stealth takedown, as this will take one of his lives. You can now start a fight with the Warlord and the best way to do this is to counterattack and then use the Whirlwind Attack martial art. You must do this every time he starts an attack and repeat until he is defeated.
Defeating this boss will reward you with a Prayer Bead.
SEVEN ASINA SPEARS - SHIKIBU TOSHIKATSU YAMAUCHI
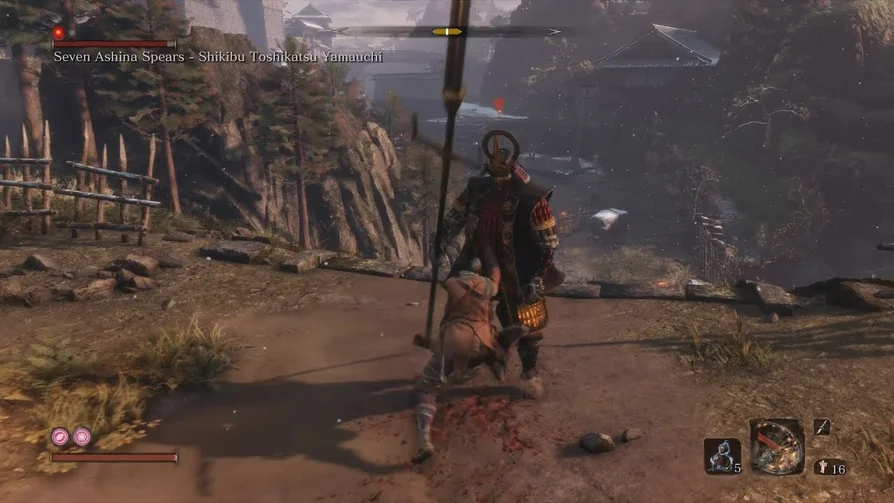
This boss can be found in Ashina Castle, near the Ashina Reservoir idol. Once you enter Ashina Castle, turn left and climb the wall, which will have a long drop down. Your destination is the area around which you can reach by grabbing onto a tree branch.
When you get to the end, kill the small enemy on the left and then go right to the temple. To simplify your task, you must take one life from this boss. You can do this by sneaking behind him, taking the left secret path behind the temple and through the hole in the temple wall. It is better to stay away from other enemies, otherwise they will chase you.
This will put you right behind the boss, allowing you to take one of his lives.
The fight with this boss is different because he uses his spear to attack in an arc. This makes it impossible to dodge his attacks. The best way to fight this enemy is to use the Firecracker Shinobi Prosthetic Tool and Ichimonji: Double Attack.
The first phase of the fight should be to use a few Mikiri Counters, when he uses Turnarounds you can double jump to deal focus damage. Other fighting methods are to first stun him with firecrackers and then immediately proceed to use the Ichimonji martial art twice to attack him. This is the safest method and is enough to make the whole fight very easy.
With this combo, you can stun him 8 times in a row and perform a martial art attack until his defenses break. You should focus on taking down his defenses as he has a lot of health.
SWORDER LONELY SHADOW

This boss can be found in Ashina Castle, in the Ashina Quick Access Reservoir. When you enter Ashina Castle, go left, open the gate and jump down. You need to find the Reservoir Idol here. From the idol, you need to jump over the branches to your left and land on the enemy camp.
There will be two enemies here, a drummer and a shooter. Behind the drummer there will be a cliff that you need to head towards and then look to the right where you can grapple to a point across the chasm. This will take you to an area with a friendly samurai standing over a hole. The boss will be in an area inside this hole.
The best way to fight this boss is to dodge his attack by diving towards him, but towards his left side. Then use the martial art Whirlwind. Repeat this step and you can deal good damage to the enemy. Dodging an attack requires proper timing when he is about to swing his sword. This way you can be sure that he will never hit you.
This boss also has low health, making it easier to defeat the Swordsman. Once you defeat the boss, you will receive a Magnetite Piece and a Prayer Bead as a reward.
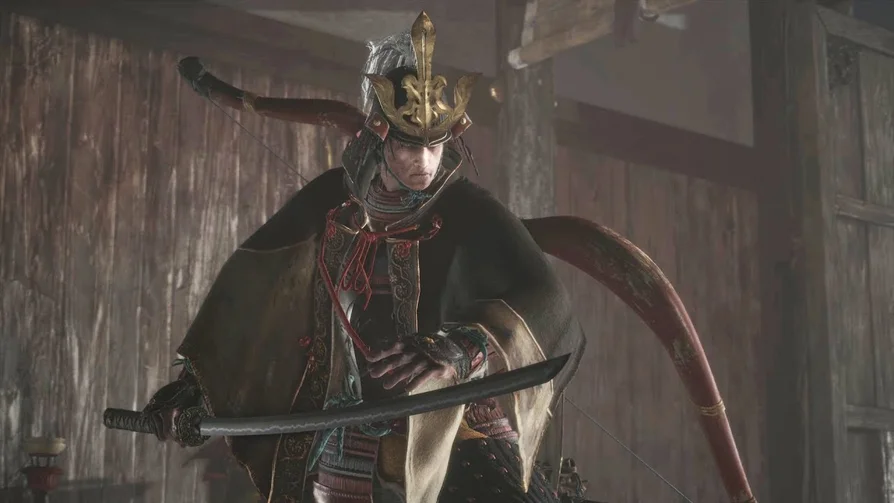
ELITE FIGHTER ASHINA - JINSUKE SAZE
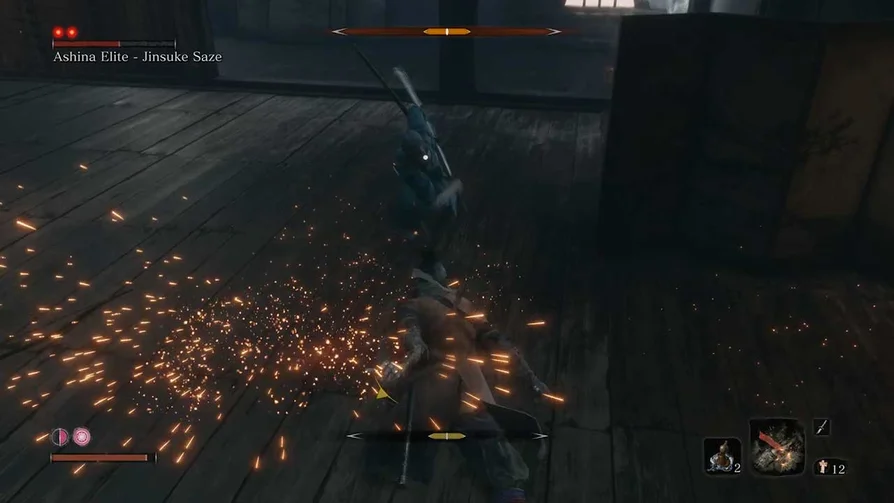
This boss can be found in the Upper Tower - Ashina Dojo in Ashina Castle. You can fast travel from the Ashina Castle idol and then follow the path on the right to jump to the roof. Follow these rooftops to enter the tall tower in the middle of the area.
Once you're inside, you'll see some blue-robed samurai in a room on the second floor on the right, which you can hook into through a hole in the ceiling. From there, you can follow the path up to reach the Ashina Dojo at the top of the tower.
This enemy has a lot of power in strikes, but little health. However, he has two lives, which he uses to come back again and fight you.
The best way to defeat this enemy is to play aggressively, stunning him with your firecrackers and then attacking. Other ways you can hit him is to rush towards him when he strikes and then hit him from behind. His blocks can stop your attack, but you can continue Whirlwind multiple times to drain his health.
Once you defeat this boss, you will be rewarded with a Prayer Bead.
GENICHIRO ASHINA
This boss can be found in the Upper Tower - Ashina Dojo in Ashina Castle. This boss comes right after you defeat the previous boss. In the room where you fought Jinsuke Saze, get out through the window and go up to the roof.
This boss fights in two stages. The first stage has two lives, and the second stage has one life. After his first two lives are gone, he will begin his second stage.
You need to focus on attacking to drain his focus rather than trying to drain his health. You should also carry the Embedded Ax prosthesis, as it will deal heavy focus damage.
Control the fight and don't let him use his bow. You can do this by standing close to him and just stubbornly repeating regular strikes so that he can't even use a bow. The basic tactic is to hit him twice, then block his incoming attack with a counterattack, and then perform simple quick strikes. Repeating this tactic is enough to deal enough damage to him and prevent his focus from recharging.
Each time it charges up to attack, it remains open for a quick strike. When his health drops to 60%, his concentration will deplete very quickly. This indicates that you should launch attacks with your Embedded Axe. Keep hitting him with this ax while counteracting his attacks.
You have to pay attention to his attacks, but he will never use them if you are close enough. When he loses both lives, he will return in a stronger version of himself and use thunder attacks. When he jumps into the air to attack, always dodge to the left. The rest of his attacks are identical to the previous stages, and you can repeat the counterattack and quick strike until he loses concentration.
Defeating this boss will reward you with Flashback: Genichiro, Ninjutsu Blood Smoke Technique.
ARMORED WARRIOR
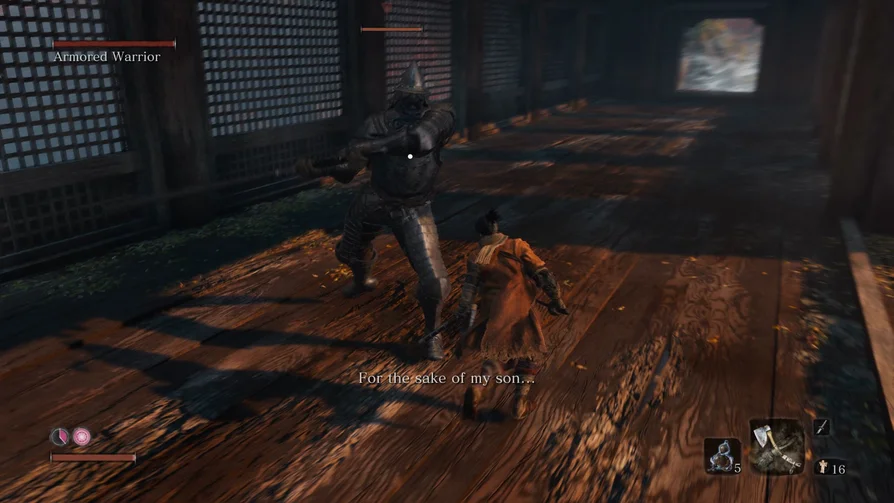
This boss is located in Senpo Temple - Shugendo, where it will be after the second idol in Senpo Temple, Mount Kongo, where you will automatically reach this boss.
He can't take any health damage and the only way to defeat him is to break his concentration and then grab him to throw him off the balcony. When he falls, he dies and the battle is over.
The best part is that his concentration does not recharge. You can either dodge or block his attacks, as between his attack combos he can't move and is easy to hit for a few seconds. The built-in ax works best and deals massive focus damage. After a few hits with an ax, he will lose concentration.
Now you need to make sure that during the attacks he breaks the balcony window so that he has a hole to fall. Now you can grab it and throw it away.
Defeating this enemy will reward you with a Prayer Bead and Nature's Breath - Shadow.
CENTIPEDE-LONG-ARM SEN'UN
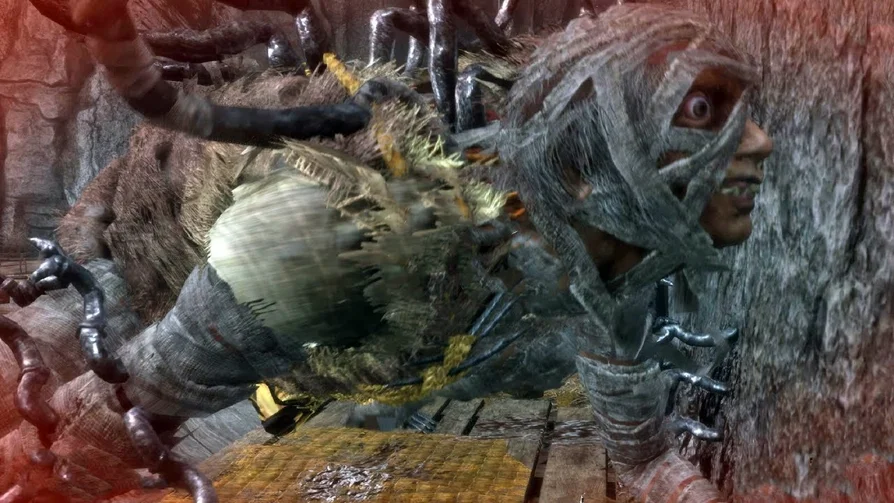
This boss can be found in the Senpo Shrine in the Temple Courtyard. To get to the boss, you need to go to the Senpo Temple idol, Mount Kongo, which is the third idol in this region.
From the idol you will see a path with wolves and some monks who will throw bombs at you. You need to grab the roof of the temple with a hook, and then jump down into the temple on the right. You can enter the dark room through this temple roof.
Before starting the fight in this room, you need to first kill 3 small enemies that are sitting on the beams. Try not to fall and not attract the attention of the boss. After you've killed the enemies, jump on the boss for a mid-air sneak attack. This will take one life from the Centipede.
Now you can only focus on the battle with the Centipede. The fight should be about taking the enemy's focus away, deflecting the successive attacks that he unleashes on you, and then, when he stops for a moment, go to your execution.
It is better to have the following skills in your arsenal during this battle: Rising Carp, Descending Carp, Flowing Water, as they increase your dodges and increase your concentration. Another way you can try to defeat this enemy is to grab onto the beams, jump down for a couple of hits, and then hook up again. This works best if dodging isn't easy or your focus is depleting faster than expected.
For defeating the boss, you will be rewarded with the Prayer Bead and the Yellow Powder Prosthesis Mod.
MONKEYS IN THE SCREEN
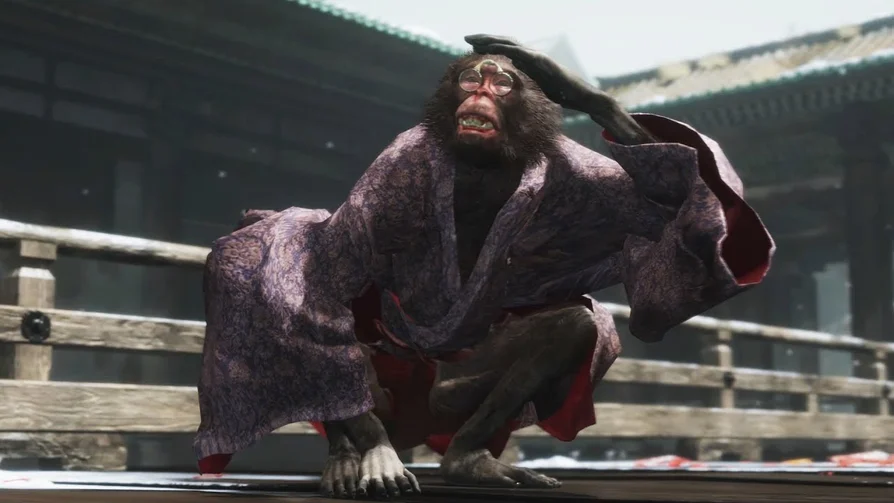
This boss fight will take place in the Senpou Shrine - the main hall, where from the Main Hall idol you need to interact with the altar. This is only available after you've defeated Genichiro Ashina in Ashina Castle, then talked to the Divine Heir in Kuro's Room at the top of the tower, and followed the smoke signals on the rooftops of the tower to find Isshin. Only after that you can interact with the altar, which will take you to this place with the monkeys.
This battle is more like a chase where you have to catch the monkeys and eliminate them. In total in this location you need to defeat 4 monkeys, mostly on the roofs of buildings.
At the very beginning, you can destroy the Invisible Monkey, which will be in the same place where you appeared. Take a few steps forward and then turn back and you will see the scattered dishes on the floor, run to the center and hit the air until it appears, and then make a killing blow.
Next up is the Green Kimono Monkey, which can be found on the opposite side of the location. You can grapple the tree in the middle to get to the other side. But not on the roofs, but to a huge bell with a note hanging next to it. When you spot a monkey sitting on the balcony right in front of the bell, ring it and it will stun it for a few seconds. This will give you enough time to go up to the balcony and execute her.
The third - a monkey in a purple kimono is on the tower in the upper left corner. This monkey is usually always there but will run away when it sees you. Let her run away, because first you need to put out the light in the upper left tower. To do this, you need to open the door inside the tower, which will cause the light to be extinguished by the wind. You can now chase the monkey around the map following the purple tracks until it returns to this tower. Jump on it from the roof above.
Finally, the Monkey in the orange kimono is the monkey with the drum. You can chase her up to the roof, then crouch and try to sneak around her from behind and eliminate her. It's easier to do this with Gatiin's Candy, which makes your movements soundless.
The rewards that you will receive after completing this battle, Flashback: Temple. monkeys and puppeteer's technique.
SHIRAHAGI SNAKE EYES
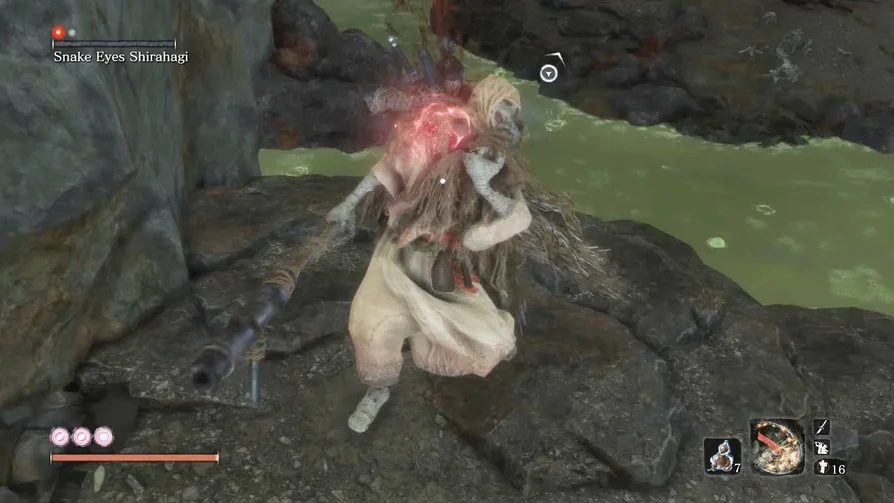
This boss is located in the Fortress - Sunken Valley. You can travel to the second idol or fast travel to Sunken Valley. From this idol, you need to climb down the cliff at the idol and grab onto the trees as you fall. Then you will automatically see this boss on the way to the Fortress. Ignore the encounter with him, go to the Stronghold idol, and then return to inflict stealth attacks from the back of the enemies.
Return to the boss to also pounce on him and perform a stealth strike. During the battle, you should reflect all his attacks and fall asleep with normal sword strikes after dodging.
When he has a red icon, then you need to dodge the retreat, as this is his unblockable grapple attack. If you get hit, you can run to the left side of the area and heal. You can also grab onto a tree branch to get out of his line of sight.
Once an opponent's health is depleted by more than 2/3, their focus is very easy to break. As soon as you take away his concentration, you can defeat him with one blow. After defeating this enemy, get a Prayer Bead.
CENTIPEDE-LONG-ARMED GIRAFFE
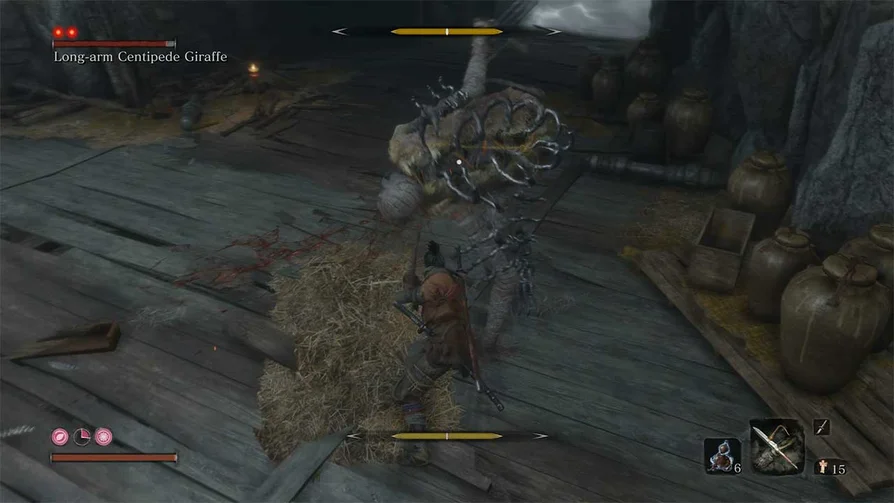
This boss can be found in the Sunken Valley - Fortress, he will be to the right of the idol, in the next room. This is after the area where you fought the Snake Eye Shirafuji boss.
We recommend that you consume Ungo lollipop in advance, as it increases concentration for a while. This boss fights in the same way as Centipede Senun. Although with one exception, you can't steal him at the start, as he always sees you.
You must block his attack, while trying to land 1 or 2 hits in a chain of attacks. The nice thing about this fight is that the boss can be killed much faster compared to the previous Centipede. By continuing to dodge his chain attacks, his focus breaks after the second chain, allowing you to immediately perform a killing blow.
His attacks include a dangerous attack with a red symbol that you have to jump over twice to avoid. You need to synchronize this jump after dodges to avoid being hit. The reward for defeating this enemy is a Prosthetic Tool, Yellow Powder and a Prayer Bead.
SNAKE EYES SHIRAFUJI
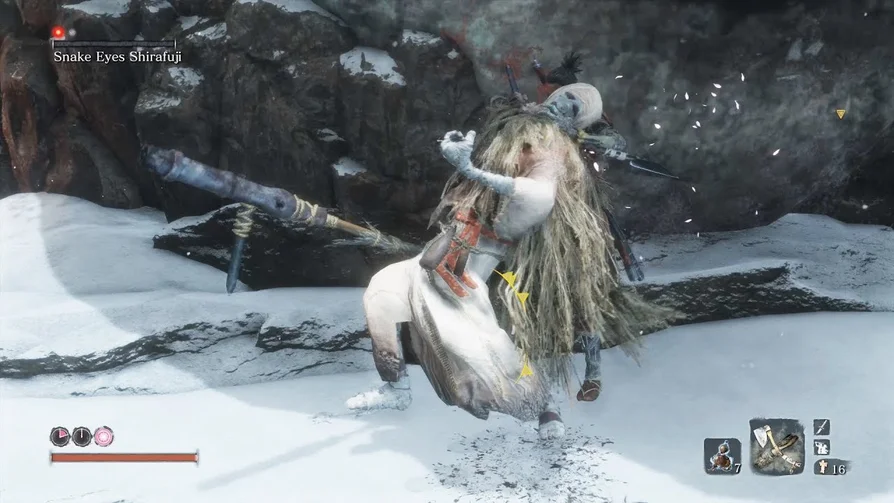
This boss is located in the Ashina Depths region, you need to go to the adjacent space, where this boss will be waiting for you. This is a place with poisonous lakes.
To get to this location, you need to go to the old well where you fought the Lone Shadow Swordsman in the Ashina Reservoir. From there, you need to swim through the well to where this boss fight took place in the dark room. There will be a purple boss here that you should ignore for now. Then you will find a woman praying by the cliff. Drop down onto the cliff and follow the cliffs and dark tunnels on the left.
This boss fight is very similar to the Shirafuji Snake Eye boss fight, although you have to be more careful with the other smaller enemies and make sure you don't attract them.
From the Ashina Depths idol, you can jump down to eliminate the shooter standing on the platform above. Ignore the rest of the enemies as they won't notice you.
Now you can grab the statue on the right and from there the trees and the statue near the boss. Now you need to get down from the statue to his left and perform a stealth kick from behind. It will take a part of his life from him.
If you were careful not to fall when you grappled with the hook, the other smaller enemies won't notice you and won't bother you. In truth, you have to make sure you don't draw their attention, as they make the fight much more difficult. If you mistakenly jump down and draw their attention to you, it's best to start over with the Ashina Depths idol.
Your fight with this boss should be to stun him with Firecrackers and then hit him. Reduce the boss's focus to 50%, then parry all of his attacks while landing basic sword strikes. Once he loses focus, you can perform a deathblow to end the fight.
Defeating this boss will grant you a Prayer Bead.
TOKUJIRO BURNER
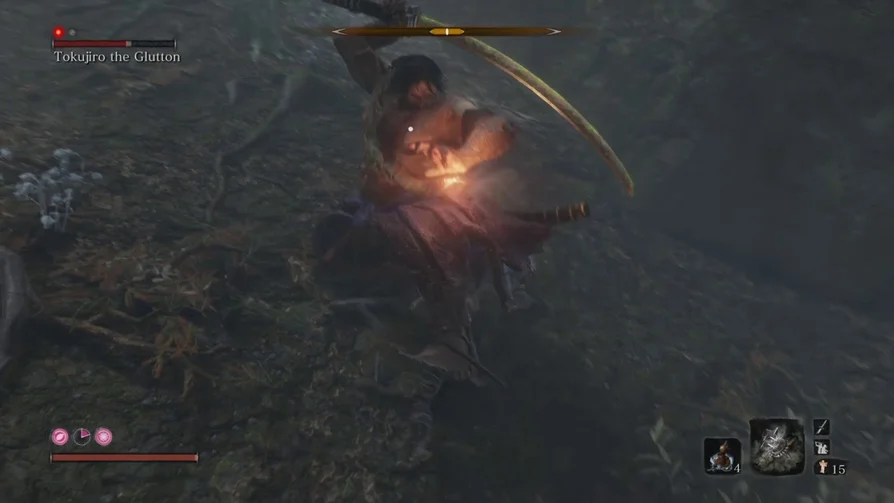
This boss is located in Ashina Depths - Hidden Forest. This enemy is revealed shortly after you defeat the previous boss, Serpent's Eye Shirahagi. It is on the main road of history, so it is not to be missed.
Either way, you can go to the Hidden Forest idol and then jump over the trees, from where you will enter a foggy area with ghostly enemies. To your left will be a capture point with a tree from where you can bypass Tokujiro and the monkeys guarding him. Tokujiru fights exactly like Juzo the Drunkard, but much stronger. The best way to start a fight is to steal one of his lives. To do this, first you need to remove the monkeys, and then go back until the boss loses sight of you.
Now you need to go back to the area and grab the tree branch that is on the right side above the boss. He won't notice you and you can land a killing blow from above.
In combat, you should use a dodge, another dodge, and then attack with two hits. Repeat this and heal if you get hit. The reward for defeating this boss is Unrefined Sake and a Prayer Bead.
NOBLE MIST
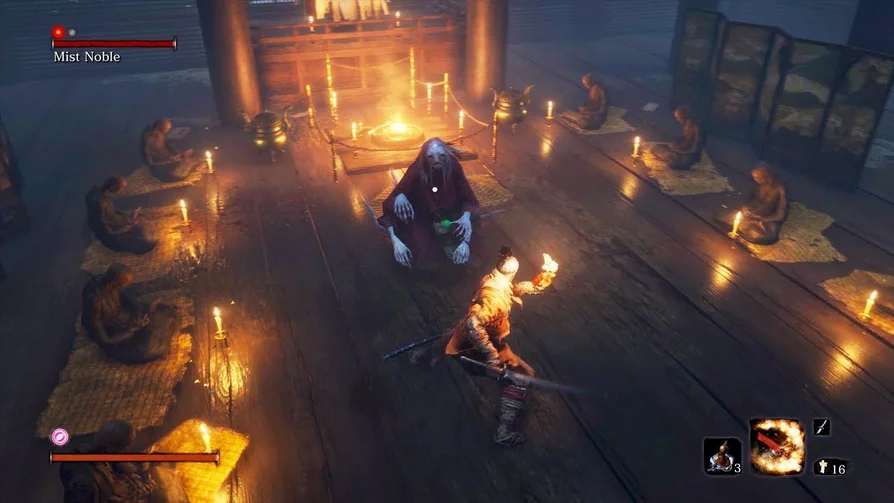
This boss is located in Ashina Depths - Hidden Forest, not far from the area where you fought the previous Tokujiro boss. Grab the tree branch on the side of the mountain with a grappling hook and head towards the larger tree. From there you will find a temple where someone is playing a flute. There is a hole in the roof of the temple that allows you to fall on the boss.
When you fall on the boss, you can perform a stealth deathblow. This boss is not very good in combat as it doesn't attack, doesn't block your attacks and dies in a few hits. What it does is make the fog disappear and bring out a few ghosts.
Defeating this enemy will reward you with the Prosthetic Piece of Corpse Fat Wax.
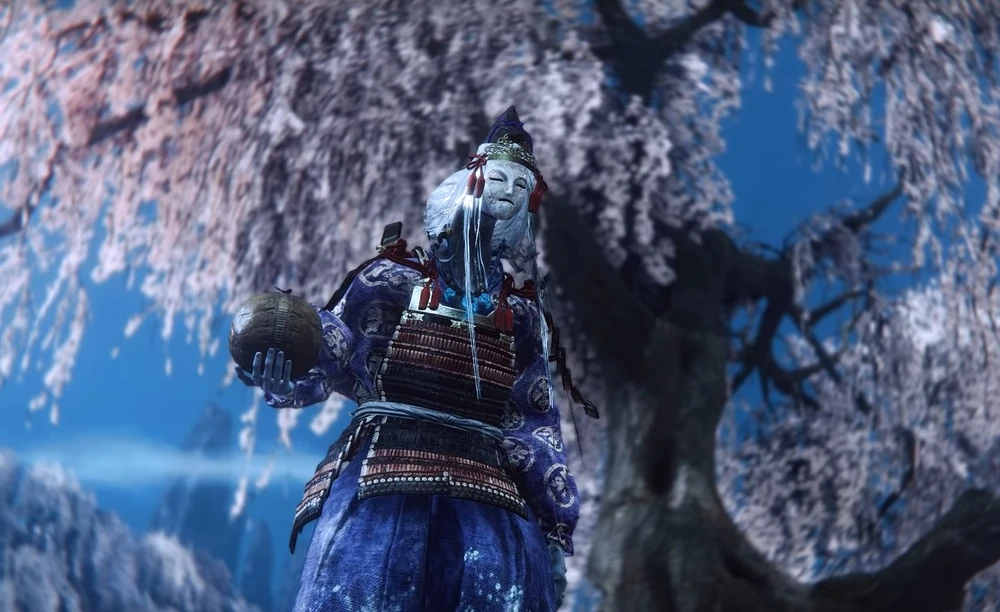
WATER O'RIN
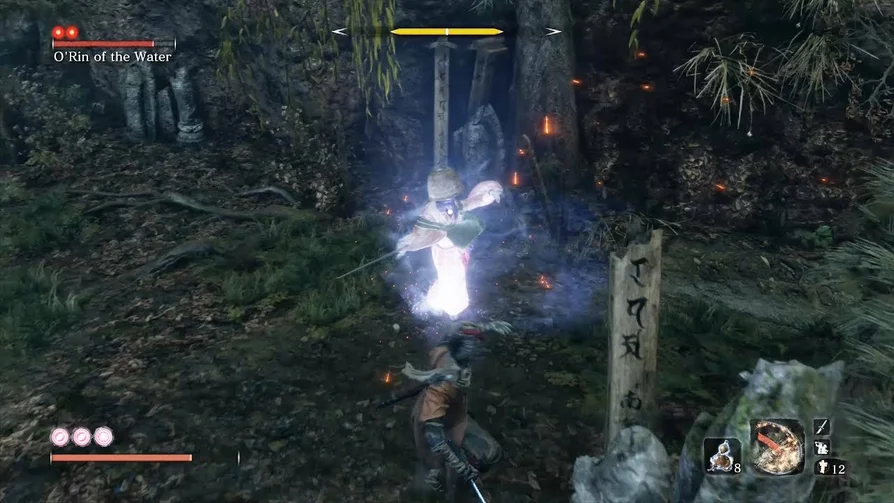
This boss is located in the Ashina Depths Idol - Water Mill. Right after the idol, you will find a woman making music, when you pass by, she will start attacking. You can't skip this boss as it is story related and you need to defeat it to advance further.
Since O'rin is a ghost, you can't deal much damage when attacking, and you can't perform any stealth deathblow. The best way to win this battle is to parry all of her attack combinations, including double jumping right before the red symbol of her dangerous attack appears. This is followed by blows that cause massive damage to concentration.
Dodging her attacks doesn't work and you will get hit a lot thanks to the flow of her attacks while you dodge. Dodge until her defenses break and perform a killing blow. If you take damage, heal from a distance as she fights at close range.
Keep hitting her with basic sword strikes. Even if she blocks your attacks, she still loses focus. Repeat all steps to continue draining her concentration. As soon as she loses concentration, proceed to the death blow.
Defeating this boss will reward you with a Prayer Bead and Nature's Breath - Shadow.
BAD MONK
This boss is located in Ashina Depths - the water mill, where he will be right after the O'rin boss.
This is one of the main bosses in the game, dealing a lot of damage from a long distance, with many attacks in his arsenal. In addition, his attacks are unblockable arcing and lunging attacks, and deflecting and blocking his attacks only breaks your concentration.
The best way to deal with all this is to use the martial art Immortal Strike, which deals unblockable damage and hits the opponent. To unlock this martial art, you must purchase Anti-Air Strike from the merchant in Ashina Castle - Old Grave area for 1200 sen. Then get the Mortal Blade, which will unlock this martial art.
In battle, dodging or blocking boss attacks is pointless. Instead, you should force him to attack you by getting close and then dodging away. When he finishes his attack, he will be vulnerable for a few seconds, and you can take a couple of hits.
Repeat this using his missed chain of attacks. Jumping makes him vulnerable for a long time, so you should be ready to attack during this period.
After winning, get the Mibu Breathing Technique, which allows you to stay underwater indefinitely.
GUARD MONKEY IN A DOWN VALLEY

This boss is located in Sunken Valley - Bodhisattva Valley. The guardian monkey is right behind where you fought the Centipede Giraffe boss. To access the large door where the boss is located, you need the Keep Shrine Key, which you can find in Kuro's Library in Kuro's Room.
The guardian monkey fights in two stages. The first is the normal phase, and the second is when he becomes headless and more dangerous than before.
The first phase of the fight with the Guardian Ape is not difficult, as it does not block your attacks and has only one life. However, she does make some dangerous attacks that can take a fair amount of your health. Avoid them as soon as you see the red symbol.
In the first phase, your best strategy is to use Firecrackers to stun her, then get behind her and land a few sword slashes. Avoid using martial arts as they are very slow.
Another thing Guardian Ape does is he becomes resistant after depleting health to a certain amount. These are 75% health, 50% health and 25% health. When she staggers, you can keep attacking until she runs away.
Finally, in the first phase of this fight, you must block her attacks, use firecrackers to stun her, and then attack. Also attack when staggering. When you lose concentration, deal a killing blow.
The second stage is when the guardian monkey becomes headless thanks to a killing blow from Shinobi. But, because of this, it becomes harder to fight with her than before. In the second phase, the Guardian equips himself with a sword, which he now uses to hit you with a flurry of attacks. In addition, he now has a heartbreaking scream that always forces you to run for cover. You will see a red symbol that indicates the appearance of a scream, and rush away to be in the distance.
There are only 2 moves that give you the opportunity to attack. First, she is about to finish her chain of sword strikes while holding her sword high in the air. You should now parry this attack instead of blocking, as it will hit her and place you right under your belly. Here you can perform several of your attacks.
The second move is when he jumps forward and delivers one hit. At this point, you can just jump over him and then land a couple of sword slashes before blocking again. All other movements are dangerous and are best avoided by keeping your distance.
Dire Shout with a red symbol is another new extra step in this phase of the fight. If your fear gauge fills up, you instantly die. Prepare a Sedative in Quick Access Items so that you can heal this negative status, and it's also best to stay away from its wide area of effect.
After you defeat the Guardian Monkey, you will receive a reward to enhance the power of Memory: Guardian Monkey and the Thin Finger Prosthetic Tool.
A LONELY SHADOW - THE HAND OF DISHONELESS

This boss is located in Ashina Castle Upper tower - Ashina dojo. After taking out the guardian monkey and the fallen nun, you need to return to Ashina Castle through the Abandoned Dungeon. There, on one of the roofs of the tower, you will meet this boss. This is also where you previously fought the mini-boss Elite Fighter Jinsuke Saze.
It is better to start this fight with a companion. You can use the Puppeteer Ninjutsu to go around the ninja on the left side, backstab him and activate the Puppeteer skill to make him fight you.
Although this companion dies fairly quickly, it still allows you to deal good damage for the duration of the two of you fighting the boss. When you are alone and face the boss, you can use the same strategy as on the Swordsman mini-boss. That is, whenever the Hand of Infamy is about to attack you, dodge slightly forward to the left, and then move on to the Whirlwind Attack martial art.
Repeat the action and the boss will be defeated. At the end, you will be rewarded with the Prayer Bead and the Fat Wax Piece Prosthetic Upgrade.
You have reached the final: after this boss we will reach the end of the game! You can now find many new minibosses spawning in old areas, or finish the ending first and continue in free roam to find them later. Don't worry, you'll still be able to walk around after you're free to move around, choose which order (and ending) you like. You can create a backup at this point so you can copy your save back and try different options!
SUR ENDING BOSS
Listed below are all the bosses that you will encounter if you choose Sur's ending in the game:
EMMA, SILENT BLADE
For this boss fight, Emma can be found in Ashina Castle Upper tower - Ashina dojo. When you get to the roof, you choose the ending of the game. Select "Follow Wish. code, leave Kuro" to trigger Sur's ending and start the fight with Emma.
You must have the Shadow Attack martial art equipped for this fight. This is an irresistible attack for the last two bosses in the game. The tactic you should use in this fight is to keep your distance from the boss, use Shadow Attack and jump back to escape. Repeat Shadow Attack as Emma can't block it. Keeping your distance will ensure that Emma cannot reach you with her attacks.
Once defeated, you will be able to fight Isshin Ashina.
ISSIN ASINA
This fight takes place in Ashina Castle, Upper Tower - Ashina Dojo. It is called immediately after defeating Emma.
Again, in this fight, your first priority should be to use the same tactics you used against Emma. Perform a Shadow Attack from a distance and then jump back out of reach of the boss. This attack is not blocked by the boss.
Isshin shoots fire in a straight line that can be dodged to the side. His strongest move is when he causes fire throughout the arena. At this point, you must stand in an area where there is no flame, and then jump in its direction. This is because he will come running with a chain of attacks that will immediately kill you.
Upon victory, you will receive the Remembrance: Isshin Ashina reward for an attack boost, the One Mind martial art, and the Sura ending.
BOSSES IN OTHER ENDINGS
The following are the bosses that you will face if you choose Kuro's devotion in the end of the game:
THE GREAT FATHER OWL
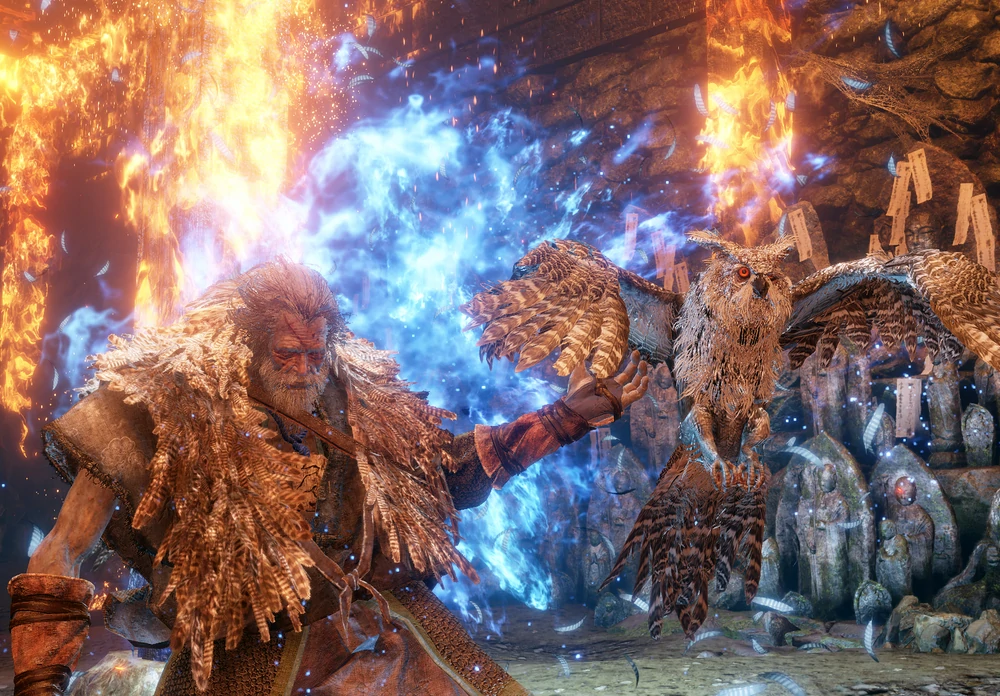
This boss can be found in the Upper Tower - Ashina Dojo in Ashina Castle. When you get to the roof tower, you can choose from multiple endings for the game. Go to the option that asks you to stay loyal to Kuro. So the fight with Owl will begin.
The best way to kill Owl is to be behind him. You can do this by dodging his heavy attacks in the same direction they come from. First, his heavy attacks make him vulnerable for a short time, and this is where you can attack him to deal damage.
When he goes for sword attacks, dodge in the same direction they come from. If he attacks from the left, dodge to the left. If he attacks from the right, dodge to the right. This will put you right behind him, leaving him vulnerable to a few Whirlwind Attacks.
He also jumps high into the air, here you need to dodge twice to get behind him. This will give you a good opportunity to attack him.
If you take any damage and want to heal, you can use Firecrackers to stun Owl and retreat to heal. Otherwise, you should not stay away from Owl, as he follows you very quickly and strikes with his sword.
In the second stage of the fight, he will throw poison and smoke. When he is about to use the smoke, keep hitting him because it leaves him completely vulnerable. When he uses his poison, stay away and block his attacks until the poison dissipates.
Other than the smoke and poison, his attacks are the same, and the same dodge and strike from behind will be enough to defeat the enemy. After you defeat Owl, you will receive the Remembrance: Great Shinobi and Aromatic Branch reward.
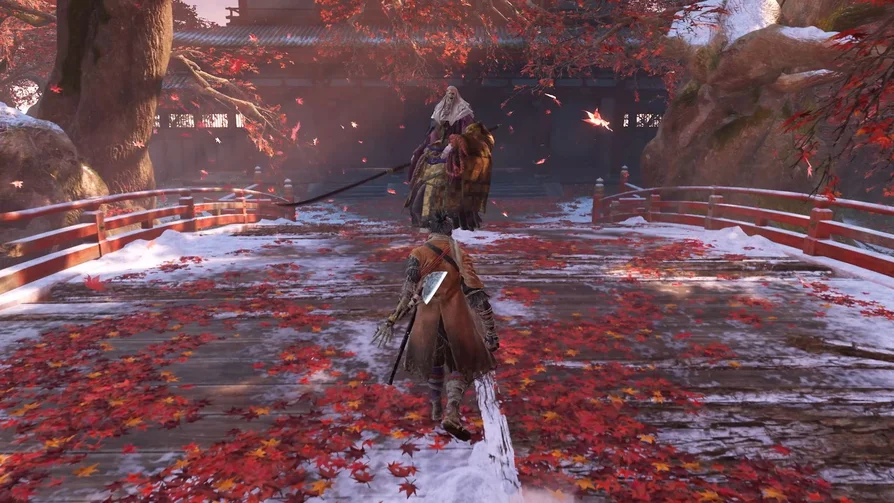
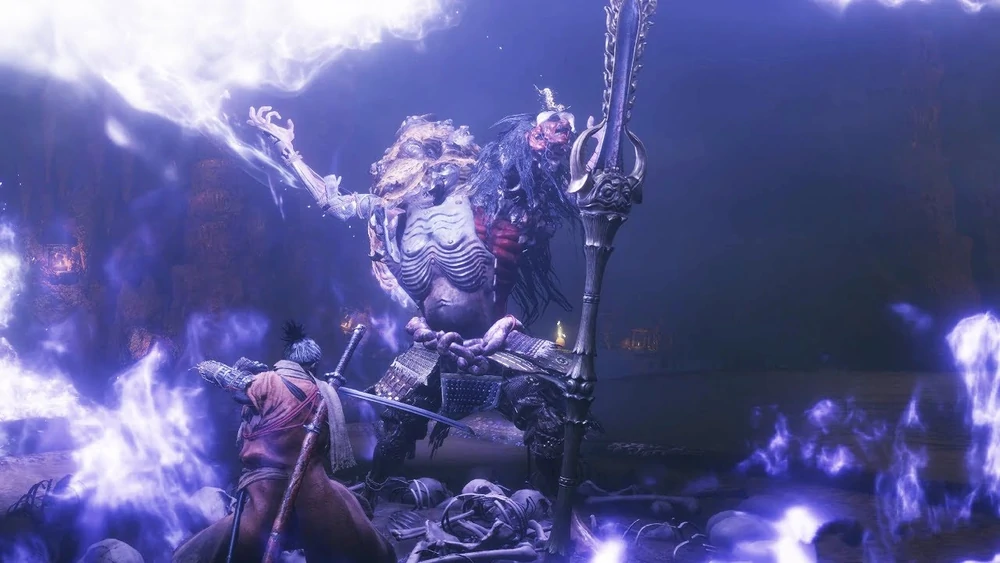
TRUE FALLEN NUNK
This boss can be found in the Source Palace, where you can choose a different ending after staying loyal to Kuro and defeating Owl. After talking to Kuro a few times, head back to Ashina Depths - Wedding Cave Door, where you will see a tent in the cave that will take you to the Fountainhead Palace.
Once you're here, a True Corrupted Nun will be waiting for you. This boss has three lives, but you can thankfully take two with sneak attacks. To do this, enter the area where the boss is and grab the tree branch on the right. Then for the second and third branches after that.
If you do this quickly, the boss won't notice you and you can jump down for a stealth kill. When the boss enters the second phase, immediately jump back into the trees and switch to the same stealth kill technique again. This will effectively take away two of his lives. Now for the battle, all you need to do is throw firecrackers at the boss and then stab him with your sword. You can also use Ako's Candy for more power and Ungo's Candy for less damage.
After defeating the True Corrupted Monk, you will be rewarded with an attack upgrade Memory: True Monk and Dragon Scoreboard.
GREAT SNAKE
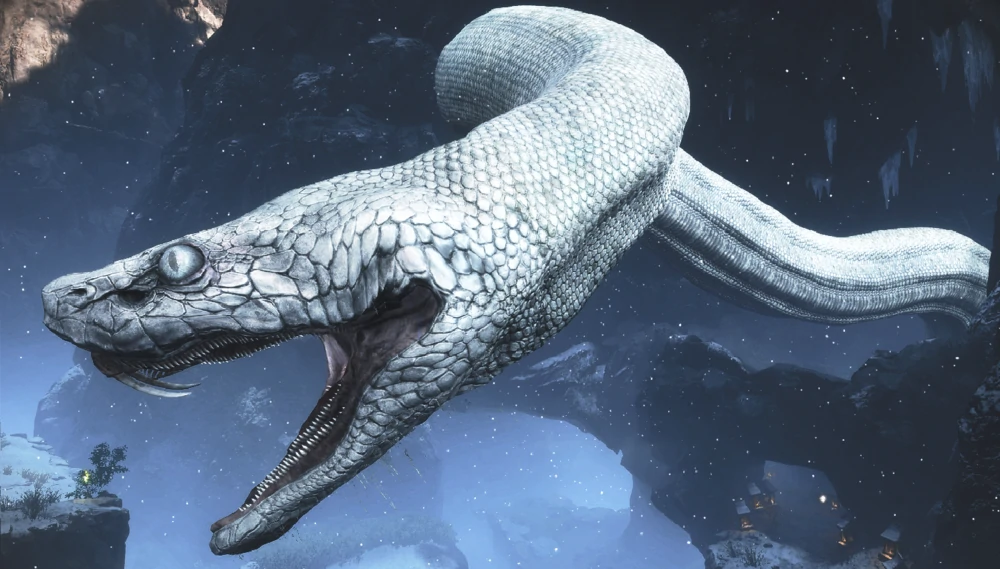
This boss is located in Senpou Temple, Mount Kongo. To get there, you can use the Senpo Temple idol, Mount Kongo, or a fast travel point.
This boss fight requires you to have the Puppeteer Ninjutsu technique. This technique can be obtained by defeating the Screen Monkeys. You should also go to the Sunken Valley region to make this boss weaker.
From the Senpo Temple idol, Mount Kongo, jump off the cliff to the right, where you will see a single enemy with a kite. Use your puppeteer skill on the enemy to have him hold the kite control stick. Now go through the monks' forest, through the prayer room and into the next area where there is a big tree on the right.
You can now grab onto the kite and jump across to another area towards the Cave idol in the Sunken Valley. The fight isn't really a fight, and all you have to do is fall on the Giant Serpent's head and plunge your sword into it. Upon victory, you will be rewarded with Fresh Serpent Entrails.
GUARD MONKEY IN THE POISON POND
This boss is found in Ashina Depths in the Poison Pool, where he can be found after defeating the Corrupted Monk. He will be in the arena between the Poison Pool idol and the Hidden Forest idol.
This boss is exactly the same as the first Headless Guardian Ape you fought in the second phase of the battle. The only difference is that it is much slower and has two health bars that deplete very quickly. This is mainly because you are stronger than before.
His attacks are slow. This allows you to simply block one of her consecutive attacks and then unleash sharp sword strikes on her. He will call another monkey to help. This new monkey is not that hard to defeat and dies very quickly. She can be stunned with firecrackers and finished with a sword.
When the second monkey disappears, focus back on the headless monkey. Repeat the same tactic, blocking and attacking. After defeating her, perform another blow with the sword and pull the centipede out of it and cut it down as well. This ensures that the Guardian Monkey actually dies this time.
Once this boss fight is completed, you will be rewarded with 2 Prayer Beads, the Ninjutsu Bestowal technique.
PALACE BULL
This boss is located in the Fountainhead Palace's Flower Viewing Area. When you get to the Flower Viewing Place idol, you can find this bull behind the Mibu Mansion. The fight with this boss is exactly the same as at the beginning of the game before you reached Ashina Castle.
This boss will be much easier to defeat, mainly due to how strong the character is this time around. Dodge forward to his ramming attack and slash with your sword when you are behind the bull.
Once the bull is defeated, you will be rewarded with the Prayer Bead and the Beast's Karma skill.
HEAD OF THE OKAMI SHIZU CLAN
This boss is located at the Big Cherry Blossom in the Fountainhead Palace. Once you're at this fast travel point, the boss will be on the adjacent tree ahead. This is a mandatory part of the story, as you must kill him to advance further in the game.
Once you get to the boss, all you need to do is avoid his lightning attacks and get close to him, so he will be unprotected. From the Big Sakura idol, grapple to the tree and use the grapple points to the right of the tree to dodge the boss's electric shocks. As soon as you get close, stab him with your sword and he will be defeated.
Once the battle is completed, you will be rewarded with a Prayer Bead.
GREAT CARP
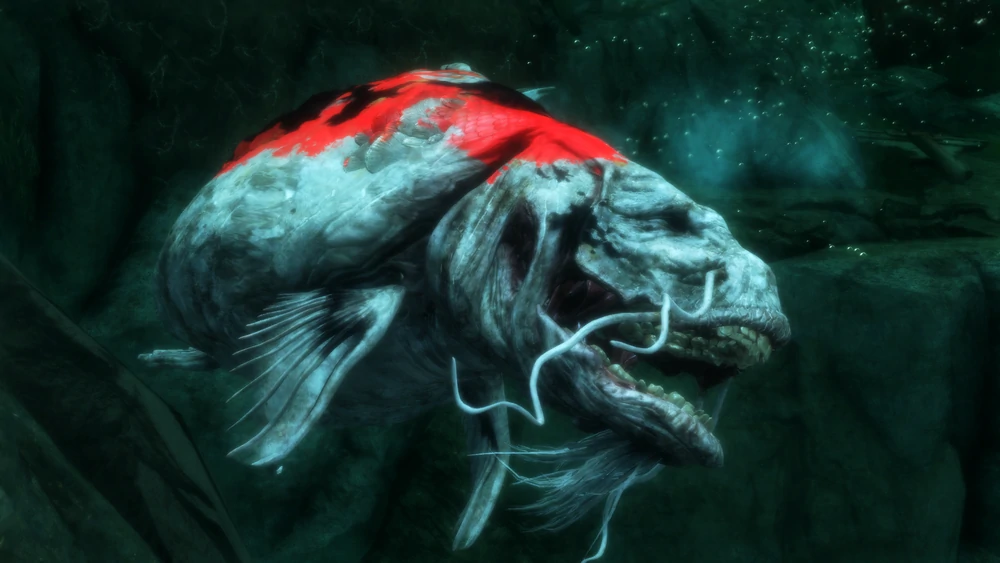
This boss is located in the Fountainhead Palace, by the Feeding Place idol. The boss can be destroyed in a few steps. Instead of fighting, you must poison him.
First, you need to activate the Feeding Place idol, talk to the NPC there, and ring the bell to summon the Great Carp. To get to the Feeding Place, go from the Fountainhead Palace idol and get to the Palace idol. Go through the house to the other side and immediately turn right, where behind it you can grapple to the roof and from there to the branches of the tree, to the roofs of the temple and finally the Feeding Place. Now you need to talk to the NPC and ring the bell to make the Great Carp appear.
Then you need to teleport to Hirata Manor and talk to the Blue Barrel Merchant, Noble Harunaga. Buy any items worth 7 scales. This will unlock another option to talk to him and give you Truly Precious Feed.
Return to the Feeding Place and treat Karp with this valuable bait. This will poison the carp. You now need to travel to Sunken Valley Guardian Ape's Waterhole. Here you will find the body of a Great Carp with a glowing item that you can pick up. Once you pick it up, the battle is over.
You will be rewarded with Precious Scale and the Great Carp trophy/achievement.
HEADLESS BOSS IN THE OUTSIDE OF ASHINA
This boss can be found in Ashina Outskirts - Stairway of Death. From where you previously fought Warlord Tenzen, go right and jump onto the tree branch by the cliff. Now you need to jump down to a cliff where you can hang, and then jump over the dark cave where the boss is.
In order to defeat the Headless Boss, you need to use Divine Confetti to damage him and Pacifier to protect yourself from his terrible attacks. Since you are very strong at this point, it is quite easy to kill him.
You will be slowed down by his fog, but you should just attack him with your sword. Once the effect of Divine Confetti and Calming has worn off, you can simply heal and slash with your sword.
Upon victory, you will be rewarded with Ako's Blessing.
WARRIOR CITYMAN
This boss can be found in Abandoned Dungeon - Bottomless Hole. From where you fought Lone Shadow Swordsman, swim through the well to reach the Abyssal Hole. Next to the idol in the dark arena, this boss is waiting for you.
As with the previous boss, you must take Divine Confetti and Calming to protect yourself from his Dread Attacks. These attacks can instantly kill you. Dodge all of his Dread Attacks.
This boss will then teleport and use a massive beam for a few seconds. Run to the side until this beam attack stops and then walk towards him with normal sword attacks. Repeat this until you defeat the enemy. Also remember to keep taking Divine Confetti and Calming Remedy when their effects wear off.
Upon victory, you will be rewarded with a Ceremonial Tanto.
A GIANT IN THE STOOTS IN THE CASTLE OF ASHINA
This boss is located in Ashina Castle - Upper Tower - room. From the room, go down inside the tower, where you will find this Giant in the stocks.
The fight will be exactly the same as the one you had earlier with the Chunky Giant in Ashina Outskirts. Use a lunge attack when he attacks and then cut him with your sword. Once you defeat this enemy, you will be rewarded with Prayer Bead, Passive Skill Shinobi Medicine: Lv. 3.
LONELY SHADOW SPEAR MASANAGA
This boss can be found in Ashina Castle - Great Serpent Shrine. From the Old Grave you need to go to the Shrine of the Great Serpent idol, and then you will find this boss. It is only available at the end of the game.
Before you start the battle, you need to kill the three wolves that are right in front of the boss. Then you need to crouch and sneak to the left of the Sanctuary where the boss is. Once you're behind him, backstab to take one of his lives.
The main fight is the same as with the Swordsman of the Lonely Shadow. When he attacks, you need to dodge to his left and use Whirlwind Attack. Keep repeating this step to defeat this boss.
A whirlwind attack is easy to perform if he misses his attack. After the victory, you will receive Yellow Gunpowder to upgrade the prosthesis and a Prayer Bead.
HEADLESS AT ASHINA CASTLE
This boss can be found in Ashina Castle - Old Grave, he will be underwater in the pond where the Old Grave idol is located. In order to go underwater, you will need the scuba diving skill, which you get by defeating the Corrupted Monk boss in Ashina Depths.
Since this is a headless boss and has a Dangerous Attack in his arsenal, it's best to use Divine Confetti and Calming Agent beforehand. With the effect of these items, you need to hit the enemy with the sword. The boss doesn't have enough attacks and is slow. When he goes for a heavy attack, dodge and get behind him to hit a couple of times.
Once you defeat this boss, you will be rewarded with Ungo's Candy.
HEADLESS IN THE DEPTHS OF ASINA
This boss is located in Ashina Depths - Hidden Forest. From this idol or fast travel point, you need to jump down and find Headless under the trees.
Again, it's best to take Divine Confetti and Calming beforehand. Under their effect, you need to hit the enemy with a sword. It's best not to grab the boss and always go to his left. This gives you some time to attack.
The lack of a grapple means he is more likely to miss his attacks when he strikes and you move to the left. When it does hit, you take unblockable damage, but it's still less due to item protection.
If the Fear Gauge fills up, retreat and take Divine Confetti and Calm. Continue attacking until Headless's concentration is broken. Then perform a death blow.
Upon victory, you will be rewarded with Gatiin's Blessing.
HEADLESS IN THE DROP VALLEY
This boss is located in the Sunken Valley - The valley below the sanctuary. From this idol or fast travel point, turn around and head up the hill. You can then jump across the gap to a tree branch. Here you will find 2 shooters that you must kill.
Having done this, you must jump onto the wall on the left, lean against the cliff to get to the hidden area. Here you will find a small pool of water that you can dive into. Through the pool you will enter a dark room with a boss.
Since this is a headless boss, use the same tactics as with the other Headless.
Upon victory, you will be rewarded with Gokan's Lollipop.
UNDERWATER HEADLESS AT THE ORIGINAL PALACE
This boss is located in Fountainhead Palace - Big Sakura. It will be in the large lake of the palace, where you need to dive deep to get to it.
Since this is a headless boss, use the same tactics as with the other Headless.
This Headless has another weaker Headless that deals a few hits to you from afar. But, you can easily avoid them. Upon victory, you will be rewarded with Yakshariku Lollipop.
CITYMAN WARRIOR IN THE ORIGINAL PALACE
This boss is located in Fountainhead Palace - Flower Viewing Place. From the Flower View Idol or Fast Travel Point, head to the Big Sakura Idol. Along the way, you will find this boss under a bridge that you must cross.
This boss fights in the same way as the Shichiman warrior in the Abandoned Dungeon. Before you start the fight, use Divine Confetti and Calm to counter his Dangerous Attacks.
Start by attacking from behind and hit the boss until he teleports. Now run to the river where he will respawn. This boss always teleports and spawns from the same location. As soon as he spawns, quickly attack before he fires a purple laser beam at you. It's best not to grab this enemy, as this will make it easier for you to get behind the enemy.
Once he is defeated, you will be rewarded with Lapis Lazuli.
DIVINE DRAGON
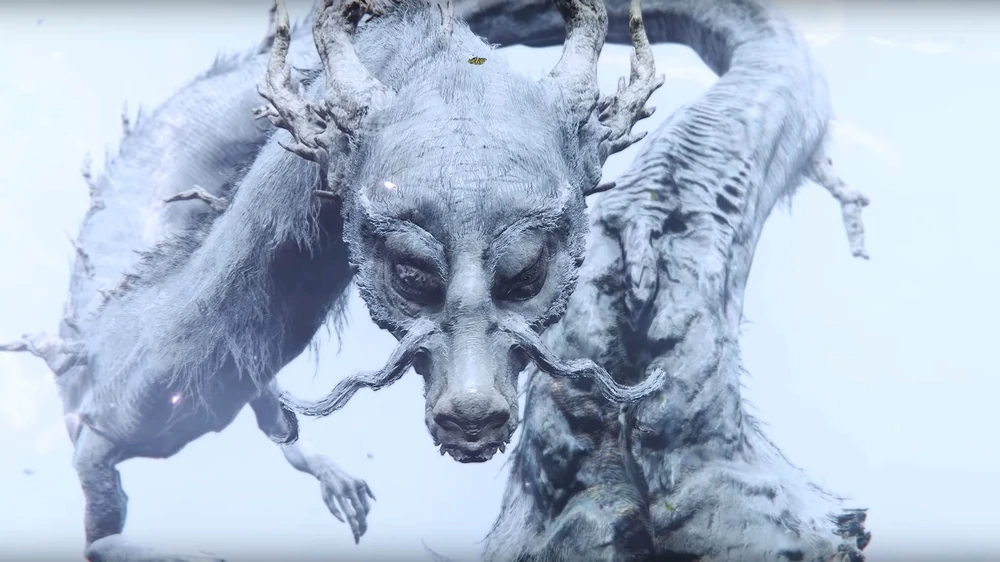
This boss can be found in Fountainhead Palace - Palace. From this idol or fast travel point, you need to go inside the next building to turn right and exit this building. From here, you can grab onto some tree branches and follow the stairs until you reach a woman you can talk to to start a fight.
To defeat the boss, the first step is to defeat all white enemies. These enemies only use poison, which you can dodge easily and doesn't deal much damage. As soon as you deal with all the white enemies, the Divine Dragon will appear. Run sideways to sidestep attacks and jump when you see the warning red attack symbol.
There will be a lightning bolt on the platform that you will have to grab onto when the boss is not attacking. This will give you a lightning bolt that you can direct at the boss.
Was the article helpful?