Tale of Immortal is an adventure tactical action game with elements of real-time tactics. This is a game based on Chinese mythology and culture. With backgrounds based on ancient Chinese myths and stories, players will have many interactive options with scenes and in-game characters that will influence the game's storyline and transform the game world.
Tale of Immortal: guide and review, walkthrough
This guide contains an overview of all the stages of ascension, how certain systems work, and guidance on common issues you may encounter in Tale of Immortal. It doesn't walk you through the basics, but suggests that you read tooltips instead.
Introduction
This is a guide based on the fact that I have played the game twice. I won't go into the basics, hovering over many items will actually give you a lot of clues as to what to do. I also haven't fully explored each spirit's upgrade grid, so I can't fully judge how good some of them really are.
So, you are warned that the game requires heavy polishing due to heavy reliance on RNG for drops. Sometimes I may edit parts when I feel they are poorly designed, kindly ignoring that I'm expressing my frustration.
Savescumming refers to the practice of saving before doing something risky and exiting the main menu without saving (either manually or at the end of the month) to try again. Chances are you will be doing this often.
There will be no screenshots as, frankly, I would have to add too much to cover every aspect in this guide.
I will link to the wiki regularly, you can find it here: Link to Wiki - [fandom.com]
Then there's the Chinese trainer from XiaoXing, which gets rid of a fair amount of dubious design options. I can't offer a link here as it is updated regularly, but you should be able to find it by name, there are also several English translations of it.
In addition, you can look into the Cheat Engine to reduce the mindless work of some parts of the game.
Character Creation in Tale of Immortal
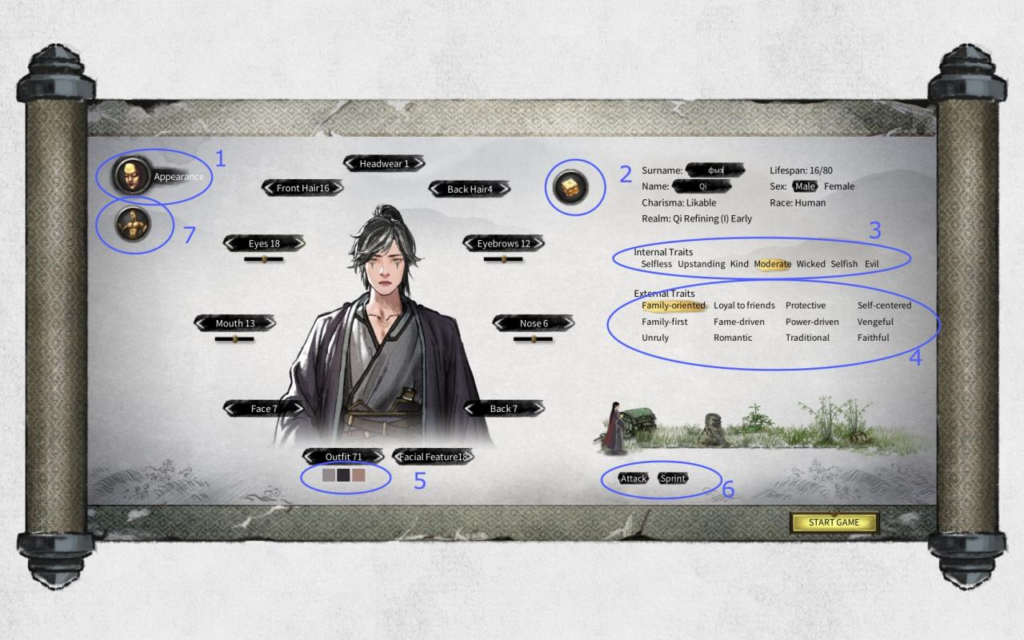
When you create your character's appearance, you can see the red mark applied. This means that you have chosen clothes that enhance your charm. Charm is largely meaningless, so don't worry about it.
Of all your starting statistics, only four are really relevant. You should roll until you have starting Fates with meaningful buffs to them if you want to make things easier for yourself: high perception will make it easier to learn manuals and, more importantly, give you more reroll points to upgrade traits later. This cannot be increased permanently, so your starting stat is very important. Aim to at least exceed 100, ideally significantly more if you want to roll/use the machine.
Good luck also helps a lot. It also cannot be increased permanently and you will encounter a lot of random events in the game. Less important than perception, but useful.
Agility is your movement speed in combat. There are only two starting fates that increase this (one for the achievement). The gain, however, is quite small (20 points), but it helps a lot very early on. You can upvote this, but it's useful.
Launch attack/defense makes the beginning easy, but the meaning quickly becomes meaningless. If you can get a promotion, that helps, but it's not critical.
All other stats are either not important for promotion, or any starting fate becomes meaningless almost immediately.
Just/Demonic not really important, the best quest results tend to come from doing Just Things, so you'll likely lean towards that anyway. Even though there will be a quest line much later where you can be forced to follow the demonic path even as just a character, you will move 50 points for it. If you choose the above boosts, some of them will also go to Just for starters.
By the way, almost all starting fates are on the verge of uselessness, and achievements actually add more than you don't need. The more achievements, the more difficult it is to get a good starting fortune. Enjoy mind-blowing rolling.
Tips for getting started in Tale of Immortal
A loose set of information that you might want to know ahead of time.
NPCs will steal from you like absolute bastards. The members of the sect will steal from you. Friends will steal from you. All thieves. It can become downright absurd when five people in a row try to steal the same item.
They steal combat manuals, ascension materials, and even spirit stones from you.
The first includes the guides you are currently studying.
If you are threatened, check the cultivation level of the enemy. If it's the same as yours, you should win. If higher, due to increased ascension bonuses, you most likely won't. Reboot. If you run during combat, you still lose the item.
You can prevent all of this by keeping all your ascension manuals and materials in your cave at the end of the month. If you study something and it's not done at the end of the month, teleport back, store it in a cave, and only then start a new month. I know it's tedious and I wish this system didn't exist.
Buy teleportation talismans. Always have something on hand. One set is enough, as you can simply migrate to other cities with money. Similarly, always upgrade your mounts and equipped ring as you break through.
Just go through the first area relatively quickly, items like books that increase Specializations start at 5 points in the first region, but give 10 points in the second. You don't need alchemy in the first one, so you can basically grind points twice as fast by quickly moving to the second region. However, you will need to update alchemy (and, for the sake of sanity, herbology) for every region except the first.
You can and should save breakout fates (unless in Chaos), item drops if you're hunting for special artifact metal, and certain breakout items.
Always save before making pills/artifacts as they can randomly fail.
Mood/Health/Energy can give you a debuff if they drop too low, so take a break from time to time/use hobby items to replenish them (for mood, monster drops/shopping in town). They are rather redundant as systems.
The first four difficulties only change the amount of grinding required, the Chaos difficulty prevents you from rolling the fates of the breakthrough. However, you can use the rare Mushroom Drop from Mushroom Man to get a second set of Fates.
For some reason, many hitboxes in this game are rectangles. You should avoid this. In this game, this means that some attacks can only be safely dodged by going left/right or up/down. You can also attack enemies better from above when they use spin attacks.
Tavern buffs are quite powerful, and you can get one for every drink and every region. Check the wiki to see what's available. You should probably get completely drunk before any big boss later on.
Damage works like Attack-EnemyDefense divided by resistances with some math multiplied by skill damage. This means that you must have high enough attack to deal damage in a meaningful way, that the resistance values are a lot stronger than they seem, and that the skill's damage value is actually a multiplier. The attack boost pill actually has double the power in the formula.
In connection with the above, you should always pump all the skills after breaking through to a new level. Basic attack bonuses overpower almost anything since they are multiplicative. It's really only a movement technique where it matters less. The red skill is roughly comparable to the next level grey-green skill, it's so extreme.
Crits compare the value of crit - crit defense to determine the chance of a crit (it's not that high) and then apply the crit damage bonus % - crit defense%. Due to the way things scale, the defense falls behind and the crits become more dangerous as the game progresses. Enemies in the late game can deal 5x damage as a warning.
Your spiritual roots not only allow you to learn skills, but also give you a chance to significantly reduce incoming attack damage, depending on how high your roots are. Unfortunately, spiritual fruit grinding is downright stupid, so to be honest I would just suggest Cheat Engine here.
Your main source of spiritual fruit is sects. You can either befriend a sect to get good prices or join one. They give up to twelve fruits for each species each year and if you look at the values you can see how stupid this is as you will need to befriend all the sects and purify them for many years. For multiple regions.
As for random events, they usually have certain outcomes depending on your choices. Do X, get spiritual fruit or money, etc. You will probably remember most after a while and after trying a few options. By the way, a scientist who asks about love can give you the fruits of mastery.
You will probably see the Fortune Teller NPC a lot, don't worry. The results are not worth it.
You can also randomly trigger quests such as events. This may include quests for which you are absolutely not ready yet. It's usually a good idea to put them aside if the dialogue allows you so you can at least get to the Late Kingdom.
The easiest way to make money is by auctioning ascension materials and red or orange skill books from bosses. More details in the city section. Unfortunately, you will only be informed about the appearance of the bosses of the zone in the area in which you are, as you would like to always see them.
Running depends on your movement speed (mounts increase it) and the number of enemies. One enemy makes this the easiest, so if you happen to run into something too powerful, try to run right away before it calls for supplements. If you escape with no monsters around, you won't even lose drops.
You must complete quests by being kind, helpful, and willing to talk before you fight. This usually gives you the best results.
If you want to test something, you can export and import your saves to create duplicate save files.
Tale of Immortal Skill Notes
The skills are completely unbalanced.
Sword is a very good skill for beginners as it provides solid damage and AoE. If you roll a good trait for a single shot LMB, you can even get pierced on it. The calls are mostly not that good.
Fire can be made quite tanky. The blade can be turned into a nearly invulnerable face. The Sword + Wind Movement could become forever invincible. Fist has a special fate that can let you create a Boss-OHKO build if you need build ideas.
Lightning is pretty fun as it has a chain lightning LMB that really gnaws through enemies.
The Finger and Palm look like they have a decent AoE, and the Finger move ability allows you to get a crit. Unfortunately, this only really matters to enemies.
Water has damage issues and Spear is generally considered weak. The tree is mostly focused on summoning, which is generally weak in terms of damage but good for drawing aggro.
Wind is by far the best movement technique. This makes you invulnerable for three seconds (feats can increase this) while you can still attack. It's incredible.
Water movement leaves a clone that insults enemies, this can be useful against specific bosses.
Single hit damage is generally better than single target AoE multi hitters, although this is just my rough impression. Spread type attacks against a single target can also be very powerful.
The rarity is as follows: gray, green, blue, purple, orange, red. As for skills, each higher rarity level has one more trait than the previous one. Attack skills also increase base damage. The difference is about twice the damage from blue to red. This boost is very high and is the main reason for trying to upgrade to red skills. Passive skills also receive significant base buffs. From blue to red, the difference is about 25% for the base value.
Never forget to upgrade your pa*sivs if you can. They provide an absolutely massive boost to your stats and keeping them up to date becomes really important in area 3. For these you will need skill points, from NPC interactions and Ascension tournaments in cities, see info below.
You can equip up to 8 different devices. You cannot use two pa*sive that increase the same stat, but sometimes traits can increase stats that the skill does not have.
These traits are a pretty big part of why red skills are king. The more traits, the more boosts, in addition, you can increase traits to red, the highest level. Some traits are even critical for builds to work, good luck getting them to drop the skills you want.
By the way, in region 4 you will have to grind materials to improve skills, since it becomes prohibitively difficult to do this in combat.
Trait-rolling (Insight) makes sense as long as more than half are at the highest level of the skill. You probably won't have enough reroll points to go beyond that. You cannot change the nature of the trait, only the strength of the enhancement. Throw points depend on your spiritual roots and perception, which is why the latter is so important. Unlearning Free Slot Skills Gives You A Few Things To Understand.
Items dropped by world bosses can be rerolled, but the active skill that drops depends on your higher spirit root (pa*siv does not). If you're choosing a singleton build, you'll definitely want to make sure it's also your highest spiritual root for a guaranteed redbook source. There are no other guaranteed sources. This, by the way, is one of the main problems with pumping your skills, pray for a good RNG. There are a few events that permanently increase some spiritual roots (elemental, wood, sometimes all martial), so you can leave a little gap to counteract this.
Another source of red skills is the auction house and the ultimate+pa*sive set that the sect has. Here you go. Up to region 3/4 you can work fine with purple/orange as normal.
Introducing the Breakthroughs and Destinies of Tale of Immortal
Basically, you should always aim for an optimal breakout with the highest rarity items, as it usually doesn't take much longer and the stat boosts stack. Especially on difficulties above Normal. As a general rule, you should value attack/defense buffs over vitality buffs, etc.
For minor breakthroughs, you just need a tablet, the quality doesn't matter, just buy it in the city.
Only cities (large blue map icon) offer items for the second tier of the region's realm.
By the way, for every second level of breakthrough there are only suitable recovery/buff pills, which means that at the last level of the region you really won't have good pills.
Always remember to improve your attacking skills and your punches after breaking through.
The later you go, the more bonuses for breakthroughs. Unfortunately, this also means that it becomes less and less possible to defeat higher level NPCs. You can if they're still early and you have the tavern buffs + the defense-reducing spirit artifact, but it may well not be possible.
To be honest, I find this a bit frustrating, since transcending the realm is the core concept of the new cultivation power fantasies, kind of wishing the boost pills were stronger but also hurt you or something.
Every breakthrough has a chance to fail. When this happens, you get Lightning Tribulation. You can save it, or you can endure it with wind movement + pills. It doesn't even scale in later levels, so it becomes less threatening over time.
The fates are a tricky topic since some of them are build dependent, but the bottom line is that most of them are bad. Expect a re-roll. Many of them come in levels, with the later ones offering better power-ups. When you choose a level I skill, you are much more likely to see later levels. You can look at the bottom of the guide for an overview. Generally speaking, only combat fates are useful.
If you ever fail to find something, you should continue to explore the region you are in. All important areas are marked on your world map once you find them. You can also buy special talismans from shops that allow you to find nearby special zones.
Chi Refining (I) Tale of Immortal

This is the first introductory segment after the lesson. You must know how the basics work. You need pills from shops for minor breakthroughs, and items to break into the Foundation (II).
As a general rule, always choose the highest climbing route. Bonus stats accumulate over time.
You cannot use the ascension element more than once, even if you have duplicates.
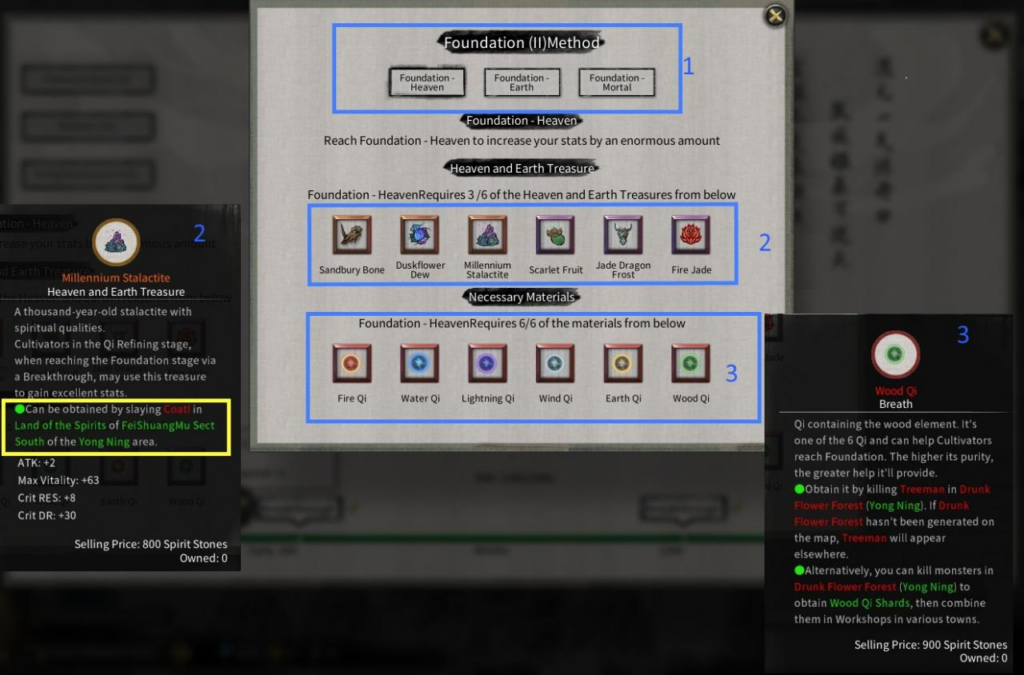
To go to the Foundation, you need 3 special items (for the Skyway). Stronger ones come from the "Land of Spirits". These are special places that cost 500 Spirit Stones to enter. After you pay, you will enter the dungeon and the boss at the end is guaranteed to drop a certain item out of three. In short, you need to find and visit all three Spirit Lands. Do not confuse them with the Arcana Lands. These places cost 1000 stones and will kill you right now.
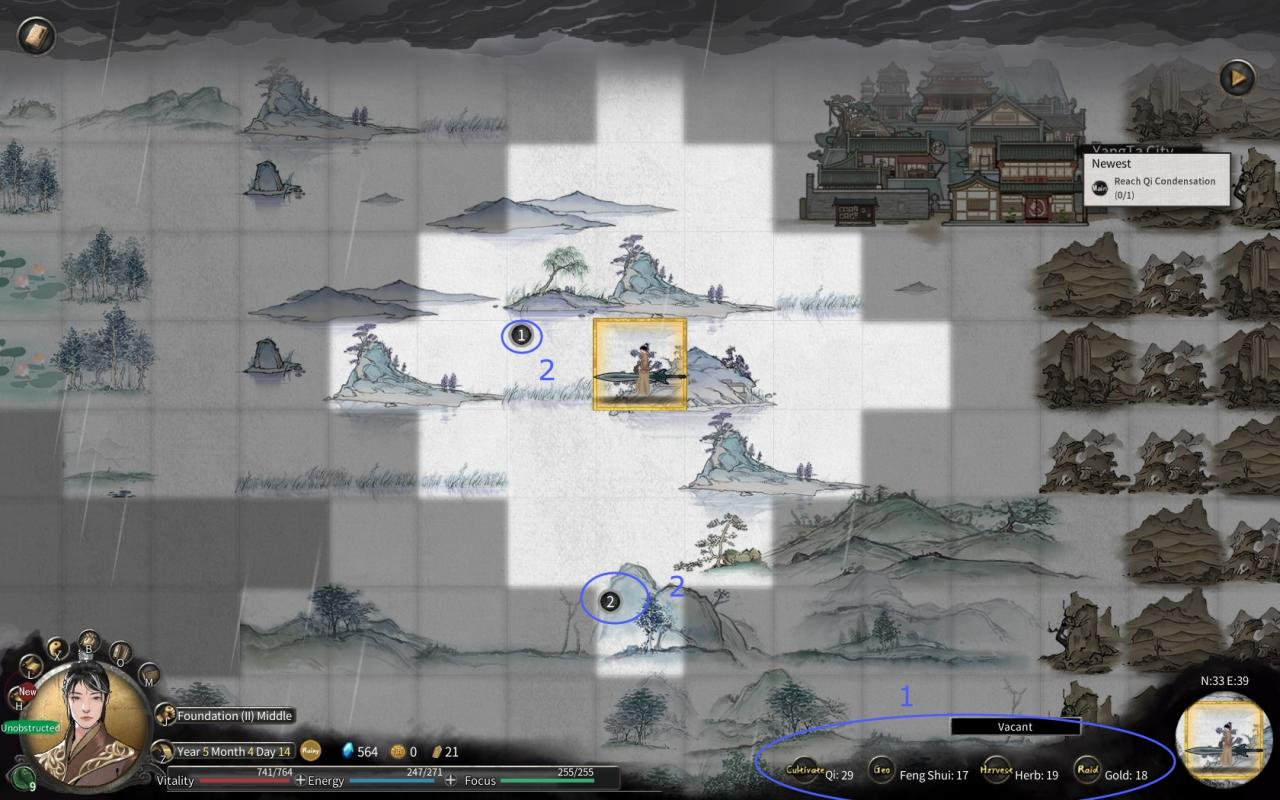
The second part is the Qi pearl. 6 separate elemental zones can be found in the region. You should take the time to just map out everything for this purpose. From time to time a zone boss will appear and you will be notified. If you hurry (you will get about 3-6 months), you can kill them and get a guaranteed High Purity Qi Pearl of a*associated element. Bosses will also drop Purple Ascension Material and possibly a Rare Metal Artifact. Don't throw away the last one.
For this region and all others where it matters, you can buy talismans that highlight nearby elemental zones if you have trouble finding them. Although usually you should just explore everything to find all the cities, sects, special places, etc.
If you're unlucky with spawns, you can manually make Qi Pearls. If you fight monsters in the corresponding elemental zone (don't confuse wind and lightning, by the way), you will receive Elemental Pearl Qi Fragments. In the cities you can synthesize 100 of them into Qi pearls, usually of lower purity.
The purity of the Qi Pearl doesn't matter, it only affects your chance of getting Lightning Tribulation, which isn't an issue if you have a few healing pills in your slots.
Don't forget to choose a good fate and upgrade your skills to Foundation level (II).
Unused ascension materials make good gifts or can be auctioned off.
You should try to complete this step relatively quickly, as specialization books in region 2 cost 10 points. There is no point in trying to grind alchemy and so on in region 1.
Foundation (II) Tale of Immortal
The foundation is very similar to the first kingdom. You should have noticed that you have a lot more stats and are pretty powerful. Get skills for a new level, the difference will be noticeable. Now you can only do this in the main city. While you're there, upgrade your ring and mount.
By the way, there are no healing pills for the Foundation level, and the Qi pills are no longer very strong. This will happen in every region for the second cultivation level and is quite tedious.
You need 4 treasures for the last step. One drops from the left world boss in the Lei Ze area, to the bottom right corner. In it, you are automatically attacked, so be prepared with pills and a teleportation talisman.
Three more may come from the Arcane Lands, those that cost the 1000 stones mentioned in the previous section. It's the same as before, dungeon, boss, guaranteed specific drop.
Lesser Treasures are random drops from lesser bosses (no red skull map marker) in Lei Ze's area.
You also need a breakthrough pill. You can create them for yourself in the city workshop or craft them yourself with Alchemy. The latter, however, is a waste of time, Alchemy grinding is best done in Region 2. Just be prepared for potential hardship if you fail your roll.
After you've broken through, you need to go through the bottom right corner to the next area. As soon as the month ends in a new region, you will be kicked out of your sect and allowed to freely choose a new one.
Chi Condensation (III) Tale of Immortal
You should now move to the lower right area, past Lei Ze. As always, get new skills, equipment and so on.
There is something new in this region. You can enter the Ascension Tournament once you reach level four and you can start crafting artifacts if you want to get through this grind.
Specialization skill books now cost 10 points, and you can also start this job once you become Late Qi Condensation or Golden Core. At least Alchemy and Herbology will be useful.
Avoid going down to the top right corner of the ocean, you will trigger a boss fight where you have no hope of surviving. The quest line will solve this problem later.
To advance, you need to find four Spiritlock circles, they are usually found in the lower right corner. When you enter, the turtle will demand G4 Spirit Fruits from that region from you, 3 for each circle. You will then have to survive an endurance fight while protecting the turtle. The enemies mainly target the turtle, the ability to clear mobs is very important. However, on Normal this is not particularly difficult. When finished, you will receive a treasure. Smaller treasures can be obtained if you do this again, or as drops from elemental zones, but there really is no reason for this.
You also have another world boss to kill, this time in the bottom right corner in Lei Ze.
Finally, you need Qi Pearls again, it works the same as before. Kill bosses that spawn in elemental zones, or mine pearl shards and synthesize. Lesser Break requires herbs from the north of the filled area, where you are automatically attacked.
During the "Filling the Earth" quest, you will be given the choice to save the girl. The decrease is permanent, but most builds don't make any sense in the divine sense. It is added to your cave and gives you items based on hearts. You can increase them by giving gifts, but even for 5 hearts I got nothing but junk from her. However, it looks like a new quest has been added that she is on, giving you a new boss fight. Keep her close, I think.
Golden Core (IV) Tale of Immortal
If you have joined a sect, register to participate in the Ascension Tournament. You really need those skill points.
The treasures are the same, only now they are located to the north of the filled area (Hundred Mountains, the place where you will be attacked automatically) in the Circles of Demon Powers. And the turtles require 5 fruits each, but luckily there are only 3 circles. The world boss is in a new area, but there is a new snag.
Making a pill requires learning alchemy, the workshop will tell you that the recipe is too complicated. Thus, you must grind your alchemy in this region. The real test will be the herbs. You will be wondering where to get them from since you won't have them yet. There is a dungeon in the Hundred Mountains called Cloud Cave (the northern area where you are automatically attacked). In it, you can donate 50 herbs (any one will do) to summon very durable mandrakes and tree mini-bosses for a limited time. You won't deal much damage unless you seriously upgrade yourself, but you can also just run it over and over again. Each kill drops the herbs you need, trees fall more. A good mobclear makes this easy.
This is done. Register for the Ascension Tournament one last time before it's time to go.
Origin Spirit (V) Tale of Immortal
Welcome to the first region, where things get a little more complicated. Expect to spend a fair amount of time here, in addition to having to improve your skills more than before.
By the way, this is the worst method of ascension of all. Just to be warned. The pill needs to be crafted again by yourself, so you will need to upgrade your alchemy (and herbology if you want a decent drop rate).
Super fun is getting heavenly treasures. One of them is, as usual, a world boss, but the rest are RNGs of the worst kind. First you need to define Lands of Beyond. You enter your divine sense and enter the battle arena.
Your goal is to destroy the core of the array in the middle, while being attacked by monsters and constantly taking damage from the area. If you've upgraded enough, this shouldn't be a problem. Lifesteal makes this a joke.
This will give you the map element. If you pay the Spirit Stones, it will show you a location on the map where you have to use Feng Shui nearby to find it. No enter the snow zone, you are not ready for it.
You'll find a cave with a fox boss that can be quite tanky. Once he finally dies (moving the wind is good), he will give you... A completely random treasure. Including the worst. Or duplicates. Or even none at all, if you like. You need a new card for every treasure, but you can save the boss fight itself.
If you want to get optimal treasures, prepare yourself for many attempts to get the last missing one if you are not lucky. (It took me about 30...)
I really hope that this breakthrough will be reworked, especially since the next level is the best in the game.
Land of Origin / Land of Beginning works in the same way as the elemental zones from the past, but this time there are only two of them. Just get Heaven Qi. You can also take a pill, but why? Earth Qi is good for sale.
Nascent Soul (VI)
Welcome to one ascension segment that I think is really fun. It is quite difficult and very difficult. Now you are strong enough to survive in the northern ice region.
First step, upgrade your skills. You will most likely spend a lot of time preparing for this breakthrough, so work on getting the red skills. If you have a mono-element build and this is your highest spiritual root, you can kill the XNUMX mountains world boss to get red attack skills, and a sect for some red pa*sivs. You should probably also visit the auction a few times and perhaps grind down your spiritual roots. The latter will allow you to use a lot more features and you will still spend a lot of time preparing here. Pump up your skills and comprehend them too. Participate in Ascension Tournaments for skill points.
Now for the breakthrough. When you go to the northern ice area, you will be given a special scroll, read it to start collecting 5 souls. In this area you can find 5 special zones. If you enter them, a guard will attack you. They are quite strong if you are not prepared, but skills of the appropriate level will surpass them quite easily. Water Guardian can summon clones that attack too, you can just stay away from them. Each guardian will give you a task to complete after you defeat him.
Someone wants a pill to be made, the quality doesn't matter. Another wants to get material for ascension from the Land of No Return. It works the same with the cards of the previous level, BUT this time the quality doesn't matter. You are also tasked with picking up a few items, just follow the quest markers.
Once the quest is completed, you can challenge a unique boss. They are all very, very powerful. I hope you are prepared with good skills and lots of healing pills, preferably the highest quality. You will need them. If Wind Movement doesn't help, try Water. The clone draws aggro from some of the bosses, which is really handy. Doubly so if you have a reduced CD. I won't spoil the bosses, they are pretty neat.
Once you defeat the boss, you will earn a Soul Fragment. You need to use it in your inventory to add it to your rotation and temporarily gain its buffs.
Then you must forge an immortal soul by climbing the stairs to heaven, always located near the city. This is a very long endurance exercise. Make sure you have your tablets. We hope that your skills are prepared thanks to the previous bosses.
You are given a 2x5 area which is a ladder, with one area marked as a boss. In each area, you must fight a set of normal enemies or mini-bosses. Once everyone is defeated, you will receive a Soul Fragment. You can choose one of three, usually just pick the highest attack/defense combo.
You can interrupt Soul Gathering if you go straight for the boss, but why do that when you can get more power?
I would suggest moving the wind and call it immediately at the start of the first fight. I had enemies that spawned right around me and reduced my health to half health and I had little time to react. However, this happened only in the first area.
When you get as many Soul Fragments as you want out of 9 max, fight the boss. It's not particularly powerful, but some attacks are actually unavoidable. If you still have a lot of pills, you will be fine.
Now you must create your soul. You sacrifice four fragments and keep one as the base (the one you don't choose). The contained soul will give you special buffs, which you can see in the description.
To be honest, as far as I can tell, the blue dragon is simply the best choice. The attack boost is massive and also gains a very powerful special attack. I think turtle can help with some builds too.
And everything is ready. What follows is a terrible routine. If you encounter a giant, do not continue the quest line until you are in Enlightenment (VIII). Also, you might want to stay here for a while and take part in tournaments to earn skill points. The next ascent will take a long time before you're ready for the next region's tournament.
Soul Shaping (VII)
It will be long and rather difficult. You really should upgrade your skills and abilities for the next level. Also, more alchemical grinding for the pill.
Explore the area to find new strange dungeons, there will be six in total. Each of them will have two colors together, representing a combination of two elements for the dungeon. In these dungeons, you can find dao stones in the same color as the entrance to the dungeon. Each stone type has two associated elements that are found in the name of the dungeon.
Your first order is to go to the dungeons, fight the enemies (up to the third room, read the next two sections first) and get 1500-2000 each dao stone color Yes, it's quite a long grind, but you'll need them, trust me.
| First name | Color | Combat element | Spirit element |
|---|---|---|---|
| Ruby | Red | Blade | Fire |
| Emerald | Green | Palm | Forest |
| Obsidian | The black | Finger | Water |
| Amber | Yellow | Fist | Lands |
| Pearl | White | Sword | Wind |
| Amethyst | Purple | A spear | Lightning |
How do dungeons work?
The dungeon consists of five rooms in a row, ending in a boss fight with one of two bosses. They are dungeon specific and you should note which dungeon bosses you can easily defeat later.
- 1. Base mobs and minibosses, each dungeon has its own set of mobs.
- 2. More of the same
- 3. A boss that will usually be weak and easy to defeat.
- 4. A group of minibosses combined with a cultivator. Depending on the skills the cultivator is rolling, they can be quite strong. The camera will lock when you kill the cultivator, you may get hit while doing this.
- 5. Each dungeon has 2 bosses, one of which is randomly selected to fight. All of them are very powerful if you are not heavily upgraded.
Once you clear the room, the action will stop and a two-color dungeon symbol will appear in the middle. If you touch it, you will continue the fight. If you want to get out instead, press ESC and run out of the dungeon. Since the fight is over, you will keep all the dao stones you have so far. In terms of speed, it's usually best to clear the third room and then run. The cultivator can be a gamble with its own skills and possibly a mini-boss that can overwhelm you.
modifiers and you
After you clear the room, you can continue by touching the symbol in the middle. You will be shown a new screen that defines two new modifiers for the rest of the dungeon, ending with 8 modifiers if you complete the dungeon. These can range from enemy health regeneration, increased damage to guaranteed crits, increased attack cooldown, and more.
The modifier has an *associated element, a number, and a color. The element matters for the souls of Tao, the number also indicates the strength of the modifier, the color is intended for rolling.
The modifier will only appear if your elemental spiritual root is above the threshold. 5 point modifiers are always on, 10 requires >100, 15 means >200, and 20 point modifiers require your element's spiritual root to be over 300. Here you may find that you need to grind fruit for a while. On the other hand, having low spiritual roots can prevent some of the more dangerous modifiers from appearing.
If you run into a mod that is too dangerous (like 5 guaranteed crits), you can click the arrow below to re-trigger the mod. It costs modifier color Dao stones. Every 3 rolls, the cost increases by 5 gems per reroll to all existing modifiers. This cost dumpedif you move to the next room.
You should now prepare to get at least 1000, ideally over 1500 dao stones of each color. Since you will be twisting a lot to get your perfect Dao souls. Ignore the detail in the middle of the modifiers until you're ready.
What are souls for?
Once you've gotten enough stones and hopefully buffed your character, you should try to make a few runs to the end to see if you can beat the boss from the dungeon. You will need to do this in order to acquire the Souls of Tao for ascension. You can just sell dao souls on the auction house, it's a really good way to make a lot of money.
The Dao Souls you receive will grant you a new domain ability once you ascend. The properties of the specified area are determined by the primary and secondary elements of the Tao soul. Primary (Stat) determines the effect, secondary (Substat) provides a stat boost. If you have the same primary more than once, it will result in a different law. (Two sword souls + 1 primary tree soul gives a tier 2 mixed sword and a tier 1 forest domain, 3 basic means tier 3.)
You might be tempted to just get the domain for your main element, but that's not a good idea. Many domain effects, unfortunately, are not very good.
Wikipedia entry - [fandom.com]
Sword 3 with spear and wood (extended duration) is good for many builds as the ults hit multiple times and build those stacks quickly. Blade 3 is great for blade assembly. You can also mix lower level laws if the total is 3 (1 + 1 + 1, 1 + 2).
Now decide what you want and find out what combinations are possible.
Merging the souls of the Tao requires matching the elements. The primary element of a Taoist soul must either be listed in the primary or secondary elements of other Taoist souls. It must be mutual for all three souls. If you make the same primary 3 times, they will all merge into the 3rd level domain of your chosen element. If you want to use a mixed law (for example, 1+1+1), then the primary must be among the secondary other souls.
If you want to get the maximum stats from the highest purity, you should only have one primary and two secondary elements. In other words, if you want a high purity mixed soul, your Taoist souls can only consist of a primary and two secondary, which are the primary souls of other souls.
However, the increase in characteristics from purity is not so great. A less pure dao soul can have more than 3 elements, making it easier to merge.
How do I get the dao soul I want?
As you progress through the dungeon, pay attention to modifiers. Each has an element and a number. On the roll screen, you can see all elements with sums of modifier numbers. Primary is the one that is furthest away, which has the highest number. The secondary ones are all the others with smaller numbers. If you have more than 3 elements you will get an impure dao soul, you will also reduce the chance of actually creating one after clearing the last room.
Now your goal is to re-roll all the element modifiers you don't want until you only have the elements you want to have. Make sure the highest number is the main one you want to have. If you want maximum purity, the primary should be 50 or more. Minor sums does not matter.
This is what all stones are for. If you're unlucky, it can take an absurd amount of rolls (I've reached a cost of over 150...), especially if you want a pure dao soul. Keep in mind that you can roll between each fight and the price will reset after the next one.
Enlightenment (VIII)
In this patch, this is not yet in the game. The preview currently states that you need to farm drops again. You can already get the Emerald Leaf from the world boss in the desert area.
After the last section, you've got a shiny new ability, your domain. In combat, it takes a while before it can be activated, but then it triggers the effect you have chosen through your dao souls (you can read it on the breakout screen... after you have chosen it. Not before. Sad.) For now enemies are in the area of effect, they will be affected (with some exceptions). If a domain builds stacks, they stay until the domain ends.
It requires Dao points to use, which replenishes every month, more if you equip a specific spirit. There is no other way yet.
If you want to head west, you need to complete the Giant's quest line, make sure he's healthy. Since there are time limits, you should only start it when you are in Enlightenment.
There is no point in going through the desert right now, once you have completed the Giant quest. There is nothing at the end and you will be teleported back. There are no cities there, so even if you find a trick past it, there is nothing there. Mobs are getting harder if you want to test if you can make the trip I guess?
It's annoying that NPCs from the realm of Ascension are around and might try to fight or steal from you...
If you want to challenge, fight the Fallen Vale boss from the last area with 50 Nether Breaths. Good luck. Save in advance.
Cities
All storage caverns are interconnected and I think that space is infinite? No one can steal from them either.
Inns restore all your statistics.
The Quest Board allows you to earn Spirit Stones and Mayor's Orders. The latter is the currency for the manual pavilion. You can get new quests every month, but you don't have to complete them in a month. Keep in mind that quests are multi-level. If you make a breakthrough, you will get more difficult quests. In Zone 4, hell quests will be tough if you don't have the full set of tiered and orange-red skills and pa*sivs. The resource quest will be easy, as you will quickly have a large number of items. Avoid ring of storage or a*sa*sination quests, as it requires stealing/fighting and causes hatred towards NPCs.
Feng shui treasure hunts can end up with NPCs attacking you. They shouldn't be a problem. However, treasures are almost always worth nothing.
Taverns can give you temporary buffs (useful), increase your affinity with random groups of people in the city, and allow you to start a small number of side quests (purple exclamation mark).
In the markets, you can buy basic pills, minor breakthrough pills, rings and mounts, teleportation amulets, and some other items. They also have a set of books for learning specialization skills.
Each city has its own set of books on feng shui and herbology, but not on mining. So make sure you round up and buy them all when you are about to leave the region.
Cities (bigger, blue map icon) offer items for the second tier of the region's realm.
Pavilions allow you to buy combat manuals, with the exception of ultimate skills. Usually only up to purple rarity. They require stones, mayoral decrees and reputation (from quests). Cities have guides for the second level of the region's realm. This can be decent if you've broken through and need to upgrade your skills. There will never be anything red in them and almost never anything orange. They are updated every 6 months, so don't delay if you need it.
Workshops cover forging and alchemy, which will be discussed below. Synthesis allows you to make chi pearls from fragments and upgrade materials to improve skills if you need more.
You can buy forging and alchemy recipes here.
For cities only:
Immortal wardrobe allows you to buy new outfits. It's pretty much pointless if you really don't like it. You need to buy an item to start a limited-time monster battle for drops to buy anything.
Auction houses sell their inventory every 2 years, the first month. They cannot be dropped since their inventory actually comes from NPCs. Here you can sell level-appropriate red/orange items for a lot of money. This is the main source of red guides, be sure to check it out. However, manuals are usually only for the second kingdom of the region.
During the auction, if you like something, you can try to kill the NPC. Keep in mind that here you can incur hatred for outbidding someone, although this hardly matters. Also, the prices get quite high, 10-20 times the selling price, which is not uncommon, make sure you have plenty of cash.
NPCs seem to have a certain buy limit, so if you reload you can just bid directly.
By the way, you can force the game to skip all the items that you don't need anyway.
After the first region of the Ascension Conference, a rather long tournament for the Fruits of Skill. They happen every 3 years. You can participate if you are a member of a sect, have a high enough reputation (complete quests) and are at a later level of the region. You should always participate as skill point grinding is dumb and you can get a lot of points at the same time.
You will be fighting the strongest NPCs in the region, and rarely can a world simulation put you up against the next level NPCs. Be sure to drink first. NPC wins are random but weighted based on their stats, so re-rolling can sometimes let you get past the cheater.
By the way, there seems to be a small bug where if you re-register right after the tournament ends, you won't actually register. Let the month pa * s.
Sects in Tale of Immortal
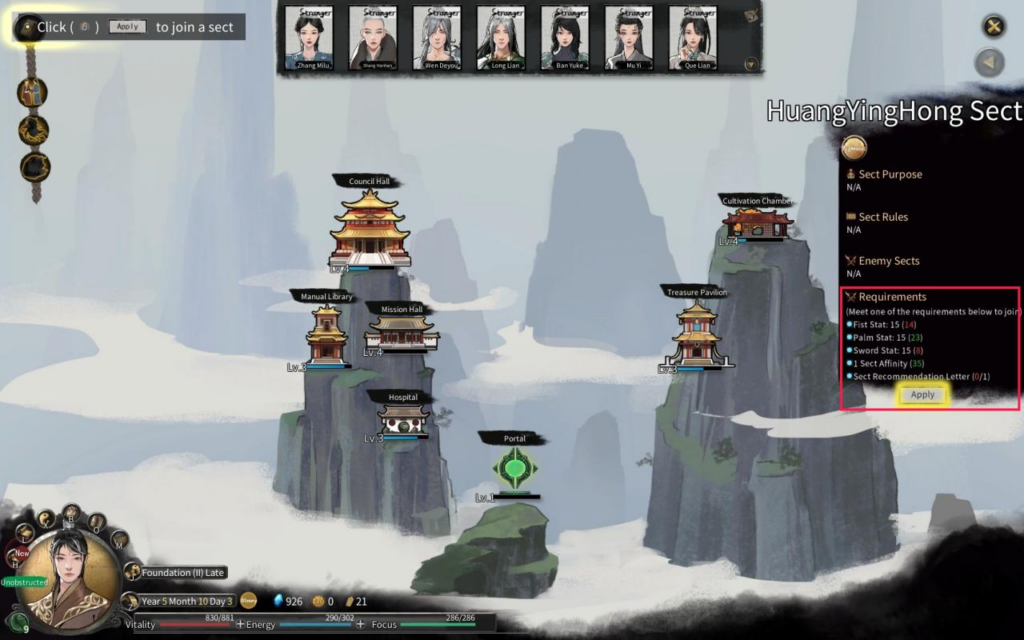
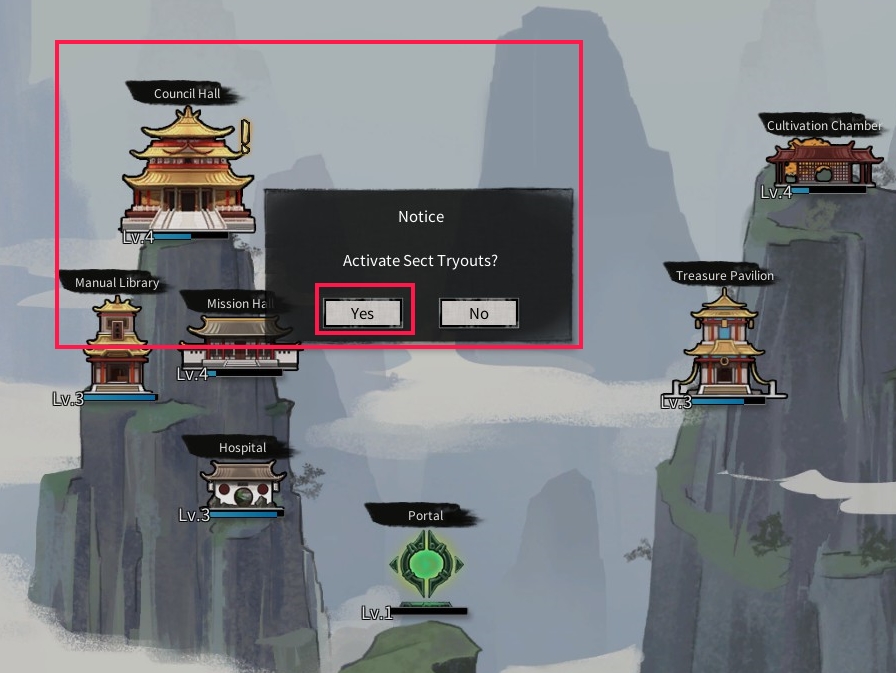
To join a sect, we need to meet the requirements:

In this case, you need to have one parameter specified in the list, the attention ticket received at the beginning of the game is also a pass to the sect.
Then when we entered... and nothing is available that we would like, but we will receive a message that there will be a knockout competition soon, it is in 2 months:
At the specified time, we arrive and launch the event, fights between students begin.
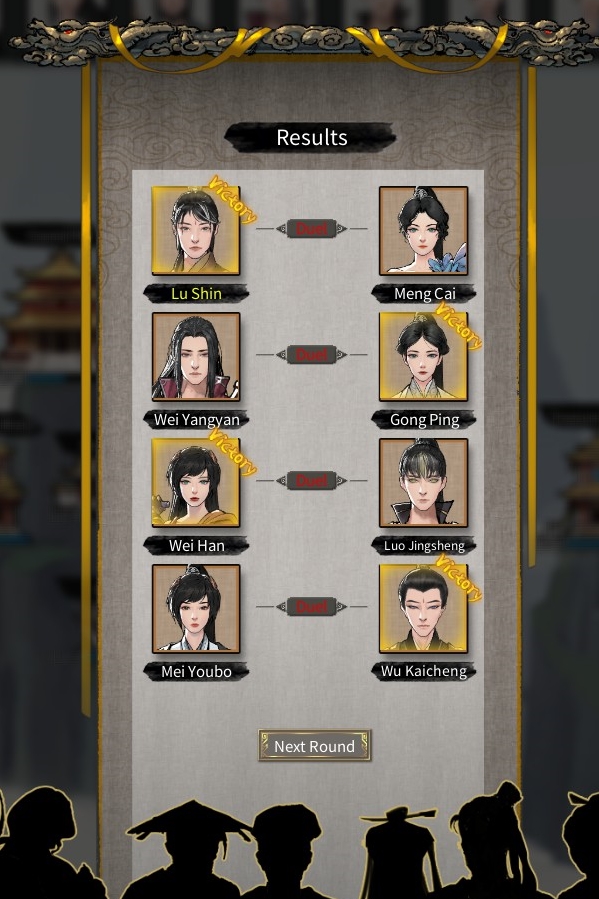
At the end of the fights, the reward will be distributed:
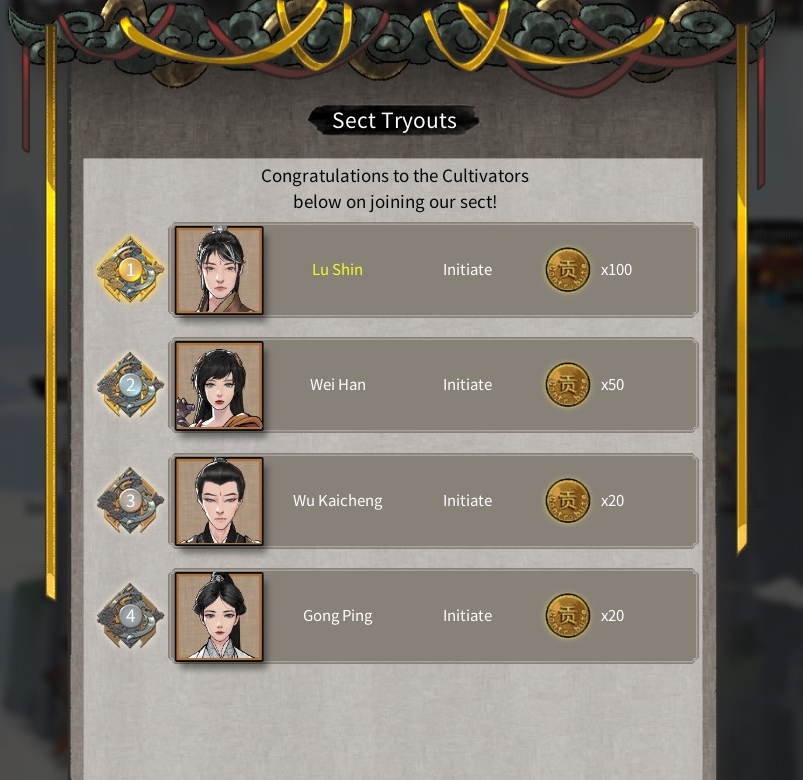
and friendship will grow with all students.
And after that we can start visiting all available houses in the sect:
council hall - house of the council of the sect: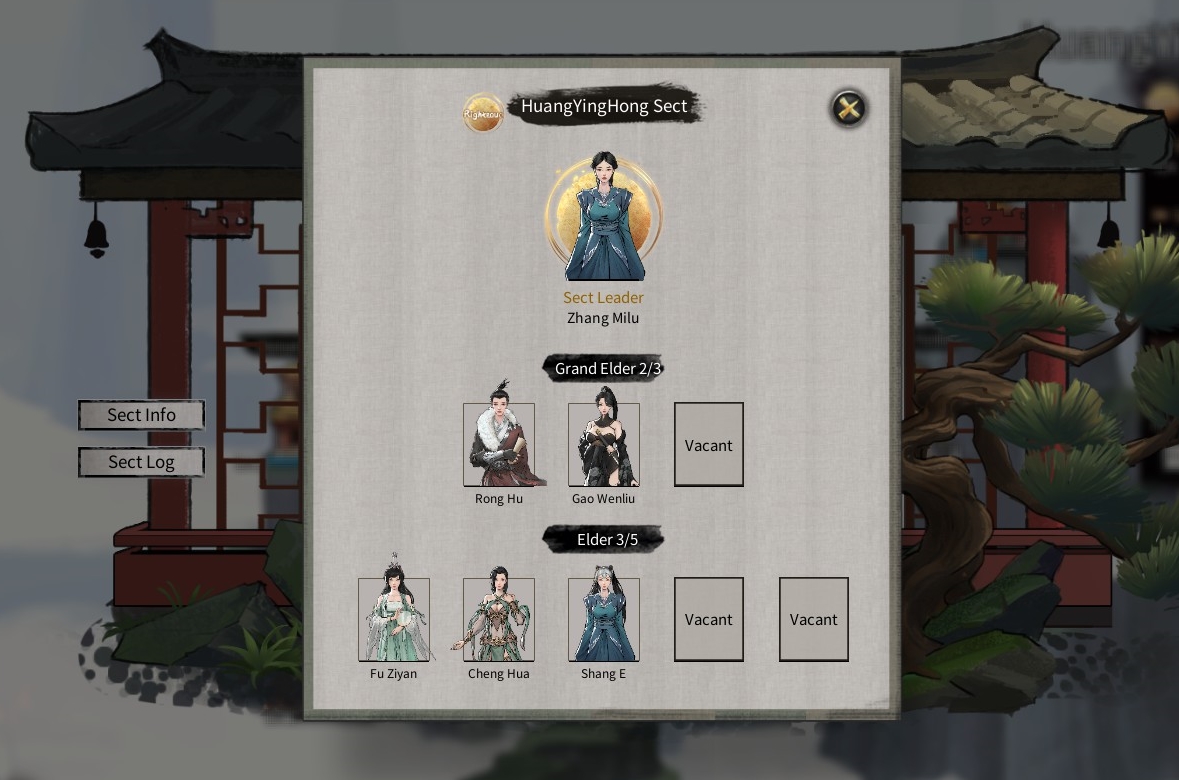 the elite of the sect, its leader and masters are represented here, there are also vacant places, that is, I think they can be taken until they are mature)
Hospital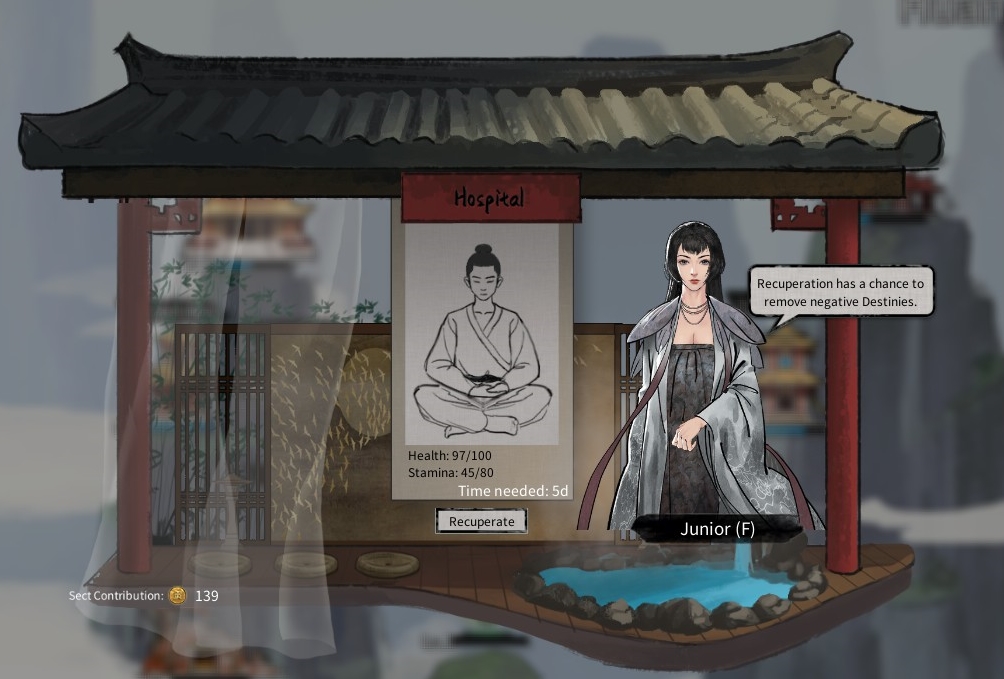 Here you can improve your health and energy.
Library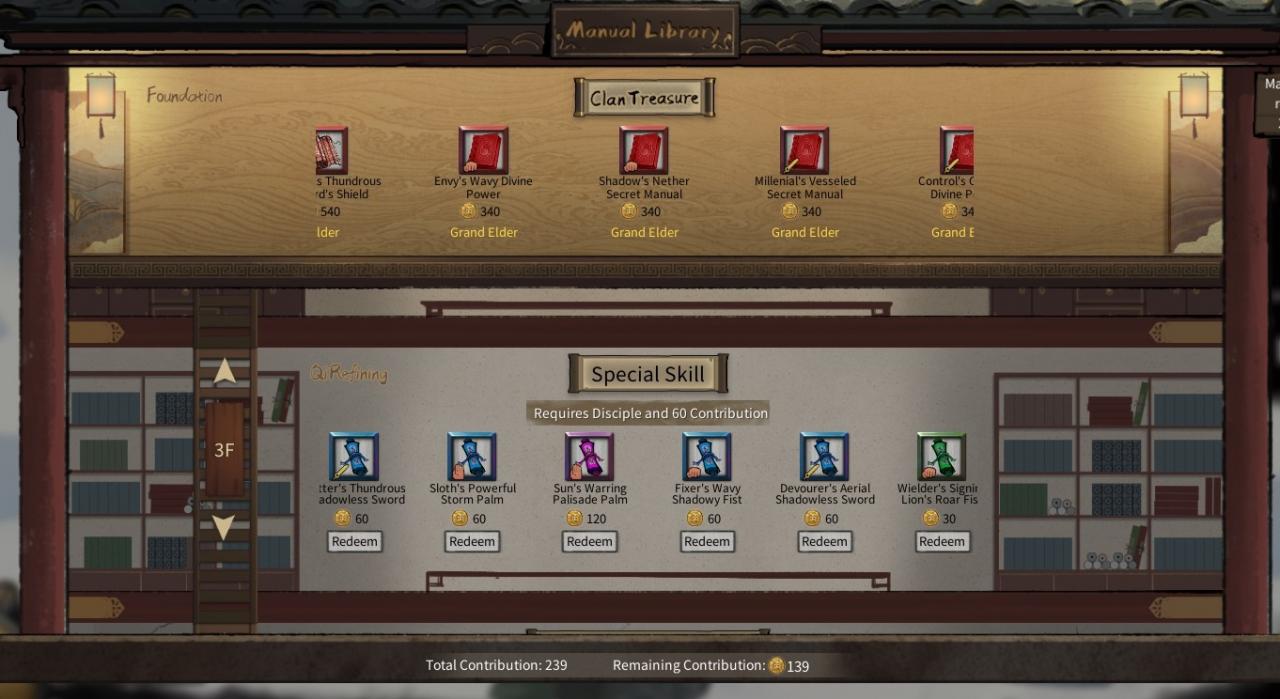 contains books that can be bought with sect tokens, which can be earned in sect duels or by completing sect quests,
Order House of the Sect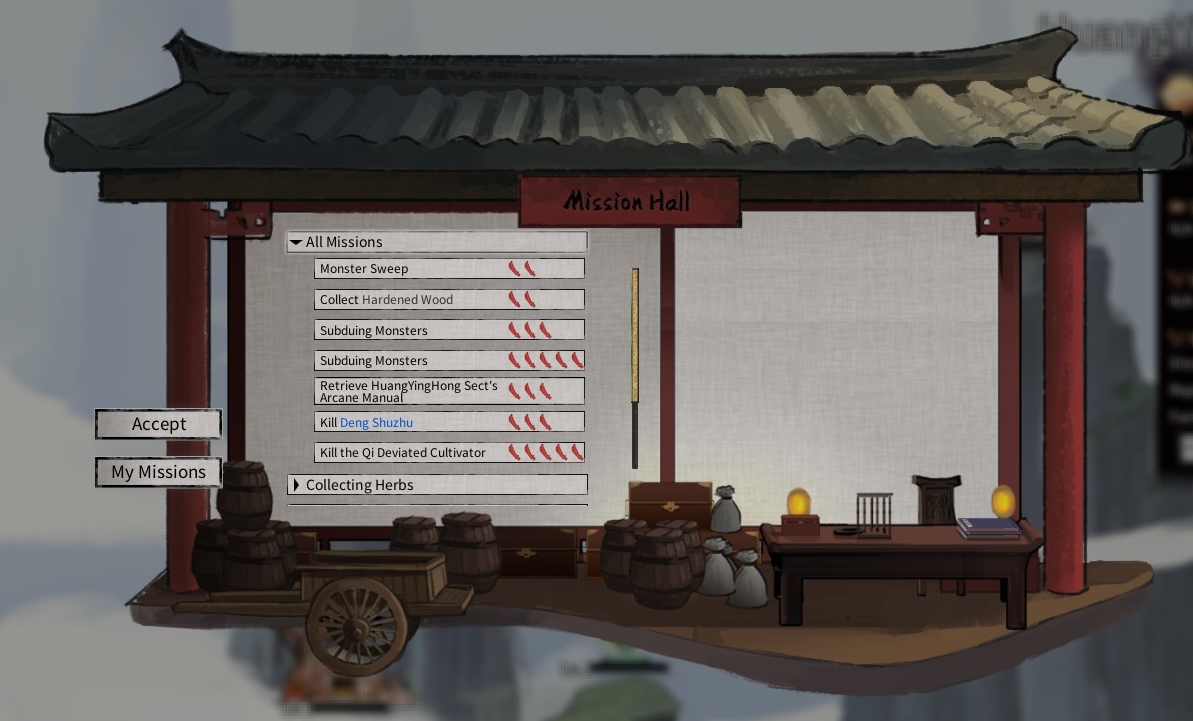 here you can select quests to complete and turn in right there, as a reward, reputation and sect tokens, which you can buy but only in the sect.
house of meditation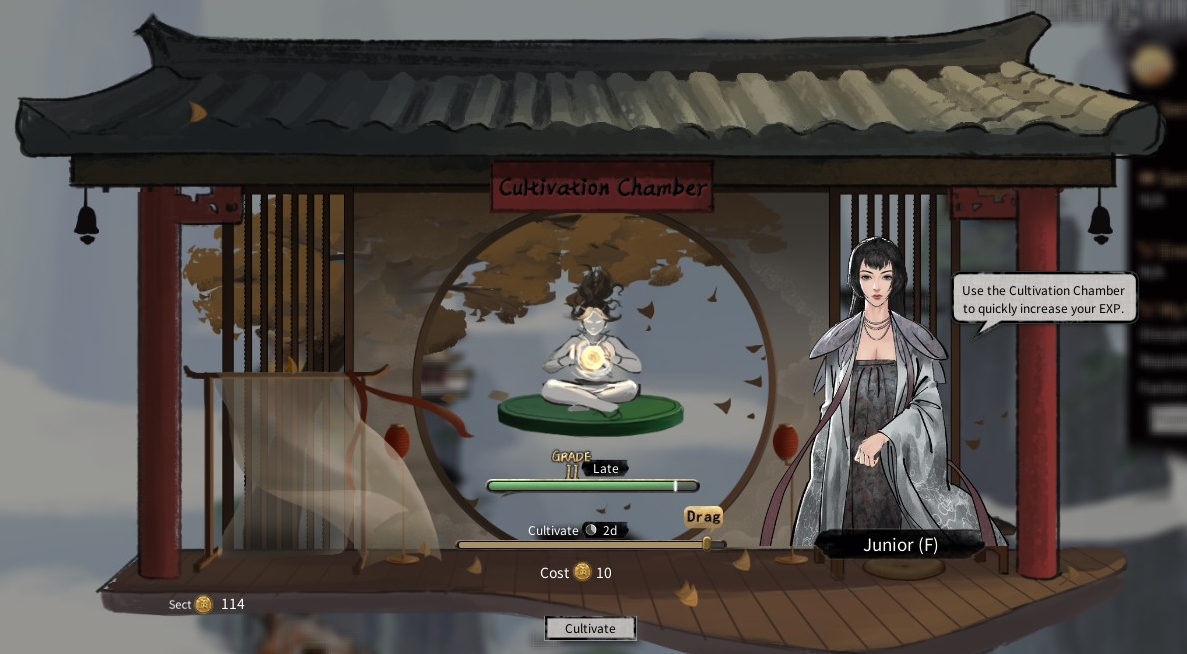 in principle, everything is clear just to meditate by raising the cultivation, again for tokens.
I don’t know what else the sect gives us, I just started playing, but the main thing to leave the sect is:
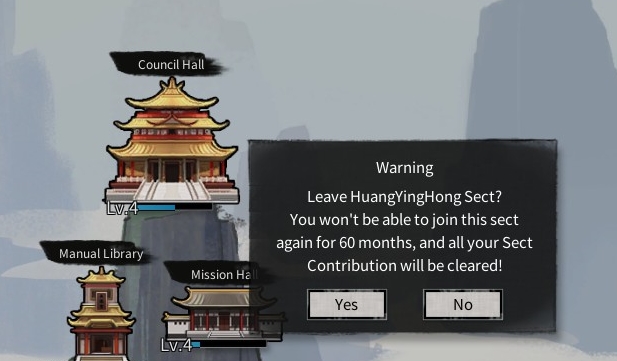
very expensive pleasure - the inability to enter another 60 months))
Relations NPCs
The whole system is pretty much overkill and really only good for dao/skill points.
When people want to discuss the Tao with you, always agree and verify their identity. Try to answer according to their personality. Everyone likes people who agree, even psychopaths.
Spars are fine and do not threaten your life, you can agree with them. Getting "Training Partner" status is also a quick dao point boost at the end of the month (and requires the least amount of work to get skill points outside of tournaments...). Agreeing to become friends is never a bad thing either.
As strangers, you can only talk to them. This can backfire if your fair/demonic alignment or your three personality traits are too different, but you can just give them gifts if they hate you. It's easier to try to catch them in the city and just buy everyone a glass of drinks over and over again until you have a basic relationship with them. You can mark an NPC as a sect leader with your divine sense and just check from time to time.
ITalkToSky user notes that buying and giving rings works very well. I can confirm this.
Here. – [steamcommunity.com]
Materials
Ascensions of any level are always good gifts, but red-orange quality guides are only important if they are NPC level or higher.
Stealing from an NPC is only worth it on very rare occasions, such as right after an auction when they have something you want. You need a higher divine sense (or use the spirit ability of a certain artifact) to steal and then get lucky with a spell roll to make it undetected. The lower amulet is better, so if necessary, remove your mount and eat a special mushroom. If you are noticed, you can get into a fight and they will hate you. Below is a compromise if you need to.
Hating NPCs is like a chain of dominoes. One person hates you, you kill him, his family hates you, you kill him, it never ends. I would advise never killing anyone to reduce the sheer confusion. However, you can give gifts to get rid of hatred, materials and books about ascension will completely change hatred.
What's even more annoying is if NPCs fight you, they'll hate you if they lose. Same with NPCs during the treasure hunt quest who decide to attack you before they get trampled. And if you find an unconscious NPC in a dungeon outside of a specific quest and heal him, they will attack you too. And then they hate you if you knock them out.
When someone invites you to a place, you can perform a few interactions with them to strengthen the connection. It's a unique area that you can't see otherwise I guess? When someone wants you to leave, be sure to check their cultivation level before the fight.
You can also marry people etc but it's all pretty much pointless as you really only want to get skill points from NPCs. If you need to track an NPC, you can use Sense to mark it.
This will always show you where they are. This does not remove meaning from your bar, instead your max sense acts as a limit on how many artifacts you can equip / how many NPCs you can track.
They can improve and develop on their own, but you can also give them materials they can use. If an NPC dies, you can make a pill of the appropriate level using alchemy to resurrect him. However, you have a time limit, and if they surpass your level, you will probably not make it in time.
By the way, NPCs don't play by your rules. Their characteristics are pumped and can be higher than yours. I got an NPC with a higher base attack than I could achieve with a purple pa*sive. And 800% monster critical damage.
Skill Points
Thus, you need them to equip more parenting skills. There are several ways to get them. All but the tournament take place at the end of the month, but you can also start them manually.
You can check out the NPC section for NPC interactions that yield knowledge that you can convert into points. It is generally slow and one interaction will give you around 3 skill points. The fastest is usually the training partner over and over again.
The last option is the three-year Ascension Tournament. Please take a look at the city section. I would advise to participate as often as possible if you are at the appropriate level. The fruits of skill are a huge reward.
There is an exploit you can do with them. You must be part of a sect and ready to participate in the tournament. Usually, when you have ascended to the realm of the next region and entered it, you will be kicked out of the sect and you will lose the right to participate, however… This event only happens at the end of the month. And teleportation talismans do not require much time.
You can actually teleport back indefinitely, stay in your old sect for as long as it suits you, and sign up for a few tournaments by starting to grind in the next area. Gets tiring but allows you to pick up a few more fruits
Skills By comparison, a full red pa*siva layout in Enlightenment (VIII) would take around 3000 skill points. Yes, that's a lot.
Feng Shui
Mostly pointless.
If you run it, it will identify nearby special areas (grass spots, qi spots, etc.). It can also trigger new special areas that didn't exist before, with some sub-skills.
Once you improve your stats high enough, you can travel to various cities and buy skill books to learn from. Each city has its own unique set of books. Later regions only improve your existing skills. Since they are a prerequisite, you always need to start from the lowest level.
Treasures or dungeons that feng shui can find are almost always worthless.
It turns out that grave robbing can be quite rewarding. This will cut your lifespan by 10 years each (and there is a counter in the game so karma could be much later?). But usually you get a rare material (special metals) to forge. This is by far the fastest way to save on rare materials. The only drawback is that feng shui, even with the highest skill, very rarely generates graves. If you're in the Fallen Valley for the spirits anyway, you can also save the random zone bosses instead.
If you come across a quest that requires Feng Shui, you can do so without even upgrading the skill at all.
You upgrade it by hunting bloody puppets that spawn near cities. You will be notified when this happens and you are in the region. They give 5x region points, this is true for all skill books. All of these special town spawns are pretty strong, you have to be either in late realm 1 or realm 2 for the region to have a chance. To be honest, book grind is getting pretty nasty for all majors.
Herbology
With herbology, you can use it in green grass patches to collect materials. It's a good idea to grind this as it feeds alchemy and alchemy is good. The grass patch will only have one grass, in quantities depending on the quality of the grass patch.
Each city, like Feng Shui, has its own set of books on herbology. Books on herbology allow you to get a specific plant from a grass patch. If you have weeds, you have rolled a plant that you don't have. You can save money on this. The charts also greatly increase the drop rate of monsters.
To improve it, you need to hunt mushroom pickers that spawn near cities. As in other cities, they drop the book. They also drop a lot of herbs, which is very handy.
Alchemy
Alchemy is used to make certain pills according to the pill recipes you can buy from town and town workshops, the latter having more charts to learn. Each region has its own set, but in all cities it is the same. This is the only reliable way to get the red grade pills you are likely to need in the future. Alchemy is also used in several ascension quests. You pretty much need to improve it. Save before crafting pills.
Early on, you can use workshops to create pills for you, but they will be of lower quality. And since alchemy has a chance to fail, it's worth saving upfront.
In order to make this with your own hands, you will need a recipe from the workshop, herbs and a cauldron.
Herbs require herbology. The cauldron can be bought from sects (by joining or befriending them). Check the specifics of the boiler, some may randomly add items you don't need, which is really frustrating. Make sure you are using a pot from the correct region for the recipe, it should have enough slots for the herbs. Even within a region, the number of slots may vary. You want higher.
Alchemy now requires you to have enough herbs for the recipe. You will also see the Required Items panels. This is where things get annoying. Elements are always calculated in such a way that you need all the herbs in the quantities listed, plus one more herb you need to count to figure out. The cauldron will always place one more herb than is strictly required for the area of the tablet according to the recipe, if it belongs to the correct region.
For example, qi condensation elixirs require 50 two herbs that fill yin and yang. But then you also need 200 Lightning element. So you need to calculate the number of missing elements and then check which herb covers that. The first region's cauldron will have 2 or 3 slots and you should check if you get one with 3.
You also want to avoid adding unnecessary elements. Only one kind of grass always fits exactly what you need. These herbs can also cover multiple elements at the same time, keep that in mind. In different regions, you get higher levels of herbs with higher base stats. You can also use the lower tiers, but it will take longer. Maximum 100 herbs at a time. If you get a rare cauldron with extra slots beyond their level, you can be more flexible.
Make sure you have everything and then get started. Select tablet, boiler and confirm. Add required herbs in pre-filled amounts and check what items are left. Then figure out what the grass is missing and add it. Finish crafting and you will get QTE. You must stop the bar at the marked perfect spot. If you skip this, you will bring on impurities. Exceeding seems worse than underfalling.
After you're done, you'll get a random roll where the cauldron can explode and reduce your herbs to ash (you saved it, right?). If not, you will get an assortment of pills and improve your mastery of the pill recipe. I'm guessing this improves the chances of getting good pills, but if you fill the cauldron exactly right, you'll still end up with a bunch of red grade pills.
By the way, your cauldron has a durability rating, it can break if you use it a lot.
Later, health pills become quite important, attack pills double in the damage formula, and doing alchemy on your own is the only way to reliably get red pills.
The city of Mad Alchemists drops a skill book, as well as many random and useful pills.
Mining / Ore
Basically useless. No, actually, I mean it. This gives you access to items that drop from Fallen Vale anyway. And since the artifact spirit grind is obscene, you will almost always have more than enough anyway.
Drop charts should increase drop rates in Fallen Valley.
You can also mine resins used to enhance artifacts, which changes their traits.
The crystal golem gives you books, they cost 5 points times the region you are in.
You can roll over loot spots like Botany, but why bother at all.
Forging
Forging is quite difficult. First you need a high enough skill forging and learn the recipe in the workshop if you want to get the best artifacts (you do). It is enough to make a cut, your skill does not affect the result. In many ways, it's not worth it, since the grind artifact + spirit is dumb, and they are not even that strong.
Each artifact requires a base material. Everything but the sword are drops from world bosses that spawn after long periods of time. Since you also need these cores to upgrade them, you'd better start hunting when they appear. The sword requires an item that drops from the Dragon Boss in Fallen Vale, more on that below.
Additional materials are just drops of monsters. The total admixture of these materials must be below the artifact-specific value. Most of them are in the Fallen Valley of the artifact region (where you can get the map).
Rare stuff is where it gets really nasty. Each artifact has its own. You need 10 of them to make a red artifact, which has 25% higher base stats than purple. That's a lot more than it looks, as it's +25% for all stats.
Determine the material first, then figure out which zone boss is dropping it. For example, bosses in special elemental zones of the second area drop metal for the horn. These drops are random. Beast spawning is random, slow, and you are only notified if you are in the area. You can get 3-5 drops per boss monster, but more often than not, you don't get anything at all. Or the ones you don't need. I highly recommend getting rid of daylight whenever a boss spawns.
There is an alternative method. Grave robbery. There is a skill in feng shui that generates graves, with a fairly low chance even at the highest skill level you can get. Robbery of the grave will reduce your lifespan by about 10 years (the spirit of the artifact can negate this), and you will receive the rare metal corresponding to the region, 3-5 pieces. You can salvage this if you need anything. Grave robbing has a counter in your stats, so maybe something will be done about it in the future?
The last part is a special flame that you just buy from the sect. It doesn't seem to affect the quality in any way.
After all this, you need to play a mini-game. Read the description, click to remove bad things. If you have 10 rare materials, you should have an almost full purity gauge, 0 impurities, and get a red artifact.
Artifacts must be inserted into pill slots. They are limited by your maximum divine sense. They also have durability. When used in combat, it drops by 2 if you remember it ahead of time, and by 20 if you allow it to be broken. And unfortunately later bosses will break them almost instantly.
You can repair them at the workshop with material from Fallen Valley and monster drops below a certain impurity.
You can also update them. This requires another copy of the main item (boss fall), a different (and rarer) material from Fallen Valley, and a large amount of quartz from Souleater Tower. You must upgrade artifacts to cultivation level if you want them to be useful at all. Luckily, the Soul Eater's Tower is pretty hard to survive, so you might have to see if you can survive grinding materials until the end of the region. The artifact area determines which region you need the quartz from.
The Associated Spawn of the Forge is a Treasure Hell fiend just like the others. He drops materials for recycling when he dies. Keep in mind that his attacks are hard to dodge, and you may want to be in the region's second cultivation realm before engaging in combat.
Artifacts and spirits get their own section.
Fallen valley, gaining spirits
Keep in mind that the liquor grind is more over the top than anything else in the game, by a fairly large margin. For this you want to have a good mobclear. You will also need to interact with almost every system in the game in order to fully upgrade the spirits.
So you've made yourself a fancy artifact by forging, and now you want to have a spirit for it so it's actually useful. This requires you to buy an item in order to travel to the Fallen Valley to obtain spirits and items that will allow you to travel to the Soul Eater's Tower, which has items to upgrade the spirits.
First, you must buy "Ultima Sands" from any market in any city. They are all equivalent, and there are 10 in each store. If you need more, just teleport. It's the same item regardless of region.
You must then find one of the two Fallen Valleys in your target region, either one will do. Valleys of different regions not identical and much more complex. Each entry costs one sand and five days. Please note that the Valley is very dangerous, you must be in the region's 2nd cultivation realm to be safe.
PS: I recommend chain lightning LMB if you want to grind. Even if you need to get alcoholic fruit first.
fallen valley
Disarm your artifacts and tablets before entering. See Random Events to find out why.
The valley is always a 3x3 dungeon where you start in the middle. Your goal is to get Soul Lure items (blue orbs, they can't be taken out of the dungeon) and offer them to a large purple crystal to get crystal shards. These shards contain a random spirit.
The central zone (with one exception) is always safe. If you go in any direction, you will start fighting a large group of monsters and mini-bosses. They can randomly drop soul lures that you need. Trees tend to drop them.
During combat, be very careful with the purple spouts and AoE circles you see. This is an environmental hazard, and it damages a percentage of your maximum vitality. This means that they are always dangerous and you can never surpass them. Explosions happen only once, and if you look closely, you can see which parts of the terrain will explode when approached. These things also deal damage to enemies, by the way, can be useful.
After you've found the room with the large purple crystals, you can end your tour by interacting with it. You will offer your Soul Lures to the crystal and you will receive a number of shards depending on how many lures you offer (…and randomly how many lures you can drop, so…). Less than 10 means 2-4, 10-20 seems like 5-7, around 30 would be 9 or so. Over 30 just wasted. You can pad the space to fast forward.
The boss may spawn when you interact with the crystal, but he is very easy to defeat. If this happens, you will receive more Crystal Shards than usual and a Treasure Chest.
You must approach the shards and interact with them in order to... Roll the dice. Perfume is gacha. Wonderful.
There are three types of perfume rarities (read more in the perfume overview section).
In addition to shards, you also get two types of liquids, which are used to repair or upgrade artifacts, respectively.
Fallen Valley Random Events
In addition to the purple crystal room, there are a number of other random special rooms that you can enter. Most of them are useful.
If you see a floating green crystal in the middle of the room, you must keep attacking it a few times to break it into free soul gems.
If you find a white dead body, interact with it to get a free pearl.
There might be a random cultivator in the room that you have to fight. They can be somewhat strong for the region. If you find yourself not doing any damage, run away immediately. You'll waste your run, but it's better than dying. They don't seem to scale.
The room can also spawn a clone of your character. The clone can use your artifacts and your pills. They will have your characteristics and skills, but not your destinies. This makes them unable to use their ultimates. The AI isn't too smart, but something like a lifesteal build can do a bit of work. They give out a lot of pearls for death.
You may stumble upon a treasure chest, it may be gambling. He can either just give you the pearls or have the cultivator attack you (the odds seem to be 50:50 or worse). The cultivator can range from very weak to hopelessly powerful, regardless of your cultivation level. Even if you are in Enlightenment and visit the Fallen Valley from Region 2, he can still defeat you. The Peak of Enlightenment is barely enough. Prepare to run if you deal 1 damage.
If you manage to defeat him, you will get a lot of Soul Pearls.
It is very, very rare to see a rat artifact. This is a special enemy that only takes 1 damage from all attacks, has low health, and does not counterattack. You need to kill them relatively quickly to get a pearl out of it.
Finally, you can find the pond, which took me a while to figure out. It acts like a bank. Every pearl you drop is stored for future launches. But if you drop fewer pearls than are stored, it will give you double returns instead. For example, if you do a run where you throw 4 pearls, then you throw 5. 5 is more than 4 stored, so 5 is also stored for a total of 9. If you add 7 on the next run, you will get 14 back and the bank will decrease to 2 pearls.
Unfortunately, due to the way the math for crystal shards works in regards to soul decoys, I'm pretty sure this object is completely useless and you should never worry. You get more shards from two separate failed runs than you get from combining soul lures into one 0 pearl and one good streak.
Breath of the Void
As you continue to roll gacha, you will get duplicates. Initially, they improve the soul level of the spirit, but once they are fully maxed out, you get Nether Breath items instead. 1 for normal spirits, 2 for rare ones. You can use a large stack of them (up to 50) in the center of the starting area to summon an enhanced version of the Crystal Dragon Boss.
It will be much more powerful than you might expect.
If you spend 50 breaths, it will scale to the cultivation sphere of the next region. If you don't have any of the broken builds, it will be hard for you to win.
If you win, you will receive a large number of crystal shards, more if you spend more Void Breath. If you've spent a lot of breaths (or are you lucky?), you can find a special gear ring here. This ring gives you a percentage increase in your damage for each artifact you have equipped, but drains your senses constantly. (1%/2%/3% bonus damage per artifact per 2/4/6 sense per second). Unfortunately, the damage bonus is quite negligible and you can't recover the meaning.
Soul Eater Tower, Upgrade Materials
You should have Soul Eater Stones for every time you want to enter, you can get them from the Fallen Vale.
The tower is a series of 5 increasingly difficult boss battles, with timer.
If the timer upstairs ever runs out, you will die. Defeating the boss drops small blue items that grant extra time.
If you're not at the peak of the region's second realm, you probably won't make it to the end, but you can still get the drops you want from earlier enemies.
These are blacksmith quartz (used to upgrade artifacts) and various dews (used to upgrade spirits). They are region dependent, so you cannot upgrade items outside of your realm.
If you complete the tower, you can get a soul orb, which is an item for upgrading the spirit. You only get it once, but it acts like equipment that you can take back at any time. Some towers also give you mounts.
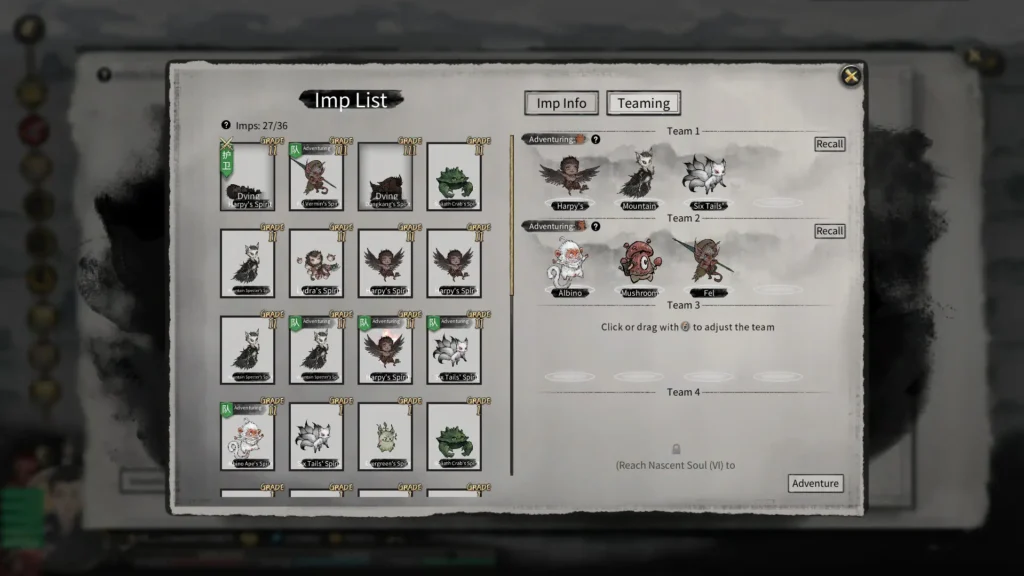
Overview of Spirits and Artifacts
So you have your artifacts and you have your spirits and you may wonder what's next.
Artifacts must be placed in pill slots (and used as a unit). All of them have unique special effects. You can read what an artifact does on the artifacts screen, which you can click under the bag icon in your inventory, on the left.
All artifacts also have a number of skills that are pretty much traits for artifacts. However, when you upgrade an artifact, you don't upgrade traits, but change their. I will say that some of them are definitely more useful than others. Traits can have levels, but you cannot choose which trait to replace. You can only replace the entire set at once.
To unlock the real power of an artifact, you must combine it with the spirit in the upper right corner. This process is reversible at any time, but it reduces the artifact's durability to zero.
Spirits add their special abilities to an artifact while it is active. Some also have traits that trigger if you have a spirit combined with an artifact in your pill slots. Artifact level can increase spirit ability power (but not duration or chance).
When the spirit says that something is triggered by "attack", it means the attack of the spirit itself, rather than artifact. Typically, attacks are somewhat slow projectiles (which can miss...), while buffs during play are on you. As far as I can tell, you won't find stats like range and cooldown for the spirit's unique attack anywhere. Damage should depend on the artifact.
Many spirit effects only remain while the artifact is active. Exceptions are skills that explicitly have a timer (such as summoning Charon's boar).
Artifacts are unfortunately only useful if you keep upgrading them to your level. This requires liquid from the Fallen Valley, quartz from the Tower of the Eater of Souls, and another copy of the world boss material.
In combat, you summon them by pressing the inventory button. They tend to draw more aggro from enemies than you do. You can cancel their call by pressing the button again. It will require a 10 second wait before you can use it again, their viability will remain the same. If an artifact loses all of its life force from attacks, it will break. This costs a total of 20 durability and requires a 60 second wait, but then regains full life force when summoned again.
Unfortunately, they tend to break quickly, and bosses often just rip them apart.
Mood
There's a lot to see on the Spirit Artifact screen. The left side contains a list of all the spirits you have received from the various Fallen Valleys. The middle part is art. The bar at the bottom is their soul realm, upgraded with rolling spirit duplicates in the Fallen Valley.
There is a spirit story at the bottom left (more unlocked in the higher soul realm).
Below, you can give them gifts to increase the similarity displayed as hearts in the upper right corner. Each spirit has a preferred type of gift (such as Mengyi and Rainbow Gems), these are just drops from the Fallen Valley where you can find the spirit. The very first entry is usually a special gift that gives half a heart. You can only give a limited number of gifts per year. Once you exceed 10 hearts, you will be able to make a contract. This simply unlocks the third combat ability of the Spirit.
The right side of the screen contains spirit abilities, hover over them to learn more. Dark skills are not yet unlocked. You do this either through a pact, through a talent network, or by increasing their soul level.
Specialization skills may require the use of Energy. You get it for feeding items to the spirit by clicking on the plus next to the bar. There is no fast food. Enjoy clicks. Some items can give up to 5 energy points each.
Talents are special upgrades for Spirits that are unique to them. Each talent upgrade increases the level of Spiritual Power. If you want to bind a spirit to an artifact, its spirit power must be lower than the artifact's ability. Therefore, if you upgrade spirits a lot, you should also upgrade your artifacts along with them.
The three slots are for the items you get for completing the region's Soul-devouring Tower. They drop out only once and increase all characteristics by a few percent. You can also take them back for another spirit if you like.
Spiritual Talents
If you click "View" next to the talents, you will be taken to the upgrade website. Each upgrade comes at a price and increases Spirit Spirit Power, keep that in mind.
Updates will tell you what they need. It can be money, dew from Soul Eater Towers (pay attention to the tower of which region you need), almost any pill (also of certain varieties ... You can buy 5 + 6 classes in cities, 3 + 4 in sects), interact with NPCs (even kill them) and much more. You need to interact with most of the systems in the game in order to upgrade Spirits. I hope you didn't get slack with your specializations.
If you see a node that requires you to see an event, they are only counted after you have unlocked the node. Everything that happened before doesn't count. This is a problem as some activities are one-time. To combat this, you can also feed the spirit an orange or red skill book, of any level, but of the appropriate type. Just defeat the world bosses to have fodder.
Web of Enhancement also allows you to use a second combat skill for the spirit.
If you are unable to progress in the web of upgrades, you may need to level up the Spirit Soul by dropping duplicates in Fallen Valley. Have fun.
The most common spirits have 3 soul levels, the moderately rare ones have 4 soul levels, and the bordered ones have 5 soul levels. The size of their renewal web increases with rarity.
The lower part of the update website is currently not completed.
Opinions of breakthrough fates
All the flat stat boosts aren't worth it. Including perception and so on, unless you really have free slots in your build fate. Summon types (Joe here, etc.) don't seem to be worth it either. The spiritual fruit gift is a joke. Death skills are meaningless, since you don't have to die.
Not all fates are available at all breakthrough levels, keep that in mind. Some quests give items that allow you to reroll fates once. If you choose a destiny that you have higher levels, you will be forced to change them all. (You can't just delete level 1 and keep level 2.)
Many thanks to the wiki contributors.
| First name | View |
|---|---|
| Essence of Energy/Life Force | Good for survivability and you can only choose one of the two. I usually use Energy Essence as life restoration traits seem to be more common. |
| Elixir Recycling | Excellent survivability as it makes your pills go much further, at least as long as the pills are still useful. |
| Flying Sword Joe | Very strong, past level 1. The first level just deals damage, while the second level can inflict random status effects. For many bosses. This could be rooting them, but also sealing/freezing them (they can't attack and skip a phase in their attack cycle). If it poisons the target, it will deal full attack damage for a row of pincers. He attacks often enough to be extremely powerful. Level 3 makes him shoot swords and if you get close to the boss with him, he will deal a lot of damage. |
| Combat expertise | Extremely helpful. This allows you to skip the need to create stacks for ultimates. This allows you to open fights with your ultimate and use it on CD, which is really useful. But there are always two ultimates, and one requires objects on the field. With them, this skill does not help. In practice, this means that half of the ultimates are just worse. However, you must get it just to use it. |
| Combat Skill Cooldown | Strong if you use them. There is no equivalent to spiritual skills. |
| Blood Claw | Hits hard, but requires a Lifesteal build to keep you out of harm's way. |
| The power of blood | Theft of life at close range. Ideal for blade assembly, questionable due to range limitation for most others. You can also reclaim your life with skill skills, keep that in mind. |
| Merging Spirits | Multicast RMB and Ultimate to reduce damage (30% of normal) while maintaining energy costs. Even so, it can be extremely powerful if you choose the higher levels. Works very well for builds that are boosted by a lot of hits. If you do the math, you'll get 90% bonus damage 25% of the time, which is 22,5% overall to your RMB and Ultimate. That's quite a lot. And the cost of the spirit only triggers when you receive a bonus. Also accumulates hit stacks like nothing. |
| burning ass | Increases agility by quite a large %. At its highest level, it even reduces the damage you do to your back. It's pretty strong. |
| Zanpakutō | Decently powerful if you have an energy recovery plant for bosses. Alternatively, you need level 3 for this to matter. At this level, he can steal energy for you. |
| Old but strong | The more you grind the better, but outside of Chaos you have to get to Enlightenment before it becomes so useful. |
| Quick escape | Not as useless as it might seem, as it's easy to get into fights you can't win. However, it doesn't have combat utility to make you win fights. |
| warlord's ghost | If you use the Shield Blast build with Fist skills, this can be used for OHKO bosses even in Chaos. If you have strong life regen (traits, life steal) this can also be used to double your effective health, but you might not need it with strong regen? |
| Fight and learn | Uncertain. This happens randomly and you cannot choose an ability. You might think that you can get red tier skills from him (and he even will skip the spirit root requirement), but you'll mostly get bad paxes since NPCs usually don't have good ones. You cannot master the skills of a higher realm based on a little testing. |
| Starlight | Nice rainbow. Requires the creation of mobs (useless against cultivators). Deals roughly your LMB damage every tick. Seems okay if buildup isn't an issue. |
| sword shadows | Deals a fair amount of damage, but takes a long time to trigger. Can only be activated once per battle, making it quite limited. Not so great, especially since it takes up two fate slots if you want to take real damage. However, it lasts 30 seconds. Possibly more useful on lower difficulty levels where fights end faster? |
| Lightning Flash | Weak |
| Next error | Weak |
| Commander of the Fallen | The necromancy tree is too weak to be useful. |
| Shield Rack | Time-limited damage reduction after you've already taken a lot of damage. Pass. |
| burning jealousy | The usefulness is too marginal, and non-human bosses are a bigger problem anyway. |
| Energy Rain/Blood Energy | Just use pills/traits to restore spirit instead of wasting a fate slot. |
| Counterattack | Just think about the math. You need to take 6 times your maximum health as damage for a 100% damage boost. This only works for lifesteal builds. |
| Witchcraft | Transformation is a nice idea, but it doesn't work against the goals you would like. Mobs are just food. |
| Mirage Pot | Ahaha this enhances alchemy and reduces agility. No. Never. Even calling doesn't make it worth it. |
| military drum | The damage is weak, but it will reduce the boss's damage by 25% twice as fast. This has some use for survivability. |
| (Elemental) Explosion | Supports your main damage, but there are only better options. |
| Mysterious shield | Unfortunately, it only works against projectiles. AoE type attacks don't count, and some of the more dangerous bosses are melee oriented anyway. |
| Improved spiritual/combat skills | Increases range, which has some marginal utility. Ranged skills don't need it later, and blade skills rely on fates/life traits that don't increase range. |
Names of sects
You can tell what a sect specializes in by their name if you forgot where to get something. Sects may have an element name or transliterated Chinese characters as part of their name.
This was taken directly from the wiki, thanks to the contributors.
Names may change due to changes in translation, I cannot promise they will remain accurate.
| Element | Name part 1 | Name part 2 |
|---|---|---|
| Blade | Ren | Zhi |
| A spear | long | Fay |
| Sword | hong | Xuan |
| Fist | Shea | Juan |
| Palm | Kang | Ying |
| Finger | Shen | Min |
| Fire | Yang | bog |
| Water | Shuang | Khan |
| Thunder | Shansky | Blue |
| Wind | luo | Yun |
| Lands | ди | Zhen |
| Forest | mu | Gu |
Drinks in the tavern
The following has been taken in bulk from the wiki and placed here for convenience, full credit to the wiki contributors.
You can buy them in taverns. Each tavern has three different drinks that have a selection of different power-ups. You can get one boost from each active drink. If you drink the same drink twice, you will overwrite the previous buff. You can just keep spending money until you get what you need.
In addition, the buffs of each region are counted separately. You can get three buffs from your current region, three from the previous one, and they stack. Going even further is not that helpful as the buffs will be weak. Unfortunately, you cannot get a drink from the neighboring region.
The force will be in the region of increase on the order of 1/2/3/4/5. 5 may not be out yet, but has been mined by data.
All buffs last three to six months, it seems random.
Placid Nu Er Hong's buff is buggy. The third area should give you 4000 vitality per month, but it only gives you 1000 per month, like the same buff from the second area. It appears to be treated as a region 2 buff in the code, as you can overwrite it by drinking from there.
Niu Er Hong
| Buff Name | Force |
|---|---|
| Boiling the blood | +100/500/2000/7000/25000 максимальная жизнеспособность |
| Power of nature | +100/250/800/1200/3000 максимальная энергия |
| Reinforcement | +100/250/800/1200/3000 максимальная фокусировка |
| Calm | 200/1000/1000 (error)/14000/50000 vitality regeneration per month |
| Alive | 200/500/1600/2400/6000 Energy recovery per month |
| Calm | 100/250/800/1200/3000 Focus restore per month |
18 Lohan
| Buff Name | Force |
|---|---|
| Intent to kill | Крит +20/65/200/700/2200 |
| Steel body | Крит ВИЭ +20/65/200/700/2200 |
| Increased endurance | Max Stamina +10/20/30/40/50, Stamina Recovery +10/20/30/40/50 |
| Blissful | Max Mood +10/20/30/40/50, Mood Recovery +5/10/15/20/25 per month |
fun drink
| Buff Name | Force |
|---|---|
| mighty strength | Атака +6/24/85/320/1150 |
| Robust case | Оборона +6/24/87/317/1146 |
| Light as a feather | Маневренность +15/25/35/45/55, скорость передвижения +400/700/1000/1250/1500 |
Laws of Soul Tao
Probably too big a moment take a look here. – [fandom.com]
Artifact Opinions
Haven't tried them all on a fully upgraded level yet. Artifacts that deal damage use their own stats to do this, which can make them less powerful than they might seem. Or more powerful if you can't keep up with your pa*sivs.
Many NPCs carry artifacts. If you want to get an overview, you can just walk around the town of the region where you can find a forging recipe and check out the various backpacks. In combat, you only need to expect artifacts from the region you are in.
Horn of Desolation
Summons boars and offers healing. The survivability of boars is based on the survivability of the artifact. But since they'll just run into everything, in practice it's probably not that much.
Even upgraded, it just seems mediocre. Boars are not strong, healing is not that strong. His traits tend to buff summoned units, so can you get him to work with wood/earth builds?
The Spirit of Charon also summons boars for tanking. Maybe two calls at once are good for drawing aggro?
Typical features: Strengthening the summoned units. A debuff that causes enemies to take more damage.
Lightning Crusher
Casts lightning spells with a small AoE in its area. Judging by the numbers, this artifact should deal solid damage. Decreasing spiritual root for enemies should be borderline pointless, as enemies rarely take less damage anyway.
Typical features: Faster bolts
You can be connected with lightning. This means extra damage and increased agility with another trait.
Some traits seem to reduce your Crit RES? I'm assuming this is a typo and means enemy Crit RES.
imperial sword
Essentially acts like one of the Sword's ultimates, in the sense that it summons many tiny swords. Everything is fine with the damage, it can be useful. I seem to have poor health though for me, even as a red artifact. This is your damage artifact.
Typical traits: More swords to summon, damage buffs, on-hit debuffs
azure bluebell
Traps and stuns enemies in its territory, dealing minor damage. There are also traits that can further weaken the target, such as sealing certain abilities. You need a ranged skill to attack from outside an area where your opponent cannot hit you.
It's pretty much an anti-cultivator weapon, as you can block it very carefully.
It usually breaks down pretty quickly.
Don't take this with you to the Fallen Valley.
Typical traits: Seal certain abilities, taunt the enemy and force them to attack the bell, stun, damage on kill
Can block items, but I can't remember NPCs using them.
bloody mask
The damage debuff on enemies in range does not last as long. I would say there are better options.
Typical traits: Increased range for each debuff, damage to area moving enemies (they will), more debuffs
Can block movement skills. Although they are graceful, they should not pose a threat to you in the first place.
Solar Banner
Somewhat low fire damage in the area. It also absorbs spiritual energy that is used by skills, but I'm not sure how useful this is. Traits are required to work. I don't know if bosses are considered to consume spirit energy at all, which would basically make this artifact only useful against cultivators or with few abilities that reduce enemy energy.
Traits: Absorbing spirit energy from enemies inflicts debuffs, damage buffs.
Pool with pearls
Generates balls that fly towards you. Once they get to you, you'll get a solid damage boost. Since it was created quite late, it also does not require a long update. If you want to hunt down traits, you can get some really useful ones.
Traits: Faster orbs, more orbs, and new special orbs.
A black orb that causes you to dodge (not take damage from) multiple attacks for a limited amount of time. This trait is pretty good as it basically makes you invincible most of the time for a certain amount of time. Green balls heal a lot.
White balls make you much faster.
Cloak
Good healing, minor defense buff, affects your summoned units as well. This is a good survival tool. The range is not very large.
Typical traits: more healing, agility buffs/debuffs, long range, one autododge per healing stack, guaranteed stack crit, strong attack within its range
Opinions on alcoholic beverages
I'm not even close to completing all the updates, that would be too much. Most of the upgrades are stat boosts in general, some offer some new traits like health regeneration.
Spirits will be divided by region, as the Fallen Valleys of each region have their own set. Within the region, the valleys are identical.
You can pretty easily determine the rarity of a spirit. The regular ones have no specialization skill and have a maximum of 3 soul levels. The next one has one skill and a maximum soul level of 4. The last one has a golden frame in the menu, 3 skills and a maximum soul level of 5.
Specialization skills that give you items can fail if necessary. I will only mention specializations if they don't explain what they do or are useful.
Some perfumes that seem decent:
Region 2 Yunling (energy regen), Burning Feather (fire DoT) and Yulin/Muqing (healing) Region 3 Zhenxin (damage boost), Charon (tanking), Jiuchen (crits), Ningshuang (damage) Region 4 Cangya (First Specialization, protection)
Region 2
Yunling: Artifact attacks restore your energy. Bosses will most likely take it down quickly as it needs to be near them to attack them, so limited use for fights where you might want it the most.
Silver Edge: slows down enemies, not useful
Searing Feather: Spawns a fire damage zone. This can be quite powerful with upgrades as it keeps spawn zones in the same place against bosses. Zones disappear as soon as the artifact disappears, so survivability is again a concern.
Faming: Attacks, others are better.
Khuofa: Chance to charm with attacks. Mangyi is better.
Yuling: Good for healing artifacts like Cloak or Pool. The specialization acts like a stay in a hotel, which is useful if you are on a long trip.
Mengyi: Attack spells that incapacitate enemies, but not bosses. You need to survive in order to fully use the damage of spirit foxes. Specialization 1 has a number of random outcomes depending on sleep. Random outfit, temporary buff to Perception or Luck.
Vitality is a problem and bosses are immune to charm, I'm pretty sure of it. Doesn't seem all that useful, even with the damage boost to charm.
Her friend chat node refers to people on your social network, not just someone with high affinity. Maybe you need to invite them to be friends?
Mucin: In combat, reduces enemy attack, emergency healing, restoring your status means healing. The normal healing range is short. Talents can greatly enhance healing pills.
It seems that her first specialization only gives you money. It's not even that much. The third simply allows you to access your cave from wherever you are.
Yuling always heals.
Region 3
Zhenxin: Increases own damage and then the damage of all allies if they are within range. Can work with defensive artifacts if you let them level you up. Just remember that you need to stay close.
Sharp Edge: Works weird. Throws out items that stick to the ground and then extracts them to take damage. Sometimes he just throws them at enemies for very little damage. It will miss if the enemy is directly under the artifact. Overall damage seems low.
Sharp Claw: Defense reduction on attack that scales with artifact level (-141 per Enlightenment attack). After some testing, it doesn't seem to be all that strong, as resistance still matters.
Voodoo: Increases damage from the enemy, everything seems to be in order.
Charon: Summons rather slow boars. They are surprisingly tanky against bosses. Best used with an artifact like the Pool, which doesn't have to be near the boss to work. Seems pretty good if you need an aggro drawing artifact. Can it work well with the Horn and for even more boars?
Dark Fang: Deals little damage on attack, but gives you a decent AoE that lasts for a few seconds when not summoned. You pretty much want to call and cancel it over and over to deal damage I guess?
Specialization guarantees success when stealing from people of the same or lower level.
Jiuchen: Specializes in crits. Usually the critical rate is too low to be relevant, but if you want to build for it, that's your spirit. Skybreak storm must be pretty strong if your own crits matter too. I haven't tested this.
The first specialization gives you random ores from Fallen Valley loot/drops. You will never need it. Second, it gives you a chance to not lose lifespan when digging a tomb, but lifespan doesn't matter. Thirdly, it is a forge that can be used anywhere.
Ningshuang: Can ignore 50% of the opponent's defense when attacking, less than it looks due to resistance, but still enough to be decent. The damage values in general seem to be quite high. If you're looking for a spirit of corruption, this is it.
The first specialization just gives you random monster drops. The second allows you to kill someone undetected if you're willing to save yourself.
Her revamped network requires doing things that cause hatred towards NPCs, such as stealing or intentionally causing revenge. This can be a little annoying.
Region 4
Xuanti: There is no chance of counterattacks.
Bagio: Gains an artifact shield when attacking. Can detonate the shield after 10 attacks. So this spirit would protect your artifact, but artifacts draw aggro, so the bosses will deal with it anyway and reduce the shield to detonate. Also, do you want the artifacts to survive through fortitude, so does that feel like something backwards? Maybe for pools or so?
Brawler: Slow and knockback on attack, as well as maximum survivability for some reason. The way maximum viability works can be helpful. While it retains damage taken (you are at 450/500 and go up to 750/800), when it comes back, if your current HP is above the limit, the damage disappears (you lose more HP to 550/800, go down to 500/500 ). In other words, if you take less damage than the maximum vitality boost, it sort of heals. With upgrades, only four attacks are required. Yuling seems better.
Rainmaker: Steals spirit roots, then deals damage. The first is meaningless, and there it is better to damage the spirits.
Jiuzhu: Increases def, can turn life force into a shield. def increments can add up and are decent. Secondly, it only matters for assembling fists. However, if you need to fill up, you can use Charon or Kangya.
Muk: Seems weak. There also seems to be a bug where the first attack after being summoned is aimed at you instead of the enemy.
Specialization allows you to find the target of revenge. So you can hunt them or befriend them to end the NPC's hatred chain if you want.
Changya: Generates shields for you on attack, albeit rather small shields. However, it's actually good. The shield, regardless of health, will always completely block an attack without bleeding. If you have 5 shields and take 10000 damage, only the shield will be hit, no life force damage. Also, since you have to lose shields quickly, it will also wear out projectiles (non-AoE) regularly. The third skill should also hurt the bosses.
The first specialization is much more useful than you might think. The bad result is an increase in your morale roots, which don't really matter. The good thing is that training with it increases the enhancement level by several times (how many traits you have unlocked) of any attack skill you have equipped. This can save you a lot of time and resources on sanding. The second increases movement speed, the third allows you to basically use the city teleport anywhere.
Be sure to get it. Great defense spirit for no-knuckle builds and the first specialization will save a lot of time. However, the bosses can quickly destroy the artifact.
Lingge: Her combat skills steal stats, but too few to matter. And it takes too many attacks to trigger the rest. Doesn't seem strong.
The first specialization gives random medicines, they will be at your level. Since the result is mediocre in quality and you don't get much, it's not that useful. The second specialization is the only way to increase the number of Tao points for your domain. Thirdly, it allows you to instantly learn the manual.
I believe specializations have some use.
Questions?
I'll try to remember to watch from time to time and will include questions that may be helpful to read.
This concludes 鬼谷八荒 Tale of Immortal General Guide and Overview - Gameplay Tips - Walkthrough, I hope you enjoy it. If you think we forgot to include something or we should update the post, let us know in the comments and we'll fix it ASAP! Thanks and have a nice day!
Was the article helpful?


