The Dungeon Of Naheulbeuk: The Amulet Of Chaos - Guide, Walkthrough, Guide
Elf skills
Active skills:
| Level of | Skill | Effect | Additional Notes |
| I | Elven Ricochet | The shot can bounce off other units; one of the Tier II upgrades prevents random allies from being hit. | This is a core skill for elves, and choosing a level II upgrade (to prevent friendly fire) is useful in the long run. |
| I | jubilant kiss | A ranged spell that heals a teammate. | This gives the elf some healing abilities. Healing amplification is affected by CHA. |
| II | B-but I wanted for the eyes | A low-damage shot that inflicts the Shredded Hamstrings status effect - the target will take damage every time it moves. | The Tier III upgrade can be either a higher accuracy penalty or an enhanced status effect. |
| IV | One shot one kill | This is the elf's most devastating skill, but it has a small penalty to accuracy/hit chance. | A Tier V upgrade that stuns enemies is what you need. |
| IV | Stabilization | + Accuracy/Damage/Crit Chance while Elf is not moving | This is an optional skill if you are not attracted to other choices. Just remember not to move for a few turns to keep the buff. |
Note: in addition to AGI and CRG, try to increase the elf's STR as you progress in Dungeon Naheulbeuk . Otherwise, even her best skills won't do much damage.
Passive skills:
| Level of | Skill | Effect | Additional Notes |
| I | Charismatic leader | +3 CRG when near a Ranger | Ranger and Elf both have passive skills that increase their CRG/Initiative when they are next to each other. |
| I | Archery | +5/10 Accuracy with Bows | No complaints here, as this (and the Tier II upgrade) increases your hit chance. |
| II | Right into your eyes | +3 hit/damage for melee and ranged attacks | Another decent choice due to the damage increase. |
| III | The Woods Stand Watch | +1/2 shot in overwatch mode | This and his improvement are wonderful liabilities. I hope you don't run into the overwatch error. |
| III | elven eyes | +1 maximum archery range | Another great passive. |
| III | Elven Arrows | +10% damage from normal bow attacks | This is an increase in your DPS. |
Barbarian Skills
Active skills:
| Level of | Skill | Effect | Additional Notes |
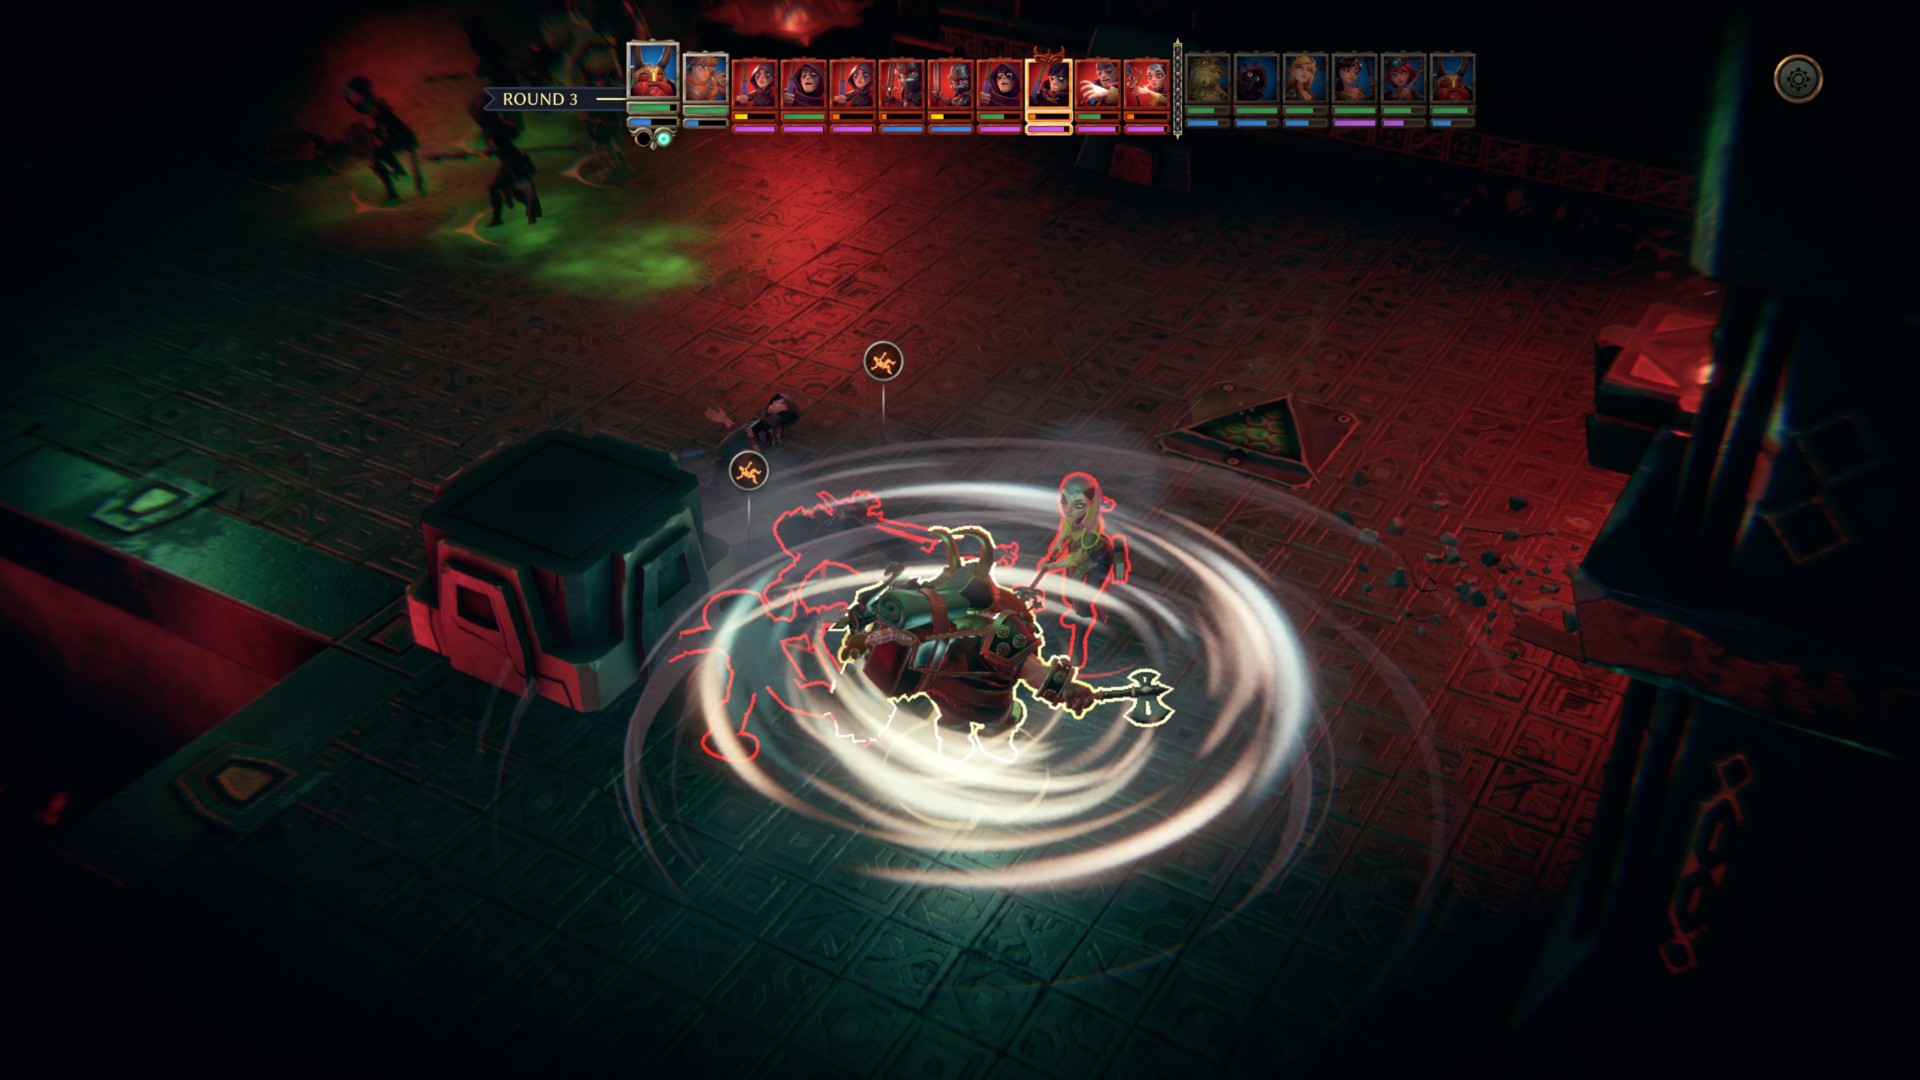
| I | Steel barrage | Hits multiple targets in front of the barbarian | Choose an upgrade that increases damage and try not to have an ally near these enemies to avoid friendly fire. |
| II | YAAARGH! | Multiple consecutive attacks on the same target | This is an absolute skill killer. Get an upgrade to land three consecutive hits and it will be a boss killer. |
| III | rib crusher | Kicks and pushes the target | Get a stun upgrade; use this when other teammates are facing the same target to trigger an attack of opportunity or overwatch. |
| IV | ferocious blow | Jump onto a tile and deal damage to all surrounding enemies | Get an upgrade that makes the skill have a 50% chance to stun. |
1 Note: if you use the Randomia level 1 buff to get an extra action point, you can go with: Ferocious Strike -> Steel Barrage or YAAARGH! quickly prepare minced meat from opponents.
Note 2: in ideally you should focus on STR and, for survivability, CON. However, pay attention to the barbarian's AGI as well. If you don't use your powerful attacks, they are useless anyway.
Passive skills:
| Level of | Skill | Effect | Additional Notes |
| I | At least it's skin | Wear heavy leather armor | Well, you will get equipment with higher protection. |
| II | Crom's guts | +20/50 Stamina | If you want to use more skills during battles, take this passive and upgrade it. |
| II | sword training | +10 Sword Accuracy | Increases chance to hit with melee weapons. You can't go wrong with this. |
| IV | Crom's power | +2/4 STR | Well, that's definitely a DPS increase. |
Sorceress Skills
Active skills:
| Level of | Skill | Effect | Additional Notes |
| I | Vortex Wazaa | AoE arcane damage | This will last you until the end of the game as it is an AoE spell. Choose an upgrade that will give him a chance to stun. |
| I | Namzar's slap | Moves the target two tiles back | This is a normal spell, but is rarely used unless teammates surround the target (for attacks of opportunity or overwatch triggers). |
| I | Treat minor wounds | Far Healing Spell | What do you know? The Sorceress has something for both damage and healing. |
| II | Killer Bunny Challenge | Restores your HP and MP depending on the damage dealt. | You hurt someone and heal yourself (and get some MP back). What's not to love? |
| III | Large fireball | Sets enemies on fire and destroys items | Get an upgrade that turns it into an AoE spell. |
| IV | Stormy hail | Can freeze your enemies | Pick an upgrade that doubles his AoE coverage and you have a chance to freeze half a dozen enemies. |
Passive skills:
| Level of | Skill | Effect | Additional Notes |
| I | Astral Energy Pool | +25/50 astral energy / MP | Another passive (regeneration) can be useful, although the Killer Bunny spell will handle your MP recovery later. |
| II | Theory of relativity | +2 INT next to Ogre; Level II upgrade gives +5 CRG | The INT bonus isn't great, but upgrading Tier II is a game-changer with the initiative bonus. If the Wizard starts next to the Ogre, expect her turn to be earlier than the others. |
| II | Astral Reach | +2 spell range | The alternative is +10% spell damage, but I find the extra range to be preferable. |
| III | Arcana von Schrapwitz | +50% chance to set targets on fire with standard ranged attacks | Alternative - +20% chance to freeze targets. I found the burning effect to be more useful due to the high proc chance. |
| IV | Bookworm | +2/4 INT | This is an increase in your INT and spell damage. |
Ogre skills
Active skills:
| Level of | Skill | Effect | Additional Notes |
| I | Cadula Opog | Push an enemy 2 tiles with your belly | Like other push-type skills, this is useful if you need to call a teammate's spectate or attack of opportunity. Be sure to select the "tipped" upgrade. |
| I | Belching | A low damage attack that hits three tiles in front of the Ogre; can stun targets | Choose an upgrade that allows the skill to also hit the sides of the ogre. |
| II | Gnolo | Two hits, each dealing 60% damage | You need an upgrade that allows both slaps to ignore defense/armor. |
| III | Dwarf Throw | Uh, he drops the gnome while he's around you; Deals AoE damage after the dwarf lands. | Get an upgrade that increases damage. Use this skill in conjunction with the gnome's abilities. |
| IV | wild jolts | Hits up to three targets in a straight line in front of the Ogre. | One of the improvements gives the earthquake a T-shaped or hammer-type protection. |
Passive skills:
| Level of | Skill | Effect | Additional Notes |
| I | Ogre Breach | Allows you to destroy reinforced doors | Take advantage of the next upgrade, which will also allow you to destroy stone-fortified doors. In these rooms, you are sure to get amazing loot. |
| I | Brothers in Arms | +5 hit/damage when near a barbarian | Try to keep the Barbarian close to the Ogre at all times to maintain this bonus. |
| II | Ogre skin | +2/4 Defense | This helps make Ogre more durable. |
| II | Advanced Kill | Allows the use of two-handed hammers | By default, the Ogre can only attack with its fists. This allows you to use better weapons. |
| II | annual bath | +1/2 Physical Resistance per level (retroactively) | This is a total of +20 to physical resistance after reaching the maximum level. |
| III | Akala Nom Nom | +20/40 HP per kill | It is likely that the Ogre will kill a few mobs during the fight, so this keeps him in top condition. |
| IV | Ogre Power | +3/6 STR | More ways to increase your DPS. |
Gnome skills
The dwarf is rude, rude and downright evil. But he's also a tough tank that can help you get further in The Dungeon of Naheulbeuk: The Amulet of Chaos
Active skills:
| Level of | Skill | Effect | Additional Notes |
| I | Yakak Charge | Deals damage and knocks down the target | By default, this only hits one opponent. Later, when you unlock level V, you can choose an upgrade that will allow you to hit three tiles in front of the gnome. |
| I | Whirlwind Strike Gurdil | A spin attack that hits every cell around the gnome | If used in combination with Ogre's Dwarf Throw skill - and assuming the dwarf is following the ogre under its own power - you can quickly follow your whirlwind to take out a few enemies. |
| II | Thunderhip Dash | Charges four tiles in a straight line or diagonally | This skill also helps the dwarf become more mobile. Choose an upgrade that increases the distance to six tiles. |
| III | Get Tae F@$*! | Shield strike that pushes your target back | Use this to force a teammate to observe or attack of opportunity; select stun upgrade. |
| IV | Hold me back | Deals 200% damage to one target; must have the support of two allies | The upgrade increases damage to 350%, but you need three allies to support you. The setup may take some time. |
Passive skills:
| Level of | Skill | Effect | Additional Notes |
| I | Leather Brothers | +3 defense next to the barbarian | If the ogre throws the gnome and the barbarian performs Ferocious Strike, then you can see these gifts even after both move on. |
| I | iron beard | +3% Physical and Magic Resistance | Upgrades will increase physical or magical resistance even more. |
| II | stone counter | +10 Parry and cannot be knocked down while in defensive stance | This passive skill is fun as it makes you more durable. |
| III | Dwemer exposure | +20/40/60 Max Stamina | If you want to play more aggressively and use more skills more often, then this passive is a good choice. |
| III | Shield Master | +3/5/8 parry | Alternatively, this is for defensively oriented players. |
| IV | Dwarven Strength | +3/5 STR | Of course, you need to deal more damage. |
Thief skills
To be honest, Vor is probably my least favorite character in "Nakhylboyk Dungeon: Amulet of Chaos" . Whether he strikes close or strikes from afar, he hardly matches the abilities of others.
Active skills:
| Level of | Skill | Effect | Additional Notes |
| I | Sneak Punch | Backstab for 200% damage | This only works if the thief is directly behind the target. You can use the aggro/taunt spell first. |
| I | caltrops | Deals minor damage, but immobilizes the target. | It can be helpful, but half the time it is resisted. |
| I | Stealth | Becomes invisible and can move; will be automatically detected if within 3 cells in front of the enemy | Again, this can be helpful, but you will probably get discovered from time to time. |
| I | Defuse the trap | Allows you to disable traps during combat and exploration | Unlocked by default. You can also switch to Vor while exploring to disable traps and get an explosive bomb. |
| IV | nerve blast | Chain three attacks in a row; each attack has a penalty to accuracy; a missed attack will break the combo | Upgrade it so you have four consecutive attacks. This is probably the thief's most useful skill and comes very late in the game. |
Passive skills:
| Level of | Skill | Effect | Additional Notes |
| I | God saves man, who save himself | Allows you to wear heavy leather armor | Get this so you can equip the best armor pieces. |
| I | lone wolf | +5/10% Critical Strike Chance when there are no allies nearby | This is useful as long as you stay away from teammates. |
| II | bomberman | Bombs are stronger and have additional effects | A good example is the Frost Bomb, which usually hits a single target. If you have this passive, it can hit 6 tiles instead (potentially freezing everyone on those tiles). |
| III | Poisoned Daggers | Normal melee attacks have +20% chance to poison targets. | This is useful as you probably won't be spamming other skills anyway. |
| III | exploiting weaknesses | +10% more damage against targets suffering from a status effect | Have a teammate drop or drop anything that causes a status effect and let the Thief focus on that opponent. |
| IV | Cunning Agility | +1/2 AGI and +2/6 Evasion | This boosts your defensive and offensive abilities. |
Priestess Skills
The Priestess has amazing healing spells and is one of the extra companions you can choose pretty early on in Nakhylbeuk Dungeon: Amulet of Chaos . Choosing her also means I wasn't able to play Paladin or Minstrel to see their full potential.
Active skills:
| Level of | Skill | Effect | Additional Notes |
| I | Recovery of Euclid | Far Healing Spell; +50 healing and +2 defense | This remains useful throughout the game. Upgrade options even remove physical or magical negative status effects. |
| I | Euclidian chain of lightning | 90% damage; hits one target, then splits into two additional bolts that hit adjacent units | Use an upgrade that increases spell damage by up to 150%. Yes, chain lightning can hit allies, but try to use stronger characters as "guides". |
| I | The Inner World of Euclid | +4 Defense and +2 CHA | This is available by default. I rarely used this buff. |
| II | Blessing of Euclid | +2/4/5 STR, INT and CRG | This is one of the best buffs in the game. This not only increases your physical and magical damage (STR and INT), but also increases your initiative (CRG). The AoE coverage is huge too. |
| III | Lightning Euclid | Spell 200% lightning damage | This can only be used if two or more allies are below 50% health. |
| III | wave of healing | +50 healing; 6 tiles | This is an AoE heal that is great for the endgame. The upgrade also increases it to +80 Healing and is further affected by your CHA. |
note: what regarding the Youclidhian Lightning Chain spell, the idea is to have someone like a Barbarian, Ogre, or Dwarf get close to the enemies. They have skills that make it easy for them to do this. For example, a barbarian has a ferocious strike, and a dwarf can use Thunder Hip Dash (or the Ogre Dwarf Throw ability). Try to position your teammates so that they are next to several opponents. Then use chain lightning to fry everyone. Your friends are generally "survivable", which means they can survive a devastating attack.
Passive skills:
| Level of | Skill | Effect | Additional Notes |
| I | Brainstorm | +10 astral energy regeneration/MP each turn when next to a Sorceress | I mean, two rollers are often left behind, so you have to keep them close to each other. |
| I | Heartthrob of the masses | +2 CHA when near a barbarian, thief or ranger | Three different characters will receive a fixed bonus, so it should be easy to keep it up during the fight. |
| I | Blessed Reserve and Astral Restoration | +25/50 maximum astral energy and +5/10 astral energy per turn | Having more MP is definitely helpful. Similarly, you probably won't need another passive (MP regen) while standing next to Wizardess. This can help when you're in a pinch (e.g. use Youclidhian Lightning Chain, then Healing Wave in quick succession). |
| III | The blinding light of Euclid | Targets hit by a standard ranged attack get -2 Accuracy for 2 turns. | A single shot from your regular beams and targets will make it harder to hit you or your friends. |
| IV | Heavenly teachings and divine aura | +2/4 INT and +2/4 CHA respectively | I suggest using Divine Aura first as Priestess's spells depend on the CHA stat |
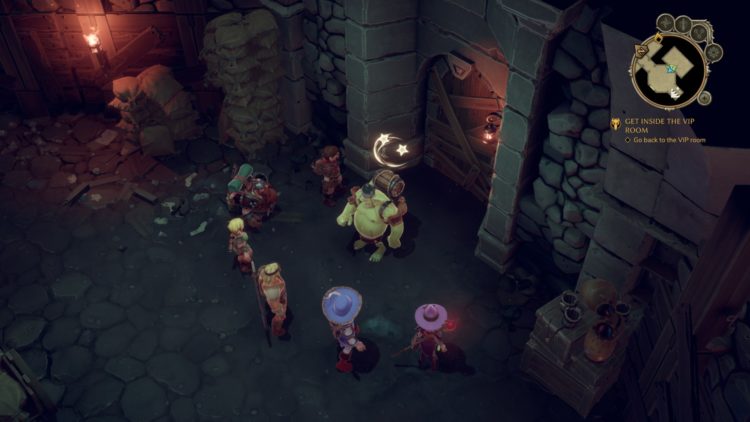
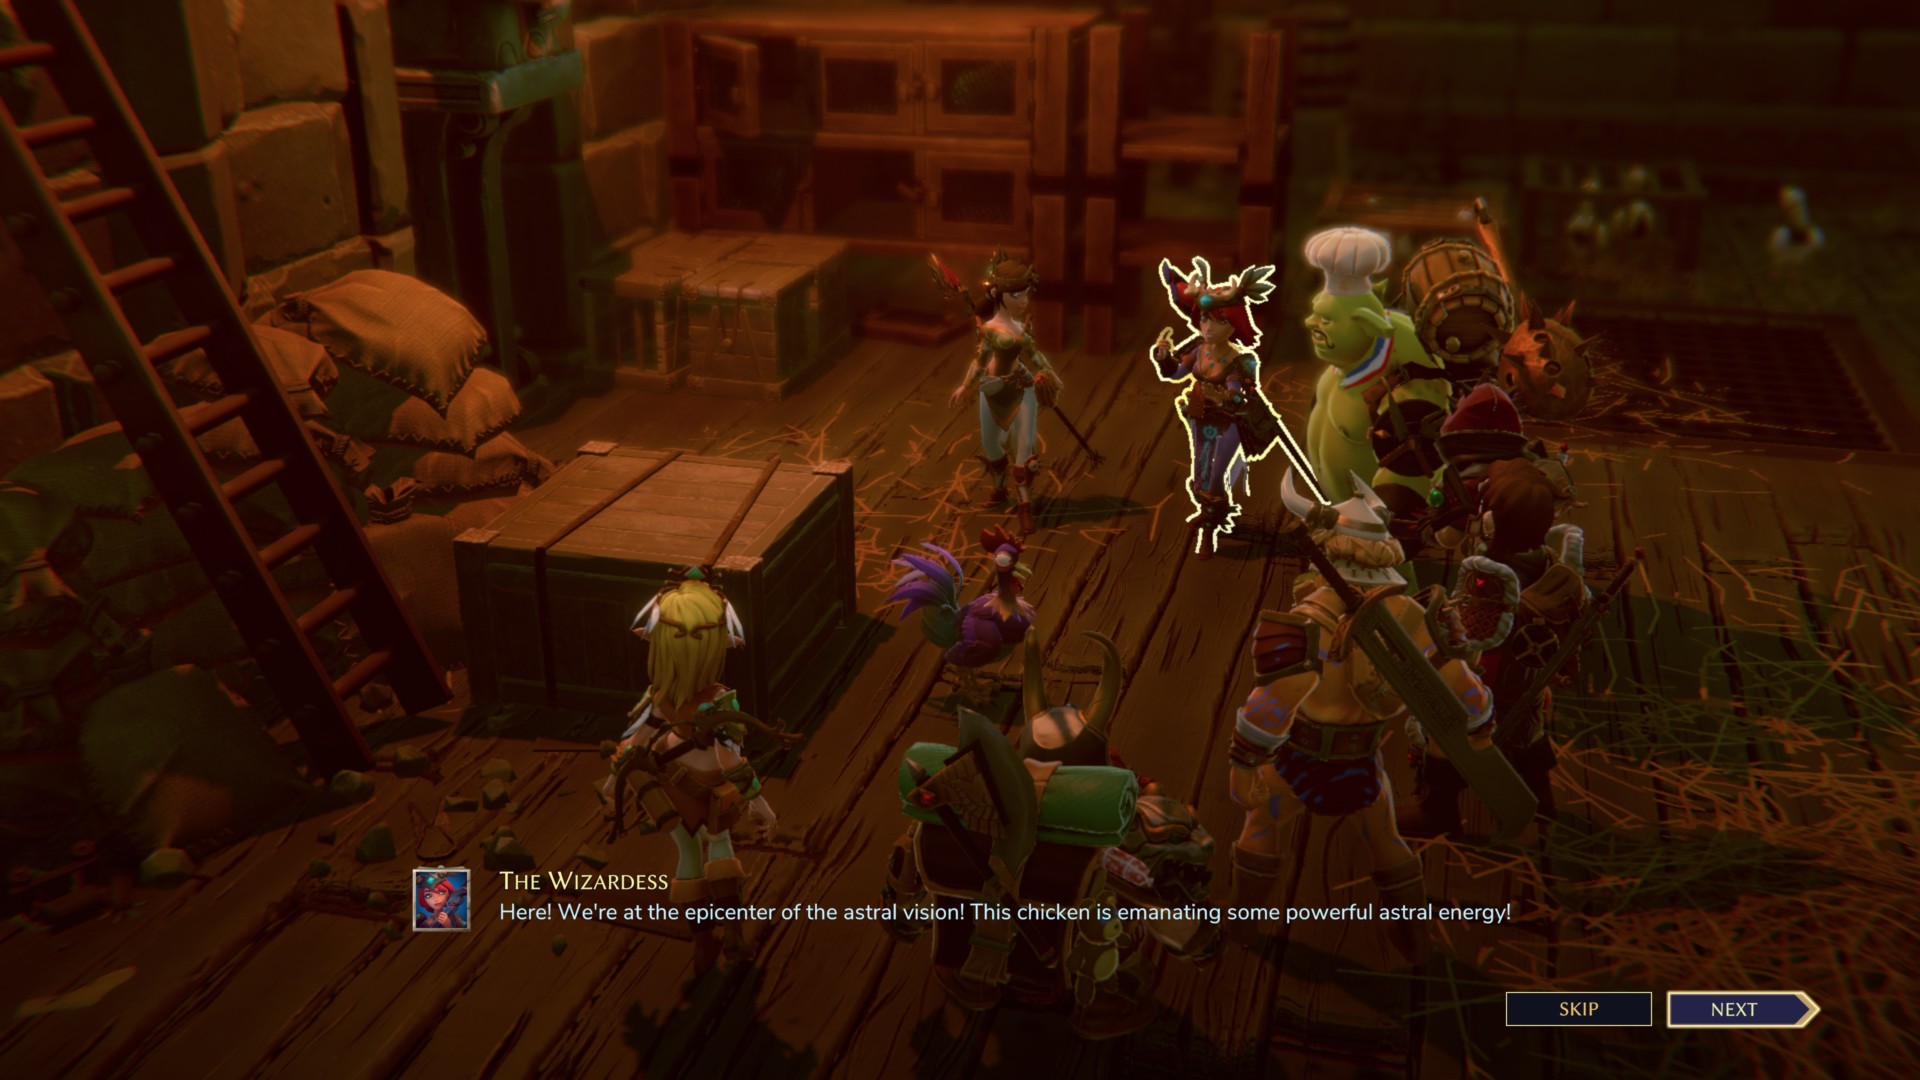
You will then take part in several battles - some involving cultists and dark knights, and others involving mad chickens (I'm not kidding). In the end, you are pushed back to the first floor. Head towards the magically sealed doorway and you will see a staircase leading to Zangdar's lair.
Zangdar is a powerful sorcerer and he is the final boss Dungeons of Nakhylbeuk . However, before you can fight him, you need to do a few things.
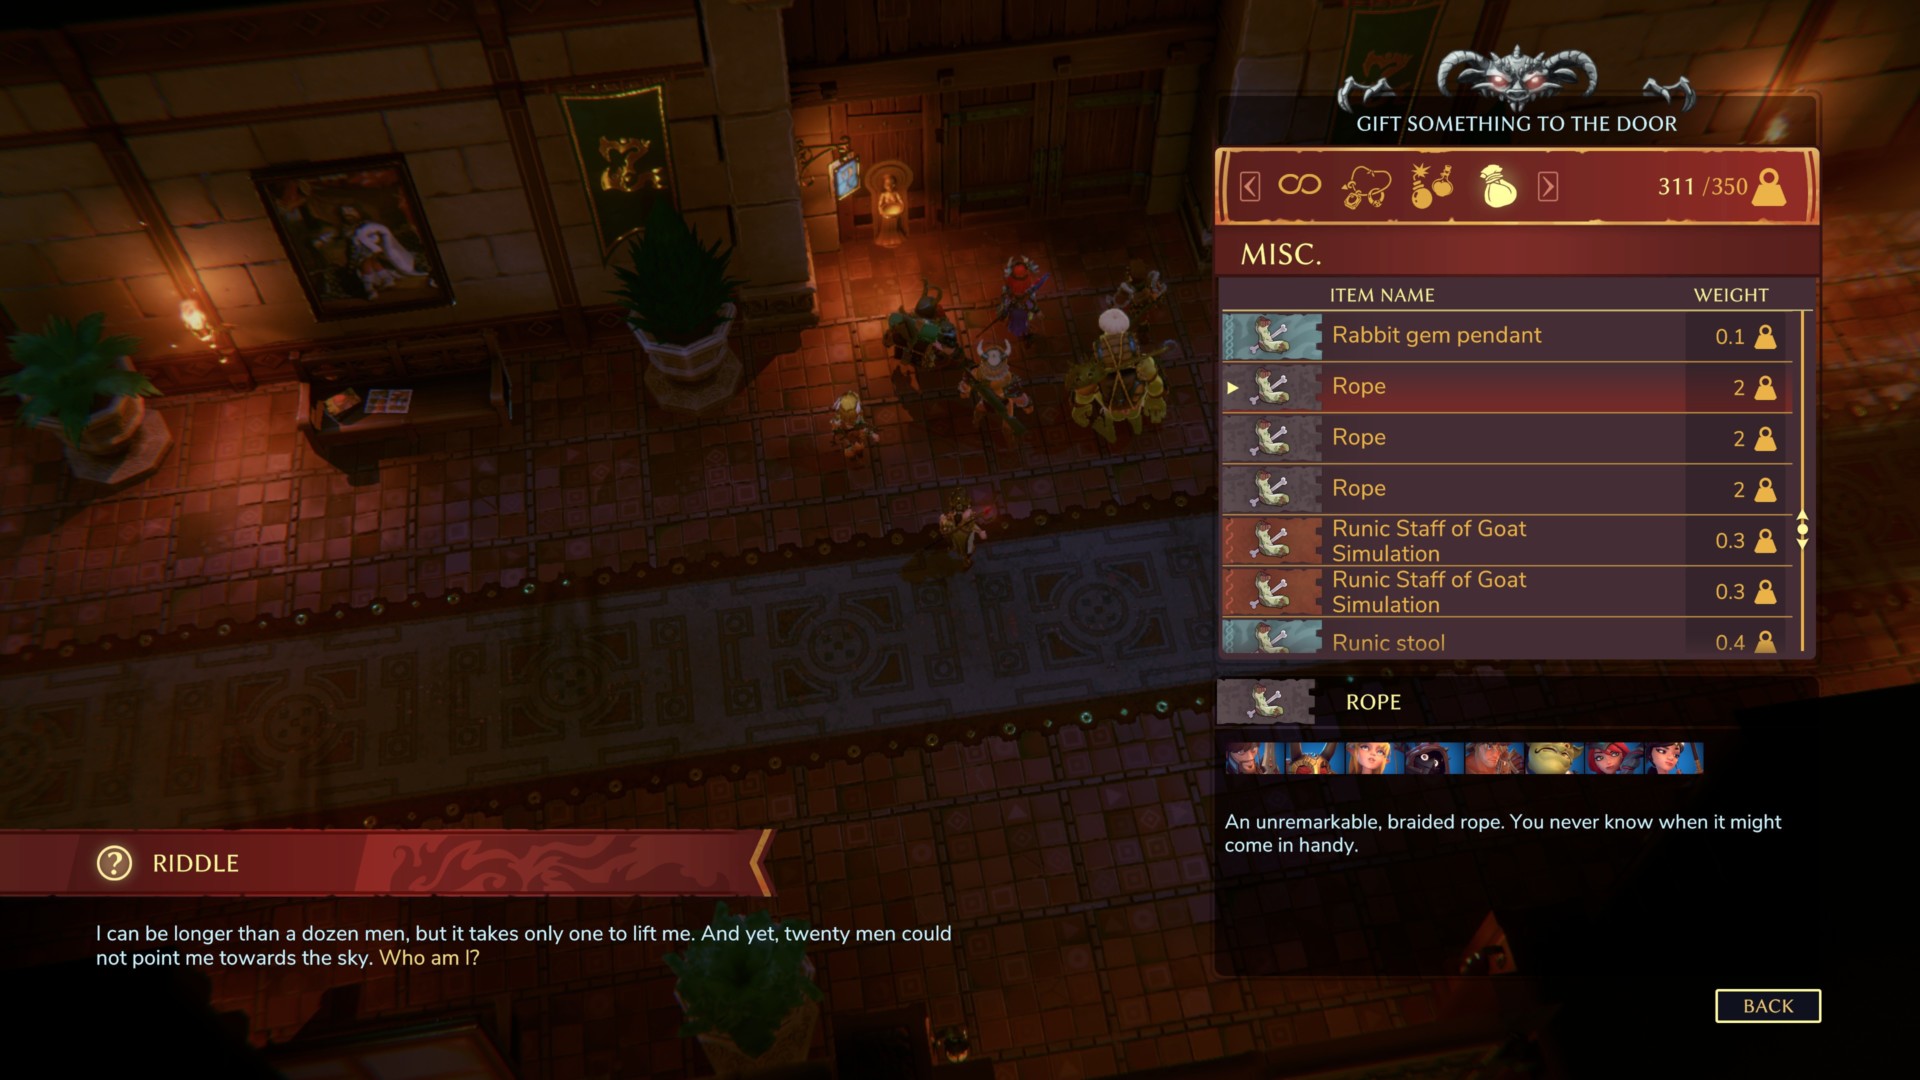
Solve the riddle
In one of the rooms there is a riddle:
I may be longer than a dozen men, but I only need one to lift me up. And yet twenty people could not point me to heaven. Who am I?
The answer is rope. You can click on it in your inventory.
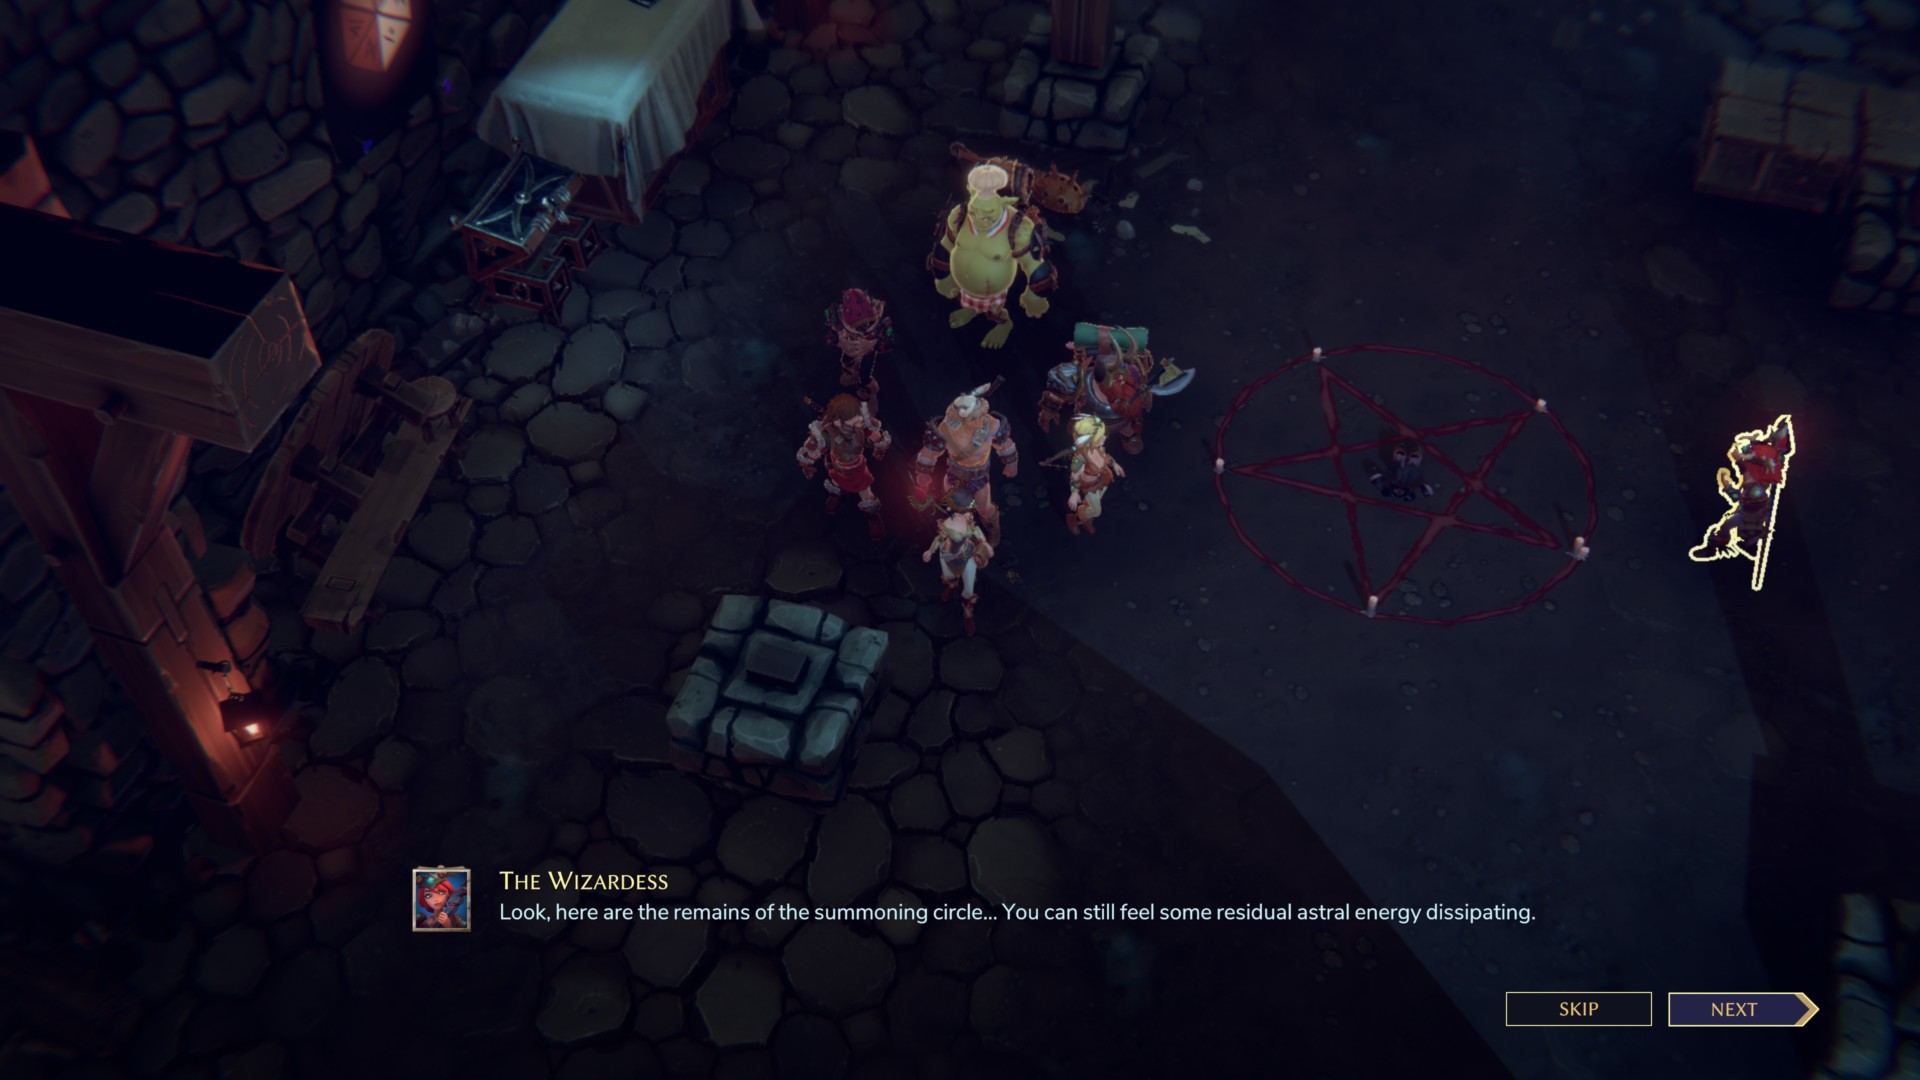
Behind the doorway you will find a garden with several statues arranged in an unusual pattern. Write down in your mind what you saw.
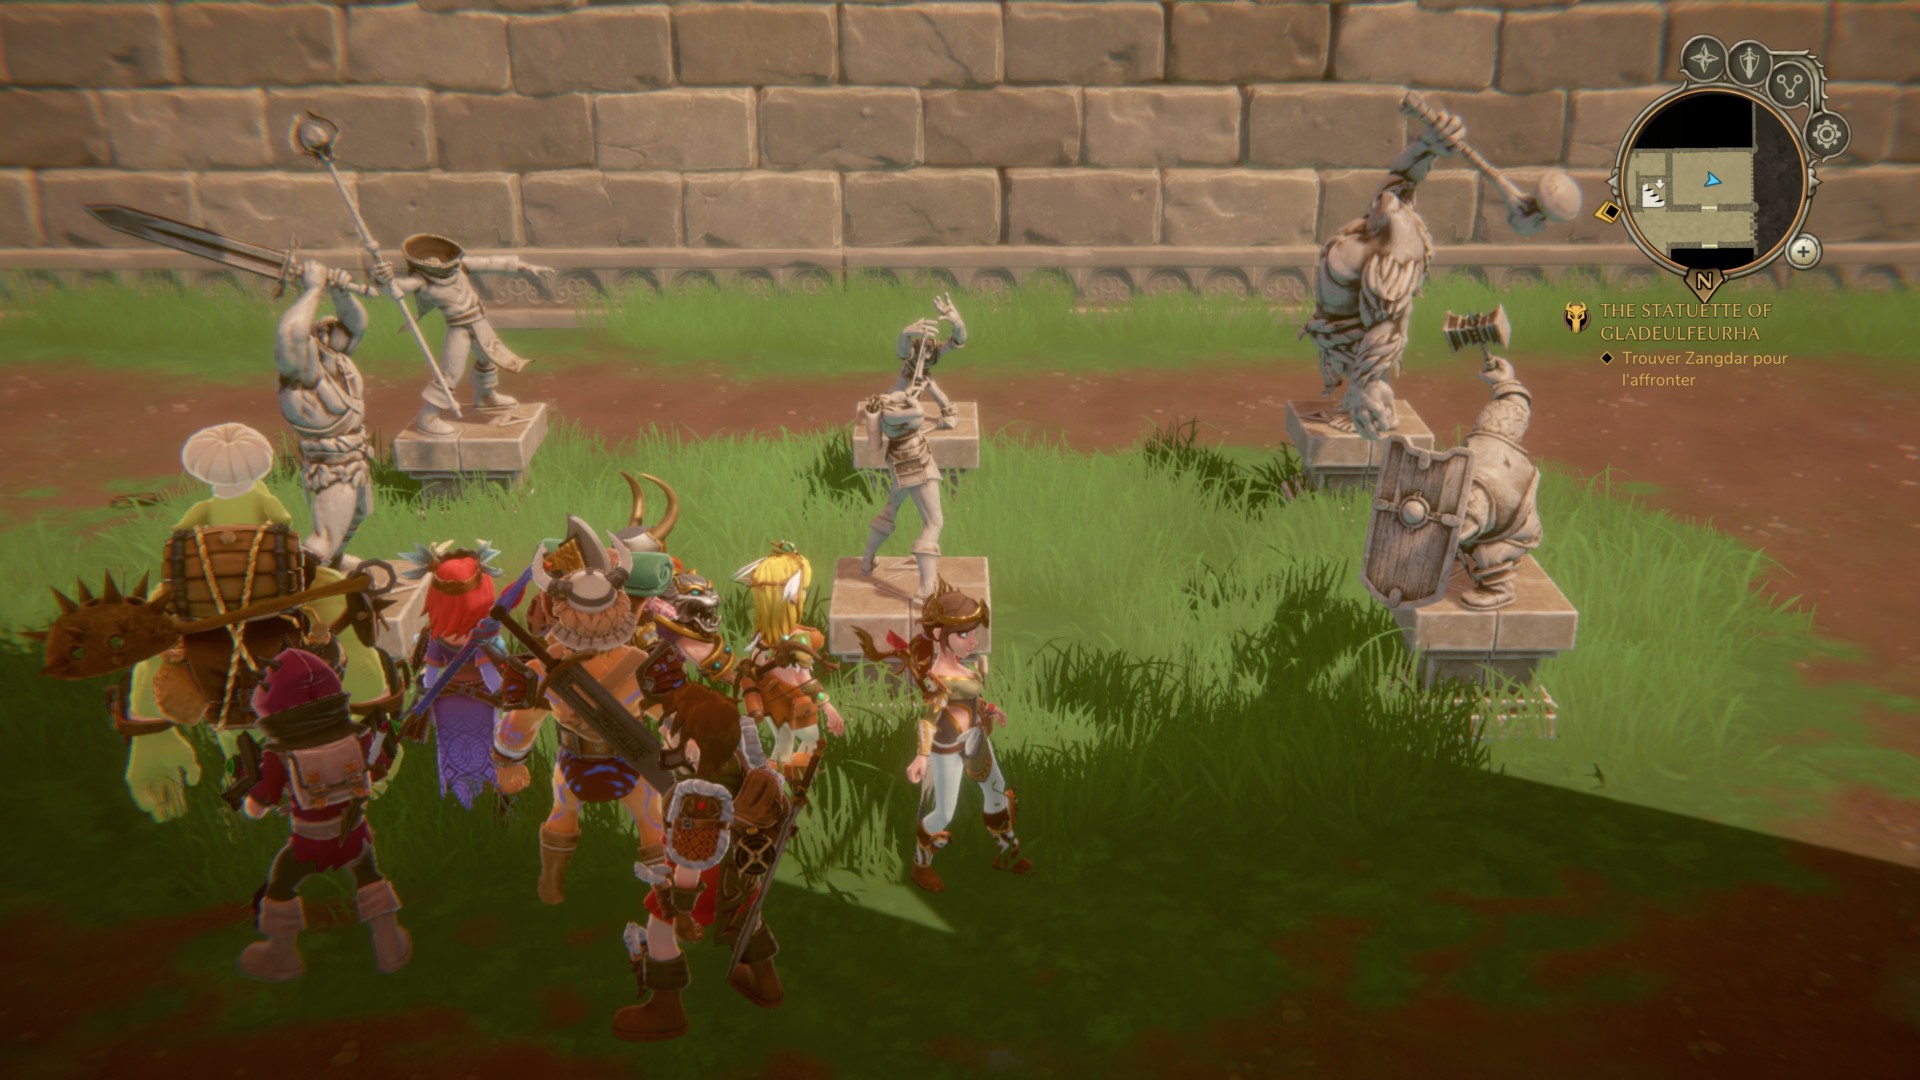
In one of the rooms to the south you will find Zangdar's laboratory. Arrange the pedestals in the same way as you saw in the garden:
- ➤The outer pedestals face the center.
- The pedestals in the center face each other.
This will unlock the next room where you can collect the Key of Zandar. This will open the door to his lair.
Other meetings
Anyway, there are a couple more meetings on this floor. One contains possessed books and the other contains several insane prisoners.
As far as I know, they are not needed to get to Zangdar's quarters. We go further and make our way there (the room is marked with a gold circle on the minimap).
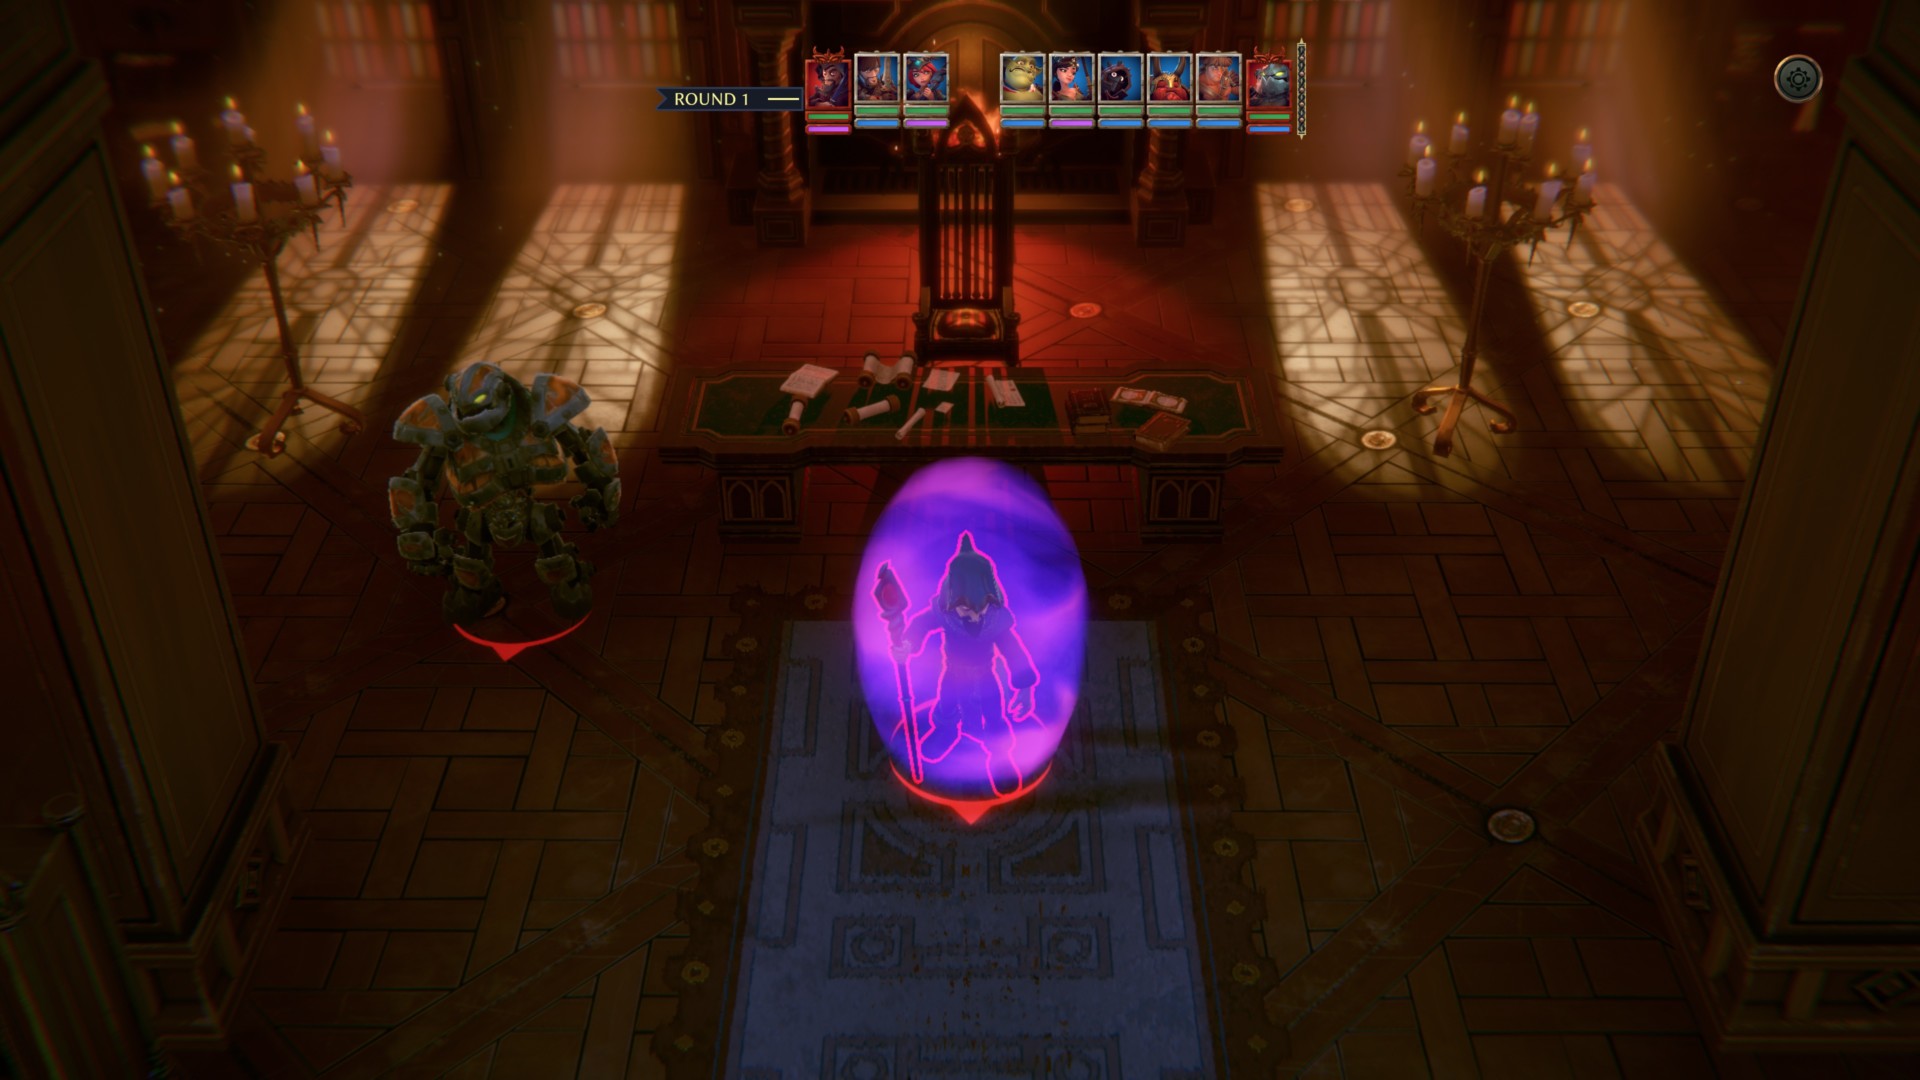
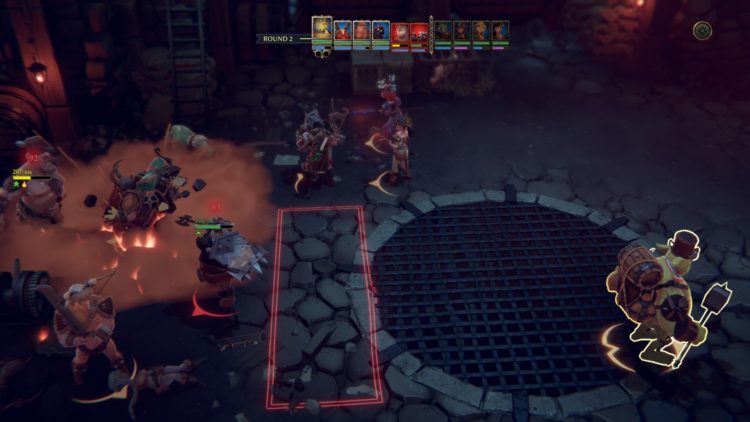
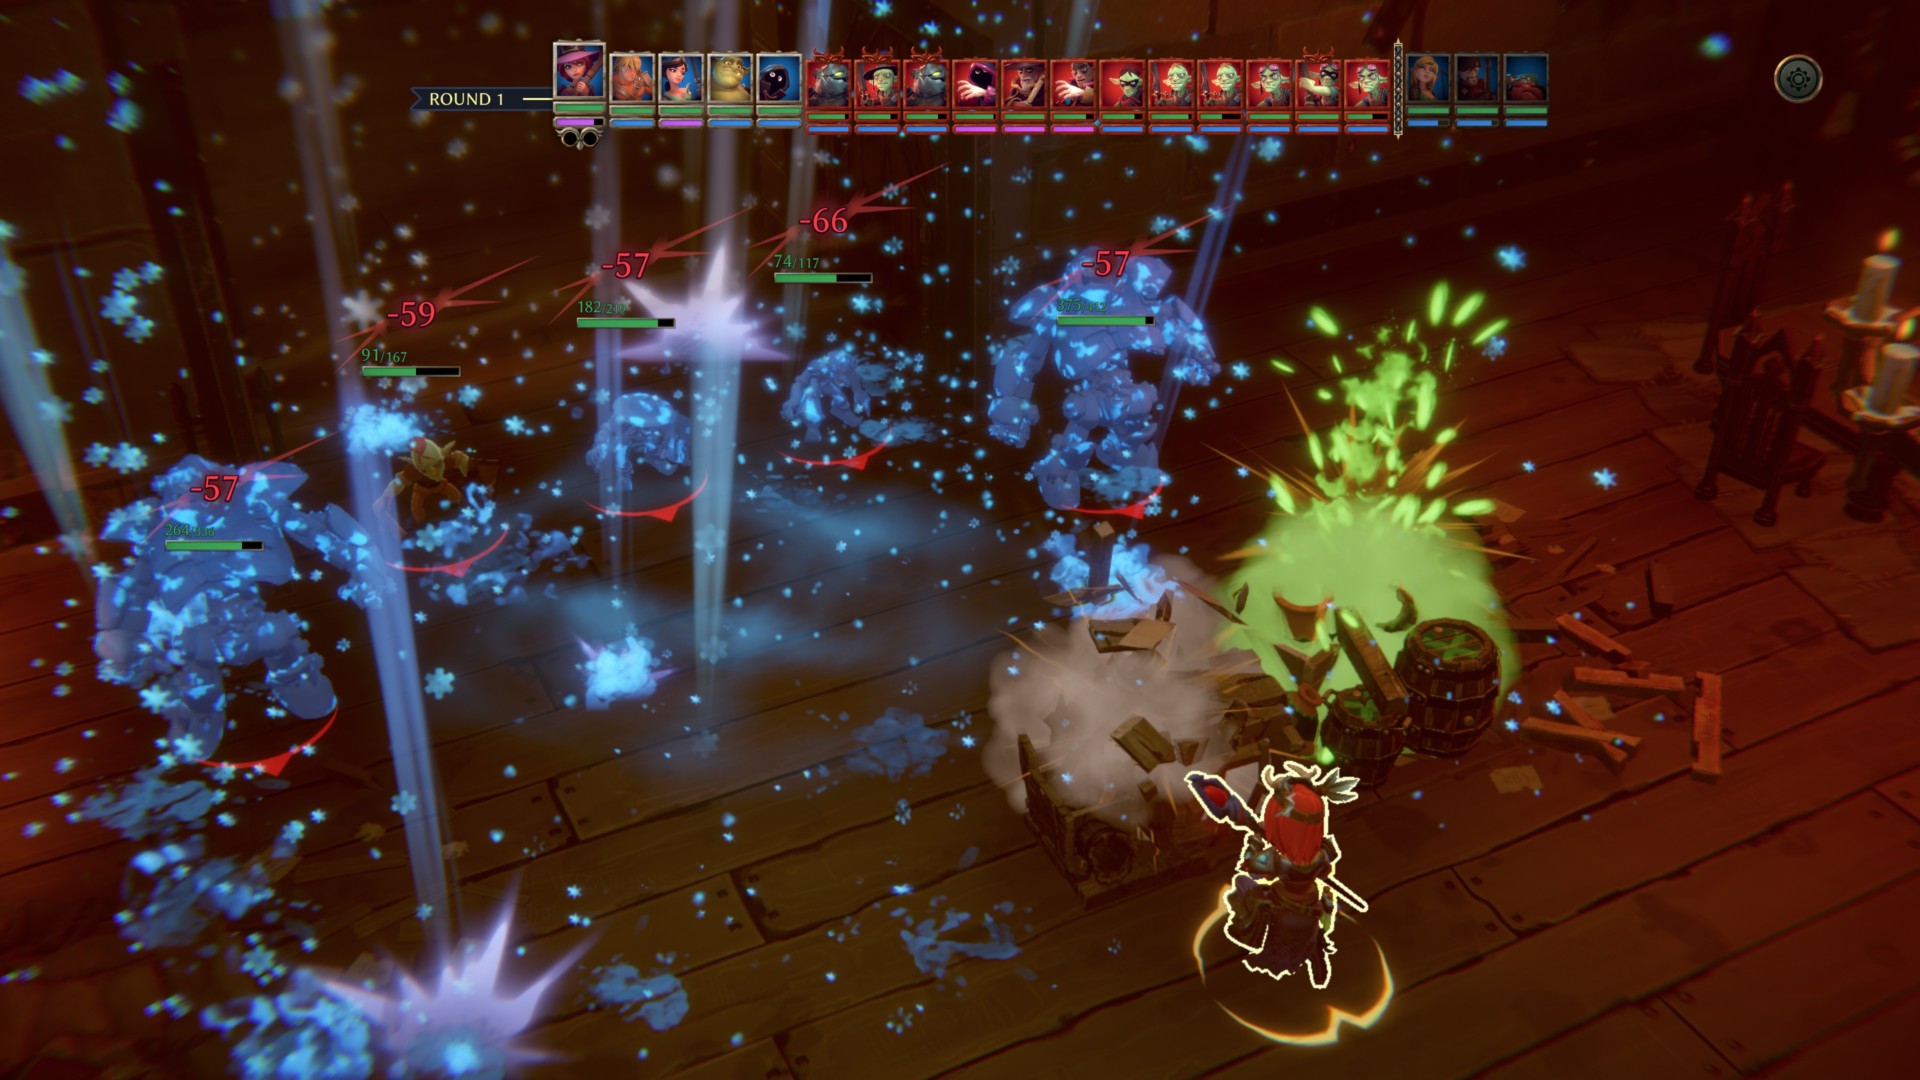
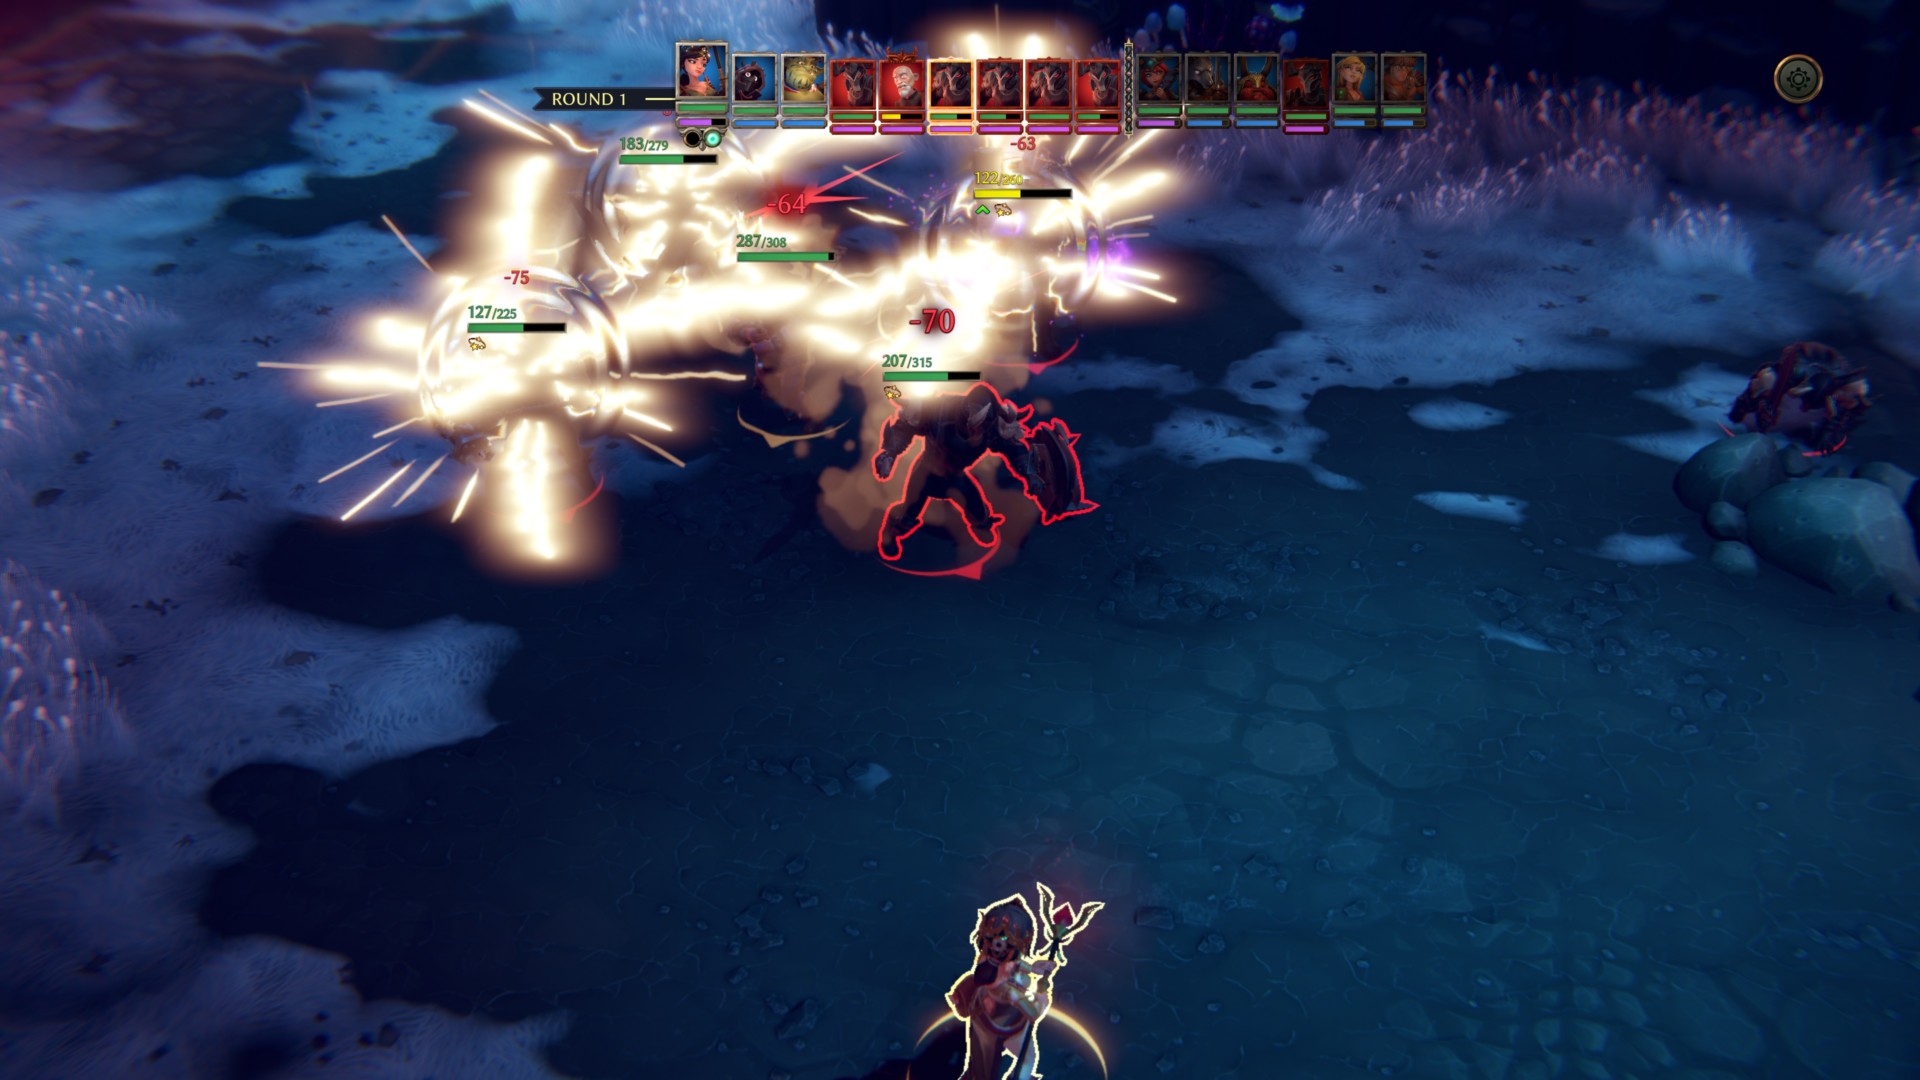
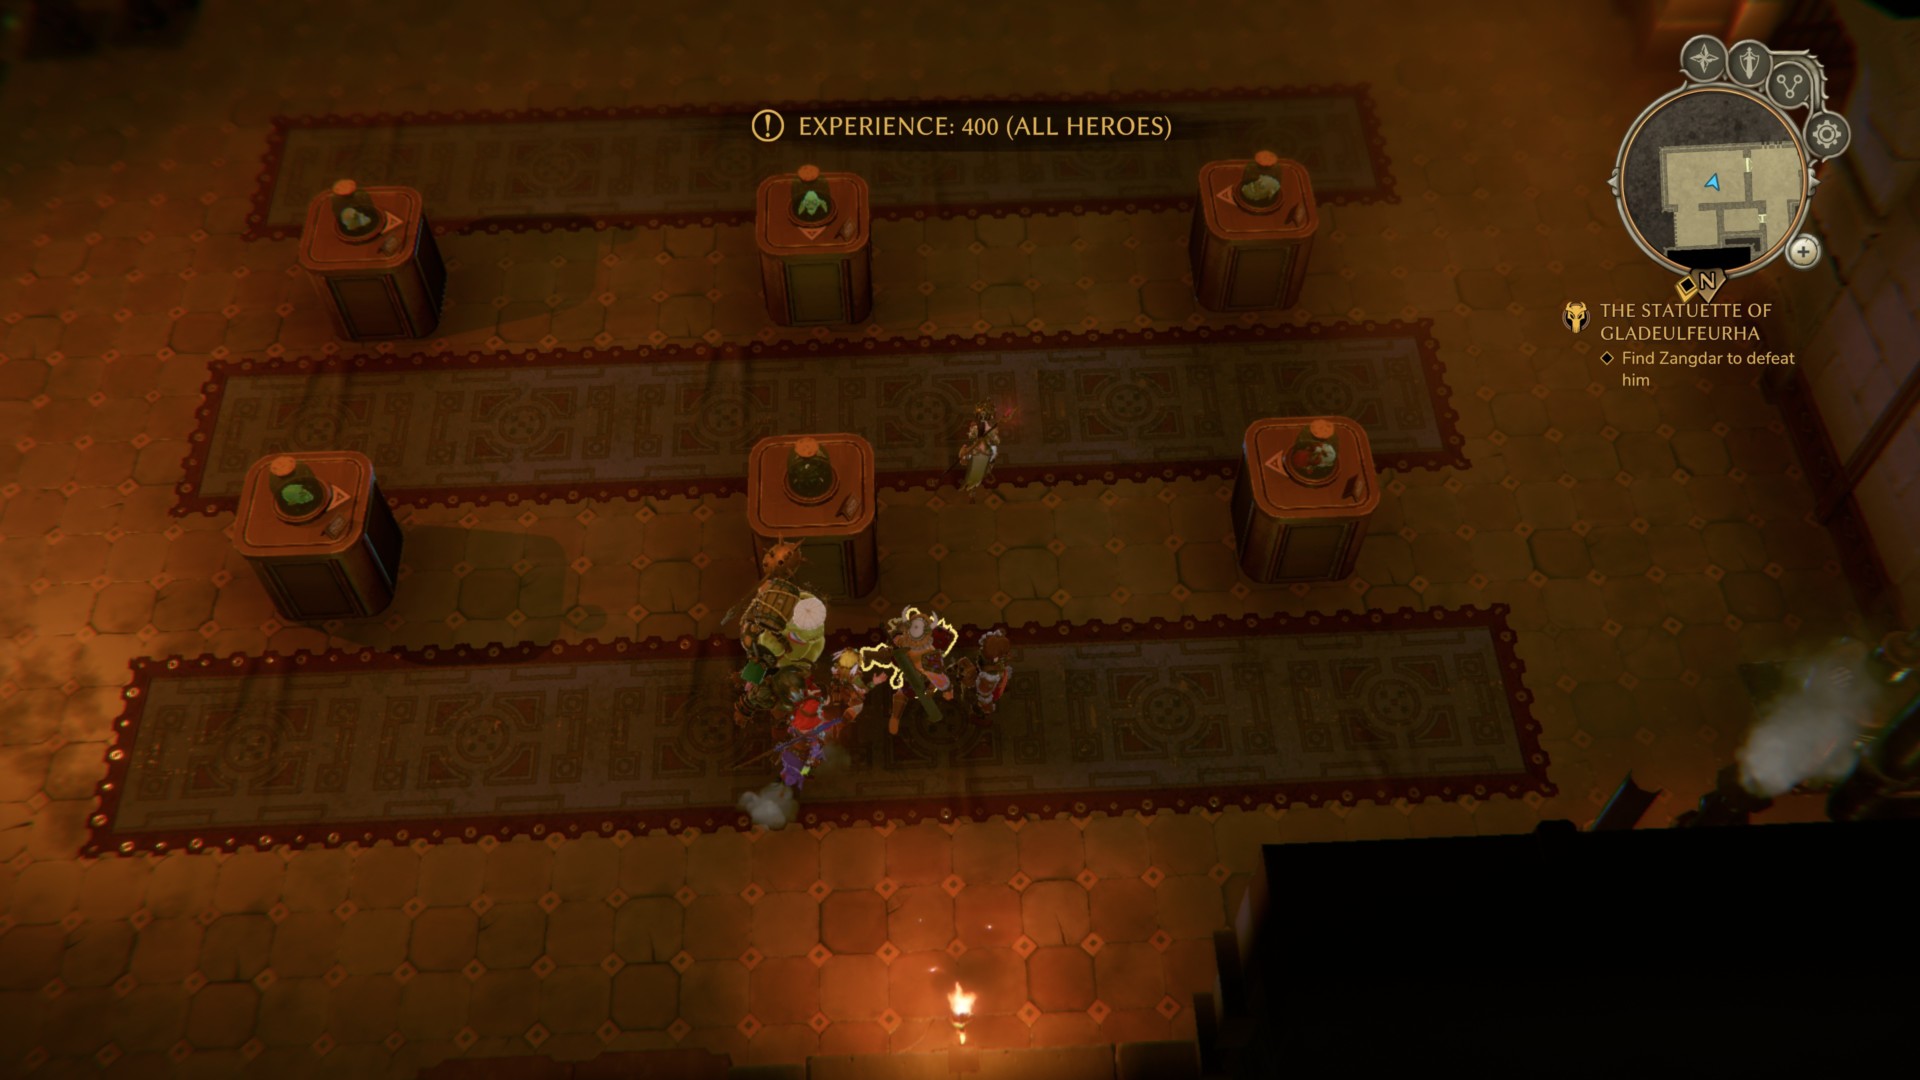
Zangdar boss fight
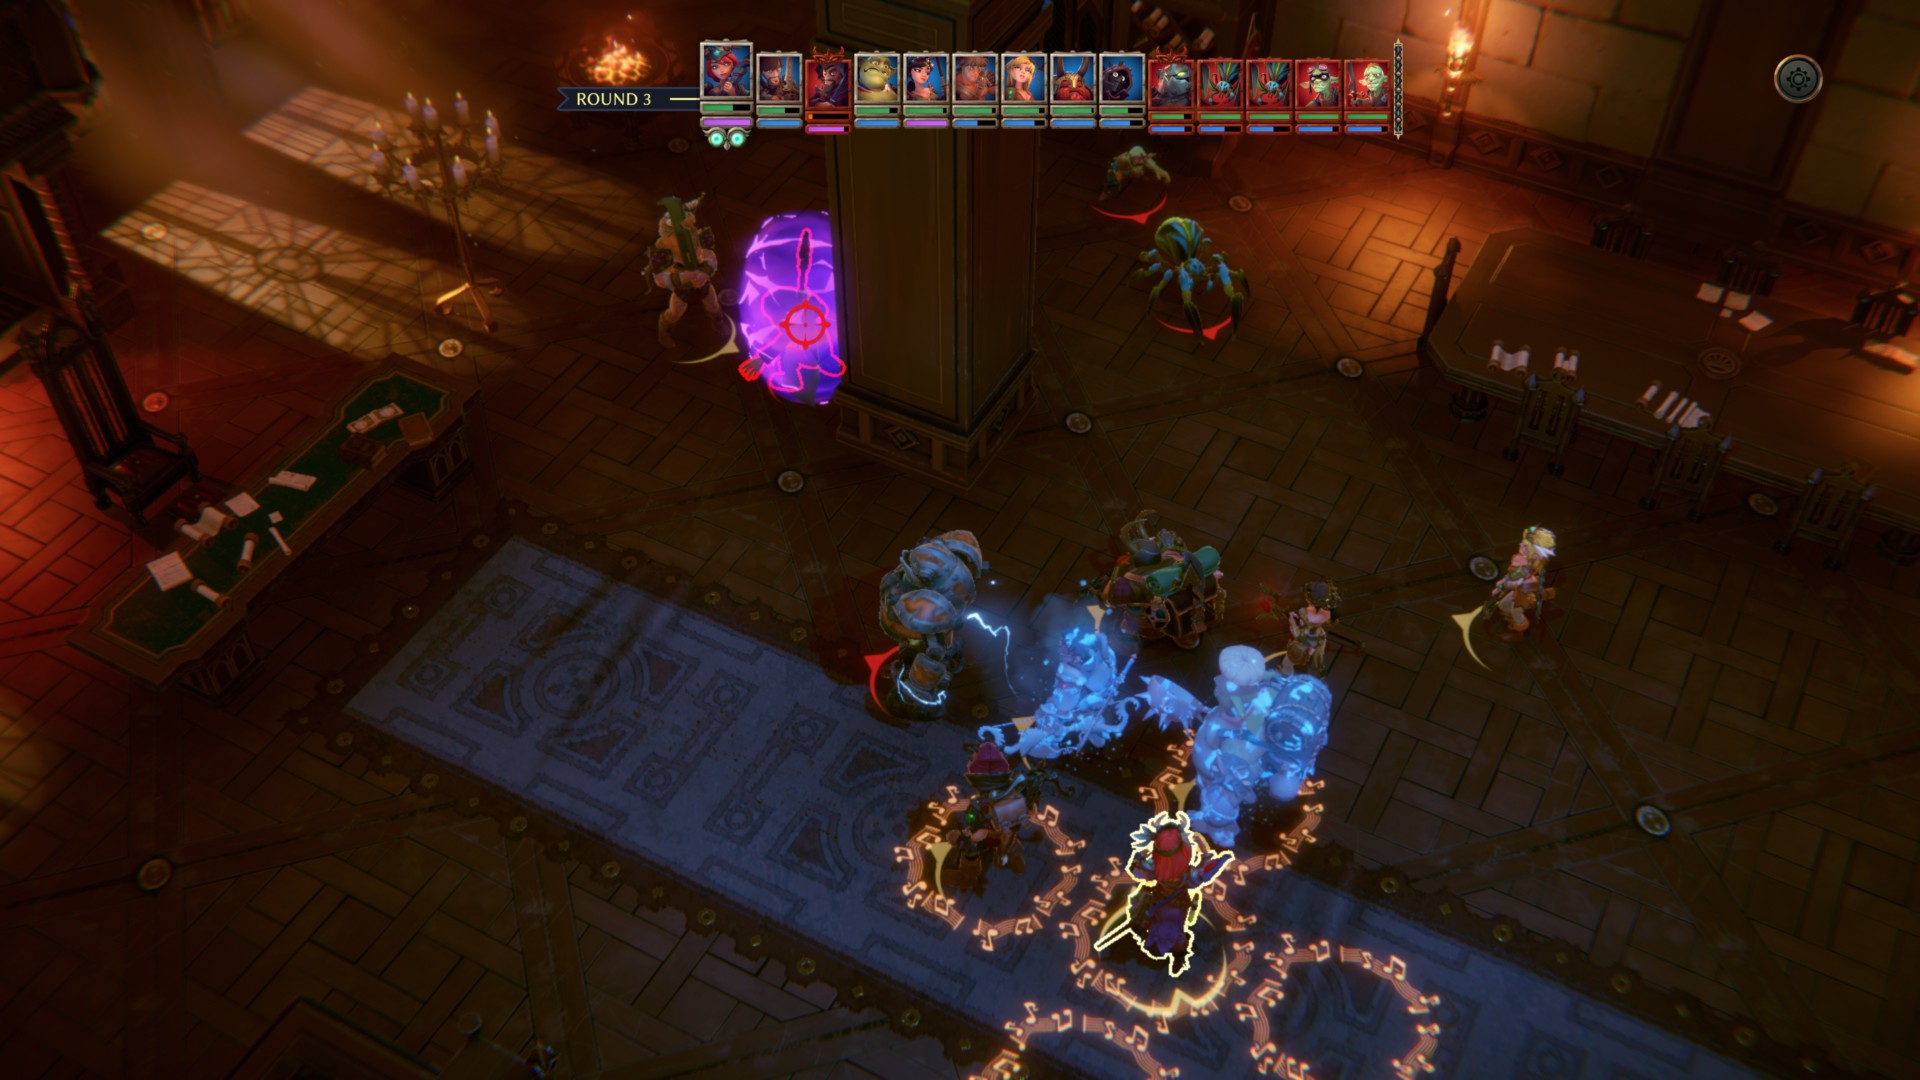
The Zangdar boss fight is unlike anything you've ever seen. have seen в "Dungeon Nakhylbeuk" . This is due to an additional mechanic that comes into play: Zangdar's shield. You can see the mechanics in the image below:
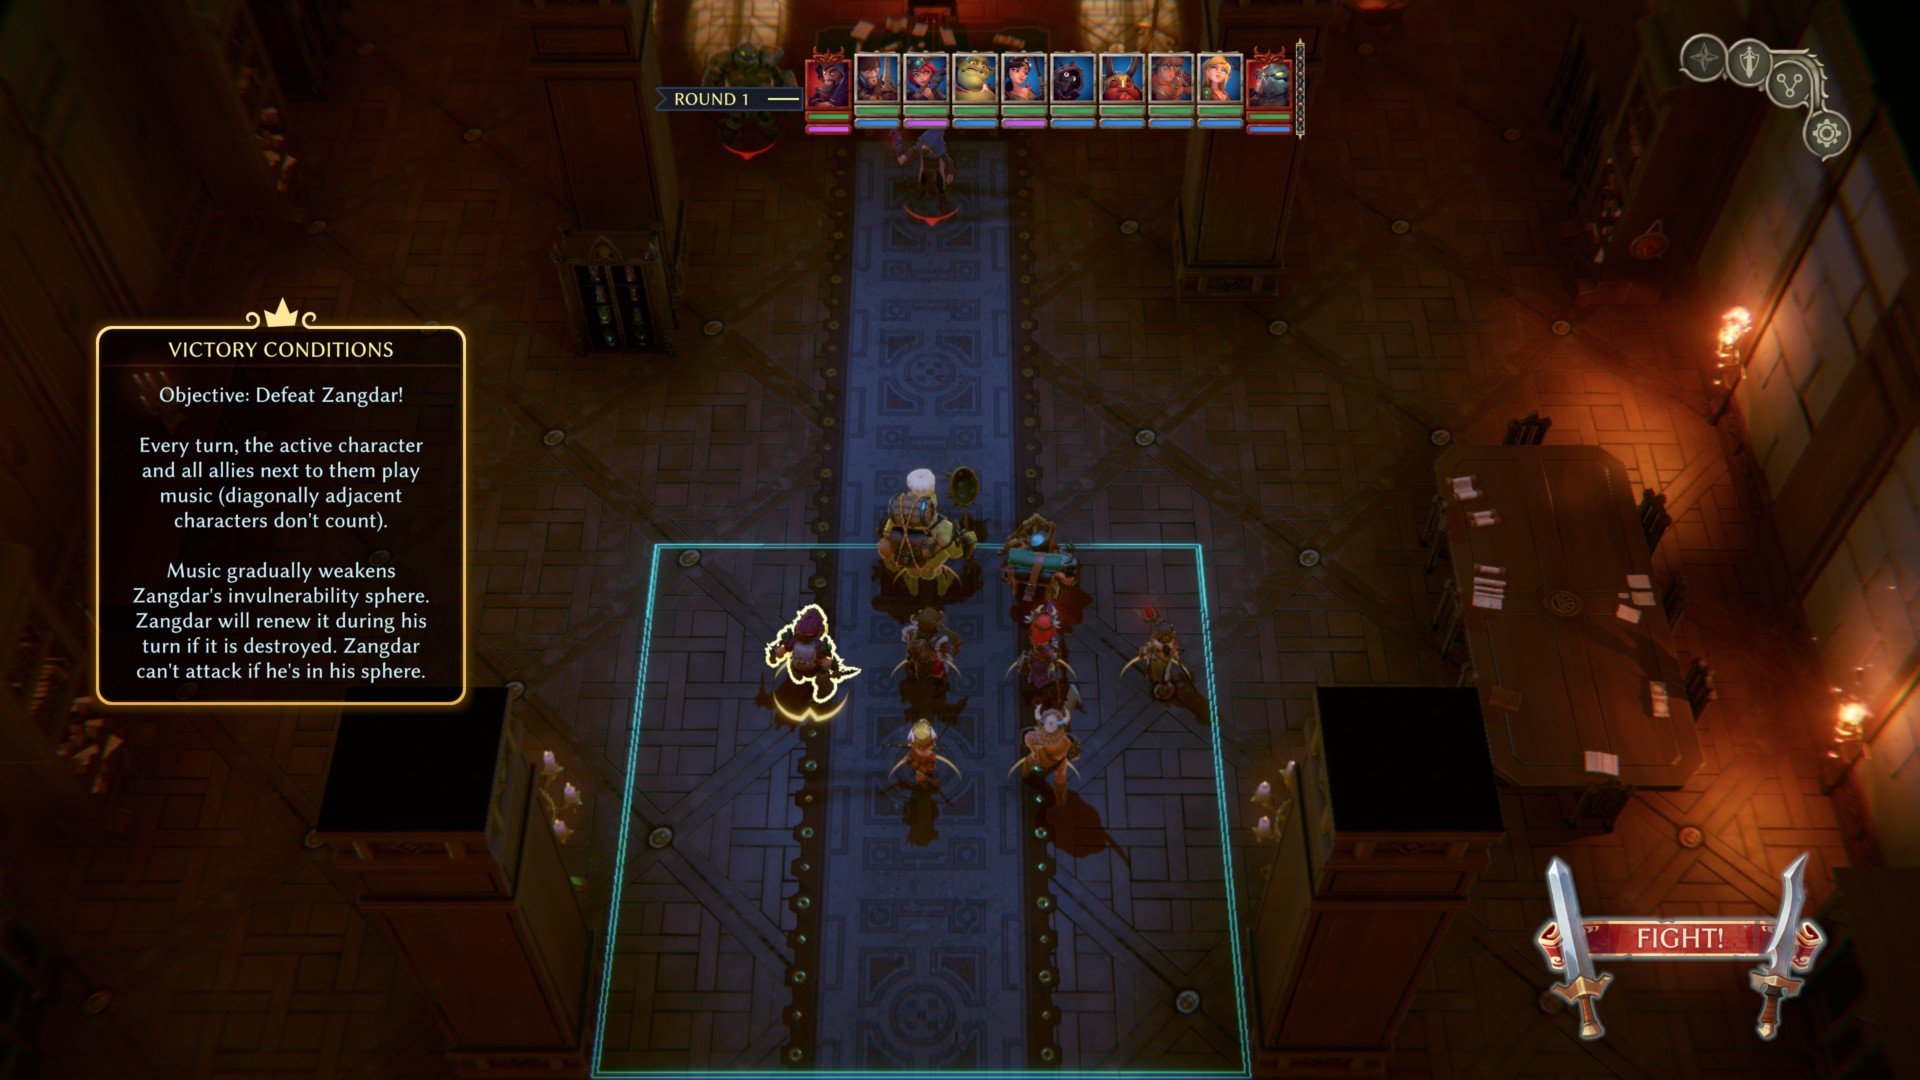
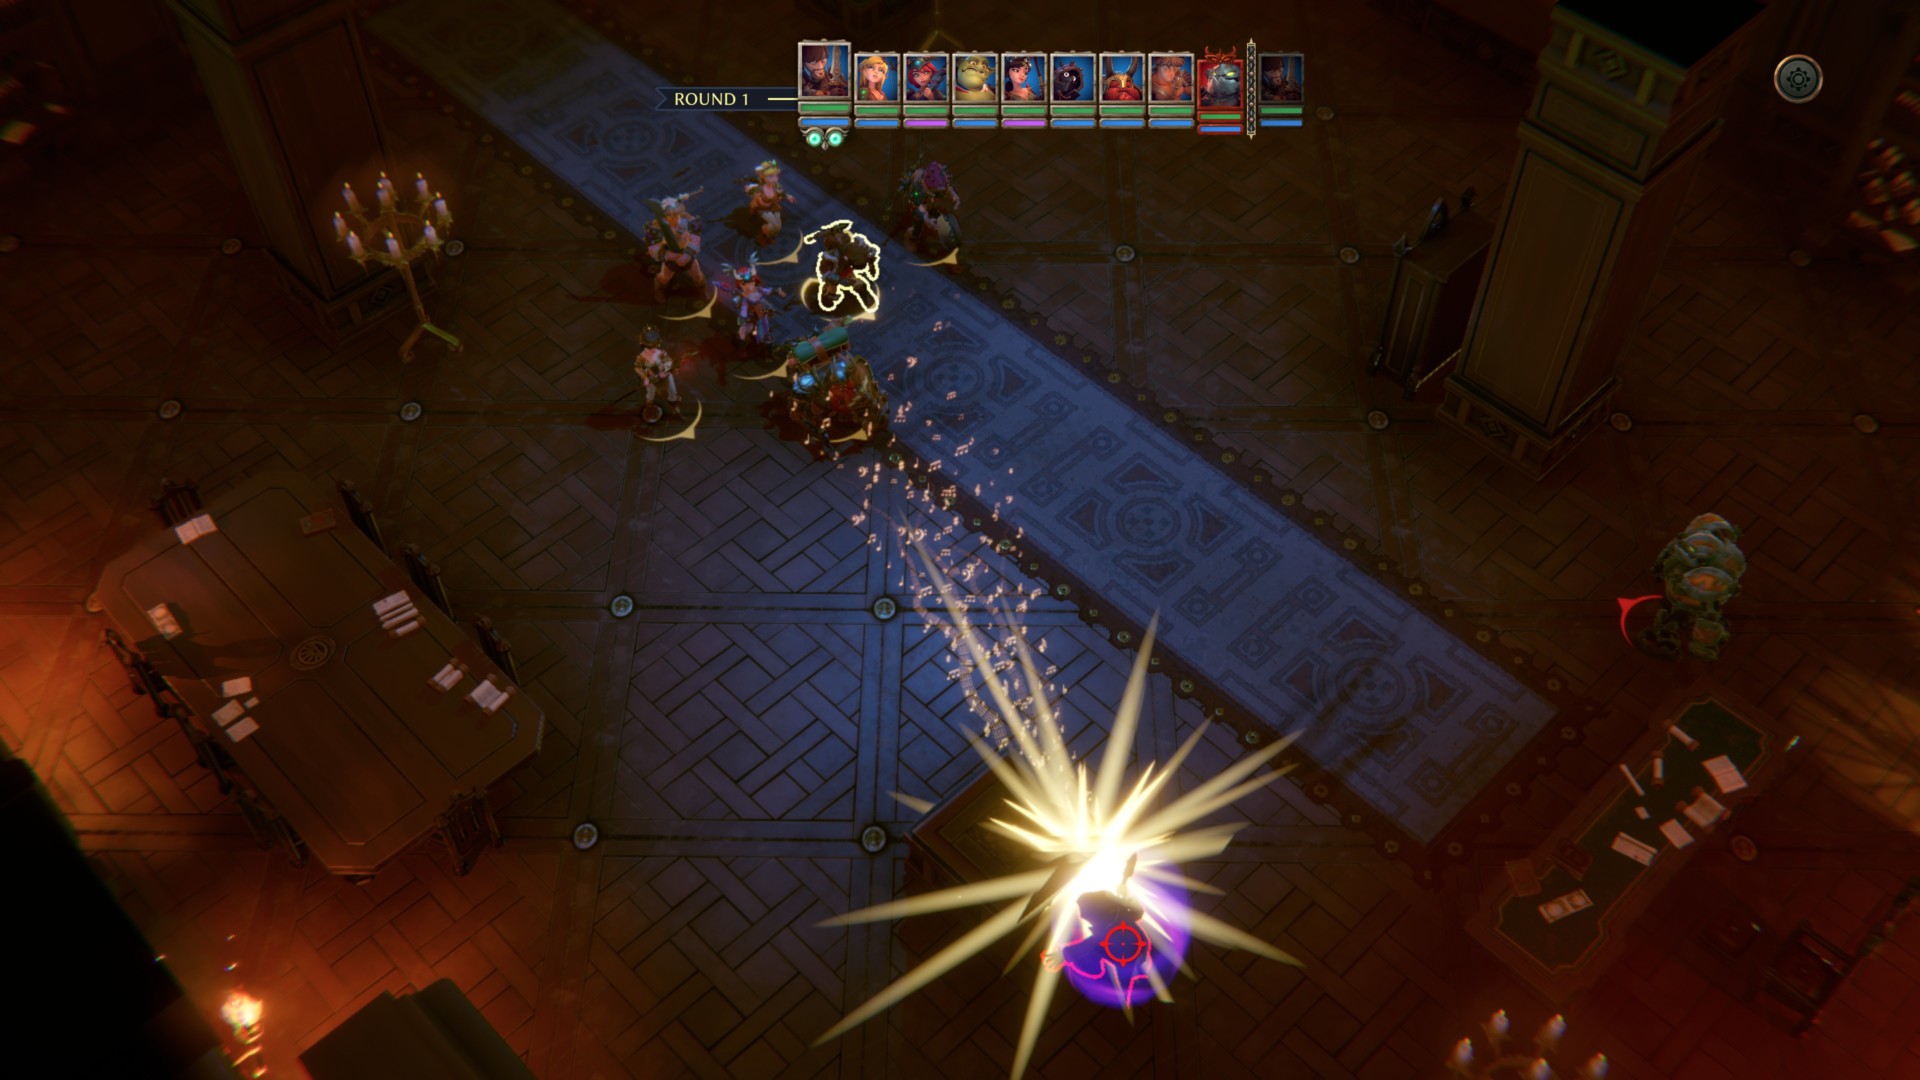
Basically, Zangdar is invulnerable while his shield is active. However, when your characters take turns, they "play music" and deal damage to the bubble itself.
The "Music Damage" that the character deals depends on the number of allies that are nearby in front, behind and next to them (diagonally adjacent ones do not count). So the goal is to ensure that the characters with the highest Courage (initiative) are surrounded by a few teammates.
As the fight progresses, try to have the non-attacking characters take positions that will be next to the one who will make the move later. If you can't detonate these notes early, you'll be able to catch up near the end of your turn order.
It takes about 15 "musical shots" to destroy the shield or, umm, pop Zangdar's bubble. Ideally, characters that can deal a burst of damage should go last - like the Barbarian with YAAARGH! and a thief with a nervous outburst. You will be able to kill him within three or four rounds.
Oh, and before I forget, there are a few more things to consider:
- If Zangdar's shield is gone, he will renew it when it's his turn. If it's too late in the turn order and his bubble hasn't been destroyed yet (but has a few cracks on it), don't break it if Zangdar is about to make his next turn. You probably won't be able to deal much damage if you time it wrong, and you'll also have to destroy the newly upgraded bubble.
- Breaking a shield will deal a small amount of AoE damage to your characters.
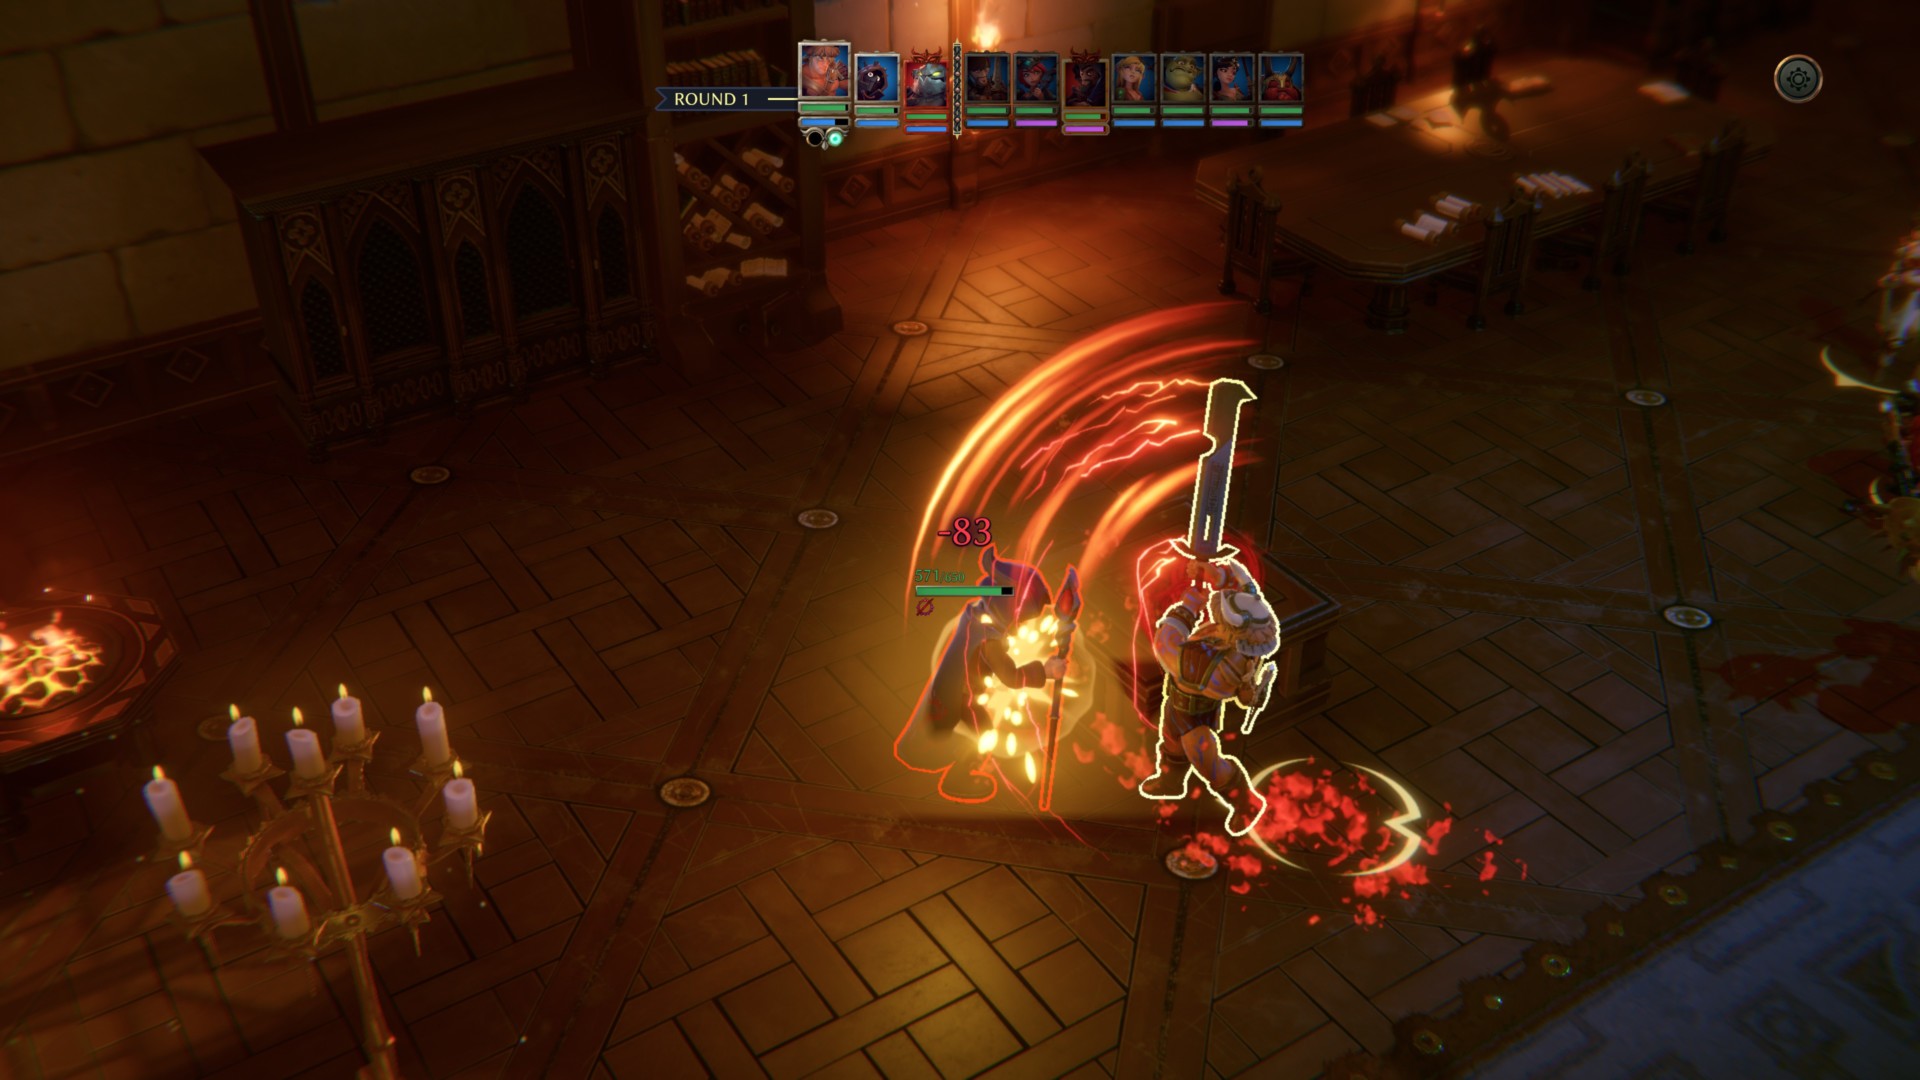
- Zangdar tends to use various spells such as Hailstorm (freeze) and something that triggers the "Scare" status effect.
- The golem is active at the start of combat. Additional mobs will also appear, such as spiders. You can safely ignore them and just focus on Zangdar and the boss fight mechanic.
Once Zangdar is dead, you can claim your loot (basic health potions only). This surprised me too, as I thought there would be additional battles ahead.
In any case, you can also see final credits The Dungeon of Naheulbeuk ". Unfortunately, after defeating the game's final boss, there doesn't seem to be a New Game+ mode.