
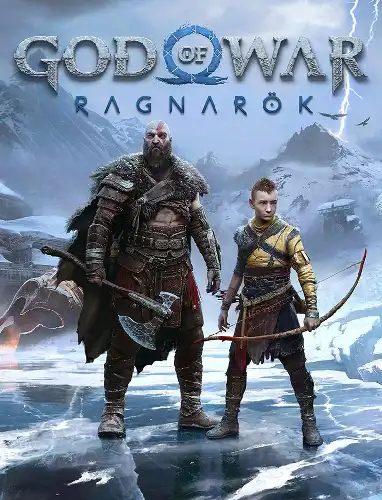
A sequel to God of War (2018), in which Kratos and Atreus must make a choice that will determine the fate of all living in the Nine Realms, all in the face of approaching Ragnarok.
Reunion Walkthrough God of War: Ragnarok

Walkthrough God of War: Ragnarok 100%. Reunion (Reunion) is the twelfth quest Ways, which represents the main storyline of Ragnarok. Within our guides to God of War: Ragnarok we are going to share our full walkthrough passing the chapter Reckoning, which includes puzzle solutions, combat strategies, and any other key areas of interest.
On this page:
- God of War Ragnarok Walkthrough Reunion
- God of War Ragnarok: Target Reunion
- God of War Ragnarok Reunion Rewards

Walkthrough Reunion God of War: Ragnarok
Talk to Ratatoskr
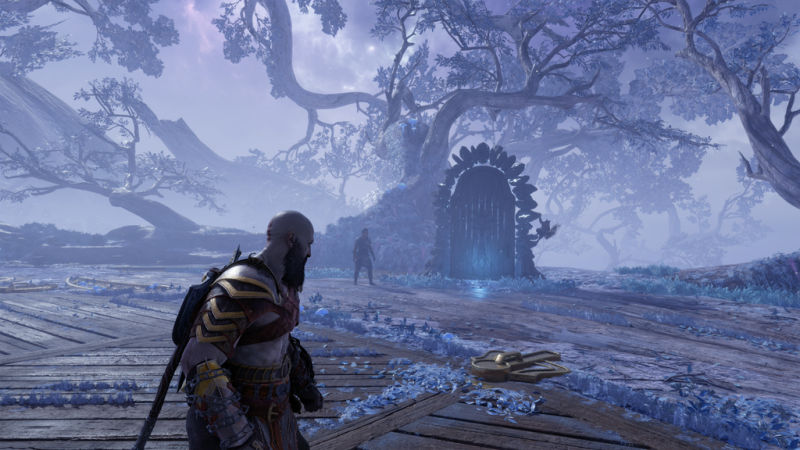
Before passing through the Mysterious Gate, you will be stopped by Ratatoskr, who will insist on talking to you before you go to Helheim.
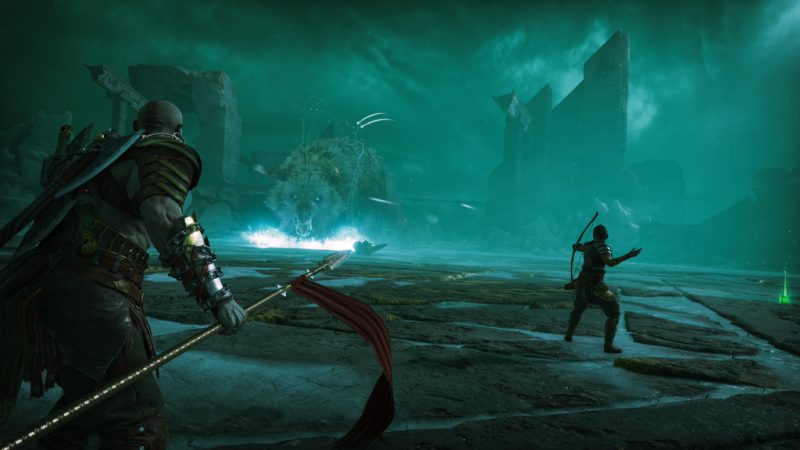
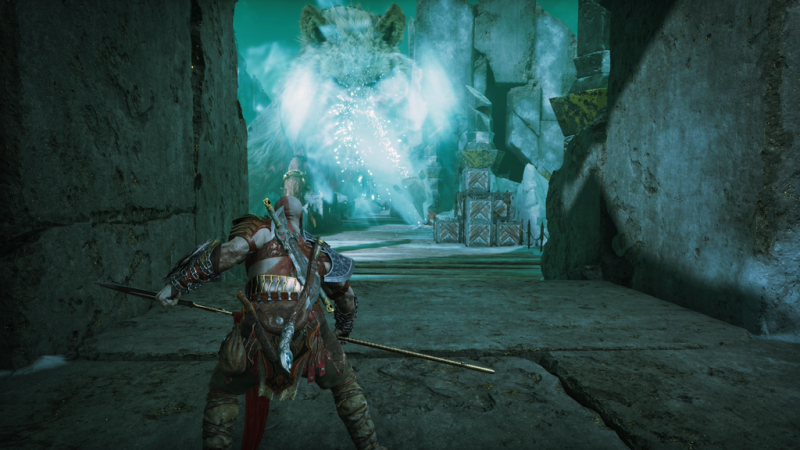
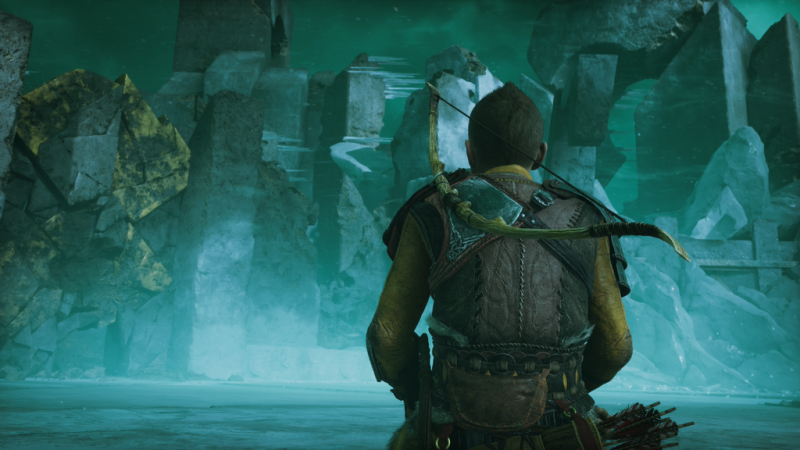
Find Garm in Helheim
After receiving a stern warning from Ratatoskr about the need to repair the damage caused by Atreus, go through the Mysterious Gate and go to Helheim.
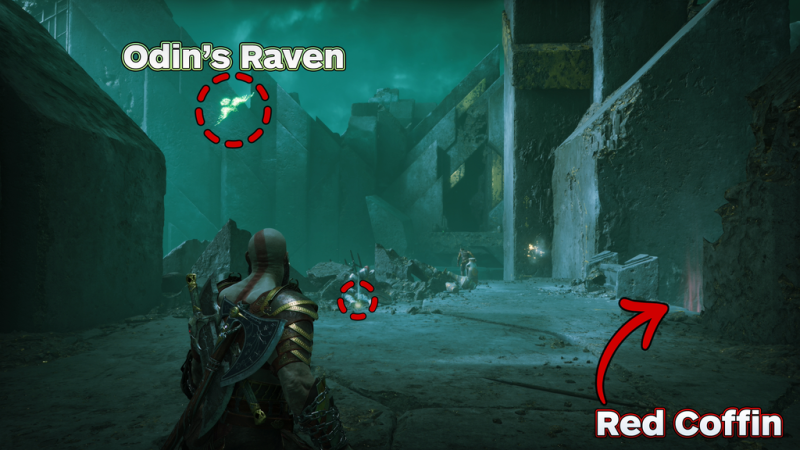
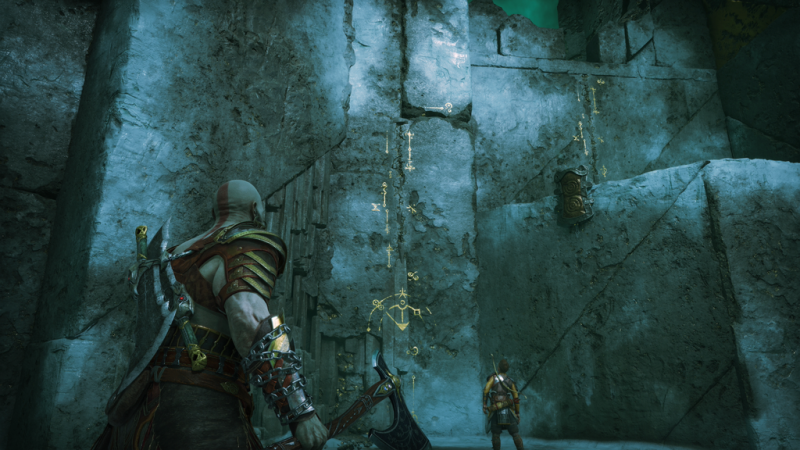
When you arrive at Garm, continue forward where you will spot one of Odin's Ravens flying in a figure-eight formation to the left of the wind crack.
In this area, you will also find a pouch of silver next to a fallen soldier, and a red coffin containing an Asgardian ingot, Dwarven steel, and some silver when you jump off the ledge to the right of the wind crack.
When you're ready to continue, throw Draupnir's spear (L2+R1) at a weak spot on the wall and detonate it to create some new stone pillars on the wall - climb down the wall until you reach the ground below. Upon reaching the ground below, you will encounter a group of hel walkers, including two new variants of these creatures: shadows and archers.
After defeating the Hel Walkers, climb up to the northeast ledge, where you'll find a Hacksilver Pouch on the first climb and a Runic Message a short distance away.
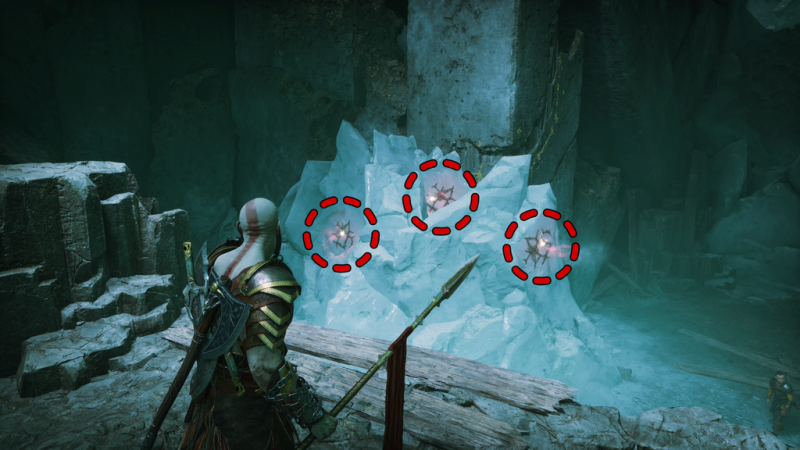
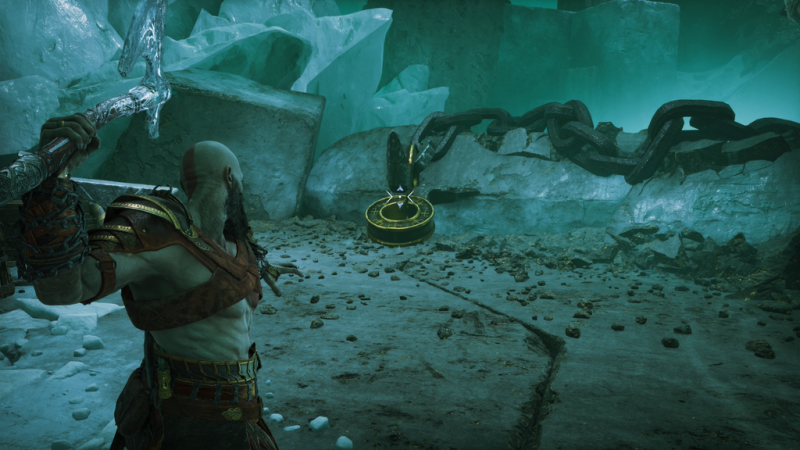
Look at the icy wall from the top ledge and use your Draupnir Spear to aim and blast the three wind cracks found on the block of ice. After the spears explode, two hel walkers will grow out of the rubble - defeat them and collect all the health stones before continuing along the wall.
Follow Atreus, you'll find another health stone and a chest before being prompted to crawl under a gap in the wall.
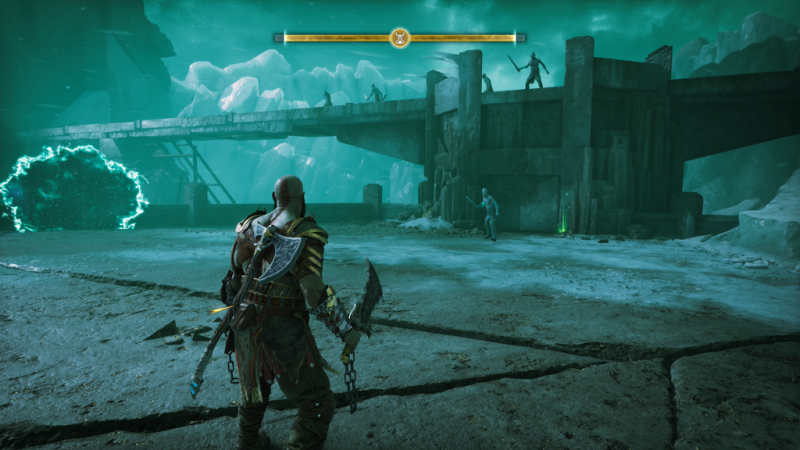
Upon reaching the other side of a small tunnel, you will come across a Rift, allowing Hel Walkers to travel between worlds. You will need to close it to continue.
As with the Hel Rift that Atreus helped Freya close at Sindri, you will need to fend off and survive the onslaught of Hel Walkers, which range from Hel Devastators, Hel Shadows, and Hel Archers within a short period of time. countdown timer at the top of the screen.
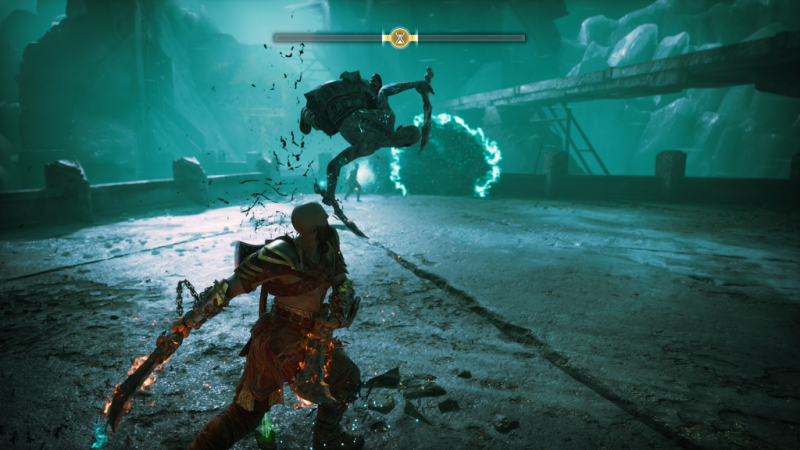
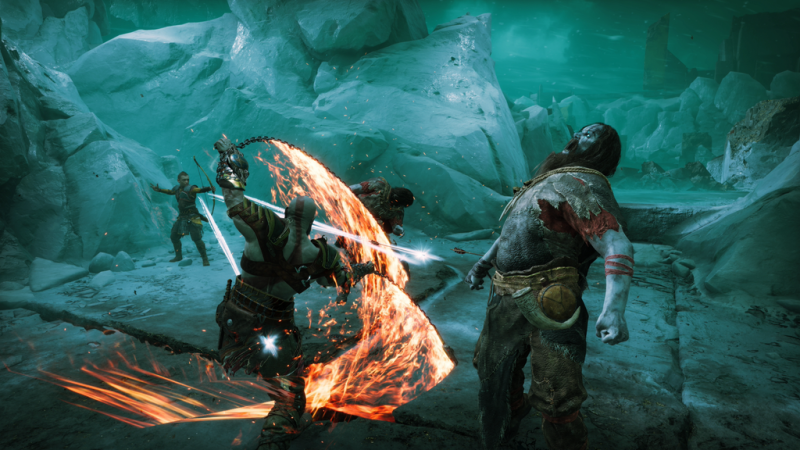
Blades of Chaos Kratos works great in situations like this. Not only does their AoE make it much easier to keep enemies at a safe distance, but the ability to pull enemies in and set them on fire by driving them into the ground while temporarily stunning them really puts the weapon over the axe.
After successfully closing the Hel Rift, you will unlock Hel to perform a favor, and receive Frost Spark, Essence of Hel, Silver Dust of Realms, and Ax Attachment - Grasp of Healing Harmony. Before crossing the chasm, search the area for Health Stones and Pouches of Silver that may have been dropped by enemies.
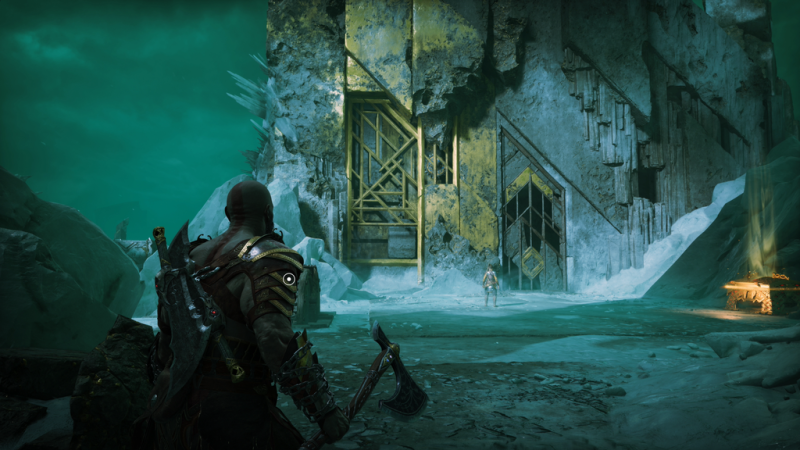
On the other side, interact with the gate and use Atreus' special arrows on the first symbols with the ring, and then the last ones above the entrance. After the symbols become hexagons, use the wheel to fully raise the gate and then throw your ax at the first symbol - this will transfer the ice effect between the hexagon bubbles and onto the symbol covered by the gate.
After freezing the gate, quickly walk through it until the effect wears off.
When you get to the other side, you will encounter three more Hel Walkers - destroy them.
Now, before you continue, turn towards the gate and grab onto the ledge where you'll find a chest of silver to loot. Once you have the loot, keep following Atreus as he runs forward.
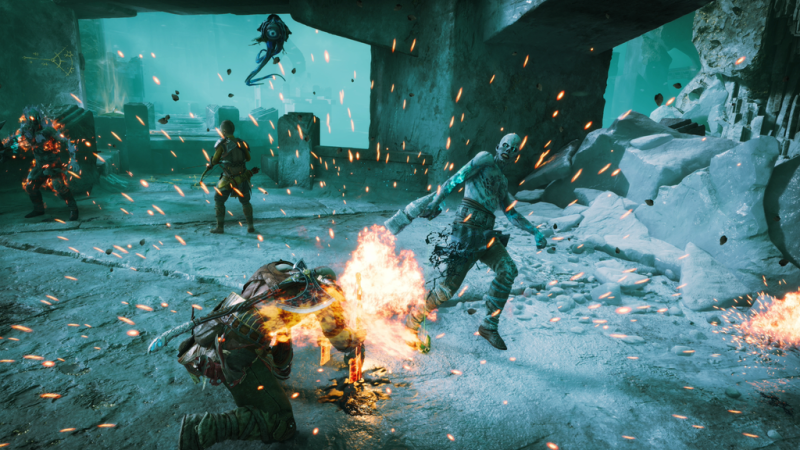
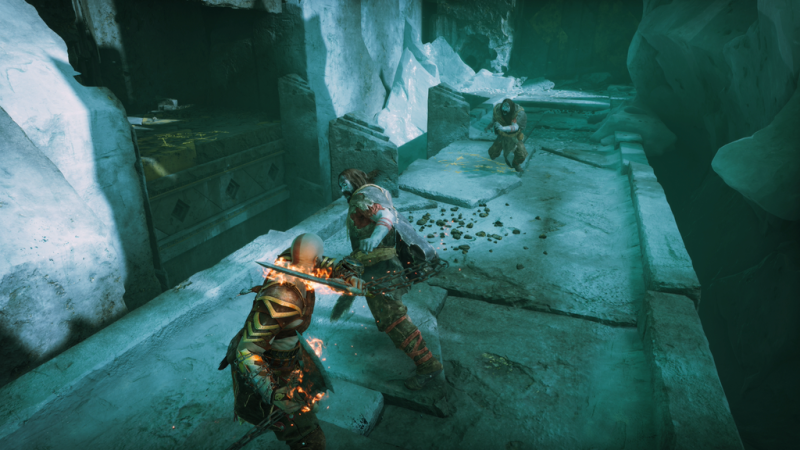
As you watch Garm tear the realm apart, you will soon be attacked by a group of approaching Ice Nightmares and Hell Walkers - defeat them.
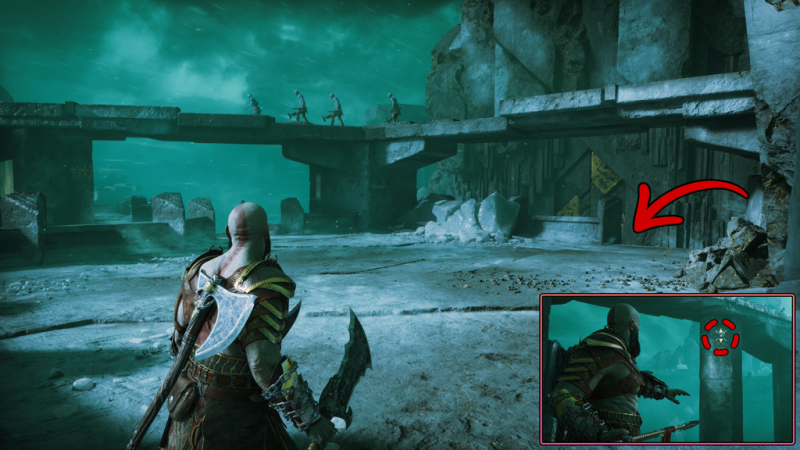
Once defeated, head down the southern ledge and walk a short distance ahead, where you will encounter some Hel Walkers.
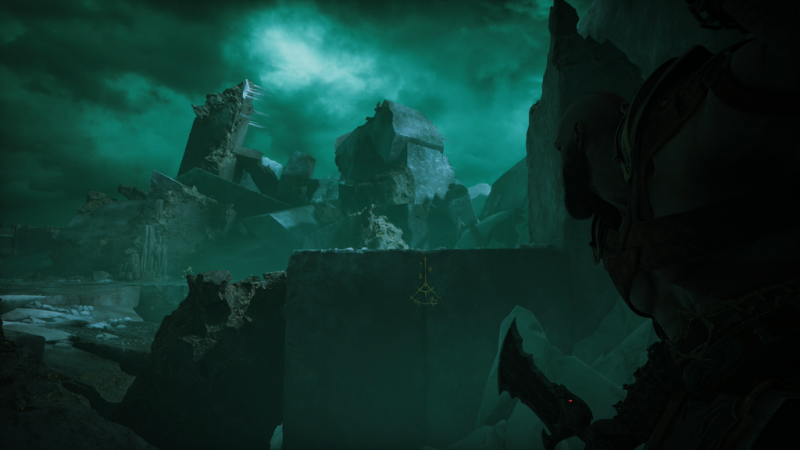
After clearing the area, look to the north and you will see a hole on a large stone pillar under the bridge - it is marked with yellow glyphs. After crafting a makeshift wand, head back to the ledge above, defeating another group of Hel Walkers along the way, and jump over the chasm.
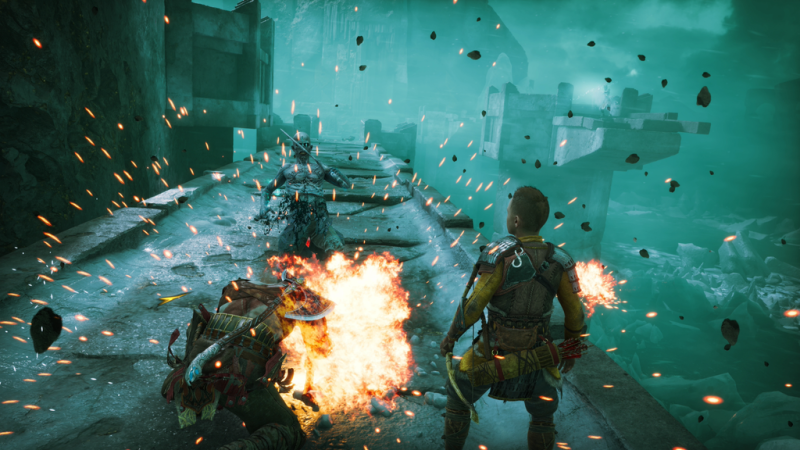
On the other side, you'll need to fend off the Hel Walkers - be sure to use Shield Bash and Spartan Kick to knock the Hel Shadow off the edge of the bridge - before you can open the legendary chest to your left.
This chest contains the Taming Beast rune heavy attack for Blades of Chaos. It is by far the strongest rune heavy attack for Blades available in the game.
After looting the chest, continue to follow Atreus to the end of the path. Before jumping off the ledge, grab the pouch of silver next to the fallen enemy. Then jump off the ledge and help Atreus climb the wall, where he will break the nearest latch, opening your way up.
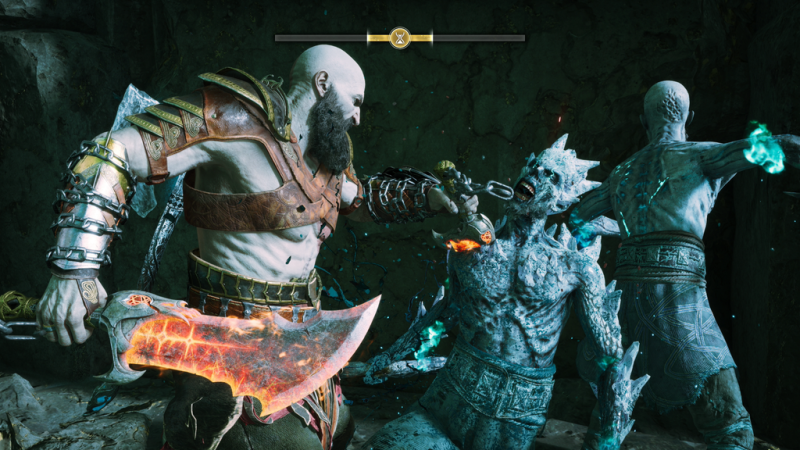
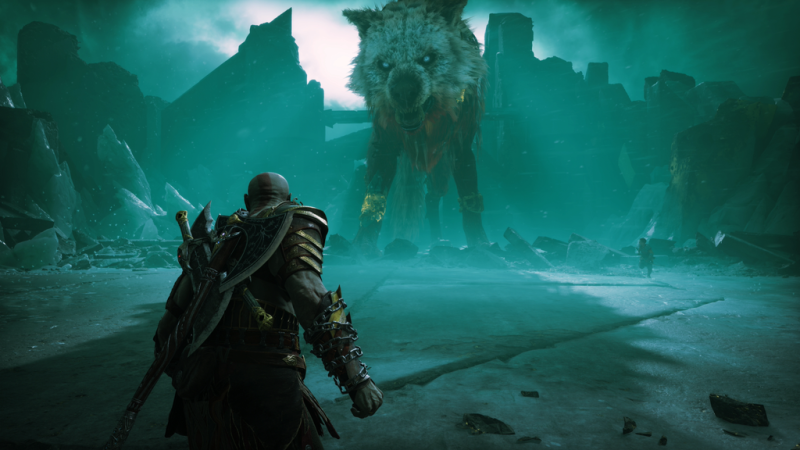
Continue up the wall where you will come face to face with Garm for the first time. Right after the cutscene, you will face the mighty Level 5 Hel Viken. To break through Hel-Viken's protected health bar, use your Blades of Chaos, as the creature is vulnerable to fire - using your Runic Abilities will deplete the bar.
With space limited in the area, make sure you're constantly moving to avoid Hel Viken's devastating ice blast
Chase Garm
Once you've dealt with Hel-Viken, it's time to pursue Garm as he retreats further into Helheim. So, squeeze through the gap in the wall and drop down to the ground below. Before moving forward, collect the chest of silver to your right and cross the gap ahead.
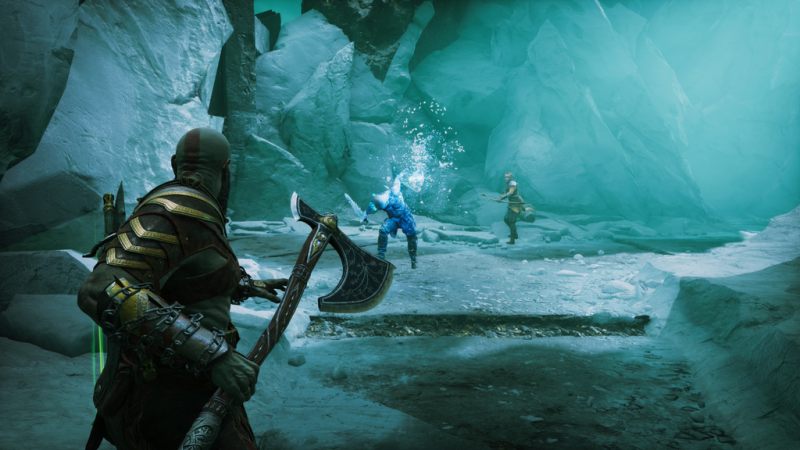
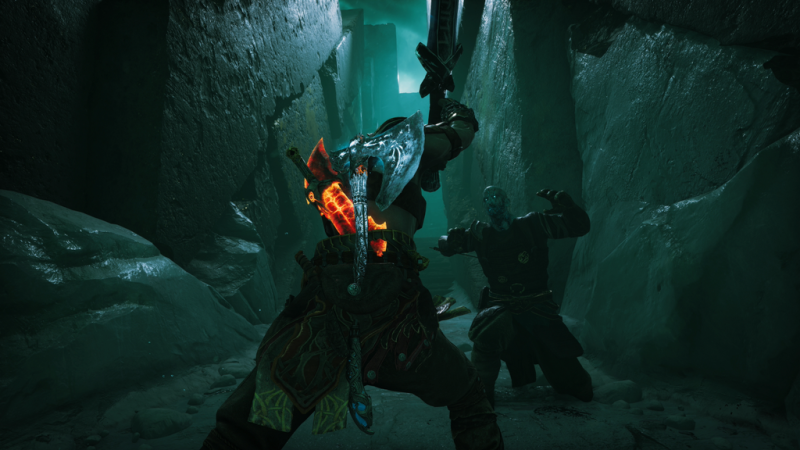
Not far ahead you will meet two Hel Raiders who will rush towards you. While they may have armored health bars, a well-timed parry can throw them off a ledge. Once defeated, jump across the chasm and then down the next ledge.
Follow the path forward, picking up the pouch of silver next to the fallen soldier until you reach the Hel Traveler blocking the gate forward.
After defeating the enemy, collect all the health stones in the area and then interact with the large wooden wheel.
Unable to keep the gate open, you will need to use Atreus' Hex Arrows to freeze the gate in its open position.
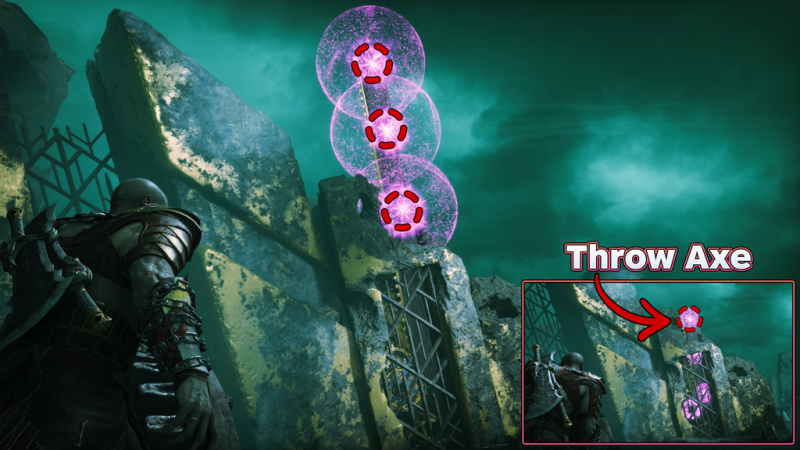
To do this, Atreus must shoot three hexagonal arrows along the wooden beam, then fully open the gate, leaving only one hexagonal bubble available. Now freeze it with your ax and quickly make your way under the gate before the hex effect wears off.
Search the red coffin to your left for a petrified bone, stone wood, and some silver. As you follow Atreus, pick up the pouch of silver found by a dead enemy to your left. Then jump off the ledge and continue through the small passage on the other side and up the ledges.
Then keep going forward and climb over the stone pillar - here you will be attacked by two level 4 Hel Raiders with protected health bars. The best way to defeat these Hel Raiders is to use the Blades of Chaos.
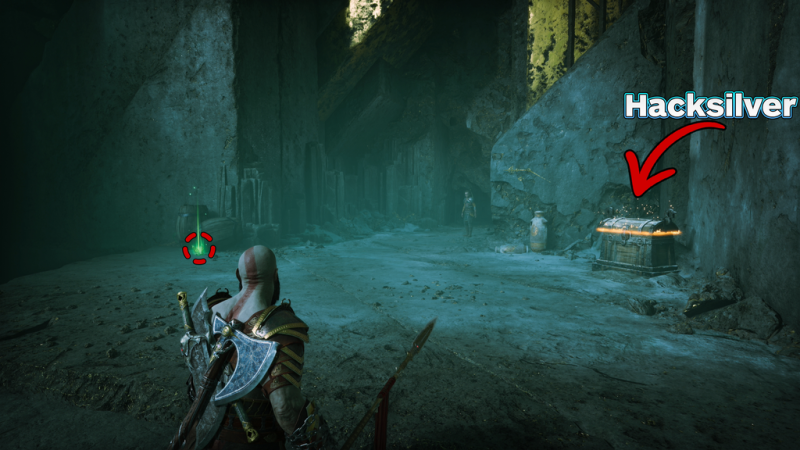
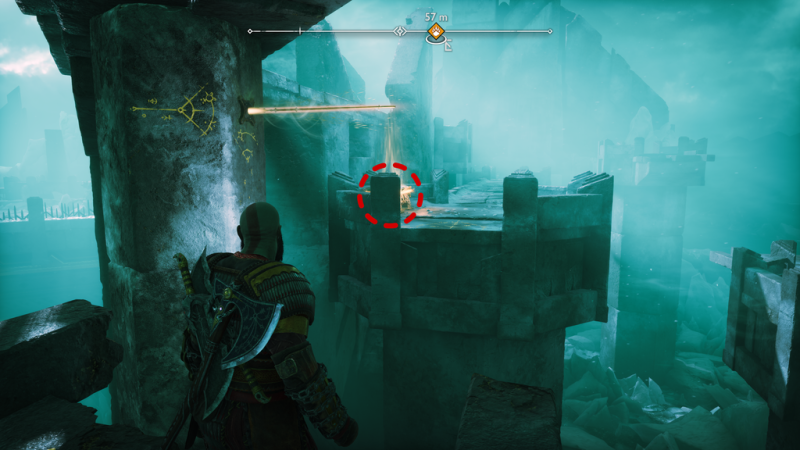
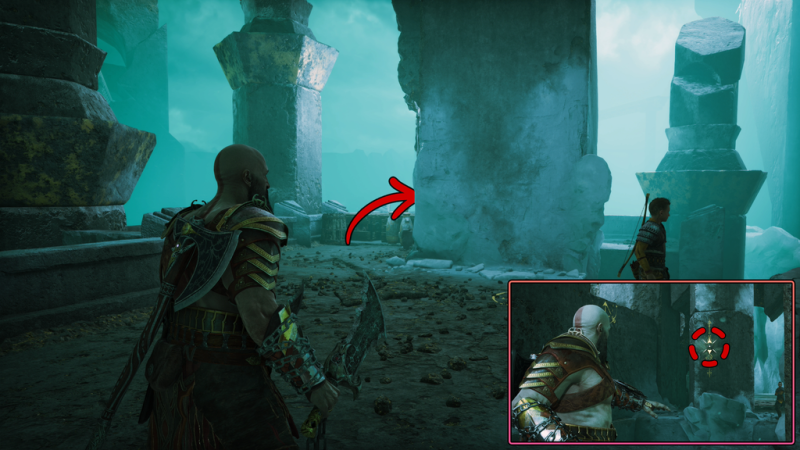
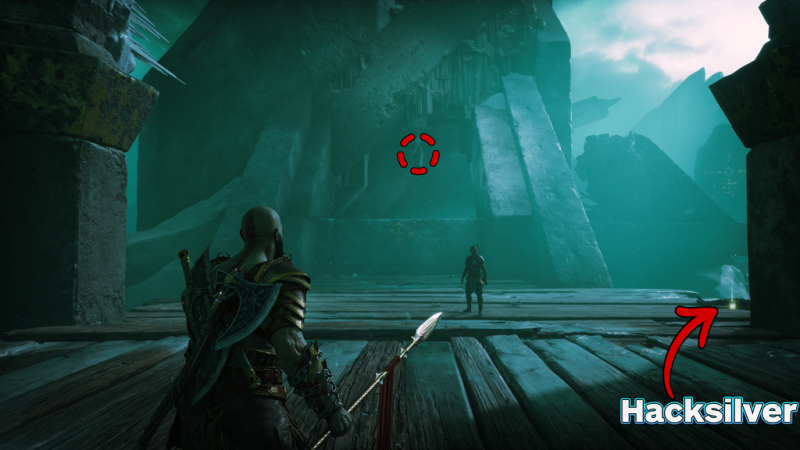
After defeating them, collect any health stones and go to the basement to the west to find a Hacksilver Pouch. After gathering, take the short path to the northeast where you will find an air vent on the other side of the chasm - throw your Draupnir Spear into it to create a turning point that you can use to cross the chasm.
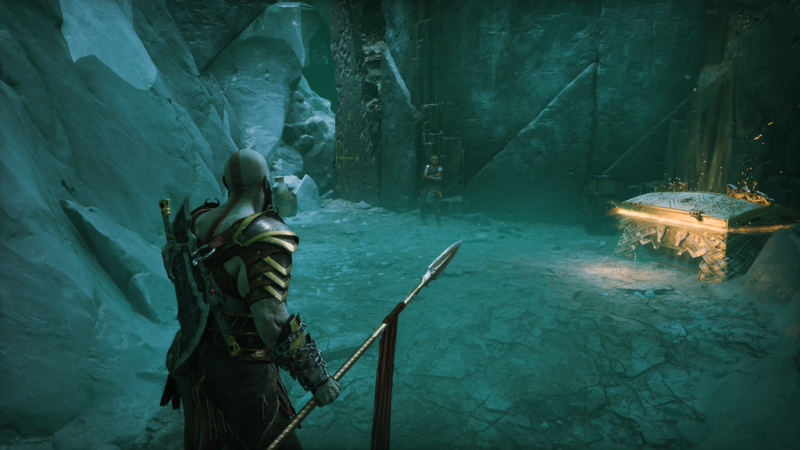
After that, take the bag of resources from the fallen enemy. Eventually, you will reach the Legendary Chest, which contains Thousand Warrior Strike, a Light Runic Attack for Draupnir's Spear. It leaves spears at the target, which can then be detonated with the triangle to deal even more damage!
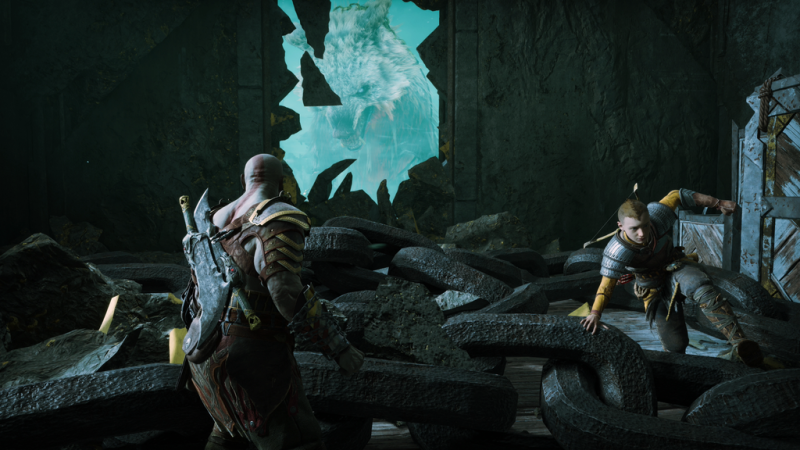
Squeeze through the gap in the wall and climb over the ledge where you will encounter Garm, who is tearing apart even more of Helheim.
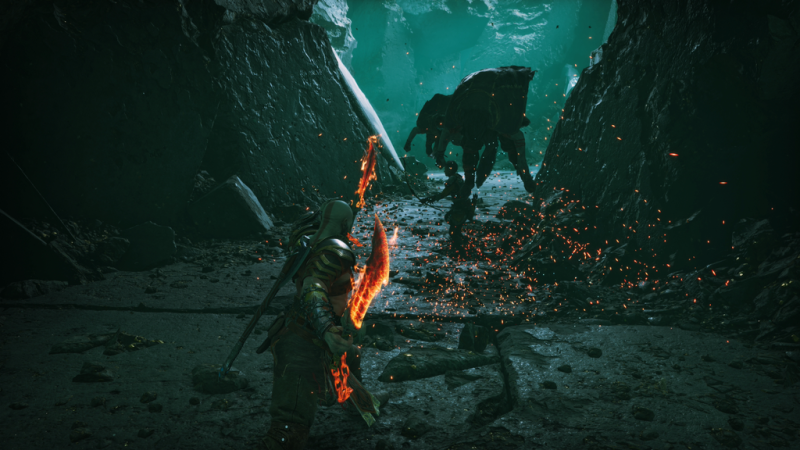
As Garm continues to run, jump off the ledge and defeat the Hel-Shadow Archers and Hel Raiders who will attack. After the victory, keep moving forward and climb over the stone pillar, trying to get closer to Garm.
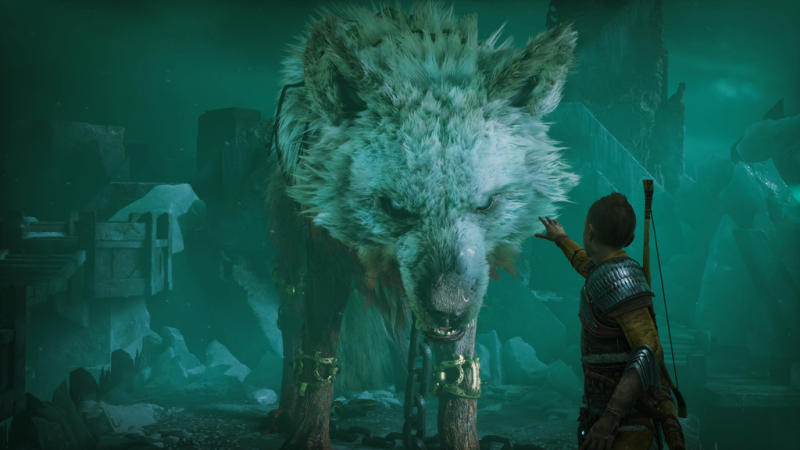
In a short cutscene, Atreus will transform into his wolf form and try to distract Garm while Kratos grabs his chain. But to do this, you need to freeze the nearest end of the chain with your axe. After that, grab the chain and you'll be taken to another cutscene before Garm escapes again.
While Garm is running, follow the path to the right and open the door. Continuing to the left, you will come across a group of hel-broods - destroy them. Then jump over the gap and open the chest to your right.
Walking forward a little, you will find an air vent. Unfortunately, you won't be able to reach it from where you are standing. Destroy the nearby crates and vases and continue on the other side. Here, throw your Draupnir Spear (L2 + R1) into the hole to create a prop that you can swing on to get to the ledge above.
By doing this, you will encounter a group of Ice Nightmares, the Ghost of Hel, and a few Broods - take them out. Once the area is cleared, collect all of the silver pouches and health stones left behind. Now continue along the path north - don't forget to knock down the resource bucket hanging over the ledge to get some runes.
As you move forward, grapple onto the large stone pillar and continue towards Garm, where you will eventually trigger a cutscene.
Defeat Garm
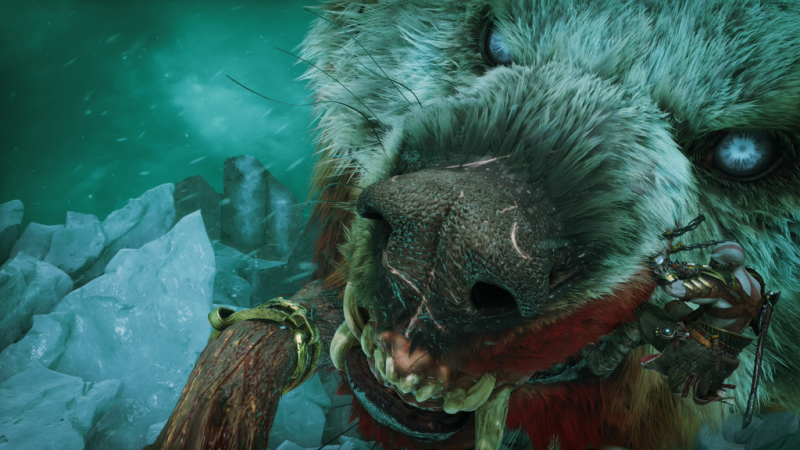
Despite Atreus' best efforts to tame Garm, the time has come to end him for good. Garm with ten health bars is no joke, so this battle will require a lot of time and patience.
While Garm isn't overly difficult, it does require you to be patient, as there are certain times when it's best to attack him, while mostly relying on parries and general melee attacks.
Tips and Tricks for Defeating Garm
- Although ranged attacks, such as Atreus' ax and bow and arrow throws, deal minor damage, the risk of taking damage from them isn't worth it.
- The length of Garm's Ice Shockwave can be somewhat deceiving, so if it's already unsafe to try to dodge, block the incoming wave with your shield.
- When Garm is stunned, use everything you have, including Spartan Rage and Runic abilities, as this will be one of the main damage opportunities.
- Once you've completely depleted Garm's six health bars, you'll hit a checkpoint, so any subsequent deaths will return you to that point in the fight.
- As the fight draws to a close, be prepared to dodge attacks as Garm will start attacking faster and more frequently.
Finally, once you've dealt enough damage, you'll have to freeze and grab Garm's chain one last time. After a short cutscene, Kratos and Atreus will require you to press Circle and Square when prompted to end the fight.
Leave Helheim
After killing Garm, continue south and climb the wall. Pick up the health stone from the rubble and then continue down the stairs where you will find a chest on your right.
A short distance ahead, you'll see another puzzle gate and a legendary chest along the right side of the wall. This chest contains the Onslaught Shield, which allows you to launch enemies into the air when you run up and hit the shield.
If you also obtained the Shield of the Shattered Star in the Abandoned Village in Vanaheim, this is the last shield you need to find for one of the loot.
Once you've looted the legendary chest, it's time to solve the gate puzzle. So, to open the gate, interact with the big wheel and then ask Atreus to use the arrows on the stone weight on the right. Then turn the wheel until the stone weight on the right is in line with the blue and yellow latch. Once in a lane, ask Atreus to Hex the stone weight on the left to tie the mechanism.
Now quickly throw your ax into the stone weight on the left and watch the gate freeze open - you'll need to quickly run under it.
On the other side, follow Atreus - pick up the Health Stone from the enemies who fell along the way - and open the door. Opening the door will trigger a cutscene that reveals that Garm is still alive.
Run!
After this discovery, Kratos and Atreus will need to escape the crumbling ruins of Helheim as Garm is determined to stop them from leaving. When Garm makes attacks, you need to follow Atreus, who will lead you through the nearest hole in the floor - keep following him, taking out the hel walkers along the way.
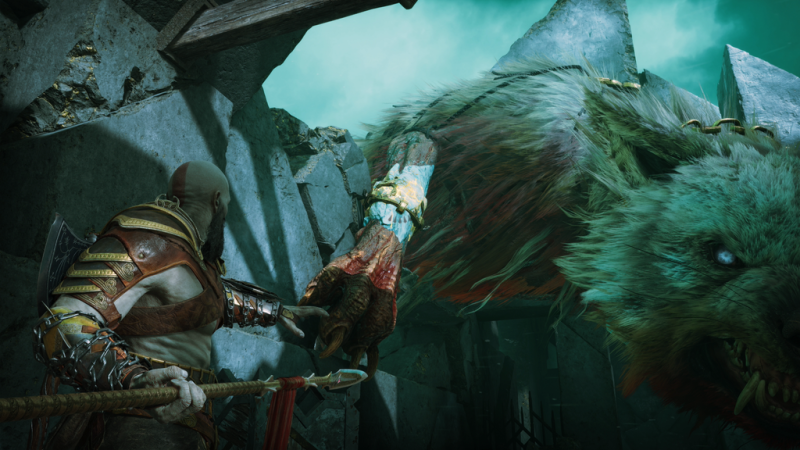
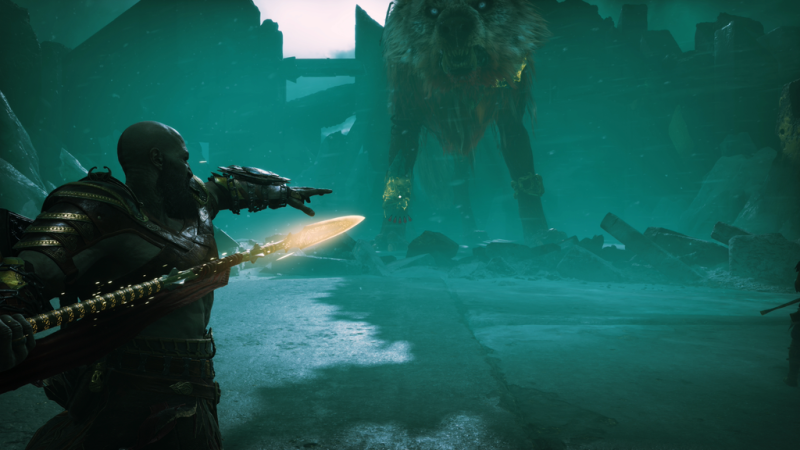
You will start another short cut-scene as you cross the chasm on the way. Since Garm is blocking the path, you will be trapped. To continue, you need to target the weak spots on Garm's leg with your Draupnir Spear. After throwing a few spears at Garm's leg supports, detonate them by pressing Triangle - this attack will deal damage equal to two health bars.
During this, Garm will perform small strikes and a smaller version of Ice Shockwave, so keep an eye on them before aiming with your spear to avoid damage.
While Garm is escaping, continue across the chasm before you run into him again. This time, he will throw an Ice Ball at you, knocking you down to the floor below. From here, keep going forward, eliminating the enemies that will attack you.
Break the wooden planks and cling to the ledge above, following Atreus to the Mysterious Gate. On the way back you will be intercepted by Garm.
Once in a much smaller arena, you will need to defeat Garm again. This part of the fight is the same as your previous encounter as Garm will use all of the same attacks and you will want to use the same strategy of hitting and stunning Garm as he approaches.
However, instead of using heavy melee attacks after he is stunned, you need to equip your Draupnir Spear and use it to target the golden metal braces on his legs and around his neck. While aiming at them, detonate the built-in spears to deal serious damage to Garm.
Repeat these steps until his health bar is depleted - or so you thought, until he regains his health again.
In this final phase, Garm will introduce a new attack where he slams his front paws into the ground, creating a shockwave across the entire area that you need to roll back from.
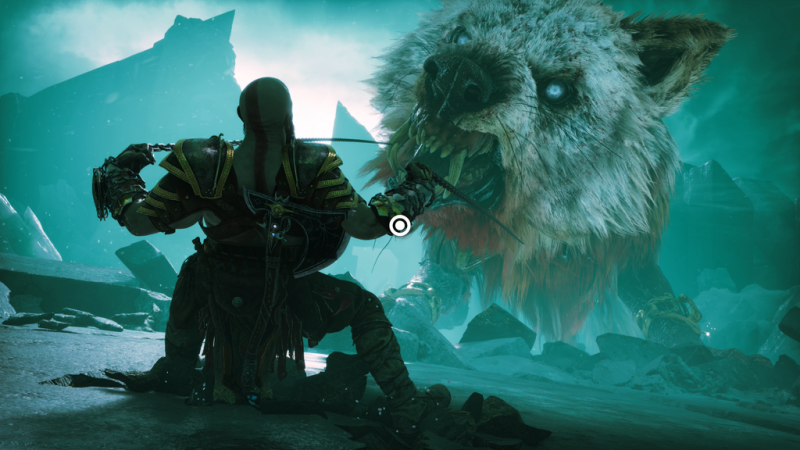
Now, to end the fight, you need to throw Garm to the ground a total of two times, after which you will be prompted to press R3 to grab onto his collar, and then press Circle while Atreus tries to climb onto his back in a last attempt to tame the creature.
Keep chasing Garm
When Garm escapes again, Atreus will convince Kratos to continue chasing Garm, as he reveals that he placed Fenrir's soul in Garm, hoping it would change his nature.
Wanting to see if Fenrir's soul has taken over, follow Atreus through the gap in the wall and jump off the ledge on the other side.
Continue up the ledges leading north and then climb the wall at the end of the path. Once you reach the top, jump off the ledge and jump across the gap. Then climb up the ledge until you reach Garm, where another cutscene will start.
Return to the Mysterious Gate
After a touching scene, it's time to return home. To do this, grab onto the ledge and follow Atreus along the path until you reach another puzzle gate.
To solve the puzzle, interact with the large wooden wheel and have Atreus Hex the bottom of the stone gear at the gate.
After the hex, rotate the wheel halfway and trace the bottom half of the gear with the hex to link the gears. Now drop your ax and watch the gate freeze - be sure to get through the gate quickly so it doesn't unfreeze.
Once through the gate, look straight ahead to find a lore marker and one of Odin's ravens above.
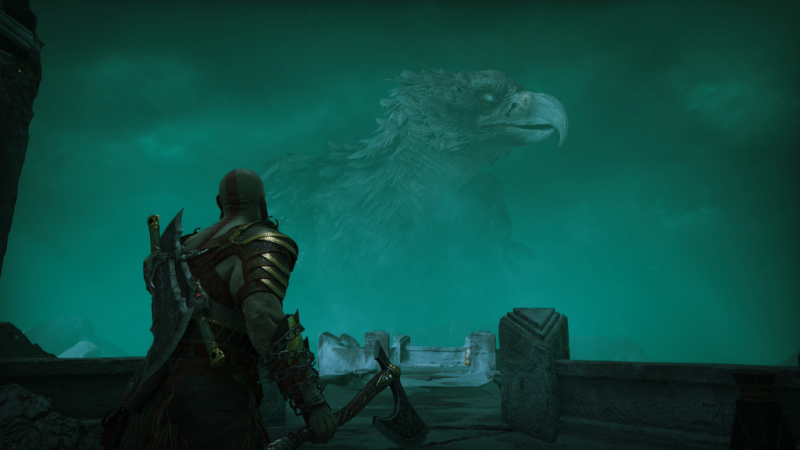
Now, before continuing to the left, be sure to turn off to the right, picking up the nearest pouch of silver along the way, where you will encounter an optional conversation with Hraisvelgr, a large eagle, who will ask you to close six space rifts scattered around the world.
After the conversation, return to the knowledge marker and continue to the left, jumping off the ledge. From here, turn right to find the Mystic Gate - you will need to press R2 to clear it of rubble. After the passage, you will watch a short cut-scene with Atreus and Kratos, who talk about the mistakes they made.
Return home to Sindri
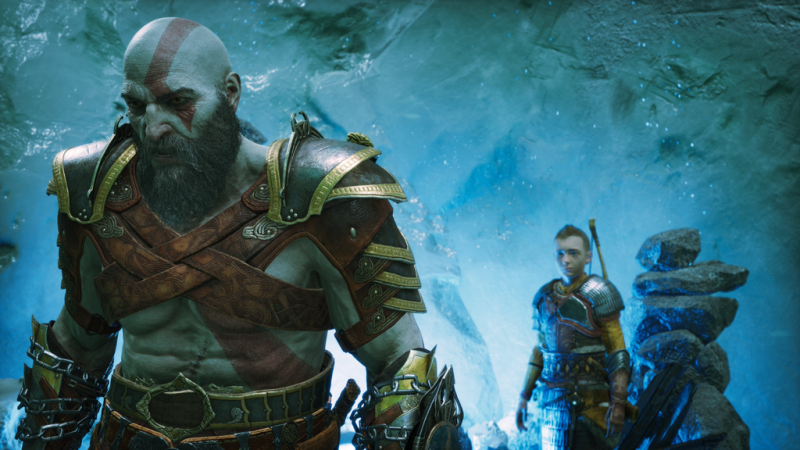
When you're ready, return to Sindri's house and go inside, where Atreus will show you his findings from his visit to Asgard - this completes the mission.
God of War Ragnarok: Reunion
- Talk to Ratatoskr
- Find Garm in Helheim
- Chase Garm
- Defeat Garm
- Leave Helheim
- Run!
- Keep chasing Garm
- Return to the Mysterious Gate
- Return home to Sindri
God of War Ragnarok: Reunion
- Kratos: 7000 XP, Atreus 3500 XP
Was the article helpful?

