Resident Evil 2 is a third-person re-release of the 2 action-horror classic Resident Evil 1998. The sequel takes place two months after the end of Resident Evil HD Remaster. In the small American town of Raccoon City, a catastrophe occurs. All its inhabitants have turned into zombies under the influence of biological weapons created by the pharmaceutical company Umbrella. The main characters - Leon Kennedy and Claire Redfield have to find a way out of this zombie madness.
All Safes and Locks Codes in Resident Evil 2 Remake
This guide will tell you about all safe and lock combinations in Resident Evil 2 Remake.
Complete guide to playing Resident Evil 2 Remake here!
Resident Evil 2 Remake is full of diabolical puzzles, but we've collected all the safe codes and puzzle solutions in one place to make your zombie killing adventure a little easier.
Some solutions to puzzles and codes in Resident Evil 2 Remake can be easily solved in the game, but some are well hidden, making the player wait a long time to find them. They also may have to back off once they've found a solution, putting them at additional risk of becoming zombie food or being discovered by Mister X.
Knowing the solution to the puzzle or locker code early on can eliminate this risk and give the player an early advantage. Imagine getting extra ammo at the start of the game, or a weapon upgrade a few hours earlier than you should? This can be incredibly useful and means the player can focus on other aspects of survival.
Below we have compiled a list of all safe codes, combinations and blocking solutions in Resident Evil 2 Remake.
What are the safe codes and solutions used in Resident Evil 2 Remake?
Resident Evil 2 Remake has a variety of lockers and safes that require a simple code to unlock, but the game is also home to various puzzles that require a specific solution or solution to unlock. It also has a habit of changing during the second run or if you're playing as a different character.
So we've broken down all of our Resident Evil 2 Remake solutions by location, type, code, and reward. We've also included a second run solution and what changes when you play as the opposite character.

Some of the puzzle codes seem to be more complex but come down to four numbers.
All codes for safes and disk locks Resident Evil 2 Remake
Here is a complete list of all lock/safe codes and puzzle solutions in Resident Evil 2 Remake:
| Castle | Solution | Reward |
| Lion Statue (Main Hall) | Lion, Leaf branch, Bird | Lion emblem |
| Lion Statue (Second run) | Crown, Torch, Bird | Lion emblem |
| Table Leon (Leon) | Left: NED - Right MRG | Hi-Cap Mage (Matilda) |
| Leon's desk (Claire) | Left: NED - Right MRG | Speed Loader (SLS 60) |
| 3F Ladder Disc Lock (Leon) | DCM (Solution also found in film roll) | Magnum Ammo |
| 3F Ladder Disc Lock (Claire) | DCM (Solution also found in film roll) | Cartridges for a submachine gun |
| Restroom | Fish, Scorpio, Vase | Unicorn emblem |
| Lounge (Second run) | Two people, Scales, Untwisted snake | Unicorn emblem |
| Male disc locker room (Leon) | CAP (Solution also found in Whiteboard operating room) | Shotguns |
| Male disc locker room (Claire) | CAP (Solution also found in Whiteboard operating room) | fire cartridges |
| West Office Secure Codes | Left 9, Right 15, Left 7 (Solution also found in STARS memo) | hip cover |
| Maiden Statue Code | Woman, Bow, Snake (shaded icons) | Girlish emblem |
| Maiden Statue Code (Second run) | Ram Harp, Bird | Girlish emblem |
| Lounge safe code (Leon) | Left 6, Right 2, Left 11 (Solution also found in confiscation report file) | Breaking the muzzle for Matilida |
| Code for the safe in the waiting room (Claire) | Left 6, Right 2, Left 11 (Solution also found in confiscation report file) | High capacity magazine for JMB HP3 |
| Sewer changing room (Leon) | SZF (Solution also found in jazz festival flyer) | MAG ammo |
| Sewer locker room (Claire) | SZF (Solution also found in jazz festival flyer) | Cartridges for a submachine gun |
| Sewer treatment room by the pool (Leon) | Left 2, Right 12, Left 8 (Solution also found on the side of the safe) | W-870 Shotgun |
| sewer treatment pool room Claire) | Left 2, Right 12, Left 8 (Solution also found on the side of the safe) | SLS 60 |
| sewer monitor | Top row: King, Queen, Pawn Bottom row: Knight, Rook, Bishop | Access to trash room |
| Sewer monitor (second run) | Top row: Knight, Rook, Pawn Bottom row: King, Bishop, Queen | Access to trash room |
| Greenhouse control room | 3,1,2,3 | Staircase in the greenhouse up to B2 |
| Greenhouse control room (second run) | 5,8,3,1 | Staircase in the greenhouse up to B2 |
| Greenhouse control room 2 | 1,0,6,7 | Unlocks the Dispersion Block in the Drug Testing Lab |
| Greenhouse control room 2 (second run) | 2,0,4,8 | Unlocks the Dispersion Block in the Drug Testing Lab |
| Plat 43 Herbicide solution | Red, Green, Blue, Red, Green, Blue, Red, Green | Dispersing cartridge solution |
| Plat 43 herbicide solution (second run) | Blue, Red, Green, Blue, Red, Green, Blue, Red, Green | Dispersing cartridge solution |
All safe codes in Resident Evil 2 Remake

Let's take a closer look at the most complex codes for safes and their solutions:
Safe in the west office (1st floor)
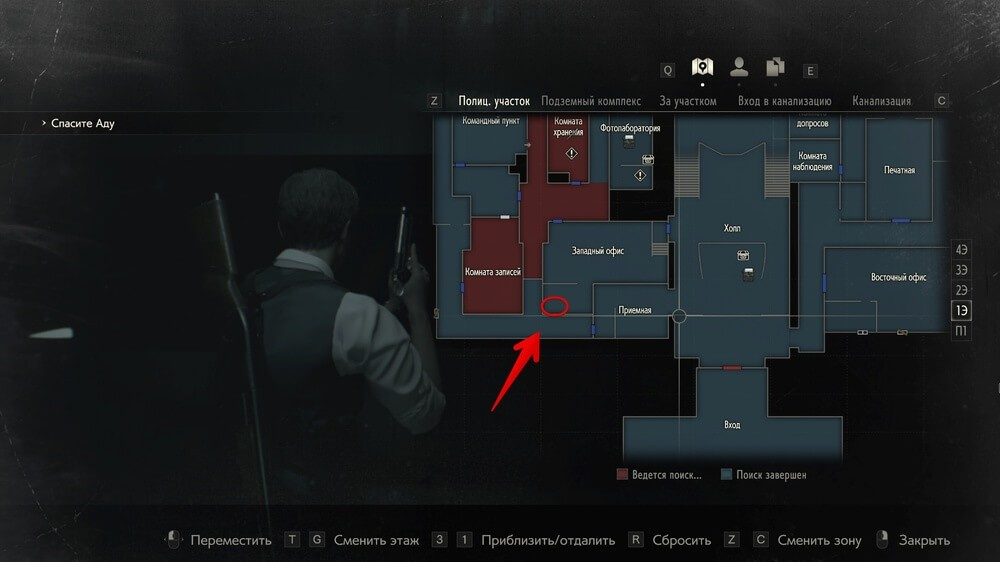
- Safe code: 9 left, 15 right, 7 left.
- Where to find the code: By reading the "Memorandum of Understanding" that can be found in the small room to the left of the entrance to the STARS Office on the second floor of the Police Station.
- What's inside: A hip pouch that expands your inventory.
Safe in the waiting room (2nd floor)

- Safe code: 6 left, 2 right, 11 left.
- Where to find the code: By reading the "Confiscation Report" in the Observation Room on the first floor. To access inside you will need a club key.
- What's inside: pistol muzzle brake Matilda (Leon) / large magazine for pistol JMB Hp3 (Claire).
Safe in the sewer (middle level)
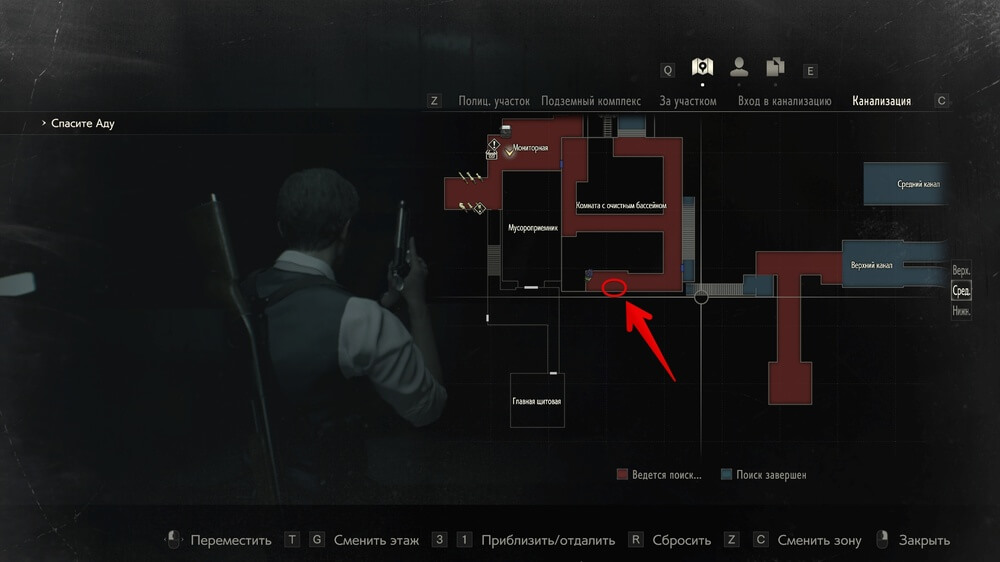
- Safe code: 2 left, 12 right, 8 left.
- Where to find the code: it is written in chalk on the side of the safe.
- What's inside: Shotgun Stock (Leon) / Reinforced SLS 60 Pistol Box (Claire).
All disc locks
Leon's desk in the west office (1st floor)
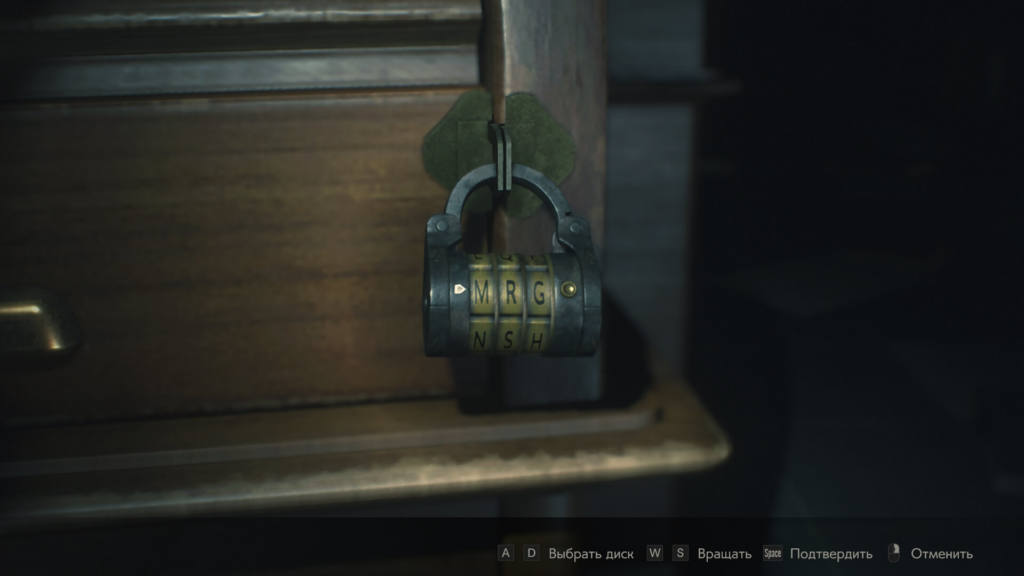
- Lock code: NED on the left and MRG on the right.
- Where to find the code: after reading the letter "The first task for a beginner", which can be found here, you will find out that the code for the table is the first letters of the names of your colleagues. The names themselves can be seen on the tables around. One tablet is lying on the floor, it is easy to miss.
- What's inside: large magazine for pistol Matilda (Leon) / booster loader for pistol SLS 60 (Claire).
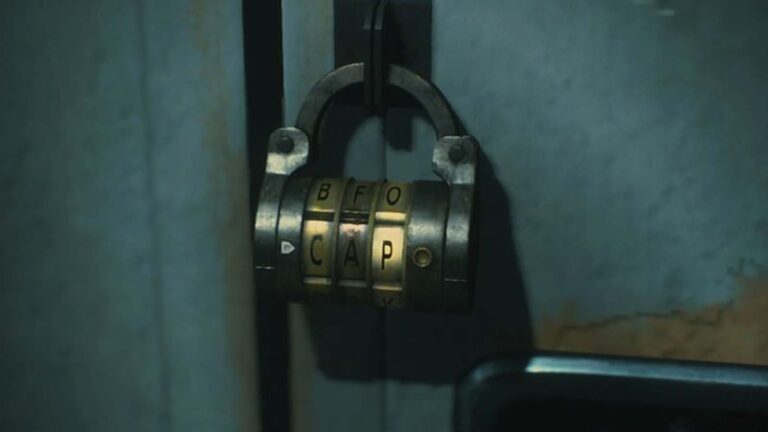
Shower locker (2nd floor)
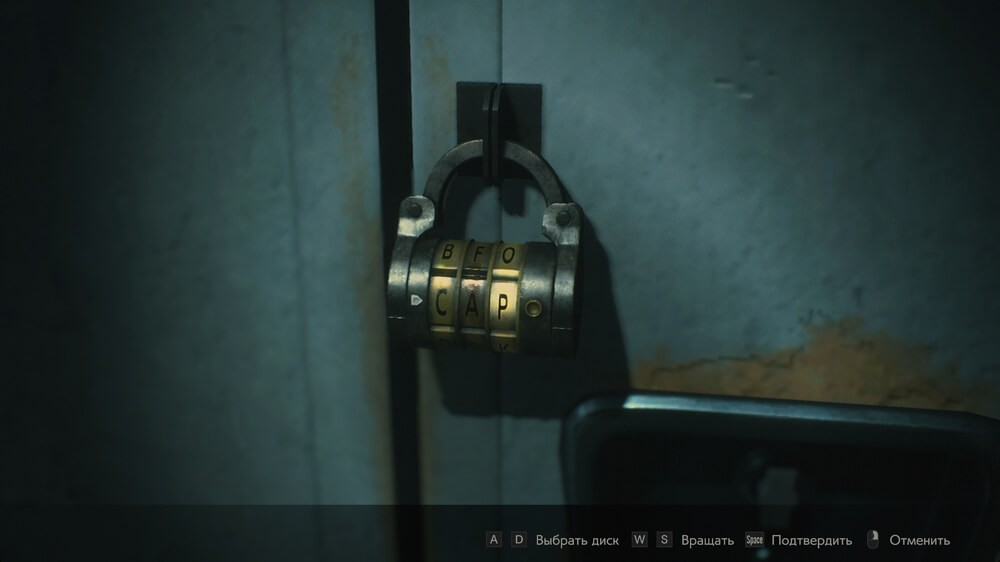
- Lock code: Cap.
- Where to find the code: This code is written with a marker on a white board in a small room between the command post and the record room on the ground floor. To get inside, you will need a bolt cutter.
- What's inside: Shotgun Ammo x3 (Leon) / Incendiary Ammo x3 (Claire)
Locker in the hallway (3rd floor)
- Lock code: DCM.
- Where to find the code: Inside a film that can be found in a small room in the Shooting Range in the Basement. You will get access there after the story part in the Parking lot. To enter the room you will need a diamond key.
- What's inside: Revolver Ammo x5 (Leon) / Submachine Gun Ammo x100 (Claire)
Locker in control room (sewage)
- Lock code: SZF.
- Where to find the code: The required letters are highlighted on the Jazz Festival flyer. You can find it in the Workers' Break Room on the upper level of the sewers.
- What's inside: revolver ammo x6 (Leon) / submachine gun ammo x128 (Claire)
All portable safes and codes for them
All portable safes open on the same principle. Place it in your inventory and press X to inspect. Each button, when pressed, lights up a certain light bulb. Your goal is to light the bulbs in order in the direction the arrows point. It doesn't matter where you start from. If you make a mistake, you will have to start all over again. The decision will be different for each player.
Portable safe in the shower room (2nd floor)
This safe can be found in the dressing room in front of the shower room on the second floor. By opening it, you can get the first lost key from the Locker Console in the Storage Room on the first floor.
Portable safe in the laundry room (2nd floor)
This safe can be found in the Laundry Room on the second floor. To access the room you will need a diamond key. Inside the safe, you will find the second button from the Locker Remote in the Storage Room on the first floor.
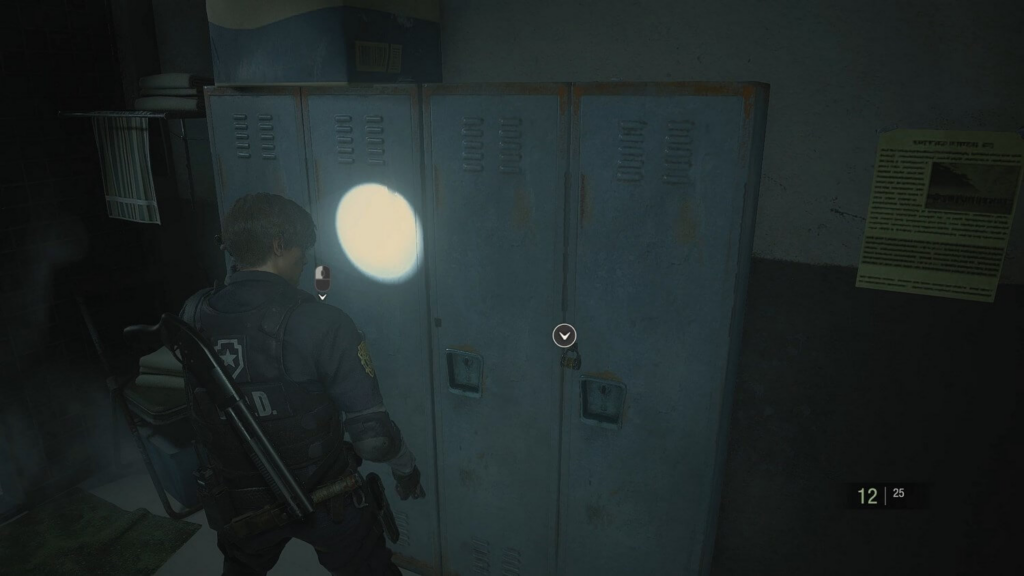
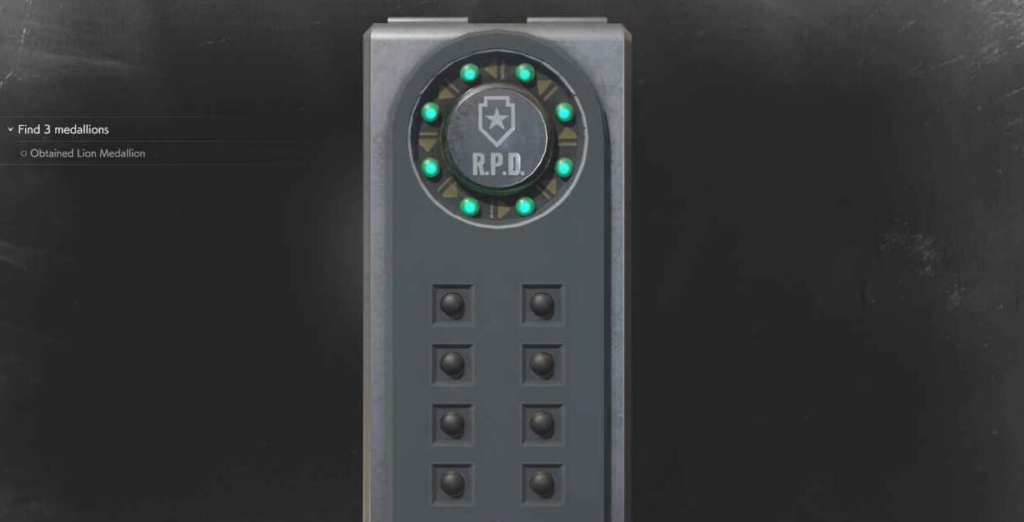
Codes for lockers in the storage room (1st floor)
In the storage room on the ground floor, you will find a bunch of lockers and a remote that allows you to open them. It lacks two buttons, which makes it impossible to enter most of the numbers. Initially, lockers 106 and 109 are available to you. Enter their numbers on the remote control and pick up pistol cartridges and film, which you can develop in the nearby Photo Lab.
The missing keys are inside portable safes, which we wrote about a little higher in this guide. Here's what's in the rest of the cabinets:
- 208 Shotgun Ammo (Leon) / Incendiary Ammo (Claire)
- 102 - gunpowder;
- 203 - hip bag;
- 103 - combat knife.
Was the article helpful?