Tower of Fantasy is an open-world multiplayer Action RPG with an anime theme. According to the plot, due to a lack of resources and energy, humanity left the Earth and moved to the planet Hades, where the action takes place. The game offers a fast-paced combat system with weapon swapping, a variety of characters and a wide variety of activities for both PvE and PvP.
All Tower of Fantasy World Bosses: Location, Respawn, Strategies
Special offer
Tower of Fantasy World Boss Guide, including a list of all bosses with handy maps, winning strategies, rewards, and information about their respawns.
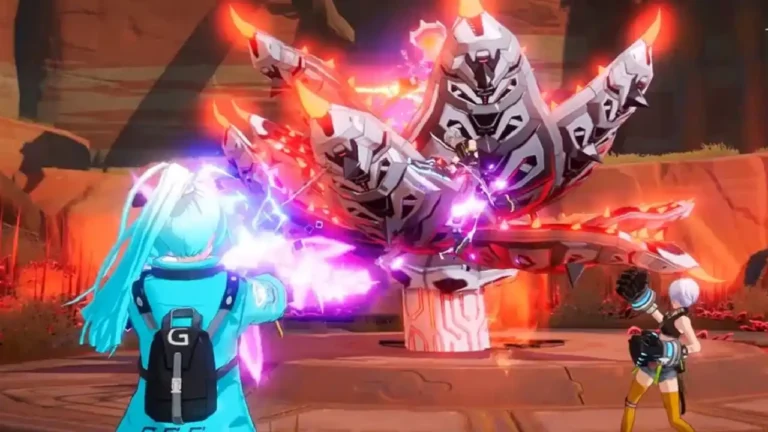
The most popular feature tower of fantasy In the MMO gameplay are world bosses bringing players together to work together to defeat the superior enemy in each region, offering many rewards with great chances for Matrix items. We will help you if you want to get an extended view of the Tower of Fantasy World Bosses feature.
Content
- Tower of Fantasy world boss locations
- How to farm world bosses
- World Boss Robarg Tower of Fantasy
- World boss Apophis Tower of Fantasy
- World Boss Frost Bot Tower of Fantasy
- World Boss Sobek Tower of Fantasy
- World Boss Lucia Tower of Fantasy
- World Boss Barbarossa Tower of Fantasy
- Tower of Fantasy Wiki
Tower of Fantasy world boss locations
Tower of Fantasy currently has six world bosses available in the first game content. The main five are available from the launch of the global region, with Barbarossa becoming active much later in the game's main storyline. There are also more world bosses in other continents of the game. However, they are only available to Chinese servers currently playing on Update 2.0 features. The six world bosses that excite global players are as follows:
| world boss | Level of | Location |
|---|---|---|
 Robarg | 22 | South of Astra, a round gorge in the Southern Ranger Ring |
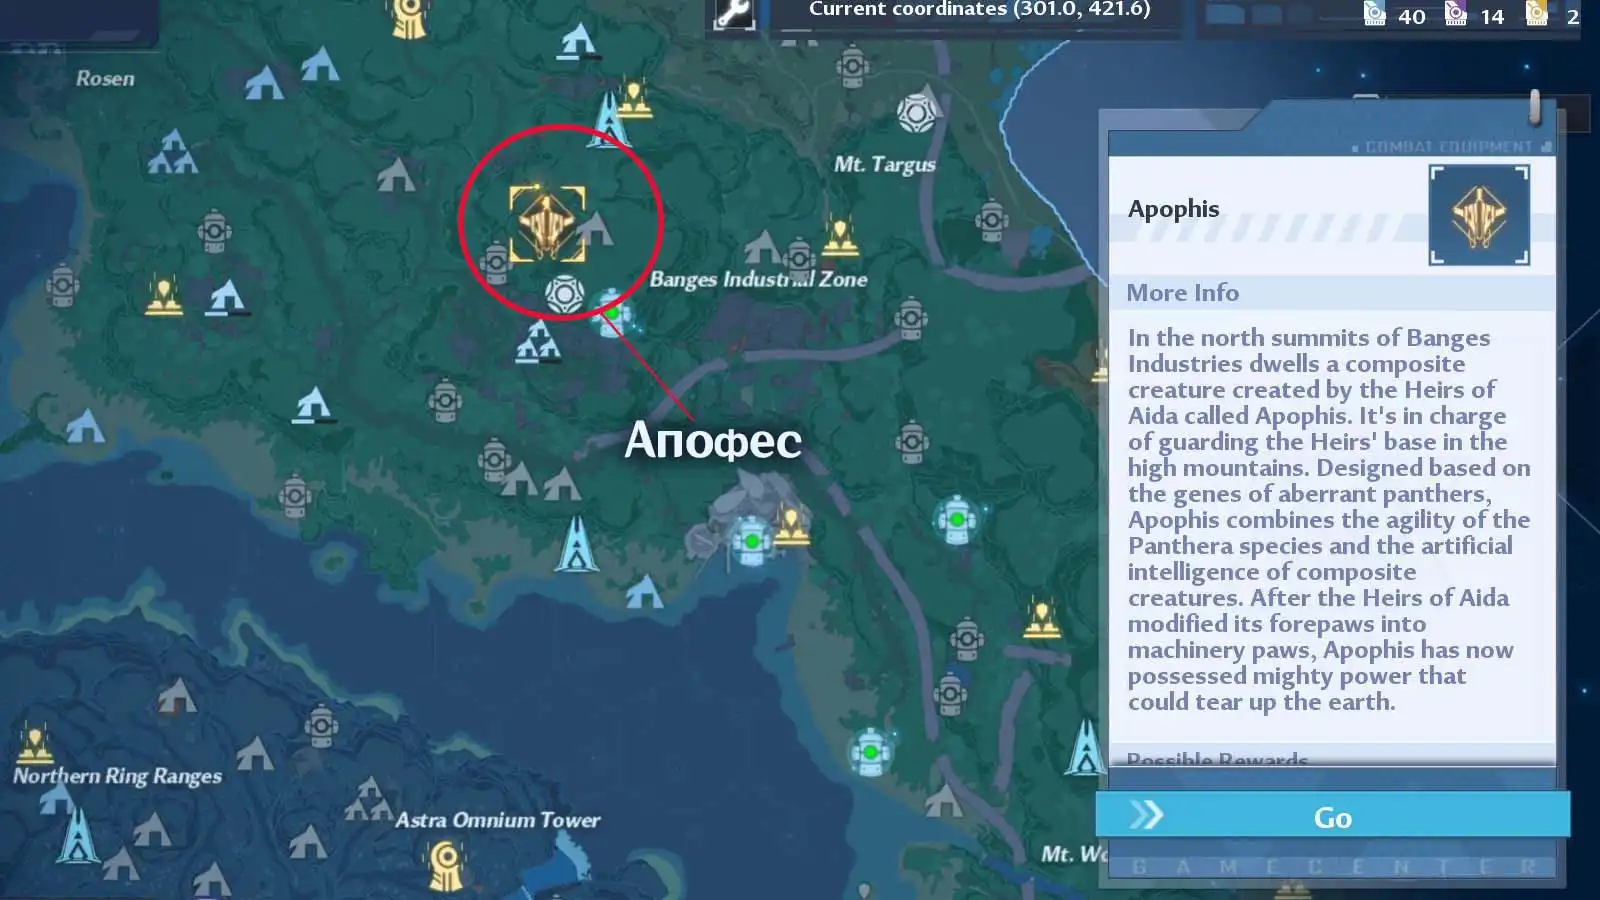
 Apophis | 30 | Banguis region, coordinates -477.8, -12.5 |
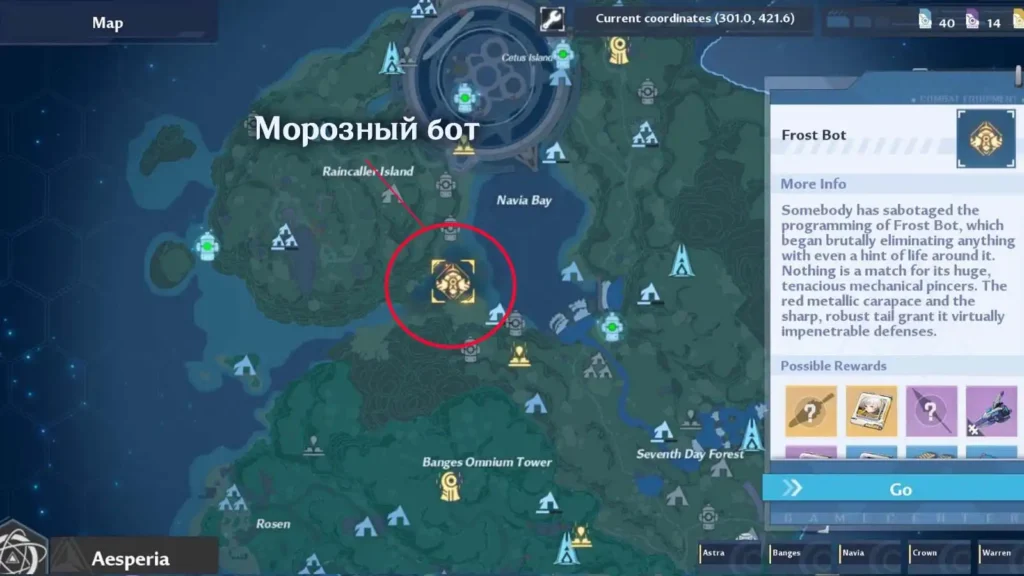
 frosty bot | 35 | Navia, near the top of the map |
 Sobek | 40 | In the Mines of Kron in a small bay located south of the Parliament |
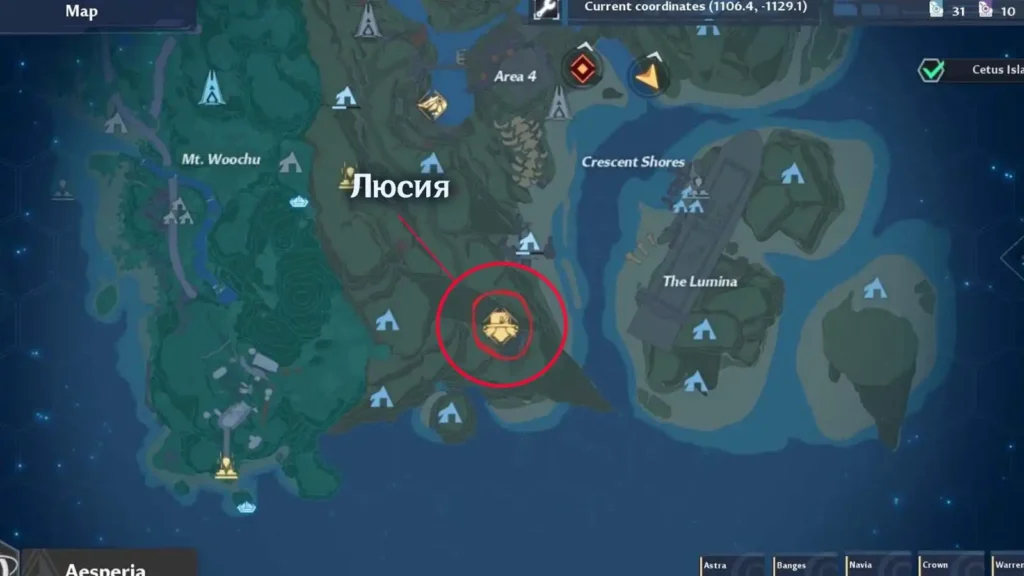
 Lucia | 40 | Kron Mines, in the south of the eastern part of the region |
| Barbarossa | 50 | Warren snowfields |
Note: This is a list of all currently confirmed Tower of Fantasy World Bosses. We will continue to update this list as more World Bosses are added!


Players can find the location of world bosses by looking at the maps above. Each boss is marked with a golden symbol in the given location where it spawns. You can also view the boss information for a description of the boss and a list of potential rewards for defeating it.
What's more, when you reach the same level as a World Boss, his level scales with yours. This is to ensure that world bosses remain a challenge for advanced players without losing their difficulty.
Fighting world bosses is important for a variety of reasons. The first one pretty much boils down to the fact that they reward gamers with a good amount of experience, which is definitely important for progression in the game. Moreover, another incentive is to obtain unique Matrix items that bosses drop upon death, as well as a chance to get SSR weapons.
World Boss Respawn Times in Tower of Fantasy
World boss respawn times are not set in a clear time frame. Rumor has it that world bosses take about an hour to respawn in the channel. However, this is an inefficient thing in practice. Instead, your best chance to take on the new world boss spawn is by switching channels. We recommend reading the world chat and then looking for an active world boss if possible.
How to Farm Tower of Fantasy World Bosses
If you want to kill the world boss repeatedly, you will have to look into Chat. Players in world chat constantly publish information about world bosses and what channel they are on. We recommend reading the chat and then switching channels.
However, please be aware that changing channels results in a 30-minute channel switching limitation. This prevents players from constantly changing channels and farming resources or overpopulating the channel causing it to lag. Instead, you can ask to join a group on the channel that the world boss is on. This allows you to change channels even while on a 30 minute block and fight the boss again.
Tip: Change the channel four times an hour
A coordinated group of four can change the team leader on a channel, and the new leader can seamlessly change channel. When a new team leader changes channel, he can invite the remaining party members to that channel to continue playing together. This means players can effectively farm four world bosses for an hour if all players don't have channel restrictions before forming a team.
However, you will need a yellow certificate Proof of Purchases to increase the chances of high-level loot. This will ensure the best chance of loot from world boss chests.
World Boss Robarg Tower of Fantasy
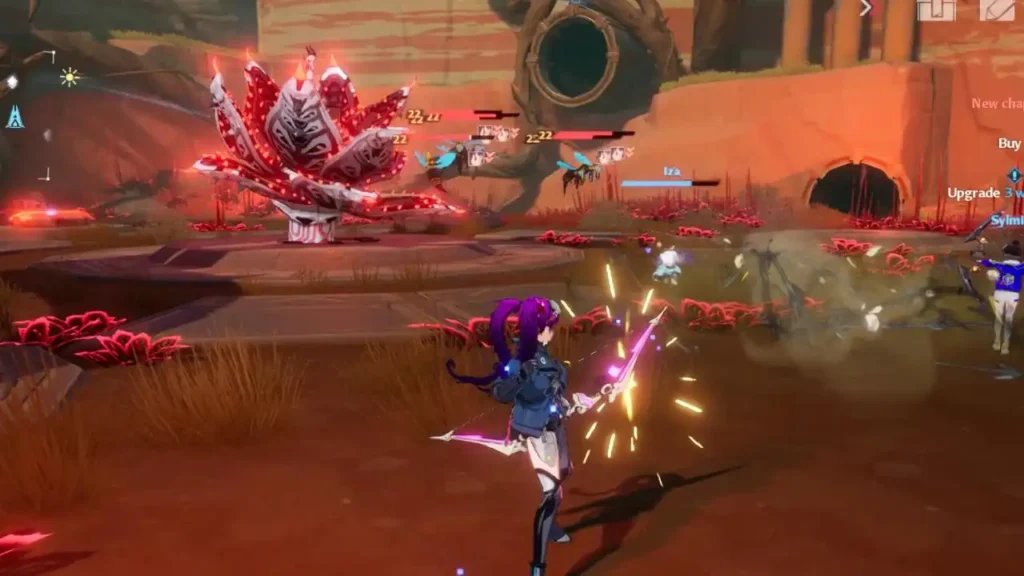
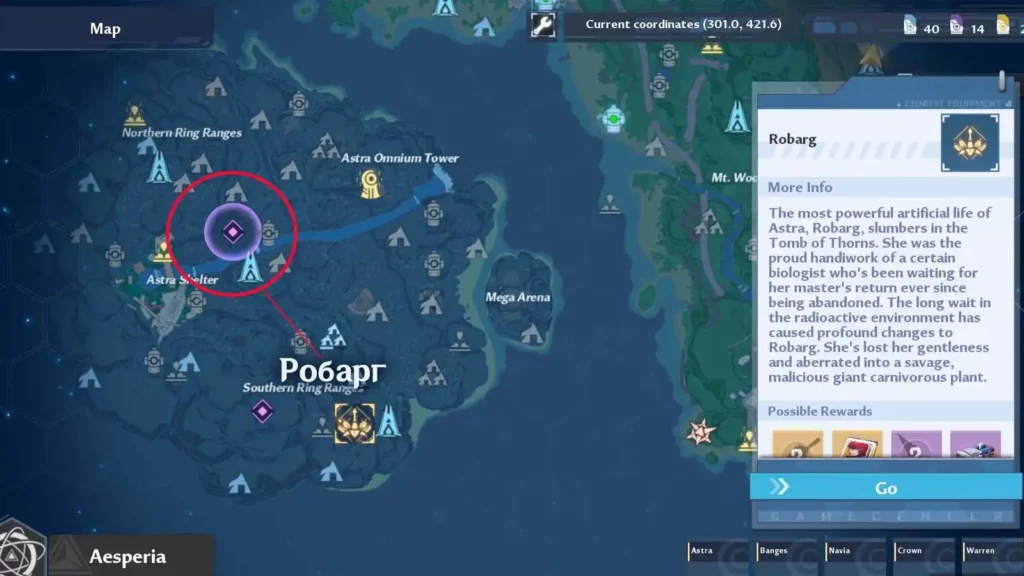
Robarg is the first world boss you will encounter in Tower Of Fantasy. This is one of the first basic repeatable methods you can do to get your hands on lucrative SSR rolls along with other possible items. If you want to get some of this great loot, there are a few things you need to know in order not to die fighting World Boss Robarg.
Robarg is a level 22 world boss located south of the Astra region. You can find it through the golden flower icon on your map. When you get to the location, you can see if it's on your channel. If not, then check the world chat.
If the boss is in place, then you can start the fight.
One of the main things you need to pay attention to is the boss shield. The boss will shield himself throughout the fight to reduce the damage he takes. Moreover, Robarg seems to be able to withstand damage from Volt. If you are using a weapon Volt, consider switching to another weapon to deal more damage.
The most common tactic the boss uses is to summon wasps to attack the team. These are slow moving enemies that will attack. You can either kill them or just run and dodge while dodging their sting.
The other main strategy you need to be aware of is the gas cloud. The boss will release some gas all over the battlefield. You need to move to the edges of the arena outside of the red poison zone to avoid damage. If you get hit, the boss will deal heavy damage over time to your character. You can heal if you have a healer on your team or use food to try and counter the debuff.
There is an attack that melee players will need to watch out for. Throughout the fight, the boss will spin the leaf around his body and hit any character within reach. You can easily get away from her before the boss attacks to avoid damage.
Finally, the last tactic to be careful with is the vine attacks. Small vines and a red bud will spawn above the boss and deal damage to anyone in the area of the attack. They're hard to spot, but they're something ranged players should be careful with if they're standing still for long periods of time. The boss can also perform a fireball attack in red zones, which players should avoid by dodging. If you catch yourself in the red zone, get out of it to make sure you're all right.
Drop from World Boss Robarg
| Icon | Reward | A type |
|---|---|---|
 | Random SSR weapon | SSR Weapons (Rosy Edge, Icewind Arrow, Absolute Zero, Scythe of the Crow, Chakram of the Seas, Negating Cube, Dual EM Stars, Thunderblades, Molton Shield V2) |
| Matrix King | Two-Piece Set: For every 10% of hit on the target, increase damage over 25 seconds, up to three stacks. Four-Piece Set: When there are 3 or more enemies around, restore the HP of the damage dealt. | |
 | Random SR weapon | SR Weapons (Thunder Halberd, Scar Staff, Terminator, Pummeler, Nightingale Feather.) |
 | Rocket Gun Upgrade Shard | Shards |
| Roborg Matrix | Three-Piece Set: When a target is shattered, poison the target and deal damage equal to a percentage of ATK every second. | |
| Random R-matrix | random matrix | |
 | Weapon Battery III | Materials |
 | Matrix Data Pack III | Materials |
World boss Apophis Tower of Fantasy
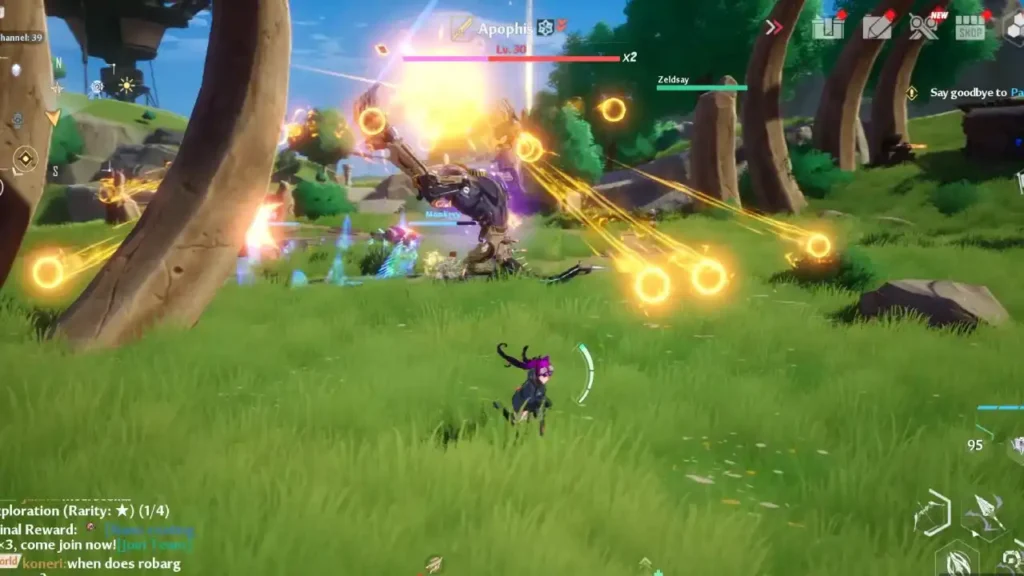
Apophis is the second world boss in Tower of Fantasy when players travel to Banguis and encounter him along the way. Players want to fight World Bosses for a chance at loot, but it won't be an easy task as Apophis is one of the hardest World Bosses in tower of fantasy.


Apophis in tower of fantasy can be found in Banguis. You need to be in the central part of the district, in the Industrial Zone (Banges Industrial Zone). Move there, and then go up the hill to be above the factory.
Now that you've arrived, you can join the fight. You can do it alone, but it's better to do it in a team.
Tactics of the battle with the World boss Apophis in Tower of Fantasy
Once you're in place and ready to go, you'll need to know Apophis' tactics to avoid death or retreat. Below are the main steps you need to pay attention to:
Advice: Grease Elemental Weapon
The boss is of the Grevious type, meaning it has a high resistance to damage from weapons of this type. Therefore, we strongly advise against fighting him with the Nightingale Feather (Bai Ling) and Chakram of the Seas (Shiro).
fireballs - Throughout the fight, Apophis raises his hands in the air and launches fireballs from his hands. This tends to target all players in combat, starting with those at the furthest distance. Each player will need to move to avoid the explosions. The fireballs drop randomly so be on your feet to avoid being hit. Melee players should move as soon as the fireballs drop much faster as they are closer to the boss. Also, don't stand where another player just stood, as this means you could be hit by a slow moving fireball heading towards your previous position. At the end of the cast, the boss throws the last big ball at a random player. It has a large explosion radius, so you have to run as far as possible. If you are the one chosen as the target, you will probably die.
Rock throw - Another move that Apophes makes - the boss throws stones at enemies. There are certain criteria by which the boss chooses who to throw a cobblestone at, namely the presence of aggro on the player. Ideally a tank should have this as any lower level player might not survive being thrown at it. On the other hand, you can easily avoid damage by dodging as the flying stone approaches.
Melee Swipe - The boss also has a general anti-melee skill where a red circle appears around the boss. The boss will then charge up his arms and perform a 360-degree kick attack. If you are in the red zone, just get out of it and you will be fine.
Random melee attacks - Apophis can also collide with the player and do a swipe attack. The move is either a single heavy charged paw strike or three bursts that slam shut at the end. If the boss is in your direction, you need to move towards him and at a distance as fast as possible to avoid getting hit.
Pounce - The boss turns to face the player and lowers himself. The boss then stays in that position for a few seconds before lunging towards that player. Once again, avoid being in the direction of his attack and you should be fine. Apophis can also bounce multiple times.
Drop from World Boss Apophis
| Icon | Reward | A type |
|---|---|---|
| Random SSR weapon | SSR Weapons (Rosy Edge, Icewind Arrow, Absolute Zero, Scythe of the Crow, Chakram of the Seas, Negating Cube, Dual EM Stars, Thunderblades, Molton Shield V2) |
| Matrix for Tsubasa (Tsubasa) | Two-Piece Set: For every 10% of hit on the target, increase damage over 25 seconds, up to three stacks. Four-Piece Set: When there are 3 or more enemies around, restore the HP of the damage dealt. | |
| Random SR weapon | Thunderous Halberd, Staff of Scars, The Terminator, Pummeler, Nightingale's Feather |
 | Shard to improve the Couant | Shards |
| Apophis Matrix | 3 pieces: Increases damage when health drops. The character deals maximum damage when his HP drops to 20%. | |
| Random R-matrix | random matrix | |
| Weapon Battery III | Materials |
| Matrix Data Pack III | Materials |
World Boss Frost Bot Tower of Fantasy
The boss is located in Navia, not far from the top edge of the map, in the bay area (to the left of its deep water part). It occurs on a mechanized site right in the shallow water, next to the beach.
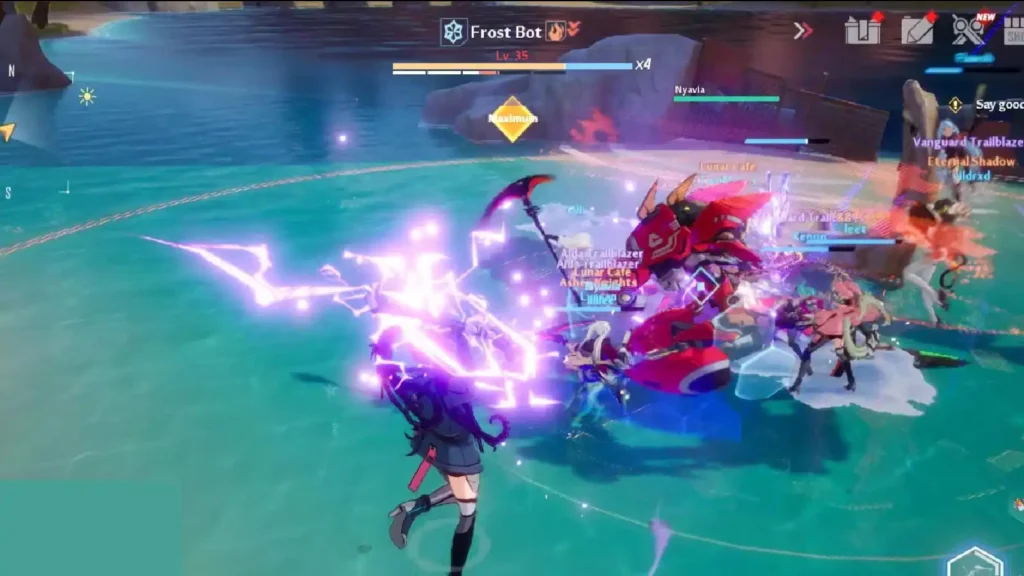
There are quite a few tactics that you need to be aware of if you encounter a Frost Bot. Most of the abilities aren't too difficult, but if you don't pay attention to them, you can die pretty quickly.
Frost Bot is a frost-type monster, which means it will take less damage from ice-based weapons. If you use Absolute Zero, Frosted Spear, Icewind Arrow, Pummeler, Rosy Edge or Terminator you will deal less damage to the boss. In addition, Frost Bot takes additional damage from firearms. If you are using Scythe of the Crow, Negating Cube, Molton Shield V2 or Composite Bow, you will deal more damage to his Frost Shield and break it faster.
Big Freeze: One of the boss's moves sends out a large AOE attack marked with a red zone. Those caught in the explosion will freeze, which can last for five seconds if you don't leave the red zone. Those in the area after the ice breaks may take damage. What's more, blue frost rises from the sand after the initial explosion, indicating that the damage effect is still in place. If you see it then stay outside of it unless you have HP to be ok.
Bubble trouble: The boss sometimes stands still and shoots several bubbles at the player. The player it targets will need to dodge the projectiles or they will take damage or potentially die if they are below the level of the boss.
crab claws: The boss will start attacking around the battlefield and swing both of its claws in front of it, hitting enemies along the way. Try to avoid the direction in which the boss is moving. The boss can change direction several times during this turn, so stay focused.
frost shield: Frost Bot often stands still and sets up a shield around his body. This shield is weak to fire damage and acts as an additional health bar. Removing it stuns the boss, leaving him open to attacks.
ground slam: The boss will raise his claws up and then start attacking. He will then drive one claw after another into the ground for great damage. If you are in front of the boss, back away in whatever direction you prefer.
DDT tornado: Frost Bot sometimes stands still, picks up sand from below, and then starts swinging its arms around its body in a 360-degree motion. The boss will then run around the battlefield and try to hit people. Each hit doesn't deal that much damage, but can easily hit multiple times if you can't dodge it, which will quickly build up a lot of damage and kill you.
Drop from World Boss Frost Bot
| Icon | Reward | A type |
|---|---|---|
| Random SSR weapon | SSR Weapons (Rosy Edge, Icewind Arrow, Absolute Zero, Scythe of the Crow, Chakram of the Seas, Negating Cube, Dual EM Stars, Thunderblades, Molton Shield V2) |
 | Matrix for Huma | 2 pieces: Dodge damage to an enemy and inflict Bleeding. 4 pieces: Reduce the ATK of all enemies within 8 meters that take damage over time. |
| Random SR weapon | Thunderous Halberd, Staff of Scars, The Terminator, Pummeler, Nightingale's Feather |
 | Shard to upgrade the Hovering Cannon | Shards |
 | Frostbot Matrix | 3 pieces: Increases damage when health drops. The character deals maximum damage when his HP drops to 20%. |
| Random R-matrix | random matrix | |
| Weapon Battery III | Materials |
| Matrix Data Pack III | Materials |
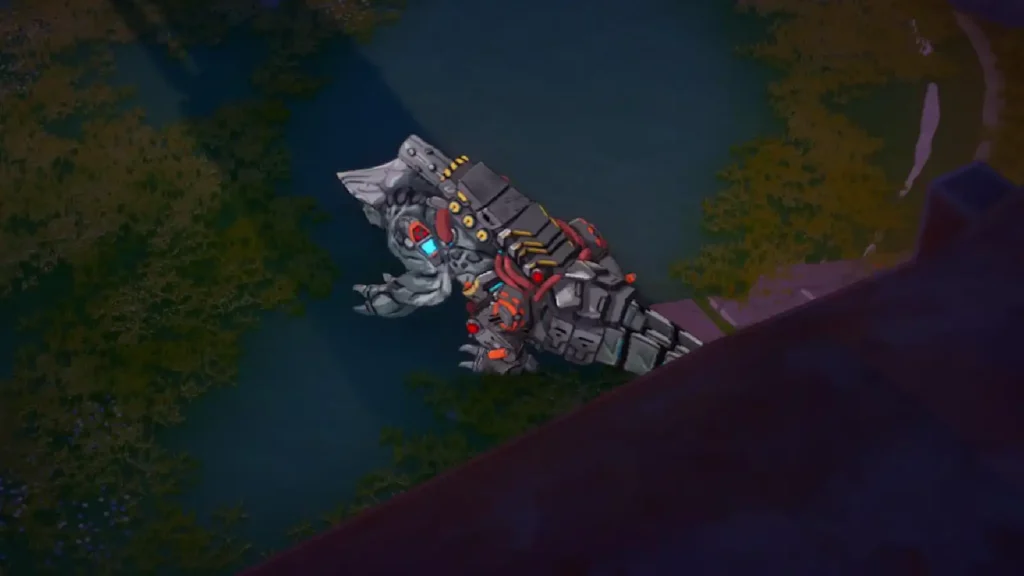
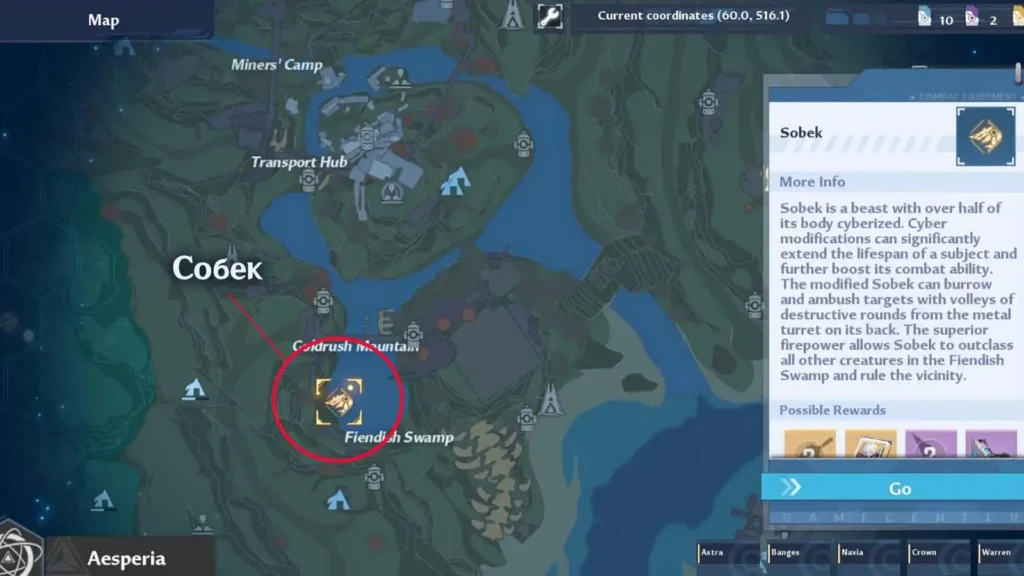
World Boss Sobek Tower of Fantasy
Sobek in Tower of Fantasy is located in the Mines of Kron in a small bay located south of the Parliament. On the map, it is indicated by the crocodile icon. Usually this enemy spawns near a cliff. Although you will most likely find him fighting other players. Fighting him alone is not recommended.
Note that Sobek is a level 40 enemy. This means that players need to be around level 35 and have their potential at a high enough level to go to the Kron Mines.
Sobek is a boss with several tactics to take care of.
Sobek is a Volt-type enemy, which means he will take less damage from Volt weapons. If your character uses a Volt weapon while their shield is off, they will resist some of your damage. This way you will deal less damage if someone is using a weapon like Volt.
Air Strike: Sobek goes underwater, making himself untargeted and starts launching missile strikes across the battlefield and hitting many players. You must keep running around the battlefield, avoiding explosion zones aimed at you, and avoid getting hit by other players.
Barrel Throw: Sobek will look at the ground and then stand on his back. The boss will then do a barrel roll, hitting all enemies in the direction it rolls.
Burrow attack: Sobek goes under the water and will soon appear under the character's position. This seems to ensure it hits the player it's targeting, so make sure you don't stand next to anyone to avoid collateral damage. This move deals a lot of damage and will most likely kill any low health or down level players.
head charge: Sobek activates himself, creating a kind of blue effect on his head. It will then attack around the battlefield and try to collide with players and deal damage. Just dodge him and get out of his way.
Swipe tail: Sobek sometimes strikes using his tail. The boss will move slightly back and to the right, charge up for a moment, and then lash out with his tail where his head used to be. Anyone to the right of the boss or in front will get hit. Ideally, move to the left side of the tail or get ahead of it to avoid damage, depending on your current position.
Thundering claw strike: Sobek will make his front claws glow blue by lifting them into the air before they crash down. The move is easy enough to avoid if you don't attack and run away as soon as possible. Those caught around Sobek's body will take damage otherwise and be dazed if directly hit by the claws.
Volt Shield: Sobek sometimes wears a shield around him. The monster is a Volt creature and will take reduced impact damage during this phase. Break the shield to return to normal damage values.
water gun: One of Sobek's main moves is firing the big cannon on his back. The move targets the player, launching a large watery bolt at the enemy and dealing damage if the player doesn't dodge it.
Drop from World Boss Sobek
| Icon | Reward | A type |
|---|---|---|
| Random SSR weapon | SSR Weapons (Rosy Edge, Icewind Arrow, Absolute Zero, Scythe of the Crow, Chakram of the Seas, Negating Cube, Dual EM Stars, Thunderblades, Molton Shield V2) |
 | Crow Matrix | 2 pieces: Increase critical damage when fighting enemies below 60% health. 4 pieces: Adds a critical strike that deals additional damage over 5 seconds based on the character's attack power. |
| Random SR weapon | Thunderous Halberd, Staff of Scars, The Terminator, Pummeler, Nightingale's Feather |
 | Shard to upgrade the Cybernetic Arm | Shards |
 | Sobek matrix | 3 pieces: Increases damage dealt by 6%/7,5%/9% for each nearby enemy. Can stack up to three times. |
| Random R-matrix | random matrix | |
| Weapon Battery III | Materials |
| Matrix Data Pack III | Materials |
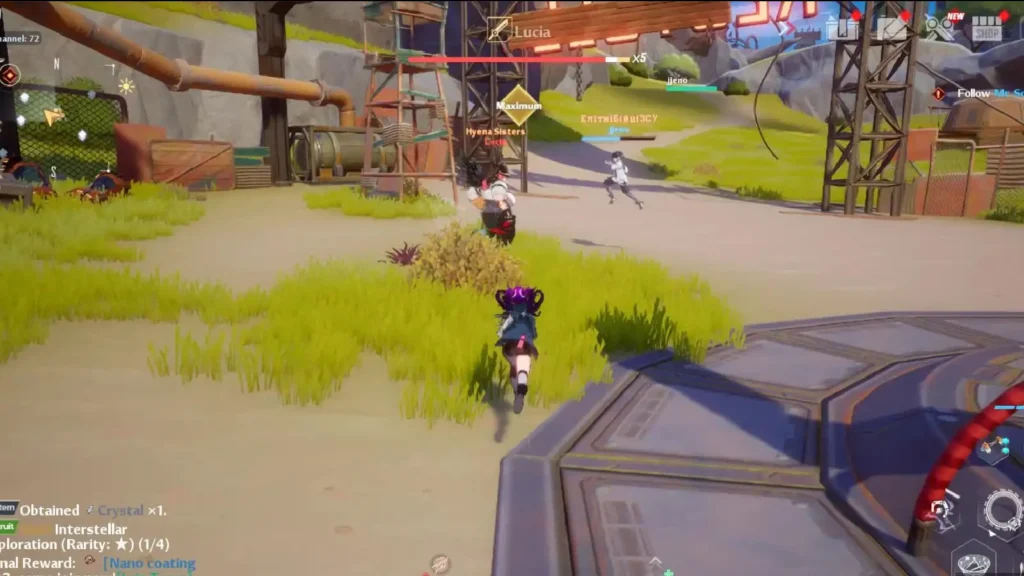
World Boss Lucia Tower of Fantasy
Lucia is the fifth main world boss in tower of fantasy and becomes available to those who are at level 32. Lucia is a great farming boss, especially for those who are looking for solid Matrix items to boost their damage.
There are quite a few tactics you need to pay attention to with Lucia. However, it is not that difficult. For these reasons, she is arguably one of the easiest world bosses to farm.
Belly Slam: Lucia will walk around the battlefield chasing the player. After the jump, she will plop her belly on her target. This is easy to avoid and timing your dodge properly will trigger the slow effect.
crack that whip: She raises her hand in the air with the whip held high. She then blasts it forward after a short moment, causing a purple shockwave to hit the area. The purple shockwave hits multiple players caught around the whiplash. Move away from the direction she is facing to avoid getting hit.
Rotating fist: The boss moves by rotating his fist around. After several rotations, she will try to break through the target. Once again, try to dodge the fist as it approaches you. This is very easy to avoid and is another easy way to push through the purple fading dome to attack her even more.
sword swing: The boss can sometimes swing his sword at the ground right in front of her. It's hard to read when she's doing this, so the best advice is to avoid confronting her altogether.
Whip spin: Lucia will spin her whip around her and keep doing it for a few seconds. Any player that is standing within a short distance within a 360 degree radius around them will be hit and take damage.
Please note that there are two versions of this. One is where she spins 360 degrees and moves, while the other is where she stands still and makes her whip damage stronger. Ideally, if you see the whip coming out, move away from her and don't face her.
Villains Reborn: Lucia located in a small bandit camp, surrounded by rhino robots, sentinel robots, assassins and ordinary gnome-like snipers. These crowds will continue to respawn as long as the fight with Lucia lasts. You will most likely have to deal with respawning enemies during the fight, as they can easily kill players if too much happens.
Drop from World Boss Lucia
| Icon | Reward | A type |
|---|---|---|
| Random SSR weapon | SSR Weapons (Rosy Edge, Icewind Arrow, Absolute Zero, Scythe of the Crow, Chakram of the Seas, Negating Cube, Dual EM Stars, Thunderblades, Molton Shield V2) |
 | Matrix for Meryl | 2 pieces: If the character's health bar drops below 30% after an enemy attack, they will gain a shield equal to 20%/26%32%/40% of their maximum HP for 10 seconds. The effect occurs once every 90 seconds. 4 pieces: While the shield is active, heal for 60%/75%/90%/105% of the damage dealt. The maximum amount of HP regenerated every 0,5 seconds must not exceed 105%/127,5%/150%/172,5% of ATK. |
| Random SR weapon | Thunderous Halberd, Staff of Scars, The Terminator, Pummeler, Nightingale's Feather |
 | Shard to upgrade Quantum Cloak | Shards |
 | Matrix Lucia | 3 pieces: When using a Discharge (Ultimate) skill to switch to your current weapon, grants 80-120 weapon charges. |
| Random R-matrix | random matrix | |
| Weapon Battery III | Materials |
| Matrix Data Pack III | Materials |
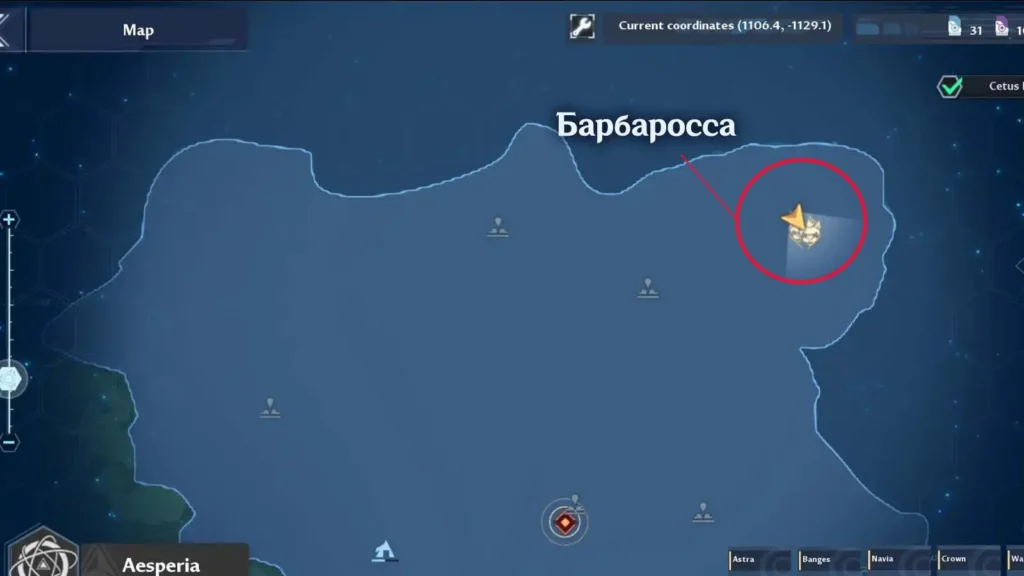
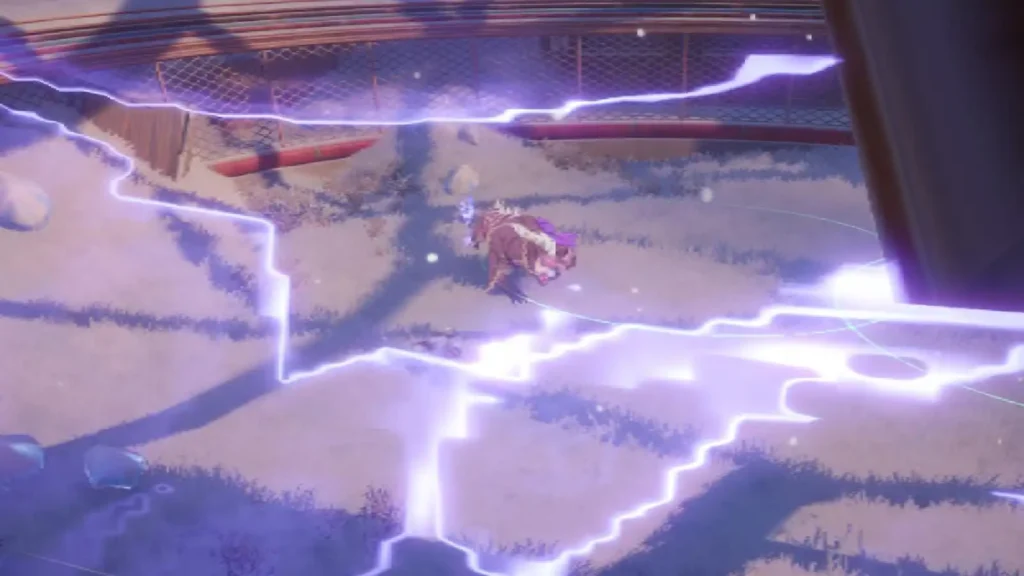
World Boss Barbarossa Tower of Fantasy
It can be found in the upper right side of Esperia in Warren's Snowfields. Head northeast after moving to the Spacerift: Fjord Cliff teleport gate. The enemy is on a small island near the sea, surrounded on all sides by a mountain stream. You will find it inside an unusual spherical cage in the center.
Fighting him alone is highly discouraged, especially if your level isn't high enough. The table below shows the items that can drop from this enemy.
You can find the dog as the final boss in one of the Joint Operation missions, so the tactics are pretty much the same. Here is a summary of Barbarossa's attacks.
Bounce - Barbarossa jumps to a target and lands in that position, damaging anyone under her hitbox as they land. The area is marked with a purple damage zone that is highlighted twice. Avoid these purple zones and you may avoid additional damage.
Roar - Boss's two heads roar, dealing damage to anyone standing within a 180 degree radius when the boss roars. Avoid this when you hear the boss making a roaring/growling noise.
sketch Barbarossa pounces to the side. If the player gets hit by it, the boss will pin it to the floor, with both heads biting the player for a significant chunk of damage.
Right paw - Boss slams his right paw around him and then into the ground. Avoid being in swipe range to avoid being knocked back. Players will be knocked down and take damage.
Spin attack - The boss will lower his body and then do a 360 degree rotation. Players caught with either the head or the tail will take significant damage.
Summoned Followers - Barbarossa will call on followers to help heal him when he drops a few HP bars. Players need to target the Aberrant Canine Alphas and defeat them so they don't lick the boss's wounds and restore the boss's HP.
Shield - This creates a shield around itself to reduce the damage it takes.
Drop from World Boss Barbarossa
| Icon | Reward | A type |
|---|---|---|
| Random SSR weapon | SSR Weapons (Rosy Edge, Icewind Arrow, Absolute Zero, Scythe of the Crow, Chakram of the Seas, Negating Cube, Dual EM Stars, Thunderblades, Molton Shield V2) |
| Matrix for Meryl | 2 pieces: If the character's health bar drops below 30% after an enemy attack, they will gain a shield equal to 20%/26%32%/40% of their maximum HP for 10 seconds. The effect occurs once every 90 seconds. 4 pieces: While the shield is active, heal for 60%/75%/90%/105% of the damage dealt. The maximum amount of HP regenerated every 0,5 seconds must not exceed 105%/127,5%/150%/172,5% of ATK. |
| Random SR weapon | Thunderous Halberd, Staff of Scars, The Terminator, Pummeler, Nightingale's Feather |
 | Shard to upgrade Magnetic Pulse | Shards |
 | Barbarossa Matrix | 3 pieces: After switching to a weapon, increase damage reflection by 50%/62,5%75% for 20 seconds. The effect works once every half a minute. Switching to another weapon increases damage by 25%/30%/XNUMX% for XNUMX seconds. The effect works once every half a minute. |
| Random R-matrix | random matrix | |
| Weapon Battery III | Materials |
| Matrix Data Pack III | Materials |
If you have any questions about world bosses, ask them in the comments. Follow the guide section for tower of fantasy on our website:
Don't forget to check out our other Tower of Fantasy tips and guides:

Tower of Fantasy Guides

Guides for beginners
| Creation and customization of characters | Reroll Guide |
| Skip and immutable functions | Leveling guide |
| What to do every day | List of content gateways and levels |
| Guide to Cooking and Satiety | List of shops and what to buy |
| Server list | Recommended settings |
| Language options | List of Controls |
| Explanation of the Gacha system |
Agriculture Guides
| Dark Crystal Farming Guide | Guide to farming Golden Cores |
| Black Cannon Farming Guide | Red Core Farming Guide |
Game mechanics
| How to do the Jetpack Dash trick | How to perform an endless climbing stunt |
| Gameplay and combat system | List of puzzles around the world |
| Weapon resonance guide and best customization | Simulacrum Awakening and Trait Guide |
F.A.Q.
| How to redeem codes | Can you change gender? |
| Is the battle pass worth it? | SSR select block: which character to unlock? |
| How to change channels | How to join the team and rewards |
| The best banner to pull | Multiplayer Guide: How to Play Online Co-op |
| Daily reset time | What to do if lava pits don't work? |
| What to use Vitality on? | Should you buy the Clotho Supply Pod? |
| Are Simulacra just skins? | How to change your name |
| Ideal or forced decryption? | Which SR relic to choose? |
| How to add friends |
Other guides
| Best Weapons | List of all in-app purchases and microtransactions |
| List of scenic spots | All electronic lock passwords |
| Mighty Mushroom Locations and How to Use Them | What is Claire's dream car? |
| Birthday Rewards and How to Install Them |
Was the article helpful?

![Guide to Tian Lan in Tower of Fantasy [build]](https://portalvirtualreality.ru/wp-content/uploads/2022/12/Новый-проект-2022-12-20T220220.314.webp)