Passage of the game Lost Lands 9: Tales of the First Brotherhood 100%. All the secrets, puzzles, mini games, collectibles and achievements in one place...
Lost Lands 6: Past Mistakes 100% Walkthrough
Passage of game Lost Lands 6: Mistakes of the past 100%. All secrets, puzzles, mini-games, collectibles and achievements in one place.
Games series: Lost Lands
Content
General information. Walkthrough:
Lost Lands 6. Mistakes of the Past (Lost Lands 6) - An adventure game with an incredible story, during the passage you will encounter the dark sorceress Kassandra, who was buried alive many centuries ago, but suddenly she came to life and broke out, instilling fear in the inhabitants of the game Lost Lands 6. You wake up play as the main character Susan who needs to unravel the secrets and puzzles of the witch. For the complete passage of the game Lost Lands 6 you have to go back in time and correct all the mistakes of other people. If you are stuck at some point and do not know how to proceed further, you can always watch the walkthrough of the game Lost Lands 6. Mistakes of the past, on our website.

Chapter 1. Cassandra
As never before, I came to the Lost Lands of my own free will. Someone sent me a message saying that the fate of my old friend Maaron was hanging in the balance. I could not ignore this call. Having dressed more comfortably, I used the temporarily created portal and was transported to an unfamiliar city of a completely different world. First of all, I ran into two spider-like creatures. I don't know who it was, but I had to run away from them. By the way, I had a map with a meeting point and I followed it.
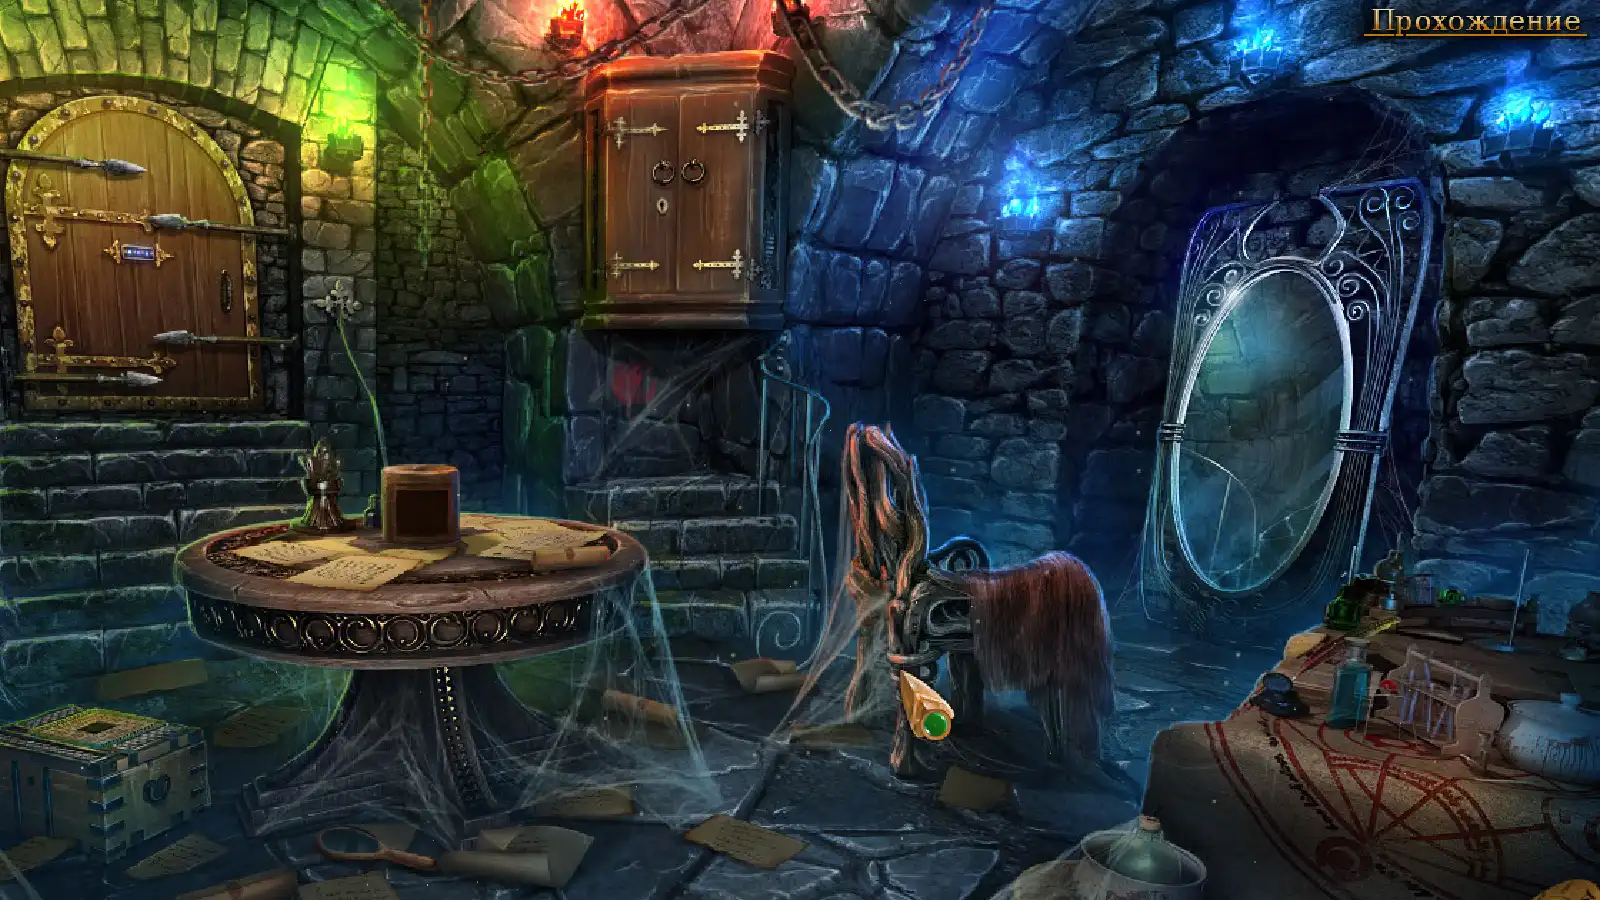
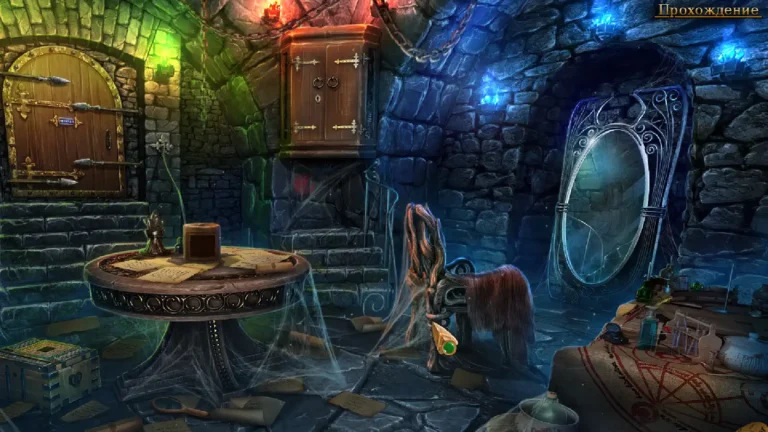
1.1. Chamber of Secrets
Lost Lands 6: Mistakes of the Past . Walkthrough
We have returned to the Lost Lands. Instead of a village, we will see a huge medieval city. Let's run through the streets past the big spiders, hide in the building.
A. Inside we will meet the matured great-granddaughter of Maaron - Fiora. We learn that Maaron is captured by the sorceress Cassandra. During the conversation, one of the spiders will attack us.
Secret. On the right on the middle shelf of the fireplace lies spider figurine (1/8).
Secret. Below, in the center of the floor lies ghost bones (1/30).
B. At the bottom left of the door, we tear off the steel part of the zhikovina.
C. On the right, take a scoop, use it on the fireplace, you get a scoop with coal.
D. We throw coals at the spider, he will raise his paw. We strike the detail from below.
E. Fiora saved. Now on the right we are repairing the steps of the stairs.

@ 1. On the right we take the boards, put them on the steps. You need to find pairs of boards that will cover the entire length of the steps. If the pair is matched correctly, the boards will straighten. Solution:
(1-13) - (2-14) - (3-15) - (4-16), (5-17) - (6-18) - (7-19) - (8-20) - (9 -21),

1.2. old cemetery
Lost Lands 6: Mistakes of the past. Walkthrough
F. On the assembled stairs we will go out into the street, together we will run out of the city.
Secret. Top left, on top of the crypt lies ghost object (2/30).
Secret. Overgrown gate on the right, a little lower in the stones urn (1/8).
G. In the cemetery we examine 3 tombstones, next we collect 3 pebbles with a letter. Ahead on the ruined crypt manuscript (1/9), a stone "moon", a figurine of a man.
H. Insert 3 letters on the central tombstone. Collecting the word.
@ 2. On the tombstone of letters, you need to add the name of the wizard: MAARON.

1.3. Maaron's laboratory
Lost Lands 6. What is the name on the tombstone
I. A hatch will open under the tombstone, we go down underground.
Secret. Below the table lies ghost brush (3/30).
Secret. In the center, under the wall cabinet red print (1/7).
J. On the table we move apart the papers, read the note, take the key. In the center of the table we will see a button, press it, we will get the sand of time from the cache, the 2nd figure of a little man.
KLM NO. Use the key to unlock the cabinet in front. Inside, we examine all the containers, we find the 3rd figure of a man, an empty hourglass. Combine the clock and sand in inventory to make an hourglass.
P. At the top right we put an hourglass over the mirror. In the mirror we will see Maaron's message: he created a Time Hexagon in order to return to the past and neutralize Cassandra. We will hear the exact date where you need to return, and the code from the door.
Q. We go to the doors on the left, enter the password: L, I-, I.
@ 3. Press buttons: [1]x3, [2]x2, [3]x5.

R. Behind the left doors you need to find 10 items from the list:
1. Key - on the floor under the tiles, you need a chisel. Apply to a drawer.
2. Hex key - in the desk drawer, you need a key. Left on the table.
3. Hammer - on the workbench in the center. We hit the part in a vise.
4. Mop - on the right is near the pole. On the top left shelf.
5. Metal rod - on the left under the table. In a vise on the table, you need a hammer.
6. Part of the mechanism - on the right in the elevator, you need to raise it. On the table on the left.
7. Chisel - on the right above the big gear. Tile in the center of the floor.
8. Handle - on the upper left shelf, reach with a mop. On the gear.
9. Ring - take a rod, make a ring in a vice. To the elevator on the right.
10. Detail of the mechanism - on the left on the table, from 2 halves. Center on the table.
On the mechanism, press the holders 1-2-3-4. We get a temporary hexagon.
S. We go upstairs, in the crypt on the left we insert 3 figurines of little men.

@ 4. You need to collect the figures in a round dance. All of their hands should be on the marked circle. If set correctly, then the hands will begin to glow. Photo solution:

T. Inside the crypt, take the urn with the ashes. Let's put it in the time machine.
@ 5. On all watches we set the date that Maaron spoke about. It can be viewed in the magazine, in the lower left corner of the screen. We enter into the dials in turn, clockwise, the following values: 30-88-VIII-23-00-20. We press on the red button in the center, and we will move to the past.

1.4. New cemetery
Lost Lands 6. How to put the year on the medallion
Secret. To the right above the gate, on the turret sits ghost cock (4/30).
Secret. Between the crypt and the gate, on the wall red print (2/7).
U. To the left of the center, near the stone lies a yellow bundle, inside the stone is the "Sun". Near the gate on the right we take a shovel.
V. We insert 2 stones into the hands of the statue: the Sun and the Moon. A beam will appear.
W. The beam pointed to the ground, we dig it out with a shovel, we get a magnet, a steel.
X. A man will come out of the gate, and we will hide. The dying Cassandra was visited by her disciple, the young Maaron. He will give her the potion and lock her in the crypt. We secretly pursue him outside the gate.

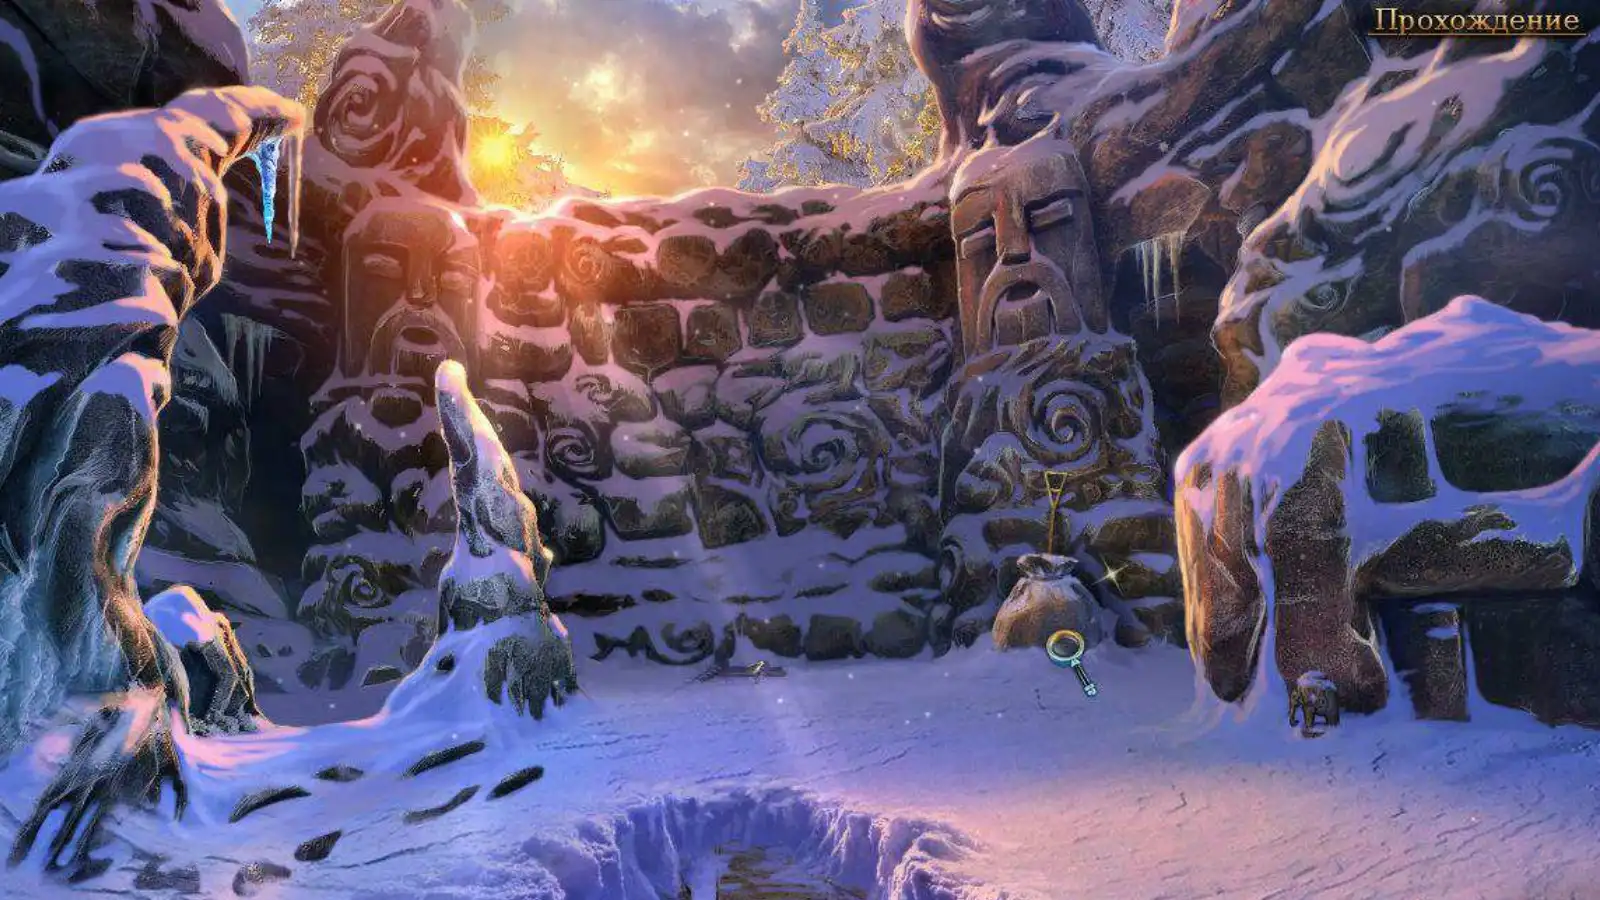
1.5. dried swamp
Lost Lands 6. How to get through
Y. In the swamp, we will hear Maaron's conversation with the old woman Helma: he replaced the deadly poison with a lethargic sleep, hoping to cure Cassandra of darkness in the future. Let's go back to the present, because the time machine ran out of dust.
Secret. Top right, on a wide tree ghost squirrel (5/30).
Secret. On the right, on the cliff between the bumps stands spider figurine (2/8).
Z. At the bottom right, inspect the hatch, dig it out with a shovel. Let's take boards.
A. Under the hatch we will find a map with a mark, a rag, a fragment of a blade.
B. Use the boards to get over the bumps ahead.

@ 6. First we build bridges to the right and up to take 2 more boards. At the end we build a bridge to the left up. The bridge to the right up will remain.
C. On the bump on the top right, take manuscript (2/9), cutting.
D. On the left go to the water, use a rag, get a damp cloth.
E. On the top left, everything is overgrown with ivy, cut it off with a knife.
F. On the veranda of the hut, we are looking for 10 items from the list:
1. Blacksmith tongs - we will get it last. You need to assemble the puzzle.
2. Piece from puzzle 1 - in a bag with a patch, you need a knife. On the chest.
3. Gear - you need to pull out the chest, in the pit under it. On the left box.
4. Detail from puzzle 1 - in the left drawer, break the vase. On the chest.
5. Handle - top left in a bag. On the left box with a gear.
6. Broken knife - in the left box, you need a handle, gear. On a bag.
7. Handle - inspect the bags, on the left on the branch. On the chest in the center.
8. Kettlebell - behind the chest in the center. Break the vase in the left drawer.
9. Symbol of a raven - near the left box. On the book in the chest.
10. Piece from puzzle 3 - in the chest, in the book. On the lid of the chest.
G. Use the pliers to remove the nails from the board, take the key to the hut. We enter.

1.6. Empty hut
Secret. On the left, between the boxes lies ghost sieve (6/30).
Secret. To the left of the bed, on the wall red print (3/7).
H. Cut the blanket with a knife, get the straw.
I. On the right we examine the grate. We use a damp cloth, twist it with a wooden handle. So we part the bars, and take the key to the box.
J. Use the key to open the box on the left, inside manuscript (3/9), bottle of rum. We use a knife on the bottle, we get an open bottle of rum.
K. We put straw behind the grate on the right, pour it over with rum, set it on fire with a flint and a knife. The body will burn, the resulting ashes of the witch are taken away with a shovel. Pour the ashes into the time machine.

1.7. witch swamp
Lost Lands 6. Passage of the game in pictures with a description
Secret. Bottom right, in the right swamp grows ghost lily (7/30).
Secret. Under the house, behind the boards lies urn (2/8).
L. There is a net at the bottom left. At the house under the door we take the axis of the hammer.
M. The hammer itself will fail and fall into the grass.
N. We use a magnet on the grass, we drive it around the screen.
@ 7. Bottom left we find a door knocker, magnets (1/3).

O. Use the hammer and axle on the door. Helma will not speak to us.
P. Go back to Maaron's Lab, tell Fiora everything.
Q. We get a piece of the puzzle from Fiora, insert it into the chest on the left.

@ 8. On the chest, you need to rotate all the elements so that all the lines are combined into one pattern. To achieve it, you need to complete it in 130 touches.

R. Get out of the chest manuscript (4/9), Maaron's diary, magnet (2/3).
ST. We return to the swamp, show the diary to the witch, she will let us in.
U. Helma will tell you that in order to destroy Cassandra, you need to find a blade and prepare a potion. Get the recipe for a destructive potion.

1.8. witch's hut
Lost Lands 6 Walkthrough
Secret. On the left under the table lies ghost broom (8/30).
Secret. In the center near the bottles stands spider figurine (3/8).
V. Ahead near the witch we take a closed bucket. We examine it, open it with a knife, inside we will find a brush cutter, a bucket. In the hut, remove the gauze from above.
W. Behind the gauze we inspect all the cans, take the can of the red praying mantis.
XY. On the table manuscript (5/9), keeper of fire. Use for a candle.

Z. We go to the swamp, in the center we collect fresh water in a bucket.
AB. We examine the torch, set fire to the keeper of the fire. Moths will fly into the light, we catch them all with a net. To achieve this, you need to catch them in less than 30 seconds.
C. We go to the hut, pour water into the cauldron, through gauze. Wet gauze.
D. New cemetery, through wet gauze we can take a fiery flower.
E. Old cemetery, on the right from the gate we cut off a branch of a thorn bush with a knife.
F. Open the potion recipe, put all 4 things on it, you will get the ingredients of the potion. In the hut, use the fire keeper to melt the cauldron. Pour all the ingredients into the water at once. While the potion is being brewed, Helma will give us a stone disc and send us for the blade.

G. In the swamp, insert the disk into the panel on the right.

@ 9. Rotate the dials on the bottom and right to move all parts of the picture. They move at different speeds, and they need to be built into the whole picture.

1.9. Elogan ruins
Lost Lands 6: Past Mistakes
H. After the solution, the portal will turn on, we enter it.
I. We will find ourselves in the place depicted on the paper map.
Secret. To the left of the doors, on the roots lies ghost shield (9/30).
Secret. On the top left, under the upper inclined column lies urn (3/8).
J. We examine the knight, take the spear, manuscript (6/9).

L. Pull the rope, tilt the tree.
M. Take the Anvil seal from the nest.
N. Cut off the second side of the rope.
O. With a spear we will move the stone head, under it is a long stick, a shield.
P. There are 3 circles under the head, put a hint on them.
@ 10. You need to rotate the shapes to the center with the same shading that is shown on the paper tip. After the decision, we get a fragment of the blade.

Q. From the doors we take the magnet (3/3). Insert all magnets.
R. Press the buttons to pull the ball to the center: bottom left.

1.10. Allsmith Dungeon
Lost Lands 6. How to get through
Secret. From the central statue on the top right there is ghost pattern (10/30).
Secret. Bottom right, on the wreckage of the column there is spider figurine (4/8).
T. In the dungeon, on the right, take out the hatchet from the knight. We examine the wall.
U. We go to the street, on the right we cut down pine branches with a hatchet. We examine a long stick, add branches, a rope, we get a broom.
V. In the dungeon, on the right, we clean the wall with a broom, take the Hammer seal.
wx. We insert two seals into the door on the left.

Behind the left doors, let's start searching for items from the list:
1. Stone tiles - on the left near the altar. On the panel with tiles on the right.
2. Bucket of water - take in the center, fill on the right. To a bowl of fire.
3. Gaff - lies on the right below. Apply to the clogged pipe on the right.
4. Square key - handle plus tiles on the right. We put it on the altar on the left.
5. Pen - in the bowl, need water. On the right we shift the tiles, put them in the center.
6. Hammer handle 1 - above the stairs, you need another ladder. In the chest.
7. Part of the stairs - in the center on the chest. To the top stairs.
8. Hammer handle 2 - on the left of the altar, you need to insert the key. In the chest.
9. Bucket - Center on the floor. Let's fill it at the pipe on the right, we need a hook.
10. The key is above the stairs, you need more stairs. On the chest in the center.
In the central chest, take the hammers of the Allsmith.
Y. We insert two hammers into the hands of the statue.
Z. Add 2 parts of the sword to the anvil. From above we set fire with the help of the keeper of fire. Get the Blade of Justice.

A. Go back to the witch, talk to her, get a coin for the crypt.
B. On the right, dip the sword into the cauldron with the potion, you get a poisoned blade.
C. We go to the cemetery, insert the coin into the doors of the crypt.

@ 12. The coin must be moved from above to the hole in the center right. Click on the handles to rotate the colored holders. To achieve, you need to complete in less than 20 touches. Solution:

D. Enter the crypt, use the poisoned blade on Cassandra. We will kill her, but young Maaron will see it. He will not have time to catch us, but he will remember our face and promise to take revenge. Let's move to an alternate present.

Chapter 2. Consequences
Aftermath - The Resistance hideout is located in an abandoned sewer. There, the leader of the Order, Mira, was waiting for me. This little girl turned out to be a distant descendant of Helma. From the memoirs of an ancestor, Mira knew about my appearance in their city and sent Obian and Korko after me. Now I know that because of me, events went the wrong way: it was not I who should have killed Cassandra, but the young Maaron himself. This should be his conscious step, so that later he does not turn into the evil Lord Maaron.
2.1. Infinite Graveyard
Lost Lands 6: Mistakes of the Past. Walkthrough
Secret. Above the entrance to the crypt hangs ghostly circle (11/30).
Secret. On the left behind the cart is urn (4/8).
E. On the right we look into the pit, take the coffin lid.
F. We go into the crypt, take the Blade of Justice.
G. To approach the cart, we put the coffin lid in a puddle, like a bridge. With the blade we cut the fabric of the wagon, inside the locked chest.
H. On the right we go to the city.
2.2. Road to the city
Lost Lands 6: Mistakes of the past. Walkthrough
Secret. Top right, behind the city wall there is ghost tower (12/30).
Secret. Hanging on a pole to the left wanted poster (1/7).
I. On the left we examine the road sign, take the lever from it.
J. We will see the inscription Maarongrad. We go to the gates of the city.

2.3. in front of the gate
Lost Lands 6 Guide
Secret. From the bottom left on the road crawling ghost turtle (13/30).
Secret. Right between the towers, on a stone wall red print (4/7).
K. Talk to the beggar. He will show a secret path to the city if we give a value.
L. On the left we tear off the poster with our face, under it there are 5 symbols.
M. There are sleeping guards ahead, we will steal a bunch of guard keys from them.
N. We return to the road, open the lock on the stone with the keys.
O. Use the second key to open the sarcophagus, take the precious ring.
P. We give the ring to the beggar. The secret path is underneath.
Q. There is a rope on the hatch, we cut it with a blade, we go down underground.

2.4. Sewerage
Lost Lands 6. Walkthrough of the game step by step
Secret. On the right side of the door sits ghost frog (14/30).
Secret. At the top right in a bright window stands urn (5/8).
RST. We examine the mechanism, raise the two covers, insert the lever.

@ 13. Assemble the mechanism by selecting parts from the pile on the right. Moving:
(1-2) - (3-4) - (5-6) - (7-8) - (9-10) - (11-12) - (13-14) - (15-16).

U. Press the lever, the mechanism will drain the water out of the way. We examine the hatch in the center of the channel, enter 5 characters from the road sign: LXMV-U. Let's take a lamp stand.
VW. We put a stand under the waterfall, and a shield on it. We can get through.

2.5. Labyrinth
Lost Lands 6. How to get through
@ 14. The beggar will return and send guards on our trail. We need to escape through the maze of tunnels in 1:20 seconds.
1-2) We take the ladder, put it against the wall on the left.
3) From the left window we take a sledgehammer.
4-5) From the bottom of the inventory take a sledgehammer, hit the wall in the center.
6) We take the valve, put it on the mechanism to the right of the gate.
7) On the left, we disassemble the blockage, take the lever, insert it into the door on the right, exit.
8-9-10-11-12-13) We collect 3 bars, insert them into the recesses under the door.
14) Take the sword from the top door.
15-16) From the inventory, use the sword to cut the ropes on the doors.
17) There is a pipe behind the right door. We use it on the blockage on the left, open the hatch.
18-19-20) On the right we move all the boxes, we find scrap.
21-22) From the inventory, use the crowbar on the boards in front.

2.6. Casemate
X. Escape will not work, we will find ourselves in Maaron's dungeon.
Secret. Top right, under the semicircular beam ghost object (15/30).
Secret. Drawn on the left at medium height red print (5/7).
Y. On the right we examine the boards, we will find breadcrumbs on them.
Z. On the bottom right is a hole, we lure the rat with a cracker, we take a sharpening.
A. By sharpening, unscrew the bolt above the boards, take the bunk.
B. An ally will appear from above, lower the chain for us, we rise.

2.7. Prison
Lost Lands 6. Passage of the game in pictures with a description
Secret. Left of center, on a sloping wall ghost wheel (16/30).
Secret. In the center on the box lies wanted poster (2/7).
C. On the right you need to block, for this we put wooden plank beds.
D. We examine the backpack, take a saw for metal, an escape plan, dynamite.
E. On the floor manuscript (7/9), a hammer. There is an additional chain on the wall.
F. On the left is a stunned guard, we take the lock from him, the key to the vault.

G. On the left, unlock the door with the guard's key.
H. Behind the vault door, inside you need to find 10 items:
1. Candle - lies in the center on the floor, we light from the candle on the table.
2. Lantern - on the floor on the right. We weigh on the hook on the top right. Adding a candle.
3. Wheel - on the right under the grate, you need tongs. At the clock nearby.
4. Hint - get it out of the clock, you need a wheel. On the table on the left.
5. Key - we get at the very end. Open the chest in the center.
6. Lever - bottom left under the table. We insert into the water pump from above.
7. Tongs - on the chest in the center, hanging on the left rod. Right to the grate.
8. Bucket - on the table on the left. At the top of the water pump, we will draw water.
9. Bucket of water - put back on the table on the left.
10. Bank of water - use bottles to measure 4 units of water:
(2-3), (2-1), (1-3), (2-1), (2-3), (2-1). We put it on the shelf on the top left.
In the chest is a backpack with things: the keeper of the fire, the Blade of Justice.
I. We go down to our cell, with a hammer we look for a weak spot in the wall.
@ 15. Tapping the wall, move down to the red vulnerable point.

K. Put dynamite on the red dot. We go up.
L. There is a wick on the floor, we set it on fire with the keeper of the fire. Let's blow up the floor of the chamber.
M. We examine the chain, we weigh on it the lock and an additional chain.
NO. We look into the gap, lower the chain there, get down.

@ 16. Let's take a boat ride down the canal. We need to click on the left and right arrows to avoid obstacles. You need to hold out for 1:00 a minute.

2.8. abandoned branch
Lost Lands 6 Walkthrough
P. Let's swim into the sewers, where we have already been. We examine the boat, move all the boards, find the key to the passage.
QR. On the right, we cut out the lattice with a hacksaw for metal. Let's go into the tunnel.
Secret. Bottom right, under the pipe, on the wall ghost object (17/30).
Secret. On the left on a pile of large stones lies spider figurine (5/8).
S. There is a web in the gap on the left, we burn it with the fire keeper.

T.U. On the left in the gap we take half of the wheel, the pipe.
V. Pipe reach the hatch in the ceiling, open it.
W. We examine the fallen debris on the floor, find the glass cutter.
X. Ahead on the wall is a rhombus, insert the key to the passage into it.
Y. A ladder will appear down, we go down.

2.9. central manifold
Lost Lands 6. How to pass the scales
Secret. On the left chair lies ghost pillow (18/30).
Secret. Below the table lies wanted poster (3/7).
Z. From the table we take the chips for the puzzle.
A. On the wall in front of the panel with gears, put chips on them.

@ 17. You need to find the extra tile in each column, and then find the extra one among the extra ones. Solution:
1) branches, 2) round window, 3) swallow, 4) fly agaric, 5) window.

2.10. The soothsayer's room
Lost Lands 6. How to make poisonous powder
BC. Let's go into the room. The soothsayer will be the child of the World - a distant descendant of Helma. She will tell us how to change the past so that Maaron does not become a villain.
Secret. Bottom right, next to the seat ghost bear (19/30).
Secret. On the lower left between the pillows lies urn (6/8).
D. Right in the book manuscript (8/9), recipe for poison powder. We examine the book again, above it is a kerosene lamp, a key.
E. To the left of the bed is an alchemy table, take combustible oil from it. Pour oil into a kerosene lamp, set fire to the fire keeper.
F. We put the recipe on the table, measure the necessary proportions on the scales.

@ 18. You need to balance the cups with weights, and only then pour the powder.
Kettlebell 8 on the left = Kettlebell 3 on the right + bowl 5 (pour the blue one out).
Left bowl 5 = right weight 3 - bowl 2 (pour yellow).
On the left is bowl 5 + bowl 2 = on the right is bowl 7 (we pour blue).
Left bowl 7 = right weight 3 + bowl 4 (pour red).
On the left is weight 8 = on the right is bowl 2 + bowl 6 (we pour out green).
A poisonous powder will be obtained from a multi-colored mixture.

2.11. Barracks
Lost Lands 6. Walkthrough, text
G.H. We go to the center, with the key from the book we unlock the door on the left.
Secret. Top right, hanging under the chain ghost picture (20/30).
Secret. Hanging in the center right wanted poster (4/7).
I. On the left on the table we remove the fabric, move the apples, take one apple.
J. On the nightstand on the right we take the jar. In the inventory, use a glass cutter on the jar, insert a burning kerosene lamp inside. Get a homemade lamp. We put it here on the nightstand.
KL. We examine the drawers of the nightstand, find the belt, manuscript (9/9), key.

2.12. Warehouse
Lost Lands 6. How to arrange the boxes
MN. We go to the center, on the right we unlock the door with the key from the chest of drawers.
O. We put all the boxes on the cart.
Secret. Bottom left, at the base of the mannequin ghost plug (21/30).
Secret. On top of the closet is spider figurine (6/8).

P. On the floor in the center we find half of the wheel. In inventory, we combine the two halves of the wheel, we tighten it with a belt.
Q. We examine the cart, insert the wheel. On the left we take a bar, sharpen it with a blade, we get a chop. We insert the chop into the wheel, we hammer it with a hammer.
R. When we put the wheel on, we can pick up the jack on the right.
S. Roll the cart into the left room.

@ 19. Boxes from the trolley need to fill in the entire highlighted field. Let's fill in two different layers one by one. Get a ladder up.

2.13. Crematorium
T. Climb up the boxes to the hatch, but it does not open.
U. Insert the jack into the hatch to push it to the end. Let's get up.
Secret. Top center, sits on a beam ghost owl (22/30).
Secret. Bottom left, on a shelf with a cloth lies urn (7/8).
V. From the bottom left, near the fabric, take the leg of the stool.
W. We examine the stove, in front of it is the 2nd leg of the stool.
X. On the left of the window we move the pot, under it is the key and 3 symbols.
Y. On the right into the chest we enter the symbols from the windowsill.

@ 20. Symbols: FQL. Solution: [1] x5, [2] x5, [3].

Z. From the chest we get a chisel, nails.
A. We put two legs on a stool, nails on top, hammer it with a hammer.
B. Standing on a stool, we will get a tin can, a valve from the ceiling.
CDE. We inspect the stove, open both doors, set and turn the valve. On the resulting ashes we use a jar, we get a jar with ashes.

F. We go to the center, the conspirators have gathered there. Let's discuss a plan on how to take the time machine from Maaron.
G. We read the plan on the board. We take a fake pass, the key to the cellar.
H. In the central room we move all the pillows, we will find the faceless elixir.
I. Pour the elixir into the water in front of the mirror, change our face.

J. From Mira we get the key to the closet. In the right room, unlock the closet.

@ 21. Arrange 5 sets of clothes correctly in the closet.
K. After the decision, take the peasant's green clothes.
L. On the right, use the key to open the hatch in the floor. We are looking for 10 items:
1. Corkscrew - on the right behind the door, you need a chopper. On the barrel in the center.
2. Garlic - on the right behind the door, you need a chopper. In the box on the left.
3. Rosemary - green top left. In the box on the left.
4. Cylinder - in the barrel in the center, you need a corkscrew. In the puzzle on the top left.
5. Sapka - take the handle on the right, insert it under the door, remove the ground.
6. Sickle - top left, on a rope. Cut the bag down.
7. Salt - apply a salt shaker on a bag of salt from below. In the box on the left.
8. Salt shaker - top left, behind the puzzle, you need a cylinder. Down on the bag.
9. Spices - top left, behind the puzzle, you need a cylinder. In the box on the left.
10. Shank - lies on the lower right. On a chopper under the doors.
M. Having collected everything, we get a box with products.
N. We go to the cemetery, in the cart we open the chest with the key, inside the harness.

O. On the road, use a chisel and a hammer on the buffalo, free the hoof.
P. We put a harness on the animal, give it an apple. will follow us.
Q. Let's harness the buffalo to the cart, let's go to the city.
RS. Near the gate you need to give the guard a fake pass.

Chapter 3
Maaron is a Mage, a student and main successor of the sorceress Cassandra, who was not only his mentor in the magical arts, but also replaced his mother, whom Maaron never knew. After her death, Maaron moved to another region of the Lost Lands and became a member of the Order of the Guardians. In addition to magic, he began to develop the skills of herbalism and alchemy. After the fall of the order, he became a hermit, and later - the headman of the forest druids.
3.1. Central square
Lost Lands 6: Mistakes of the Past . Walkthrough
Secret. Top right, on the tower window ghost spider (23/30).
Secret. To the left of the stairs, on the wall wanted poster (5/7).
T.U. We speak with the guards in front, they will send to the right gate.
3.2. Garden
Lost Lands 6: Mistakes of the past. Walkthrough
V. In the courtyard we examine the rug in front of the door, under it is the key.
wx. We unlock the door with the key, we enter.

3.3. Kitchen
Lost Lands 6 Guide
Secret. On the right table is ghost rolling pin (24/30).
Secret. On the central table, on the right wall red print (6/7).
Y. There is a recipe book on the table in the center. On the left is a jug on the stove.
Z.A. On the right from the hanger we take a cap and an apron, we will change into a cook.
B. On the left, set fire to the stone oven using the fire keeper.
C. We go through the doors to find out the menu for dinner.

3.4. Hall
Lost Lands 6. How to get through
Secret. Top left, hidden on the chandelier ghost object (25/30).
Secret. On the central wall, hanging above the axes wanted poster (6/7).
D. On the right on the stand we read the menu, take a sheet with the code.
E. Go ahead, there is a puzzle on the triangular door.

@ 22. You need to move the red square to the upper left corner so that it does not touch the two blue squares. Solution:
left, up, left, down, left, right, up,
left, up, left, up, left, up.

F. In the kitchen, inspect the table, put the sheet, enter the code: 2388.

G. Inside the table is a clamping handle, a basket, a bowler hat.
H. Go to the garden, use the basket on the mushrooms.

@ 24. In the clearing you need to find 7 white mushrooms. We'll get a basket of mushrooms.

I. We go to the square, put a jug under the buffalo, milk it, we get buffalo milk. Open the recipe book, read the Mushroom Soup page. We use a box of food, mushrooms, milk, poisonous powder on the book. Get a soup set.
J. We go into the hall on the left, inspect the panel with light bulbs.

3.5. Throne room
Lost Lands 6. How to cook the dish
Secret. Top right, on blue fabric ghost pattern (26/30).
Secret. Hidden below the center of the table spider figurine (7/8).
K. We go to the hall, we speak with the official.
L. A crystal shines on the throne, we remove it with a blade.
M. On the table on the right, take the rightmost plank, attach it to the rope.
N. In the hall, on the right, insert the crystal, click on them in the correct order.

@ 25. Press the buttons: odd, then even. We take the top of the fountain.

O. On the square, inspect the top of the statue, add the top.
@ 26. Turn the 3 feathers on the staff of the statue in the same way as shown on the bottom of the fountain. Solution: [1]x1, [2]x1, [3]x2.

P. On the square, use the pot on the fountain, get a pot of water.
Q. We go to the kitchen, pour water into the tank in front of the door. We move the tank to the fire.
R. Use the assembled soup set on the left door, start cooking.
S. In the kitchen, you need to collect 10 items from the list:
1. Firewood - inspect the table in the center, take it on the right. To the oven on the left.
2. Saucepan - in the locker, you need a code. On the table to the left, open the tap.
3. Wrench - on the shelf on the right. Install and spin the wheel.
4. Potholder - in the locker, you need the code from the fireplace. Take a full pot.
5. Ladle - hangs on the top of the chandelier, you need to knock it down with coal. On the table on the left.
6. Ax handle - on the table on the left. Bottom left on the blade.
7. Brush - in the center under the table. On the fireplace on the right, on the wall behind the pig.
8. Hatchet - a blade on the bottom left, you need a handle. We cut food on the table.
9. Coal - inspect the furnace on the left, lies below. We throw into the chandelier.
10. Ready dish - we will get it at the end, we take it with an oven mitt, on the cart.
We will have a ready-made serving trolley.
T. We go to the throne room, put the cart to the table.

@ 27. You need to properly set the table. The necessary things are marked on the table, we are looking for them on the cart, and we drag them:
(1-2), (3-4) - (5-6) - (7-8) - (9-10) - (11-12),
(13-14) - (15-14), (16-17) - (17-18) - (19-20).

U. Having prepared the table, on the right we pull the plank.
V. Maaron enters the hall, tries a spoonful of soup, and loses consciousness. We examine it, remove the palm amulet from the neck.
wx. In the hall, use your palm to open the door on the left.

3.6. Maaron's quarters
Secret. Bottom right, under the bed ghost rug (27/30).
Secret. On the right, on the wall above the bed is drawn red print (7/7).
Y. On the right we remove all the pillows, we will find a book and tin punch cards.
Z. On the left in the chest of drawers, the central part of the pattern, a threaded hook.
A. Break the glass of the picture with a hammer, get the hang glider drawing. Once again we examine the broken glass of the drawing, under it is a hint with cubes.
B. On the shelves in the center, press the cubes, as in the hint.

@ 28. Click only on the 4 marked cubes. A ladder will appear.

3.7. tower roof
Lost Lands 6. Passage of the game in pictures with a description
C. Go up the stairs to the roof.
Secret. On the right, between the pillars stands ghost barrel (28/30).
Secret. On the left on the back board of the wings lies wanted poster (7/7).
D. We open the recess in the center with a hook, we will get the lunar ice.
E. Insert moon ice and round punch cards into the device on the right.

@ 29. Move the disks so that the stars can be seen through all the holes. Start with the largest one, then add the smaller ones on top. To achieve this, you need to complete the task in less than 40 seconds. Only 5 stars will remain on the last disc, remember them.

F. We go down into the room, on the chest we press 5 buttons that we saw through the punched cards. In the chest there is a temporary hexagon, straps for a hang glider.
G. Go to the roof, add straps to the hang glider. Maaron will chase us, we will fly away from him, but we will fall near the ground.

3.8. House of Maaron
Lost Lands 6. How to display books
H. Fall into the graveyard, insert the round piece in the crypt, take Helma's potion from the cache. We fill the ashes in a time machine, move to the past, run into the portal for Maaron, accidentally knock him down.
Secret. Top right behind the fence stands ghost watering can (29/30).
Secret. Above on the 2nd floor near the tree there is spider figurine (8/8).
I. We examine the young Maaron, remove the medallion from the neck.
JK. On the right we examine the book, insert the medallion, find the spells.

L. On the left we cut a tree with a blade, we get a trunk of a young tree.
M. On the top door you need to assemble the mechanism.

@ 30. Arrange circles and pendulums so that they form a green outline. Solution: (1-2), (3-4), (5-6), (7-8), (9-10), (11-12), (13-14), (15-16).

NO. Behind the door you need to find 10 items:
1. Ladder - in the center on the floor. We put on the left to the 2nd floor.
2. Key - on the right under the book, 2 medallions. To the center of the maze above.
3. Hint - in the chest above, you need a key. On the table with feathers.
4. Book - on the stand on the right, you need 2 medallions. On the shelf, arrange.
5. Potion - in the chest on top, you need a key. Water 3 feathers on the right.
6. Feather 1 - on the bookshelf, we need another book, put it in order.
7. Feather 2 - left on the table, need a hint. Right to the stand.
8. Feather 3 - inside the book on the right, you need 2 medallions. Right to the stand.
9. Part of the medallion 1 - on the left on the table with feathers. In the book on the right.
10. Medallion Part 2 - Front on the shelf with books. In the book on the right.
After collecting everything, we get feathers. In inventory, examine the tree trunk, cut off the branches with a blade, add feathers. Get a magic staff.
P. Use the staff on Maaron to bring him to his senses.
@ 31. Draw the spell "Recovery".

3.9. Cassandra's garden
Lost Lands 6. Where is the grave
Q. Let's get acquainted with young Maaron, we will convince him to fulfill the request of Cassandra so that she does not stay alive. Let's give him the blade and the potion. Let's go back now.
Secret. On the left, on the 2nd root of the tree, there is ghostroot (30/30).
Secret. Above the entrance to the crypt stands urn (8/8).
R. On the left, in a fold of wood, there is a ladle.
S. There are candles on the tombstone in the center, set fire to them.
T. We enter the crypt, collect water, we get a bucket of water.
U. We water dried flowers below the tree. We will see the inscription "Cassandra, the most worthy of the living." The great-granddaughter will bring old Maaron to the crypt, he will thank us for helping us in the past.

Bonus Chapter
1. House of Maaron
Lost Lands 6: Mistakes of the Past. Walkthrough
We play as a young Maaron. We will see how Kassandra became infected during the fight with a huge spider. At home, she needs to prepare a decoction of peace.
Secret. On the top right on the 2nd floor we take red rose (1/12).
V. From the table we take an empty mug.
W. On the right we examine the book, it contains the portal setting, sickle.
X. Through the doors we go out into the street.
2. Court of Maaron
Lost Lands 6: Mistakes of the past. Walkthrough
Secret. To the left near the fence and the wheel grows red rose (2/12).
Y. In the yard from the stump we take a grindstone.
Z.A. We inspect the gate, knock out the valve with a stone, exit.

3. Forest glade
Lost Lands 6 Guide
Secret. To the left of the stream, grows on the bank red rose (3/12).
B. Take a dry branch under the tree on the right.
C. We take out a piece of an ax, a stick. We inspect the ax, knock out a piece, add a stick, clean it with a sickle, sharpen the blade with a stone. Get a new axe.
D. In the courtyard on the left, take an empty pot.
E. Over the stream we pass further, to a large tree.

@ 32. One has to climb to the top of the tree by moving one's arms and legs.


F. At the top, use a sickle to cut the flowers of peace.
G. We collect water in the stream, we get a pot of water.
H. We put a dry branch on the stump, use an ax, we get brushwood.
I. On the left under the counter, you need to kindle a fire by drawing a spell.

@ 33. You need to connect all the dots with a continuous line.

J. We put a pot on the fire, add flowers, pour the potion into a mug.
K. It remains to take the potion to Cassandra. She will instruct to go to Helma, through the portal, for this she will give us the key to the basement.
LM. We go into the courtyard, on the right we unlock the doors with the key, we go down.

4. Basement
Lost Lands 6. How to pass the scales
Secret. On the left in the center of the clay debris lies red rose (4/12).
N. We examine the chest, inside the cable with carbines, candles.

@ 34. Candles must be lit with a spell. We repeat the pattern.

O. Place the candles in the center of the room.
@ 35. Candles should be properly dotted so that they illuminate everything and no red background remains. There are 4 sizes of candles of 3 pieces. Solution:
(A-1, A-2, A-3), (B-4, B-5, B-6), (C-7, C-8, C-9), (D-10, D-11 , D-12).
P. On the rope we use a cable with carabiners, we raise the box.
Q. A hatch will open, you need to find 10 items in the underground:
1. Hacksaw - under the roots, termites are needed. On a golden weight in a vise.
2. The key is inside the scales, you need the same weights. On the bottom of the box.
3. Punch card - in the box below, you need a key. On the box on the left, 5 buttons.
4. Half of the kettlebell - you need to saw off the kettlebell with a hacksaw. Back to the scales.
5. Golden weight - putting the weights, we take the left back. We clamp it in a vice.
6. A set of weights - under the roots, termites are needed. We put on the scales.
7. Spoon - on the right near the scales. To the right there is a break in the wall, on termites.
8. Bank - top right on the shelf. To the right there is a break in the wall, on termites.
9. Bank with termites - in the wall we collect termites with a spoon. To the roots.
10. Metal semicircle - on the left in the box. On the locker in the center.
On the locker you need to collect a tree of 3 circles, take the portal disk.
R. We return to the house, put the disk in the middle of the room.

@ 36. On the portal, you need to set up the second picture from the book. We start setting up with the central circles. We carefully monitor where each beam should end. There are very similar, but incorrect provisions.

5. Swamp
Lost Lands 6. Bonus
S. After setting up, enter the portal, move to the swamps.
Secret. To the right of the center, under the wooden platform red rose (5/12).
T. Take the rope below on the floor. To the right near the door is a long board.
UV. Try to knock, break the knocker on the door. We enter.

6. Hut
Secret. Top center, under the ceiling in the grass red rose (6/12).
W. Helma is in a trance, remove the medallion from her neck.
X. On the left, insert the medallion into the box, find a note, fairy dust.
Y. It is necessary to bring Helma out of a trance by unraveling the threads of her consciousness.
@ 37. You need to move the nodes of the lines so that in the center all the figures indicated on the side are obtained at the same time. We repeat 3 times. Solution:
(4-5)-(1-2)-(1-8)-(6-4)-(1-5)-(4-2)-(6-8),

7. Helma's Consciousness
Lost Lands 6. Passage of the game in pictures with a description
Secret. Top right, on the balcony lies red rose (7/12).
Z. Let's get inside consciousness, we are talking with Helma.
A. On the left on the scales we take a black stone (1/5), a wedge. On the left stairs is a black stone (2/5). In the center is a black stone (3/5). On the right scales there is a wedge, a white stone (1/4), on the right ladder there is a white stone (2/4).
B-C-D. In the center, insert the wedge into the left recess. Add two wedges.
EF. The hammer in the center will be released, we hammer all the wedges with it. A gap will appear.
G. We examine the bell from above, inside we need to draw a symbol.

@ 38. You need to draw all the lines without repeating. Solution:

H. Inside the bell we will see a hint with three figures.
IJ. We examine the hole below, throw off the chain there, go down.
K. At the bottom of the gate we shift the figures, as on a bell.
@ 39. Red down left, green down, blue down center.

8. Helma's subconscious
Lost Lands 6 Walkthrough
Secret. To the right above the center of the pit grows red rose (8/12).
L. There is a black stone on the top left of the floor (4/5). In the center of the floor we select the key. To the right above the pit we take a white stone (3/4).
M. On the left we solve a round puzzle.

@ 40. On three disks you need to collect an image of an octopus.

N. The fountain will work, the pit on the right will be flooded. Let's cast a spell on it.
@41. Solution: 1-2-3-1, 4-5-6-7, 8-2-9-7, 5-9-1-5.

Let's dive into a hole with water, inside we are looking for 10 items:
1. Weight - lower the gun from the bottom left. At the bottom of the clock.
2. Sword - on the right near the skeleton. On the bottom door of the clock.
3. Key - in the clock we pull the loads: 3-2-4-1. On the grate on the right.
4. Edge 1 - floats on the top left. On the skeleton on the right.
5. Rib 2 - on the left, near the clock. On the skeleton on the right.
6. Arrow - inside the skeleton, you need 2 ribs. On the clock, we expose 01:50.
7. Nippers - inside the clock, you need an arrow. On the bottom left of the bottle.
8. Eye - bottom left in the bottle, the necessary wire cutters. At the head of the statue.
9. The second ball is on the right under the grate, you need a key. To the right of the chest.
10. The first ball is in the head of the statue, you need an eye. To the left of the chest.
O. From the hands of the statue, take the chest, inspect it, inside the key to the cabinet, black stone (5/5). Open the cabinet with the key, inside is a white stone (4/4).
P.Q. We go upstairs, place black and white stones on the scales.

9. Cemetery
Lost Lands 6. Where to get
R. Back to reality, Helma will give us the key to the cemetery. We go outside, put a long board into the swamp, like a bridge.
ST. Let's go to the gate, open it with the key.
Secret. In the center, near two bushes, a separate red rose (9/12).
U. On the doors of the crypt you need to collect a puzzle.

@ 42. You need to place all the keys on the center field. We put the handles on the axis, the circles should stand on the runes. There is only one place for each key, you can’t put it in other places.

10. Tower ruins
V. Inside the crypt, take a granite mask, a brush. We put the mask on the statue.
W. A fence will open to the left, we pass into the ruins.
Secret. Top left, grows near the cliff red rose (10/12).
X. Try to climb the ladder, it will break.
YZ. We combine two fragments, we connect with a rope.

11. Dwelling in the tower
Lost Lands 6 Walkthrough
A. Cut rose bushes, take flowers (5/8), polluted stone ring.
B. Place the linked ladder to the right cliff.
C. We go to the tower, take a long spear from the barricade.
D. We will be attacked by a surviving arachnoid. We will agree with him so that he will lead us to the sting of the queen of arachnoids.
Secret. Top left, on top of the nest lies red rose (11/12).
E. Upstairs on the stone balcony we will find a bowl of water.
F. Take the hammer on the left inside the huge nest.
G. On the right, we analyze the blockage, take the spearheads.

12. Burial ground
Lost Lands 6. Endgame
HI. We go down into the ruins, on the left we put tips into the rock, we hammer it with a hammer. Let's go upstairs, let's go further.
Secret. In the center, above the bush grows a separate red rose (12/12).
J. In the center we cut off the rose bush, we get flowers (6/8).
K. Ahead, under the roof, we remove the blockage. We find a bundle, examine it in the inventory, inside the chisel, blacksmith tongs, leather.
L. The roof has fallen on the left, we support it with a long spear.
M. Under the roof from the window we take a piece of glass.
N. On the right we examine the maze puzzle.

@ 43. On the right we collect a round puzzle, it will start to glow, move away.

O. We go to the tower, throw the skin into the fire, put the glass on top. We pick up the chip with pliers, we get smoked glass.
P. We go to the maze, use the dark glass, we can look at the puzzle.

@ 44. Need to lead the ball from the center to the bottom exit. Passing through the red dots, the ball changes its color. We need to go through an even number of points so that the ball comes out in a luminous form. Solution:

Q. Let's go down to the hiding place, here the arachnoid will die. We are looking for 10 items:
1. Homemade spear - collect in the chest on the right. On the web from above.
2. Wooden disc 1 - in the bottom of the basket, you need a key. On the altar on the left.
3. Pliers - ahead on the stone slab, need a part. On foot.
4. Rope - bottom left on the pots. Right on the sword, in a stone chest.
5. Arachnid leg - top right, need pliers. Right to the sword.
6. Bracelet with a pattern - on the leg, you need pliers. To the right of the recess.
7. Wooden disc 2 - bottom right, near the shell. We collect elements.
8. The key is in the web on top, you need a spear. On the bottom round basket.
9. Fragment with a picture - on the left on the panel with disks. On the shell on the right.
10. Part of the pliers - top right, above the monster's leg. Up.
On the left, you need to turn 3 disks as shown on the shell on the right. Take an empty bottle, use it on the monster, get the blood of an arachnoid. Remove the central part of the pattern from the monster's neck.
R. We go into the ruins, with a chisel we clean the rock with a circle, we will see the pattern. In inventory, inspect the disk, pour a bowl of water on it, clean it with a brush, you will get the outer part of the pattern. We insert both parts into a round recess. Let's take a piece of the puzzle.
S. We go to the tower, we insert a part on the floor, we solve the puzzle.

@ 45. Need to rotate the triangular elements to get the pattern. To achieve this, you need to complete it in less than 2 minutes. After the decision, we can pick up the sting of the queen.

T. We go to the witch, on the right we throw a sting and poison into the bowler hat.
U. On the right we take the vial, dip it into the cauldron, collect the sleeping potion.
V. We go into the crypt, spread the tablecloth. We need flowers and a pillow.
W. In front of the crypt we cut two bushes, we get flowers (8/8), we put it in the crypt.

W. We go to Cassandra, behind her we take a pillow.
Y. We return to Cassandra, we give her sleeping potion.
Let's carry the body of Cassandra to the crypt, at this moment the main character Susan will appear, she will eavesdrop on our conversation. We already know the rest of the story.

Bonus game
If we collect all the secret items in the main game, then in the main menu, in the "Bonus" section, the line "Bonus game" will open. At level 20, you need to remove obstacles from the path, and lead the crystal into the recess on the right. As a reward, we will receive an achievement.
Achievements (22)
1. Main game (4 pieces)
Lost Lands 6. Achievements
Collected all the manuscripts of the Lost Lands.
9 pieces. All of them lie near plot items.
| Completed the minigame in under a minute. The easiest way to do it is on the 1st riddle. |
| Completed 3 mini-games in a row without using the "Skip" button. |
Completed the Hidden Object scene in less than 2 minutes.
Easier to do when replaying.
2. Specific places (5 pieces)
Lost Lands 6. Achievements
If you didn’t manage to quickly complete the puzzles during the story, then later in the main menu, in the line “Bonus”, “Mini-games”, you can turn on any of the puzzles, and go through it to achieve there.
| In a secret laboratory, a pattern on a chest was assembled in less than 130 touches. |
| In the swamp, all moths are caught in less than 30 seconds. |
| On the door to the crypt, the coin is led to the hole in less than 20 touches. |
| The constellation was found on the roof of the tower in less than 40 seconds. |
| Inside the tower, the mosaic was assembled in less than 2 minutes. Minigame 22/22. Bonus chapter. |
3. Secret items (6 pieces)
Lost Lands 5 Achievements
| 7 pieces. Highlighted in orange text. |
| Treasure hunter (Treasure Hunter) Collected collection of funeral urns. 8 pieces. Highlighted in orange text. |
| gold digger (gold digger) Collected collection of golden spiders. 8 pieces. Highlighted in orange text. |
| A collection of bloody handprints has been collected. 7 pieces. Highlighted in orange text. |
| Detail Master (Master of Details) Collected all ghostly objects. 30 pieces. Highlighted in orange text. |
| garden keeper (The garden keeper) 12 pieces. Bonus chapter. Highlighted in orange text. |
4. Style passing (5 pieces)
Lost Lands 5. Achievements
| Story lover (Story Lover) Completed the main and bonus chapters without skipping dialogues or cutscenes. We watch all conversations and screensavers. |
| Completed the main and bonus chapters without using the hint in the hidden object scenes. We are looking for items on our own. |
| Mystery Lover (Puzzle Lover) Completed the main and bonus chapters without skipping mini-games. |
| Messiah of light (Messiah of Light) Completed the main and bonus chapters without using the hint. Do not click in the lower right corner of the screen. |
| Completed the main chapter on hard difficulty. Difficulty only affects item highlighting and tooltip recovery speed. |
5. Bonus (2 pieces)
Lost Lands 5 Achievements
| Puzzle lover (Puzzle Fan) Collected all additional puzzles in the "Bonus" window. |
| Completed all levels of the additional mini-game in the "Bonus" window. 20 levels. Remove obstacles, move the figure to the right. |
Questions - answers
Lost Lands 6. Where can I get the faceless elixir?
In the soothsayer's room, we move all the pillows.
Lost Lands 6. How to make poisonous powder?
It is necessary to balance the cups with weights, and only then pour the powder. 8 = 3 + 5 (blue). 5 = 3 - 2 (yellow). 5 + 2 = 7 (blue). 7 = 3 + 4 (red). 8 = 2 + 6 (green).
Lost Lands 6. What is the name on the tombstone?
Wizard Name: MAARON.
Lost Lands 6. How to arrange the boxes?
With boxes from the trolley, you need to fill in the entire selected field. Let's fill in two different layers one by one.
Lost Lands 6. How to put the year on the medallion?
Clockwise, we set the following values: 30-88-VIII-23-00-20.
Was the article helpful?