Passage of the game Lost Lands 9: Tales of the First Brotherhood 100%. All the secrets, puzzles, mini games, collectibles and achievements in one place...
Lost Lands 7: Redemption - Walkthrough 100%
Passage of game Lost Lands 7: Ice Spell 100%. All secrets, puzzles, mini-games, collectibles and achievements in one place.
Games series: Lost Lands
Content
General information. Walkthrough:
Lost Lands 7. Redemption (Lost Lands 7) - An adventure game about the journey of the girl Susan. After working so hard to maintain order in the Lost Lands, Susan returns home to her homeland. A dangerous relic, the heart of an ancient god, has been discovered on Earth. But even for the difference in time between the two worlds, the girl was not at home much more than she wanted. Her son is offended that his mother disappeared so suddenly. She wants to quickly solve the problem and restore order to the world, but this most likely will not come true. Find secrets and collect manuscripts full of ancient knowledge. Solve the mysteries of the mysterious world in order to defeat the ancient god. Go through unexpected plot twists in fantastic locations and use your wits to solve puzzles. If you are stuck in any place and do not know how to proceed further, on our website you can watch the walkthrough of the game Lost Lands 7 Redemption for all chapters.

Chapter 1
We will see a report from the opening of a new oil rig. During the ceremony, instead of oil, a red liquid poured out, everything around began to collapse. This is because the heart of an ancient god was found in an oil well.
The girl Susan will remember her conversation with her son, and then she will wake up in captivity at the orc. The wizard Maaron sent us here to find the stolen magic ball.
1.1. orc lair
Lost Lands 7: Redemption. What to do
Quest: Artifact of Maaron. Note: Maaron's plan.
A. At the bottom of the screen, near the chest, take a club.
B. Hit the club on the orc's head.
@. On the orc table we collect 15 items indicated at the bottom of the screen:
— Carrots in the center of the table.
- A brooch on the bottom left, on a fur curtain.
- A pouch under the figure of an orc.
- Bracer: a figurine of an orc, near it we examine the correct position on the scroll, we also set the figure: 1) the rider's hand down to the left, 2) the boar's head up, 3) the boar's leg forward.
— Drum on the right under the table.
— The flower is above the table, above the box.
“The crescent is down on the tablecloth, under the pile of bones.
- The horn is higher than the orc figurine.
- Snail: take the key on the left, unlock the cage on the right.
- The fish is on the upper left edge of the table.
- A cannonball behind a fur curtain, at the bottom of the basket.
- A rope behind a fur curtain, at the bottom of the basket.
- Ring: on the right we take a pickaxe, on the left we cut off a candle, we will find it in it.
- Red skull: below the skull figurine, dip it in red paint.
- Sharpened arrow: arrow on the left, sharpen on the stone in the center.
Of all the things we get only a rope.
C. On the left side of the screen, inspect the fence, take the details of the stairs. In the inventory we combine sticks, rope and scissors, they will make a finished staircase.
D. Take the key from the orc's belt, unlock the chest. Inside the chest is a spherical stone, scissors.
Secret. In the upper left corner, on the rocks ghost object (1/30). They can be recognized by the fact that sometimes they change appearance. Such items are needed to unlock achievements and mini-games in the Bonus section.
Secret. At the left edge of the screen between the sticks we will find scroll (1/8).
E. Use the ladder on the far wall, above the table.

Here we need to grab various objects to get out of the pit. If we grab the wrong support, we'll fall back down and start over. Remember the correct route:
1. Wooden shelf.
2. The stone is on the top right.
3. Beam to the right of the wooden shelf.
4. Stone over a wooden shelf.
5. On the left is a rope on hooks.
6. On the left in the center is an oblong stone.
7. On the top left is an oblong stone.
8. Wooden shelf at the exit.
On the surface we will meet the wizard Maaron. A woke orc will chase after us, but the wizard will deal with him. Let's give the spherical stone to the owner.

1.2. Drakov Square
Lost Lands: Redemption. Walkthrough
Quest: Overseer Hilamyr. Note: Alert light.
F. In the courtyard, you need to collect pink fragments of the stele. From left to right:
1. At the far left gate, in the castle.
2. Left in front of the pool.
3-5. We look into the pool, inside: left, right, top, bottom.
6. Near the far right gate, on the right on the ground.
7. At the right building, on the left corner.
8. At the right building, on the right near the foundation.
9. At the right building, near the doors is the central circle.
Secret. To the left below the pool lies scroll (2/8).
Secret. Hanging on the right building between the windows rag (2/30).
G. In the central stele, inspect the round recess, insert the fragments, and then the central element.

@ 2. On the stele, you need to arrange the circles so that the lines between them pass through all the Christmas tree symbols. To get the achievement, you need to do it in 1 minute.
H. From this gate will open, we enter.

1.3. stonehenge
Lost Lands 7: Redemption. Walkthrough
Task: Particles of the Void.
Secret. On the left on the ground we move the stone, behind it coins (1/8).
Secret. At the right column below lies manuscript (1/11).
Secret. At the right column on the right stands bone (3/30).
I. There is a well in the center of the floor, a framed crystal near it.
J. Insert the crystal into the right column, in the upper part. Hilamir will come to us. He will instruct us to get the heart of the god Drak Ul, recently found on Earth. To do this, we get a vessel for particles, the key to the hatch.
K. Examine the center of the floor, insert the key.
L. Let's go down to the basement, take the control part between the gears.
M. Apply the detail to the left column. We press 3 times.
N. On the right column, click on the recess for the hand.
O. A black stream of emptiness will turn on in the center, we enter.

P. In the void you need to use a vessel for particles, drag it to the stream above. It is necessary to arrange the red and blue balls on the way so that the flow turns towards the vessel. Particles repel each other from red balls, they are attracted to blue ones.
1-2. We put the red ball on the path of the stream.
3-4. Blue ball near the vessel.
5-6. The second blue ball is right inside the vessel.
We get particles of emptiness. With their help, we can open a portal to the earthly world. Two wizards will give the last parting words, and send us to Earth to get the heart of a god.

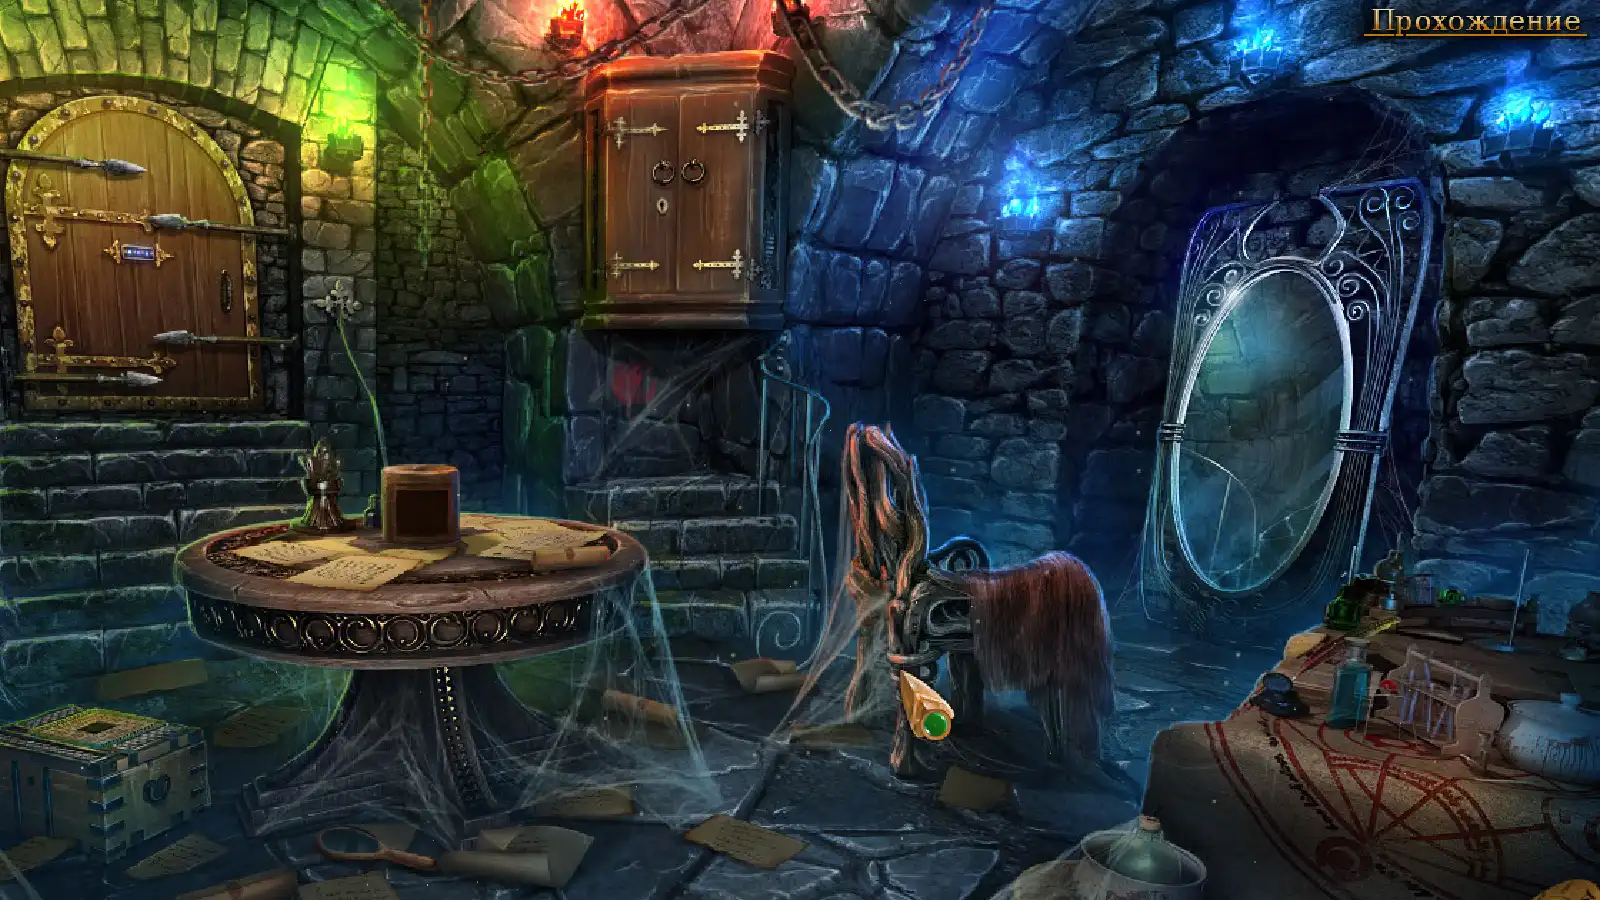
1.4. Home sweet home
Lost Lands 7: Redemption. Walkthrough
Task: News. Note: Return home.
QRSTU. We will find ourselves in our already abandoned house, where everything is covered with sheets. We take off the sheets, inspect all the items.
Secret. To the left of the window is a ghostly vase (4/30).
Secret. right under the door photo (1/7).
V. In the center of the table we take the remote control.
U. Use the remote on the picture.
W. Find the button on the bottom of the remote control, press it.
X. A safe will open behind the painting. You need to remember the password for it.

Fragments of the old room will appear in the upper right corner, you need to drag them to the correct place in the room so that the silhouettes match.
1. Curtains to the left of the window.
2. Left door, upper left corner.
3. Left door, right side.
4. Left chair, right side.
5. Left chair, left side.
6. Sofa bottom, top.
7. Right chair, left side.
8. TV, upper left corner.
9. Table in the center, lower part.
10. Sofa below, right side.
11. Right armchair, upper part.
12. Top picture, top right of the TV.
13. Bottom picture, to the right of the TV.
14. Right armchair, lower part.
15. Right chair, lower right corner and chest.
16. Upper part of the chest, under the safe.
17. The right side of the chest, by the right door.
18. Sofa below, left side of the back.
19. Window, right curtain.
20. Central table, we will see a telephone on it.

Note: Old password.
Y. From the central table we take the memory of the phone.
Z. We use the phone on the socket near the TV, connect the power supply, click on the screen, read the messages. Let's see the password.
A. Enter the password into the safe: 4 8 15 16 23 42. Inside we find a knife, money.
At that moment, our adult son Jimmy will enter the house. We haven't been home for 8 months since the last assignment. We learn that all our things were moved to the bedroom. The son will give us the key to this room.

Note: The box is in the bedroom.
BCD. We insert the key into the far door, press the handle, we enter.
@ Inside the bedroom you need to find all the objects whose silhouettes are shown below:
1. In the center, turn on the lamp above the chest of drawers. To the left of the plant we take a stick.
2-3. We use a stick to open the bottom drawer of the chest of drawers, inside we find a light bulb. At the bottom of the box, near the green iron, we shift the yellow rag, under it are the blades. On the top of the chest of drawers are fragments of photographs, collect them. A few pieces are missing. We examine 2 whole photos and a note.
4. On the left dresser we inspect the lamp, unscrew the non-working light bulb, insert the one found in the dresser. Nearby on the chest of drawers is a clerical knife, but without blades. We use a set of blades from the box on it. We get a clerical knife.
5. On the bed we move all things and rags, we find a locked box, next to it is the 1st piece of photo.
6. On the right we open the cabinet, between the boxes the 2nd piece of photo.
7. In the cabinet on top we take a coil of adhesive tape. On the dresser we combine all the scraps of the photo, glue them with tape. We turn over the whole photo, we will find a hint.
8. Open the right cabinet, there is a half of the heart in it.
9. In the left cabinet, use the knife on the top of the cardboard box, inside we will find a half of the heart.
10. We use both halves on the box lying on the bed. Inside it, you need to rearrange the lines so that you get a drawing, as on the back of the photo. We start from the point from which 5 lines go, put it at the bottom, build the rest of the lines up. Take the key from the box. Use the key to unlock the top drawer of the chest of drawers, take the bag with the laptop.
E. We return to the hall, put the bag on the table. Open all 3 compartments of the bag, take out the laptop. We insert the cord of the block into the laptop, insert the cord of the socket into the block. We open the screen.

Task: News. Note: Boogie to the rescue.
F. Enter the login password automatically.
G. On the desktop, select the icon "B".
H. In the Boogie search engine, click on the search bar.
I. Scroll the news to the right 4 times.
J. Let's read about the tragedy in Greenland on an oil rig.
K. Click the checkmark to end the search. Let's go to Greenland, my son will go with us as a journalist.

1.5. Greenland
Lost Lands: Redemption. How to get
Task: Location of the incident.
L. We will arrive by helicopter, pick up bottles of water from it.
M. We inspect the work site.
Secret. On the top left on the crane is a ghostly inscription (5/30).
Secret. Hidden in the sloping stairs to the right scroll (3/8).
@ 6. There is no light on the site. From the generator in the lower left corner, we need to conduct electricity to all the buildings around. In the upper right corner we take extension cords, connect to the generator.

Task: Plan B.
N. The door will open on the right, we enter. We put bottles of water on the floor. A guard will meet us inside and say that he can receive journalists only tomorrow. The son will try to bribe him, and we must prepare a surprise for the guard.
Secret. To the left of the darts target hangs a ghostly knife (6/30).
Secret. In front of a distant closed window, on a shelf scroll (4/8).
OP. On the right on the wall we examine the first-aid kit, we take a bandage, a laxative.
QRS. We examine the table, read the note, take a pack of cookies, open a can of coffee, take an empty kettle.
T. From the far left table we take a personal mug.
UV. We use a knife on the bottle, we get a bottle of water.
wx. At the right wall we inspect the cooler, remove the empty bottle, put our bottle of water. We put the kettle on the bottom, open the faucet, we get a kettle with water

Y. We return to the table. We put the kettle on the stand, press the red button so that it boils.
Z. We put the mug on the table, open it, fill in the laxative. 1) Take a spoon, 2) scoop up coffee, put it in a mug, 3) take a bag of sugar, add it to the mug. At the end, pour boiling water over everything, stir with a spoon. The guard will come back and let you stay. We will treat him to coffee, he will go to the toilet.
AB. We pick up a mug of coffee from the agent’s far table, inside the bag we find a green key card.
CD. We go outside, inspect the far right building, use the green key card. In addition, you must enter a password. We use a mug of coffee on the keys, from the steam we will see 3 keys that were usually pressed. Let's search for the password: 681.

1.6. Archive
Lost Lands 7: Redemption. Walkthrough
IJ. We unlock the doors, enter the second building, this is the archive.
Secret. On the top left we shift the picture, behind it coins (2/8).
Secret. To the right of the open window ghost item (7/30).
K. You need to enter the agent's voice sample into the safe. The son wrote down his words, but now they need to be arranged in the right order.

@ 8. You need to fill 6 sound bars on the left, for this we take fragments on the right. The extreme left and right entries are always thinner than the rest. To achieve this, you need to solve the puzzle in 3 minutes. On the right, all the details are always located in the same order, we take them in turn from top to bottom, arrange them according to the numbers indicated in the screenshot.

Note: X-Files.
LM. We unlock the safe with a green key with a card, press the handle, inside we will find a rune stone.
N.U. We examine all the documents on the table, learn more about the heart, write down the password, and under one of the documents we will find a blue key card.
VW. With a blue card we can open the doors of the archive.
X. Inside the archive you need to find 15 items from the list:
- The eye on the left in the figurine of a deer.
- The ax is top center, hanging on the wall.
— Maple leaf on the right curtain, behind the left patch.
- The sun is on the left, painted on the stone.
- Libra, this symbol is drawn on the top left.
- The shell hangs on the right side of the lattice wall.
— Ballpoint pen on the left curtain when it is straightened out.
— Rubin. On the drum you need to solve a puzzle, such as round tags. We remove the sheets on the top right, insert the missing chips. After that, press the sequence: 3-6-4-1-3-6-5-2. Take a ruby inside.
- Necklace. We move the left curtain, behind it is a box, you need to insert 2 parts of the bird into it. 1st part on a fixed curtain on the left. 2nd part behind the right curtain.
- The feather is down center, in a panicle against the wall.
- The glasses are on the top shelf in the center.
— A paperclip on the table on the right, in a yellow cover.
- A glass at the bottom in the center, drawn on a cardboard box.
- The bull is on the bottom left of the bags, depicted on the stone.
- Runestone. On the table on the right, we sort through all the documents, the last sheet needs to be enlarged, we will find the code on it 342, we enter it into a suitcase. Let's just take the rune stone from here.

1.7. obstruction
Lost Lands 7: Redemption. All secrets
Task: Through thorns...
YZ. We go outside, go to the elevator in the center. We use the blue key card, press the red button. Let's go down to the platform, where everything is destroyed from the fall of the tower.
Secret. In the upper left corner lies a ghostly chest (8/30).
Secret. To the right of the container we shift the tire, there coins (3/8).
A. We examine the left obstruction, the keys of the crane lie on top of the fittings.
BC. In the center we inspect the tank, unscrew the lid.
D. On the right we inspect the yellow tap, cut off the hose with a knife. Immediately insert the hose into the red tank in the center.

E. Back upstairs. Inspect the crane on the left side of the site. We use the key to open the cabin.
F. Inside the cab, take the grinder case.
G. Press the button, find out that you need to fill in the fuel.
H. Exit, inspect the left side of the crane. The faucet tank is frozen, the lid cannot be unscrewed. We use hot coffee on the lid, and then bandages.
I. We return down, on the left we examine the protruding fittings. In the inventory, open the case, assemble the angle grinder: 1) take out the base, 2) add the power supply to the right, 3) unscrew the bolt with the key, 4) insert the disk, 5) twist. We will saw off the reinforcement with the assembled grinder.
J. On the right is a container, we can open its crumpled door with fittings. Find a flashlight inside. We remove all empty boxes, from top to bottom. At the bottom we will find an empty canister.
KL. We go to the tank in the center, put the canister nearby, use the hose. Get a can of fuel. We go upstairs, fill the canister into the tank of the crane. We sit in the crane cabin, press the button.

@ 9. Move the crane with the manipulator at the right edge, hook or release the part by pressing the red button on the left. We need to clear the yellow path from debris.
First, move the small gray container to the upper right corner. Drag the rest to the center. We shift the gray one down to the right, attach the rest of the large details to it. There will be more space on the left, we compact the details there.

1.8. Heart of Drak Ul
Lost Lands: Redemption. Hyde
I. We go down, now everything is cleared there. On the left, under the red debris, we will find a rune stone.
J. We pass into the cave ahead.
K. It's dark inside, so use a flashlight.
Secret. To the left below the heart, on the stone is face drawing (1/7).
Secret. To the right of the heart, painted on the rock star (9/30).
L. On the left we examine the rune stone, take it out with a knife. Under the stone manuscript (2/11).
M. In the center under the altar we place 4 runic stones.

@ 10. On a triangular puzzle, you need to enter the correct combination. It can be seen in the diary, in the note "The X-Files", but there it is written upside down. Press: right, down, center, right, left, right (3-4-2-3-1-3).
N. Apply on the heart particles of emptiness. The agent will catch up with us, start shooting, so the son teleports with us to the Lost Lands.

1.9. Only Maaron
Lost Lands: Redemption. Walkthrough
O. Let's move to the tomb, go back to Drakov Square. We examine the wooden door on the right, next to it is a note from Maaron, under it is the key to the stone gate.
P.Q. We go to the left gate, use the key on them, enter.

Secret. In the upper left corner sits on the boards protein (10/20).
Secret. In the center at the top, on an inclined board lies scroll (5/8).
R. On the top floor, take the bas-relief of the lion. We examine the upper central part of the building, insert the first bas-relief there. We take the handle from below.
S. Use the handle on the round mechanism on the right. Let's lower the winch, we can take the blank of the central bas-relief. You need to make it:
1. On the left we open the backpack, inside there is a paper hint. Just below the backpack there is a piece of a hint, add it. In the lower pocket we take gilding, a clip, dry fuel. We pour a large bag into the trough on the right.
2. Under the barrel we take a whisk, an empty bucket, a brush. We put a bucket under the barrel. Use the clamp to remove the cork from the barrel. Water will pour, we will get a bucket of water. Pour the water into the trough on the right.
3. Shake the mixture in the trough with a whisk.
4. We take a jug from the bottom left, pour the gilding into the blank on the left.
5. With a scoop, we scoop cement from the trough into the workpiece.
6. On the right from the stones we take a hammer, matches. We compact the cement in the workpiece with a hammer.
7. Get a bas-relief of the face.
8. At the top in the center we inspect the stove, put gilding on top, put dry fuel on the bottom, set it on fire with matches. Take the wax on the left. We take liquid gold, pour it on the bas-relief.
9-10. Sprinkle with powder. We paint with a brush.
11-12. We rub with wax. We wipe with a rag. We get a bas-relief of the face.
T. Left box, open with a knife. Inside the 2nd bas-relief of a lion.
UVW. Insert all the bas-reliefs up.
X. A puzzle will open at the gate of the building.

@ 11. You need to arrange 4 pieces with pictures in their places. They all move together. You need to use the obstacles on the way to move the pieces apart. Ideal solution (7 moves):
up, right, down, left, left, left, down
в†' в†' в†" в†ђ в†ђ в†ђ в†"
Inside the temple, Maaron will meet us, take the heart, and suddenly insert it into the body of God. Drak Ul will come to life, kick the wizard and cause destruction in the temple. We will have time to escape, and Maaron will die under the rubble.
Chapter 2
The mission to recover the artifact was a success. Maaron calls his invention the Space Piercer. He says that now we do not have to look for ancient dolmens to move between them. The piercer will transfer from anywhere and to any place. By the way, I immediately had a chance to use it. Maaron's staff suddenly lit up with a purple glow. Maaron was noticeably nervous and said that I should immediately follow him.
2.1. House of Hilamir
Lost Lands 7: Redemption. What to do
Task: New adviser. Note: and you, Maaron!
Y. We go into the ruins of the temple, on the top left we find the pendant of Hilamir.
Z.A. We return to the square, with a pendant we can unlock the wooden door, we will enter Hilamir's house.
Secret. At the left edge on the table we will find photograph (2/8).
Secret. Hidden under the globe below ghost object (11/30).
B. There is a note on the table on the left, examine the notes.
C. Use the pendant on the stand. Under it you can move the balls.
D.E. We close the shutters in the window, we will see the correct position of the balls on them. Enter this combination under the pendant.

Note: drawing on the shutters.
@ 12. We put the two lower balls in the penultimate position. We put the top two balls in the lowest position.

F. The UV light will turn on in the room. There will be a new clue on the shutters about the location of the books.
G. On the right side of the bookcase, three books need to be removed: 1) top left shelf, 2nd left book on a stand, 2) right middle shelf, left tilted book, 3) bottom left shelf, right upright book. Behind the cabinet we will find a hiding place where the real Maaron was locked. The old wizard will ask for water.
2.2. Prisoner's room
Lost Lands: Redemption. guide
Secret. In the upper right corner on the wall ghost drawing (12/30).
Secret. Above the old man, in the left corner lies scroll (6/8).
H. Ahead, behind the bars, inspect the bowl, it has a hole at the bottom.
I. There are candles on the right, we will cut off one candle with a knife.
J. Give the candle to the magician to light it. Get a burning candle. We use it on a bowl, we can fill the hole with wax. We take a bowl.

I. We return to the square with a bowl, scoop up water from the pool. We take the water to the magician. We learn that Hilamir locked him up, took on his appearance in order to deceive us and take the heart. He will ask you to find Hilamir's diary.
J-K. In a dark room, remove the skin from the floor, under it is an ultraviolet circle. We remove the boards with a knife. Hilamir's casket, an axe, is hidden under them.
LM. After drinking water, the wizard will leave the place. We examine the yellow bedding, we clear the straw under it, we will find a clue to the box.
N. Enter the password into the box.

Note: Hilamyr's box.
@ 13. You need to rearrange 5 characters. We start from the top and go clockwise: 1) zigzag, 2) semicircle and checkmark, 3) hammer and sickle, 4) circle and dot, 5) star. Inside is a round tile, Hilamir's diary.

O. The diary will be empty. We carry it into a dark room, put it under an ultraviolet lamp, only there we will see the records. We learn about the secret passage under his house.
P. We go to the prisoner's room, in the center we use the ax on the boards.
Q. Under the boards is a puzzle of circles, insert a circle there.

@ 14. Rotate the circles to match the silhouettes of various animals and insects until they all disappear. Silhouettes do not match in color. Some drawings are located on 3 circles at once. Snake in all circles.

2.3. Dungeon
Lost Lands 7: Redemption. Text guide
R. The dungeon will open, we go down.
S. It's dark around, so turn on the flashlight.
Secret. Move the box on the bottom left, under it coins (4/8).
Secret. To the right under the tents on the rocks lies manuscript (4/11).
Secret. On the right, below the chest sits ghostly scorpion (13/30).
T. On the right near the tent, you need to put 15 items in place:
1-4. Left tent. We take a blue glove, under it are horns, we put them on a golden figurine of a bull. We select 2 nuts, put the nut in the bag. Bottom left drill, put in the device in the center. Goggles hang behind the left wing of the tent, move them to the right, onto the helmet of the deceased digger.
5-6. Backpack in the center. We open the backpack, inside we take a hook, we weigh it on the side along with the rest. On the left we take the part, we push the stones on the right with it. We get a flask, put it in the left pocket of the backpack.
7-11. In the center. We put the corn in the basket with the rest of the cobs. We take a wing near the basket, add it to the silver bird on the left. Below from the fire we take a bone amulet, we weigh it on the tent on the right. We rake up the ashes in the fire, under it is a lid, put it on the pot on the right. Near the cork, insert it into the bottle, in the hands of the deceased.
12-15. Right tent. On the right we shift the gems, under them is the key, insert it into the book with the lock. Inside entry 6 about the glove. We turn over the page of the book, under it is a figure of a bird, we insert it into the box. On the right side of the tent there is a pocket with a red face in it, insert it into the red column in the center. At the top of the column, a fish skull will open, add it to the fish in the fire. Of all the items, we get only a mechanical palm.
U. Ahead the cave is boarded up, we take a saw from the boards.
V. On the top right is a chest, with a knife we cut off the rope from it.
W. There is a support board on the left, we file it with a saw. The stones will roll and make a further path into the cave. In the vacated place on the left we will find a meteorite stone.
X. We pass into the cave, use the rope to go down.

Y. Let's go to the locked stone bridge. A dead man lies on the floor, we examine him, in the bag we find a record, a mechanical palm.
Secret. To the upper right of the person lies scroll (7/8).
Secret. On the right column of the bridge, in the middle there is ghost (14/30).
Z.A. We insert both palms into the gate, they will open the bridge, we pass.

@ 40. You need to run across the bridge, bypassing all the traps. We control the heroine's chip by pressing the keys on the sides of it. We are looking for safe places where traps do not touch. We run from one place to another. Safe way:
в†' в†' в†' waiting в†' в†' waiting в†' в†' в†' в†' в†' в†' waiting в†' в†ђ в†ђ waiting в†ђ в †ђ в†ђ в†ђ в†' waiting
in†' in†' in†' waiting in†' in†' waiting in†' in†' in†' waiting in†' in†' waiting in†' in†' waiting in†' in†' in†' we wait
в†' в†' в†ђ wait в†' в†' wait в†ђ в†' в†' wait в†' в†'

2.4. Entrance to the temple
Lost Lands 7: Redemption. Walkthrough Tips
Secret. In the upper left corner ghost item (15/30).
Secret. At the left stairs, at the bottom left behind the bones there is coins (5/8).
Secret. On the right, on a wooden building lies manuscript (5/11).
B. At the bottom right, examine the record 4. Move the stone block with the green stone, under it is the instruction for the task: you need to create a potion.
C. Insert a meteorite stone into the rock on the left, draw magic.

Note: Sign of the Flame.
@ 15. Draw a sign from a diary note. The sign looks like the letter S.

D. On the top right is a wooden table, next to it we take blacksmith tongs.
E. Pull the ring, raise the oven door.
F. From below we shift the circle, inside the shoulder blade.
G. In the left rock, take a fiery shard with pincers.
H. Take the shard to the lower round furnace, close it.
I. We return, in front of the bridge on the left there is a pile of clay, we take a piece of clay with a spatula.
J. Take the clay to the wooden potter's table, you will get a bowl.
K. Put the bowl on top of the oven. Raise the ring to close the oven door. We open the gate again. Ticks take a baked bowl. We take it to the alchemy table on the left.

L. Put the bowl on the table. After that, you need to find 3x5 ingredients:
1. Eggshell. Move the scrolls on the bottom left, below them.
2. Sapphires. Take the tongs in the center, take out the crystals on the left.
3. Pearl. In the center we press the button, at the bottom to the right of the phoenix we take a stone, we open the sink from below with it.
4. Rock crystal. On the right shelf, press the button.
5. Flying fish scales. In the center of the tongs, on the right we use on the fish.
Put everything in the left bowl. On the left we take a mortar, grind.
6. Mistletoe berries. In the center, hanging next to the brooms.
7. Moon water. In the upper right shelf, press the button on the right.
8. Spiky bob. On the left, inside the terrarium with the lizard.
9. Fire pear. On the top left shelf.
10. Phosphor varnish. We take the rune from below, insert it to the left up.
We lay everything in the burner on the right, set it on fire, pour it into the center.
11. Lizard skin. On the left in the terrarium, above the lizard.
12. Phoenix Feather. In the center, we collect the phoenix from the parts, in the corner.
13. Petals of bells. Left in terrarium, top left.
14. Pale grebe. In the center, hanging to the left of the brooms.
15. Spider cocoon. In the center, to the left of the phoenix.
At the end, we pour everything from the purple bottle, it stands on the top left. On the right we take matches, set fire to the entire contents of the bowl. Get the Potion of Equality of Power.
M. Pour the finished potion into the bowl inside the gate. The gates will open, the entire dungeon will flood with water. The next hall will wash away, there we will be met by the dwarf Uri. The son and all our things were lost, we go to look.

2.5. Gorges
Lost Lands: Redemption. Collector's Edition
Secret. Top left near candlestick ghost helmet (16/30).
Secret. On the left under the horned skull lies manuscript (6/11).
Secret. From the central scroll to the right lies photography (3/7).
N. In the center we read a scroll about Drak Ul, under it is a moon tile.
OP. On the left we examine the vat, inside there is a note. In the vat we move apart all the bones, in the upper right part at the bottom there is a moon tile.

S. We go to the door on the right, we will see the bottom of the gorge with water.
Secret. To the left of the barrel on the rocks ghost item (17/30).
Secret. From the barrel of wine on the bottom right on the step lies scroll (8/8).
T. We dive in the center of the water, remove the key from the skeleton. Under the chest is entry 2. On the top right, under the rope, we find a multitool knife, a key. On the right in the water we inspect the net with a barrel, we take a lantern.
U. Use the knife on the net to get a green barrel.
V. We examine the left barrel, take out the cork with a knife. The wine will run out, pick up an empty blue barrel.

W. We return to the hall, inspect the table, use a knife on it, disconnect it and get a cover from the table. We attach two barrels to the lid from below, we get a raft.
XY. We go to the water, put the raft under the rope, and we can climb up. Let's return to the furnace and the alchemy table, we pass further into the ruined temple.

2.6. Temple of the Draks
Lost Lands: Redemption. Hyde
Secret. Top left under the eaves coins (6/8).
Secret. In the upper right corner, under the cornice flower (18/30).
Secret. Bottom right, at the feet of the monument lies manuscript (7/11).
Z. Click on the circle on the central wall.
A. Behind the door is a son. Inside you need to arrange 15 items in their places:
- We examine two skeletons on the right, take the skull from the bag on the right, insert it into the box on the left.
- On the far shelves we take a hammer, break a vase, inside the 1st blue stone, put it on a golden stand on the top left. 2nd stone in the skull from below. 3rd stone in the bag on the top right. Get blue stones.
- On the right from the large skull we take a golden brooch, add it to the decoration hanging on the top left.
- On the bottom left on the floor we move the bucket, after it we take the shield, insert it into the statue in the background.
- On the left on the table we examine the skulls. We insert the twisted horn into the skull on the left. In the upper left corner we take a straight horn, insert it into the right skull. From the bottom left we take the fang, insert it into the central skull. At the bottom we shift the papers, collect the feathers, insert them to the first pen. Between the left and middle skull we take a knife, cut the rope on the right, take the green part, add it to the center.
- On the left, take a red gem from the branch, insert it into the skull on the right.
- To the right of the column we take a broom, we clean the statue to the right of the greenery. After that, we take the hands of the statue from the floor on the left, add it to the cleaned statue.
- We overturn the right bucket, inside the head, put it on the bust on the right.
- We take one spear from the left statue, pass it to the neighboring statue.
- Press the lever under the right statue, a hexagonal shield will descend from the top left, there is a puzzle on it: you need to fill in all the cells, painting only the neighboring ones. Solution: first we paint over 4 central cubes and only then we pass along the perimeter.
- In the center, raise the mirror higher, turn it to the right. A beam of light will illuminate the rock, find a purple gem on it, add it to the snake statue.
Two skeletons will open a box, inside the 3rd moon tile.
B. Bottom right, at the feet of the monument, take Ul's seal.
C. We examine the round table in the center, next to it is a note.
D. To the right of the top of the table we find the star key.
E. With the key we return to the bottom of the gorge, open the chest with the star key, inside the 4th lunar tile.
F. In the hall on the left we examine the stone statue of the dredge, insert the seal of Ul into it, the 5th moon tile will open inside.

@ 17. Go back to the round table, insert 5 moon tiles. We solve the puzzle: you need to arrange the phases of the moon, but you can only move it with two holders. We arrange from above, from the 1st hour, clockwise.
2. Change along the curve, top left.
6. From the bottom left, move along the curve to the left up, and from there in a straight line.
9. Take the top left along the curve, lower it down.
10. Move from the top left, straight down to the right, and from there along the curve to the 10th place. The rest are in the right places.

Note: The Secret of the Temple of the Universe.
HIJK. Let's listen to an audio recording about 4 gods, learn their symbols. On top of 4 cubes we place symbols on them, from left to right: hammer, scales, fan, staff.
L. Take the tip of the spear from the right statue. The temple will be filled with water, we will get to the surface through the hatch in the ceiling. The wizard will save us. The dwarf Uri will tell you that the base of the staff is kept by the snow giants.
M. In the meantime, through the house we return to the dungeon, use the key to unlock the chest to the right of the tents. Let's find manuscript (8/11), the head of the staff.
N. On Drakov Square we enter the portal.

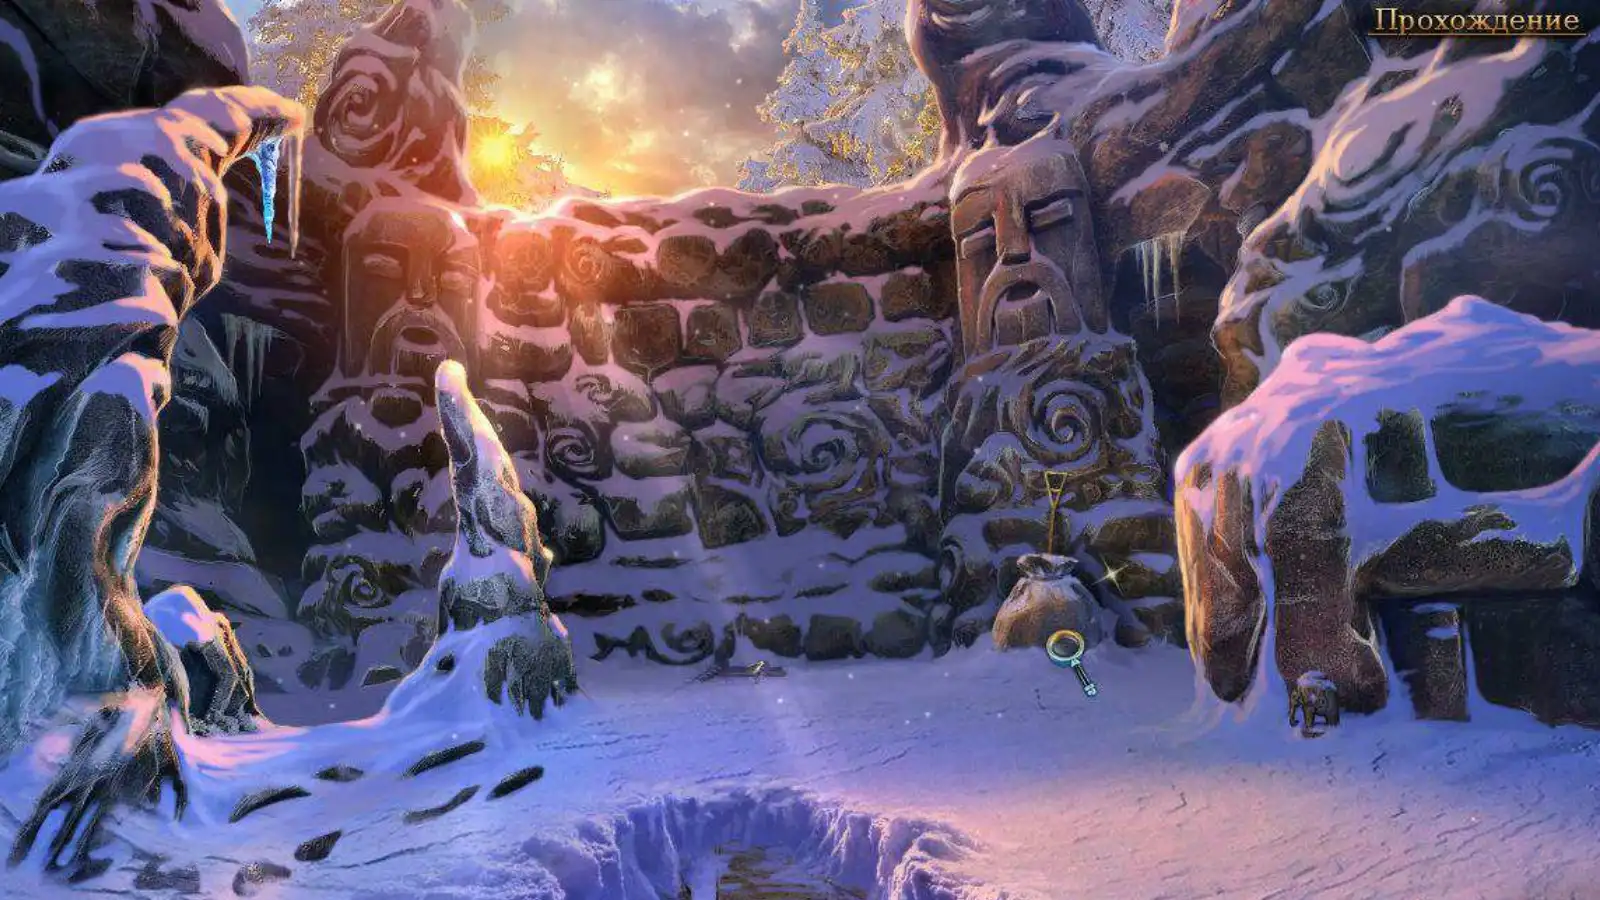
2.7. snow giants
Lost Lands 7: Redemption. Walkthrough
Secret. Top left, on a wooden roof lies tube (19/30).
Secret. Top right, in the background a column with face (2/7).
O. Ahead, we dismantle the blockage of branches, you need to find 15 items:
- A pitcher of water. We take a jug from the sleigh, scoop up water.
- Horse. We weigh the bowler hat on the fire, we take out the figurine from it.
— Tomahawk. On the bottom left, take a wooden handle, add it to the ax that hangs in the fence on the top right.
- Deer horns. Down in the center, lying on the snow.
- A spoon. Top right, in a basket of red apples.
- Elk. On the top left we remove the curtain, behind it there is a drawing on the stone.
— Boomerang. Top left, left of curtain.
— Mandala. Ahead we shift all the garbage, inspect the wooden chest. Inside we take 3 feathers, put in a box.
- A piece of fabric with a pattern. Inside the box with a mandala.
- Beads. Ahead, inside a wooden chest, on the right.
- Mushrooms. Bottom right, on a basket of corn.
- A tube. On the fire, on the upper left stick.
- Aloe juice. We take the greens, put them in a bowl, next we use a pestle for rubbing, we take the juice from the bowl.
- Fish. Ahead, inside the boxes.
- A quiver with arrows. We collect 4 arrows, put them in a quiver on the right. 1) on a fire stick, 2) on the top right in the fence, 3) in front in the center, near the stairs, 4) on the top left, behind the statue. For all this we will teach a piece of cloth.
P. In the center on the snow we examine the blood stains of the giants.
QR. On the left, in a wooden building, there is a cage with a fluffy animal. We open the cage, lure the animal out by treating it with cookies. Behind the animal we will find a horn.
S. We go forward through the cleared branches to the camp of the giants.

Secret. In the center lies on the snow photo (4/7).
Secret. Top left, under the roof of the tent subject (20/30).
T. From the top right, we look into the tent on the mountain, inside we push the boards, we will find a locked chest with a triangular lock.
U. In the left large tent, turn over the vat of bones, find manuscript (9/11), wolf skull.
V. We go forward, we get to the shore of a frozen lake.

2.8. frozen lake
Lost Lands 7: Redemption. Walkthrough
Secret. On the top left on the branches is ghostly nest (21/30).
Secret. On the right, on a rock under a tree is drawn face (3/7).
W. On the top right we inspect the rock, next we take the key.
X. On the left, on the bank, the animal will dig up the nets, you need to melt them.

Y. We return to the camp, on the top right in the tent we can unlock the chest with the triangular key. Inside the instructions for assembling the sled, scoop.
Z. We go to the initial clearing, scoop up the coals from the fire.
A. We take the corner to the shore of the lake, pour them into the hole, melt the water, take the fish skull out of the nets.
B. Apply the blueprint to the parts of the sled, let's start assembling.
@ 18. We look at the silhouettes of the necessary details, add them. First you need to put 2 bases, they have 2 horns. We tie the horns. Wheel, teeth. Wooden sides, tied with a rope. At the end we add a steering wheel, two axles for turns.

CD. We lower the built sleigh down, in the vacated place we will find the skull of a snake.
E. We return to the initial clearing, on the right we examine the nest on the tree. The animal will climb in there and throw off the skull of an eagle for us.
FGHIJ. In the camp, inspect the gate on the left, insert all 4 collected skulls into them. The gate will open, let's enter the shaman's yard.

2.9. shaman
Lost Lands 7: Redemption. Walkthrough
Note: on his deathbed.
Secret. On the left side of the statue is drawn face (4/7).
Secret. Ahead on a pole, on the same floor ghost (22/30).
K. In the center left we examine the coals of the fire, there is a board with nails in them.
LM. We enter the tent, we will see the dying shaman of the giants. She will explain to the wizard on her fingers that Drak Ul came to them, demanded to give the staff, but he never found it, and killed everyone.
Secret. To the right of the shaman, on the jamb of the door is drawn face (5/7).
Secret. At the shaman, on the right edge of the screen under the shelf ghost (23/30).
NO. We return to the initial clearing, throw a board with nails into the fire, it will burn out. Put out the fire with a piece of ice, pick up the nails.
PQR. We go to the lake, inspect the hook of the chain. We drive 4 nails into the rock, hit them with 2 stones that lie nearby.
S. The hook will fall out, collect the chain, throw it into the sled.
T. We sit in the sleigh, let's go across the lake to the other side.

@ 19. Let's go on a sleigh, dodge the rocks along the way. We can only go along 3 lines, we move along them to the left to the right. Correct way: 2-1-2-1-2-1-2-1-2-1-2-1-2-1-1.

2.10. hidden island
Lost Lands 7: Redemption. Walkthrough
Secret. On the right, on a distant island ghost tower (24/30).
Secret. In the center under the stone stairs behind the stone coins (7/8).
U. On the top left we examine a bunch of bones, inside there is a clue about the location of the fingers, a piece of bark.
V. At the top of the mountain we will see a sun stone. We return to the courtyard of the shaman, there is a statue with the same stone. Let's solve the puzzle.
@ 20. Raise your fingers on the statue. On the left hand: 3) middle finger, 4) little finger. On the right hand: 5) index, 6) middle, 7) nameless. Get a shard of the sun.

W. We return to the shaman. Insert the horn into the door with the skull.
X. Click on the floor, raise it with a stick. In the underground we will find a broken jug, we will take away a long stick.
Y. In the initial clearing, we scoop up a jug of blood in the snow.

Z. In the shaman's yard, use the stick to get a piece of cloth from the rope in the upper right corner.
A. We go to the shaman, throw a cloth over her. Attach 2 pieces to the bottom of the fabric. On the fabric we will see a hint for the door.
B. Solve the skull door puzzle.

@ 21. Insert 4 weights into the holes in the same way as shown on the fabric of the shaman. We focus on hours: 3 hours, 5 hours, 8 hours, 11 hours.

CD. Behind the door you need to find all the items listed below:
1-2. On the central table we take a mitten, a crystal.
3. On the left table with a mitten, we transplant the mandrake root into an adjacent pot, drop it with earth. Take the key from the left pot.
4-6. With the key we unlock the sideboard in front, there is an eye in it, a jar of flies, in the lower right drawer there is a part of the rune.
7. On the central table we feed carnivorous plants with flies, we get an eye.
8. On the right is a box with eyes, add 2 eyes, inside is a part of the rune.
9. On the top right is a rune, add 2 parts to it, we get a flower.
10. On the right wall, use the flower to turn on a memory puzzle: open the lockers, look for pairs among them. We get the second crystal. We use both crystals on the door, we get the tablet of knowledge.
EF. Let's go to the island again. We insert the sun stone into the lower column. Rotate the top column so that it shines on the bottom one. And we direct the 2nd column to the ice wall.
G. Behind the melted wall is a recess, put the tablet. We'll get a piece of bark. We learn that the altar on the shore needs to be stained with the blood of giants.

H. We return to the lake, inspect the altar in the form of a head. We use a broken jug on it, with the blood of a giant collected in the snow.
I. After that, a new rock "Dragon's Tooth" will appear above the island, we rise there.

Chapter 3
In the entire settlement, only the shaman of the tribe remained alive. She was seriously injured, but before her death, she told us about what had happened with her last breath. The settlement was attacked by Drak St. He somehow found out that a long time ago his pole was transferred to the tribe for safekeeping. The giants did not give him an artifact, and for this Ul exterminated the entire tribe. The shaman hinted that the pole was hidden in a tree on a "hidden island", whatever that meant. Maaron advised to start the search from her tent. He himself, without explaining anything plainly, left.
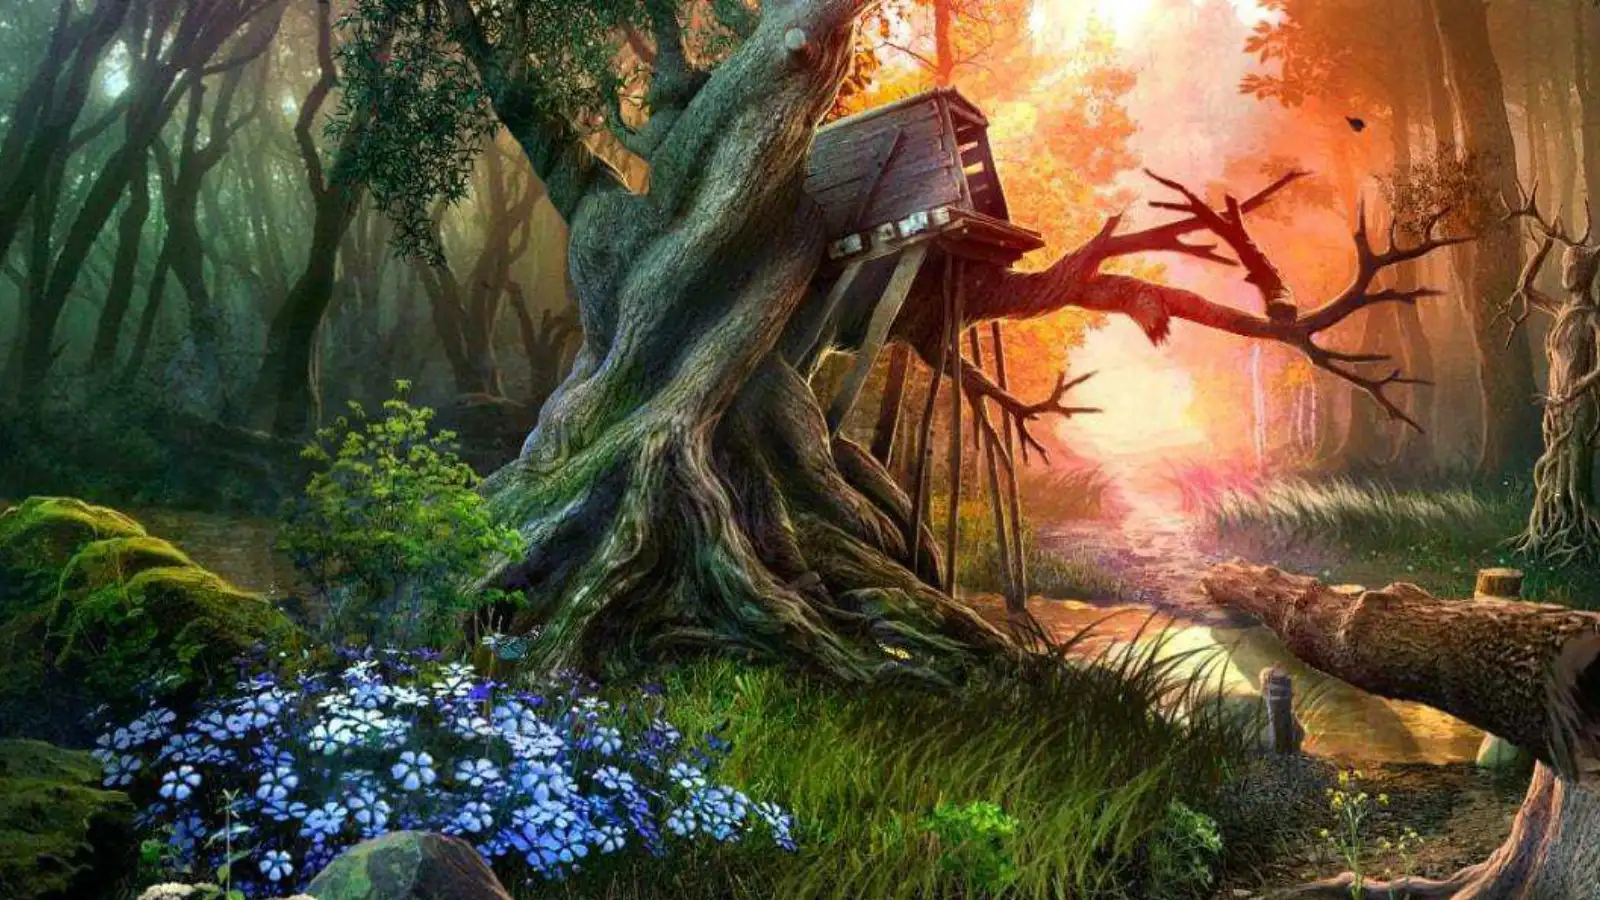
3.1. giant tree
Lost Lands 7: Redemption. Walkthrough
Secret. Right on the brick pillar photo (5/7).
Secret. To the left of the tree, on the stones lies wheel (25/30).
J. Below, behind the melted ice wall, we take a piece of bark.
K. Insert 2 pieces of bark into the giant tree. We will see the symbol "water".
L. We examine the gates of the castle, move the board, behind it is the symbol "rhombus".
MN. On the left on the doors we press two symbols: waves, rhombus.
O. Let's enter the opened doors of the round building.

@ 22. Inside the building puzzle: you need to remove all the disks from the locks, sliding them into the only empty place. With the buttons you can change the partitions between the disks, with the right button you can rotate the disks.
Press (AC), drag (15-down), press (B), drag (14-right), press (A), drag (19-up)-(14-down), press (CA), drag (9 -down)-(8-right)-(13-up), click(AC), drag(18-up), click(Ax2), drag(17-right), click(A) , drag(12-down) ), click (Ax2-C), drag (7-down), click (A), drag (6-right), click (Ax2), drag (11-up), click (C), drag (16-up )-(11-down), press (C), drag (6-down), press (CA), drag (1-down) - (2-left), press (D), drag (3-left), press (AD), drag (4-left), press (DA), drag (5-left), press (Ax3), drag (10-up).

Note: Snow, blood and ashes. Quest: Ul's Pole.
P. In the building in the center manuscript (10/11). Here you need to return 10 items to their places. From this, the colors in the center will disappear:
- From the top left we take a wing, on the right we add an angel to the statue.
- From the bottom left, we take a tent, put it up to the right on the picture.
- On the table, on the right edge, we take an apple, hang it on an apple tree.
- On the top right, we take a snake, put it on a stand to the right of the center.
- We take a spear from the right golden statue, put it on the top left to the shield.
- At the top in the center we take the sword, we pass it to the right golden statue.
- In the center in the recess we take the mask, put it a little higher to the masks.
- In the center we take an ax, we pass it to the blue statue on the left.
- On the right, near the vase, we take a stick, put it on the drum on the right.
- On the right, we take a raven from the shelf, we put it up to the left, under the ceiling.
- On the right on the floor we take a ladder, put it against the right wall. Upstairs, behind the red curtain, we collect pink eggs, put them in a nest. There is a box under the cloth, we insert a red gem into it, inside the last egg. For all the colors we get the item lightning paint.
Q. We return to the tree, apply lightning paint on it, use a stone knife for this. The tree will open up.
R. Inside the tree is the base of the staff, add the tip and pommel to it, you get the whole staff of Drak Ul.
Drak Ul will come to us. He has a son and a dwarf Uri hostage. Maaron will return, bringing with him another stone giant. During the fight, the magic sphere will roll off the cliff. We will lose consciousness and wake up in the children's room.

3.2. Children's room
Lost Lands: Redemption. Hyde
Secret. On the left on an easy chair lies photo (6/7).
Secret. Top right, on the red shelf bike (26/30).
S. On the left we look under the bed, there is a box in the distance.
T.U. On the bed we move the pillows, under them are the pistol-tongs.
VW. We open the window, below we will see a fallen rope from the sheets.
X. On the right in the closet we shift clothes, we take a stick.
Y. Under the bed with a stick we will get a box with a toy road.
Z. On the right on the table we examine the drawings, under them is a typewriter.
A. We put the car on the toy road under the bed.

@ 23. Need to build a ring road using all the elements. From the upper left corner we lower the road down, and then we lead it up in zigzags, putting bridges over the previous part of the road. Take the key from the box.

B. Use the key to open the drawer of the table, inside the metal constructor. We use the constructor on the tongs pistol to fix it: we insert the bolt, close it with the nut, tighten it with the keys.
C. We approach the window, use tongs to get the fallen rope from the sheets.
D. Under the window we tie the sheets to the radiator.
E. We go down through the window on the sheets, we get to the backyard of the house.

Secret. Top left, on the window, to the right of the light bulb ghost (27/30).
Secret. Top right, hanging under the wooden floor photo (7/7).
F. At the far fence, under the branch we will find a hammer, a toy clown.
G. On the left, the gate is locked with a lock, knock it down with a hammer. It's dark inside.
H. There is only a toy bear and a toy flashlight in the tent. Batteries are dead in the flashlight. Use the clown on the flashlight. Take the batteries out of the toy and put them in the flashlight.
I. With a flashlight we go to the garage on the left. You need to find 15 items:
— The birdhouse is on the top right shelf.
- The flag is on the bottom left, on a stack of books.
- Alarm clock on the top left, on the corner of the middle shelf.
- Bicycle on the left on the central shelf, painted on the sign.
- The glasses are on the left side of the teddy bear.
- A watering can on the lower right shelf, green.
- A bucket with a shovel. In the center left, take the yellow spatula, put it in the red bucket on the right shelf.
- Ball and glove. The ball is on the right middle shelf, the glove is in the center.
- Wheelbarrow. In the center we open the cabinet, take the wheel, add it to the wheelbarrow.
Ukulele is a small guitar behind a wheelbarrow.
— The pig is standing in the center under the wheelbarrow.
— Steam locomotive. From the top right we take the locomotive, to the left up to the wagons.
- Stick on the top center shelf.
- Stepladder in the far left corner.
- Painting. On the top left is the 1st dark fragment, on the right is the 2nd color fragment. The picture itself is on the lower left shelf. Of all the things, let's take only a stepladder.
J. We put the ladder, climb into the tree house. There we will meet a little son, save him from fears.

3.3. In front of the fortress
Lost Lands 7: Redemption. How to pass the mini games
K. Wake up near the giant tree. We learn that the dwarf Uri died. The son will come up with a plan to quickly return to the portal. First, we collect our scattered objects: 1) a stone knife on the left on the step, 2) a multi-tool knife in the center near the staff, 3) we take an emerald on the right near the gnome's body, 4) a lantern on the right column.

L. We go back to the shaman's tent, in the upper right corner we examine the decoration of the soul catcher, cut out the second emerald with a knife.
M. We go out to the center of the camp, examine the stone column, insert two emeralds into its head. The ball puzzle will turn on.

@ 24. Move the panels so as to build a continuous path for the ball. One by one, you need to solve 5 simple puzzles. After that, we get a pearl stone of power.

N. An animal will run to the clearing in front of the column, dig up stones under the snow. We examine, apply a knife to the stone, under it we will find manuscript (11/11), stencil.
OP. We return to the tree of giants. A wizard and a son stand in front of the gate, we pass them a lantern and a stencil.
Q. We go to the gate, the numbers appeared on the bars.

@ 25. Metal elements must be painted over on gates. What number is in the square, so many filled elements around it should be. The illuminated plates will form a closed figure. The gate will open.
3.4. Fortress
Lost Lands 7: Redemption. Walkthrough
Secret. On the left side of the fortress wall is painted face (6/7).
Secret. In the center, in the far corner of the fortress wall ghost (28/30).
R. Behind the gate we will get into the courtyard of the fortress.
S. At the entrance to the tower you need to raise the stairs.
T. We climb the stairs to the 2nd floor.
Secret. From the bottom left we shift the piece of wood, under it coins (8/8).
Secret. Top right, on a wooden cross ghost (29/30).
U. On the top right, take an inclined flagpole.
V. We examine the ballista, press the lever to pull the bowstring.
W. On the top left we inspect the brick, followed by a bunch of keys.

X. We return to the fortress, on the left we unlock the grate with the key.
Y. Let's go down to the basement with chains.
Secret. A square is drawn on the top right of the column. face (7/7).
Secret. In the center, at the middle level of the table ghost item (30/30).
Z. On the left we examine the guillotine, next in the basket is the element of the sarcophagus.
A. A bunch of keys unlock the door ahead.
B. Behind the doors you need to find 15 varieties of saws:
- On the left on the table we move the syringes, under them is the 1st saw. Even lower we find the key, unlock the box on the top right, inside the 2nd saw.
- The 3rd saw hangs on the top left of the shelf.
- In the center from above on the wall hang: on the left is the 4th saw, in the center is the 5th saw, on the right on the semicircular vault is the 6th saw.
- Ahead on the table with tongs we take out the circular saw. A grate will fall from the ceiling, it contains the 8th saw. On the central table under the tabletop is the 9th saw. On the left in the basket is the 10th saw.
- To the right is a locked chest, unlock it with the key next to it. There is a puzzle inside the chest: move the hexagons to get a closed figure. Inside is the 11th saw, on the right in the figure is the 12th saw.
- The 13th saw hangs on the right wall, the 14th saw is slightly higher under the ceiling. In the right corner we open the sarcophagus, inside the 15th saw. Of all the things we take only a two-handed saw.
CDE. On the left we put the flagpole in the guillotine, sharpen the blade with a knife, press the lever. The guillotine will break the stick, we get parts of the flagpole.
F. In the courtyard of the fortress, on the right we cut a log with a saw, we get a stand.
G. We go into the tower, insert the element into the sarcophagus.

@ 26. On the sarcophagus, you need to rotate all the images so that they make pairs of the same color. To achieve this, you need to complete the puzzle in 85 moves. The ideal way takes 51 moves. Press:
(8×3)-(16)-(8×2)-(5×3)-(16)-(8×3)-(11)-(2×3)-(12)-(3×3)-(5×3)-(15)-
(7×3)-(14)-(4×3)-(13)-(6×2)-(13)-(4×3)-(14)-(10)-(2×3)-(9)-(4×3)-(1×3)
Inside we will find a book about the ballista and the hammer.

3.5. Ballista setting
Lost Lands 7: Redemption. Walkthrough
H. We return to the basement, on the right we knock down the shackles with a hammer.
I. We go to the tower, put an X-shaped stand under the coil of rope. We add parts of the flagpole to the coil, hammer them with a hammer.
J. Insert the pearl into the ballista.
K. We go down, a skeleton fell from a pulled rope, move its head away, take the end of the rope, the giant's amulet.
L. We go to the tree of giants, we tie the end of the rope to the staff.
M. In the basement, on the right, unlock the chest with the key, inside the monocular.
N. On the tower we put the monocular on the ballista.
O. We twist the coil with the rope to raise the staff to the tower. We charge the staff into the ballista. Set up the monocular.
@ 27. Pass the tuning ball through the tubes of the monocular. To do this, we move the pipes themselves, and not the ball. When we pass all 3 labyrinths, the sight will be set to the maximum length.

S. We look into the monocular. It is necessary to move the sight to the right until we see towers near the teleport on the screen.
R. We give the hammer and shackles to our son.
Jimmy's hammer will hit the ballista lever. The staff will fly straight to the teleporter. On a stretched rope, we quickly slide down there on chains of shackles. Drak Ul sees this, tries to take the staff, but the son presses the button in time, and the stone god teleports into the void. The main story is complete!
Bonus Chapter
4.1. Ball search
Lost Lands 7: Redemption. What to do
The bonus will open only after completing the main story. After defeating Drak Ul, we will go in search of the rolled ball of the Space Piercer. Let's go back to the base of the air island.
Secret. To the left of the lower stairs lies stone figurine (1/12).
U. We rise to the air island.
Secret. At the base of the giant tree, on the right figurine (2/12).
V. At the left edge we examine the cart. The ball fell off this cliff. You need to push the cart to find out in which direction the ball fell.
W. We go down, to the left of the bones we take a whale rib.
X. At the top, with the help of a bone, we can throw off the cart.
Y. At the bottom we inspect the crashed cart, arrange 16 items:
- In the center we remove the fabric, under it the arrows, put it in the quiver on the left.
- In the center from the bottom we take the lid, put it on the box on the left.
- From the upper right corner we take the gear, on the chest on the left.
- We take the shield from the central box, give it to the lion on the left.
- Bottom left under the branch is a book, we add pages from the drawer.
- On the right under the ax we take a round rune, add it up to the center.
- On the chest on the left we solve the puzzle: press the buttons on the right 3, 2, 1. On the left we press: 3, 5, 2, 4. The chest will open, inside we connect the glass with the stem, the flower with the stem, remove the books, combine the wooden figurine, silver, bronze .
- On the left, we take part of the jug, add it to the jug between the boxes.
- In the center we push the bags, under them the fragments, to the shield on the right.
- Take the boot from the top left, add it to the bottom left.
- In the center right is a blue stone, add to the staff on the top left.
- From the bottom left we take a semicircle, in the center under the boards to the ball. Let's get the Space Piercer, and the wizard will teleport us.

4.2. Temple of the Dwarves
Lost Lands 7: Redemption. Walkthrough
Secret. Left in the center, on the board lies figurine (3/12).
Z.A. We examine the pit in the center, there is a drawing of a column, a stone panel. To the left of the column, in a dark corner, lies a frame.
BCD. Arrange the colors on the left column in the same way as in the drawing. From top to bottom: green, blue, orange, red.
E. The column will open a cache, a stone panel, a dwarven gauntlet.
F. Examine the doors in front, insert 2 stone panels into it. You will need to solve the puzzle on the door.

@ 28. According to the tips from above, you need to build 4 images in turn from the rays. Already set points cannot be moved, you must take the middle of the rays and put a point in a new place.

G. Let's enter the next room. The dwarf Buldan is missing.
Secret. On the right statue, hidden on the arm figurine (4/12).
H. In the center of the stone is a triangle, immediately add it to the symbol.
I. On the left we move the curtain, behind it on the wall we will see the symbol of the staff.
J. There is a triangular element on the right table near the box.
K. Buldan will come out and agree to help us revive Folnur if we find the City of Souls for him. He will leave Susan and Maaron as hostages, and he will send one Jimmy to search. Get Space Piercer. In the inventory we examine the ball, with its help we can teleport to several previous places. We select the upper left portal, we will return to the underground temple.

4.3. underground temple
Lost Lands: Redemption. Hyde
Secret. Top left on the alchemy table figurine (5/12).
L. We go down the rope. Below we take a broken barrel.
Secret. Top right, on the rocks figurine (6/12).
M. In the upper left corner, you need to remove the blockage in the river.

@ 30. The rubble needs to be disassembled like a mahjong puzzle: you need to select a couple of similar debris so that they are removed. You can only remove those that lie on top. There are 68 items in total. At the very bottom we will find a rim for a barrel, a pole, a spearhead.


N. Under the water we open the chest, inside the wineskins.
O. We climb the rope, cut off the rope with a spear.
P. To the left of the pillar with the rope, use the same spear to cut off the green moss.
Q. Go back down to the water using the teleporter in the ball.
R. We examine the raft, you need to add one more barrel to it. But first it needs to be repaired. We examine the barrel in the inventory: 1) remove the old rim from it with a spear, 2) insert the lid, 3) put on a new rim, hammer it with a stone, 4) close up the cracks with moss, caulk them with a spear. We put the barrel under the raft. We tie the waterskins with a rope, we get floats, we put them around the raft. We use a pole instead of an oar.
S. On the finished raft we will be able to sail to the upper left corner on the water.

4.4. Entrance to the city
Lost Lands 7: Redemption. Walkthrough
Secret. Top left hanging between the branches figurine (7/12).
T. In the center on the floor, to the left of the well, a triangular element. Right eye on a horizontal branch to the left. To the right of the skeleton we take a machete, a mug.
U. There is a map of stars in the skeleton's bag.
V. We examine the well in the center, pour water into it with a mug.
W. With the help of a machete, we can cut the vines on the way.
X. We climb up to the eye, turn its light on the well below.
Y. Patterns with stars will turn on around, examine the wall. We return to the skeleton, take the constellation hint from his bag, apply it to the wall.

@ 31. There are 9 constellations drawn on the paper clue in the lower right corner. We need to push blocks out of the walls, and put the same constellations out of them, in any order.


Z. The doors will open, we will enter the hall with two statues.
Secret. Under the left pillar lies figurine (8/12).
A. In the lower left corner, stone lips are lying on the ground.
B. Enter the opening on the top left.

Secret. In the center, to the left of the candles lies figurine (9/12).
C. On the right, examine the place under the ball, find the stone button. To the left on the stone near the lanterns are stone eyes. In the center we examine a large lantern, on it lies the central element. Ahead, under a hanging loop, the left eye.
D. Press the red button near the ball to make it fall.
E. To the right of the ball, press the button to lower the crossbar.
F. A button on the bottom of the right column, the ball will roll onto the crossbar.
G. We hook the hook with the chain to the ball.
H. Going back, apply the center element to the circle.

@ 32. Circle puzzle. You need to move all colored chips to the center. You can only move them to places with the same color. It is necessary to temporarily shift all the chips to the right, move the purple chip to the center, and only then alternately move the rest of the colors there. To achieve it, you need to meet 200 moves. The ideal solution takes 127 moves. Solution:
red v‡“ orange v‡' red v‡' yellow v‡“, red v‡ђ orange v‡“ red v‡“ green v‡'
red v‡' orange v‡ђ red v‡ђ yellow v‡', red v‡“ orange v‡' red v‡' bluish v‡“
red v‡ђ orange v‡“ red v‡“ yellow v‡ђ, red v‡' orange v‡ђ red v‡ђ green v‡“
red v‡“ orange v‡' red v‡' yellow v‡“, red v‡ђ orange v‡“ red v‡“ blue v‡'
red v‡' orange v‡ђ red v‡ђ yellow v‡', red v‡“ orange v‡' red v‡' green v‡ђ
red v‡ђ orange ⇓ red v‡“ yellow в‡ђ, red в‡' orange в‡ђ red в‡ђ gray в‡'
red v‡“ orange v‡' red v‡' yellow v‡“, red v‡ђ orange v‡“ red v‡“ green v‡'
red v‡' orange v‡ђ red v‡ђ yellow v‡', red v‡“ orange v‡' red v‡' violet v‡“
red v‡ђ orange v‡“ red v‡“ yellow v‡ђ, red v‡' orange v‡ђ red v‡ђ green v‡“
red v‡“ orange v‡' red v‡' yellow v‡“, red v‡ђ orange v‡“ red v‡“ bluish v‡ђ
red v‡' orange v‡ђ red v‡ђ yellow v‡', red v‡“ orange v‡' red v‡' green v‡ђ
red v‡ђ orange v‡“ red v‡“ yellow v‡ђ, red v‡' orange v‡ђ red v‡ђ blue v‡“
red v‡“ orange v‡' red v‡' yellow v‡“, red v‡ђ orange v‡“ red v‡“ green v‡'
red v‡' orange v‡ђ red v‡ђ yellow v‡', red v‡“ orange v‡' red v‡' bluish v‡“
red v‡ђ orange v‡“ red v‡“ yellow v‡ђ, red v‡' orange v‡ђ red v‡ђ green v‡“
red v‡“ orange v‡' red v‡' yellow v‡“, red v‡ђ orange v‡“ red v‡“

IJ. When we solve the puzzle, both statues will descend. On the left statue of the madman we add 2 stone eyes, we take away his cap of the madman. To the right of the statue of madness, add eyes and lips, we get a cap of madness.
KL. Again we go forward, we twist two caps into a hanging loop, we get a hammer to hit the doors. We cling to the hammer chain.
MN. On the column with the ball, press the bottom button, the ball will rise, and then the red button under the ball. The ball will fall, pull the chain. We press the top button, the crossbar will drop, the chain will loosen, the hammer will hit the goal.
O. We go into the opened doors ahead.
4.5. City of Souls
Lost Lands 7: Redemption. Walkthrough
Secret. Top right, on the yellow bar figurine (10/12).
P. In the new room, examine the wall on the right, there is a puzzle.
@ 33. "Pyramid problem" that needs to be moved to the left. But here they look like planks hanging on a hanger. Only the uppermost boxes can be moved, and those that are not interfered with by longer boxes. Solution:
red-A, blue-A, yellow-B, blue-C, yellow-A, blue-A,
violet-C, blue-C, yellow-B, blue-A, yellow-C, blue-C,
red-B, blue-A, yellow-B, blue-C, yellow-A, blue-A, red-C,
blue-C, yellow-B, blue-A, yellow-C, blue-C, green-A, etc.

P. After the decision, the statue on the right will open, there is a clue, a key on it.
QR. Open the lock in the center. Inside you need to find 15 items:
- Amphora to the right of the center, stands on a stone.
- The hourglass is in the center, to the left of the waterfall.
- The fish to the right of the waterfall is moving the dishes, behind it is a figure.
- The hand is in the upper left corner, on the stones.
- Feather on the bottom left, on the banks of the water.
- The medallion is on the right, hanging on the arm of a statue with a shield.
- The sun on the left is removed the fabric, behind it a symbol is drawn on the rock.
- An apple on the bottom left, between the flowers.
- Magnifying glass. On the right on the shield we solve a puzzle: you need to move a large golden element to the upper left corner, for this we move small elements out of the way. A shelf with a magnifying glass will open below.
- The shell in the center under the water we move the stones.
- Chalice. Inspect the chest on the top left. On the right, open the box, there is a hint in it, click on the chest with the same colors: yellow, red, blue, green. Inside the bowl.
- The bell is on the right, hanging around the neck of a statue with a shield.
- The ring is on the top left, near the chest, in the box. Of all the things, let's take only a bell.
S. We return to the lanterns, we weigh the bell in the nearest lantern. After that, ghosts will appear. Dwarf Yudnar will tell us how to perform the ritual of reincarnation.
T. A Moon disk appeared in the lantern with candles, we pick it up.

4.6. right way
Lost Lands 7: Redemption. Walkthrough
V. In front of the two statues, use the moon on the sun figurine.
U. Another path will open on the right, go there.
Secret. From the sitting skeleton to the right on the floor lies figurine (11/12).
wx. We examine the skeleton, it has a crumpled clue and a puzzle.

@ 34. Use the crumpled note on the puzzle, unfold it on the left. On a sheet of a pair of characters, you need to click such points on the right. The 1st letter is the line number, the 2nd letter is the column number. You can light the desired buttons in any order. Take the pen inside the puzzle.

Y. On the top left, inspect a device such as a crossbow. Insert the handle from below, press it. The crossbow will shoot at the ceiling, but the projectile will break. We take the broken spear.
Z. In the inventory, combine the spear and the tip: 1) remove the fragment from the tip, 2) sharpen the right side of the spear with a knife, 3) put the tip on the spear. We insert a new spear into the crossbow, shoot again. A yellow sign will fall from the ceiling.
A. We return to the crossroads, with a glove we switch the hot symbol of the sun. Both passages will open. We go to the left.
BC. On the left in the City of Souls, we examine the rotating scroll, apply a yellow plate to it. We will see a hint that a horn is needed for the ritual.

D. We return to the luminous eye, only near it we can use the teleportation ball. We move to the 3rd upper portal. On the right near the column we take the body of Uri.
E. Teleport to the lower right portal.
F. Let's tell our allies about our successes. Buldan will reveal the secret where he hid the horn, give us the frame, and instruct us to find two keys.
G. In the left wall, click on the symbol, in the cache, take the button.
H. Back out of the dwarven temple.

4.7. tomb
Lost Lands 7: Redemption. Walkthrough
IJ. In the cave of the dwarves, in the center we use the button to open the white coffin, inside with a knife we cut off a lock of Yundar's hair.
KL. We move to the last portal, in a cave with a waterfall we examine the stone table in the center. On the right we put the body of Uri, on the left - Yundar's hair.
M. From the cave we go down to the crossroads, and even lower to the glowing eye. In the upper right corner, use 2 lattices for a puzzle with colored cubes.

@ 35. You need to move the notched cubes to where they are shown on the grids. Lattices are removed to the sides so as not to interfere. You can only move cubes through the top row.

N. For the puzzle we will enter the tomb.
Secret. Top right, between the blue bars figurine (12/12).
O. On the right side of the altar we take jars of powders.
P. Teleport to the dwarven temple.
Q. On the right side of the alchemy scale, you need to solve a puzzle.
@ 36. The text hint indicates the colors and their desired weight. First, we place the appropriate numbers on the scales, and only then can we fill the bowl with this color. But for this we have only 2 weights. Solution:
- on the left, weight 8 = on the right, weight 3, bowl 5 (pour blue).
- on the left bowl 5 = on the right weight 3, bowl 2 (pour yellow).
- weight 8 on the left = bowl 2 on the right, bowl 6 (we pour out green).
- bowl 5 on the left, bowl 2 = bowl 7 on the right (we pour out the gray one).
- on the left bowl 7 = on the right weight 3, bowl 4 (pour out the red).
In the right proportion, we get blinding dust.

T. Teleport to the tomb (lower right portal). On the left we throw blinding dust into the monument. The statue will open its arms, we take away the red plate, the key to the chest.
UV. We go to the upper right portal, we pass into the far left hall, we insert a red plate on the left wall, we will see a hint for the bells and for the lock on the chest.
W. We move back to the tomb, insert the key into the chest.
@ 37. On the chest you need to enter a combination of characters from the hint. The symbols are closed, they need to be checked one by one and remembered. After that, mentally number the values on the lock clockwise, enter the full combination: 3-1-5-4-7-2-6. Inside a triangular element, a blue plate.

4.8. Horn of the Elements
Lost Lands 7: Redemption. Walkthrough
XY. We return to the City of Souls, read the hint for the horn.
Z. We move to the temple of the dwarves, use all the triangular elements on the red beam in the center, we get a three-sided key.

A. We move to the tomb to the multi-armed statue. Use the triangular key on the door with the hexagon.
B. Behind the doors you need to find 10 items listed below:
1. On the left on the floor from the raised tile we take the acid deactivator.
2. Pour the potion on the green spear in the center, get the spear.
3. In the right corner there is a lot of wax, we clear it with a spear, at the bottom there is a glove.
4. On the left on the floor with a glove we get a fox figurine.
5. On the top left from the chain we take the shackles.
6. On the right on the floor, click on the recess, the tile will go down. To the right of the monument appeared a column with a squirrel, we put heavy shackles on it. The tile will return to the top, take the squirrel figurine.
7. On the right wall from the candlestick we twist the round key.
8-9. There is a round recess in the left wall below, we insert a part of the candlestick there, we get a hanger, a brush from the cache.
10. On the left wall we erase the dirt with a brush, we will see a combination of crosses. In the right wall there is a recess for a hanger, we insert it. Behind it is a lattice and four symbols. We introduce a combination from the left wall: a cross, a square, petals, a cross and two circles. Take a figurine of a deer.
@ 2. The assembled figures must be placed in the center so that they occupy the entire area of \uXNUMXb\uXNUMXbthe square. After that, we get the horn of the elements.
G. We take the horn to the right cave, put it in a stone recess.

@ 38. At the bottom, under the horn, you need to enter a combination from the hint. Mentally number the characters from left to right, press the following buttons: 3-2-4-1-2-4-1. The horn is activated.

4.9. Ritual
Lost Lands 7: Redemption. Walkthrough
H. In the same cave, on the right, we need to hit the gongs 10 times. We look at the hint from above, hit the desired disks.
3 - K. Second and fourth. We use a double stick.
6 - N. Use the triple right stick.
7 - O. You need to move the double stick, for this we click on the hand icon, but do not release the button, but move the mouse to the side. You need to hit the 3rd and 5th gong.
8 - P. We put a double on the left, a triple on the right, use the bottom one.
9 - Q. Double and triple shift to the left until it stops, use the bottom one.
10 - R. We put the double on the 3rd and 5th gong, shift the triple to the right until it stops, use the lower stick.

The spirit of the dwarf will appear. The fire golem Tarsas will enter the cave, perform the ritual, but Folnur will not come to life in the body of Uri.
Let's go back to Buldan and talk about our failure. He decides to let the prisoners go just like that. When we are all together in a safe place, Folnur will come to life.
Bonus game
The Bonus section has puzzles that weren't in the story game. But they need to pass to get 1 achievement. It is necessary to paint the entire field in blue. Each click on a point recolors it and all neighboring points.


Achievements (22)
1. Main game (8 pieces)
Lost Lands 7: Redemption. Achievements
| Completed the Hidden Object scene in less than 2 minutes. If it didn't work out right away, it will be easier the second time. |
| Completed the minigame in under a minute. The very first mini-game is suitable, where there are 5 lines and Christmas trees. |
| Completed 3 mini-games in a row without using the "Skip" button. We pass without omissions the 1st chapter. |
| Story lover (History Buff) Completed the main and bonus chapters without skipping dialogues or cutscenes. Watch all the videos for the first time. |
| Completed the main and bonus chapters without using the hint in the hidden object scenes. Do not click in the lower right corner until we go through everything. |
| Messiah of light (Messiah of Light) Completed the main and bonus chapters without using the hint. Do not click in the lower right corner until we go through everything. |
| Completed the main chapter on hard difficulty. We immediately select the maximum difficulty, this will only affect the speed of prompts and the illumination of objects. |
| Mystery Lover (Puzzle Lover) Completed the main and bonus chapters without skipping mini-games. We solve everything, the text guide has all the answers. |
2. Specific places (6 pieces)
Lost Lands 7: Redemption. Achievements
If you didn’t manage to quickly complete the puzzles during the story, then later in the main menu, in the line “Bonus”, “Mini-games”, you can turn on any of the puzzles, and go through it to achieve there.
| The mini game on the stele in the brawl square was completed in less than 1 minute. Solution. You need to draw 5 lines through all the Christmas trees. |
| The mini game on the safe in the headquarters was completed in less than 3 minutes. Solution. We collect several lines from pieces of audio. |
| The mini game at the gate to Ul's tomb was completed in less than 25 moves. Solution: up, right, down, left, left, left, down. |
| Bridge pass mini game was completed on the first try. Solution. You can die. It is enough not to leave the bridge until victory. |
| The mini game on the sarcophagus in the ruins of the citadel was completed in less than 85 turns. Solution. On the sarcophagus, you need to rotate all the images. |
| The ancestral trail gate minigame was completed in less than 200 moves. Solution. The ideal solution takes 127 moves. |
3. Secret items (6 pieces)
Lost Lands 7: Redemption. Achievements
| 8 pieces. The text is highlighted in gold. |
| Remember all (Remember everything) Collected collection of photographs. 7 pieces. The text is highlighted in gold. |
| Collected collection of giants' marks. 7 pieces. The text is highlighted in gold. |
| Treasure hunter (Treasure Hunter) 8 pieces. The text is highlighted in gold. |
| Detail Master (Master of Details) Collected all ghostly objects. 30 pieces. The text is highlighted in gold. |
| A collection of figurines. 12 pieces. Only in the bonus chapter. |
4. Bonus game (2 pieces)
Lost Lands 7: Redemption. Achievements
| Puzzle lover (Puzzle Fan) Collected all additional puzzles in the "Bonus" window. In the section "Bonus", "Puzzles". You need to collect 5 paintings from pieces. |
| Completed all levels of the additional mini-game in the "Bonus" window. In the section "Bonus", "Bonus game". 20 levels. |
Questions - answers
Lost Lands 7: Redemption. What to do with the glove?
1) The dwarven mitten is needed to switch the hot sun symbol at the crossroads in the City of Souls. 2) a knight's glove during the search for objects is needed to get the figurine under the floor on the left.
Lost Lands 7: Redemption. Where to find bas-reliefs?
In the 1st chapter, in front of the temple you need to find 3 bas-reliefs. 1st lion on the top floor. 2nd lion from the bottom left, open the box with a knife. The third bas-relief of the face needs to be made. On the right, we lower the hanging load with a winch, read the instructions below, and create a sculpture.
Lost lands. When is the new game?
Typically, games in this series are released every year. The last game was released in December 2020. The next one will most likely appear in December 2021.
Lost lands. When is the new game?
In the bonus chapter, having received the paints, we return to the dwarven temple. On the right on the table we can weigh the cans of paints between ourselves or with the help of weights. Solution:
- on the left, weight 8 = on the right, weight 3, bowl 5 (pour blue).
- on the left bowl 5 = on the right weight 3, bowl 2 (pour yellow).
- weight 8 on the left = bowl 2 on the right, bowl 6 (we pour out green).
- bowl 5 on the left, bowl 2 = bowl 7 on the right (we pour out the gray one).
- on the left bowl 7 = on the right weight 3, bowl 4 (pour out the red).
Lost lands. How to pass the game?
To get all the achievements in 1 playthrough, set the difficulty to hard at the very beginning, do not go into the in-game hints and walkthrough text. We use only external guides, as on this site.
Was the article helpful?